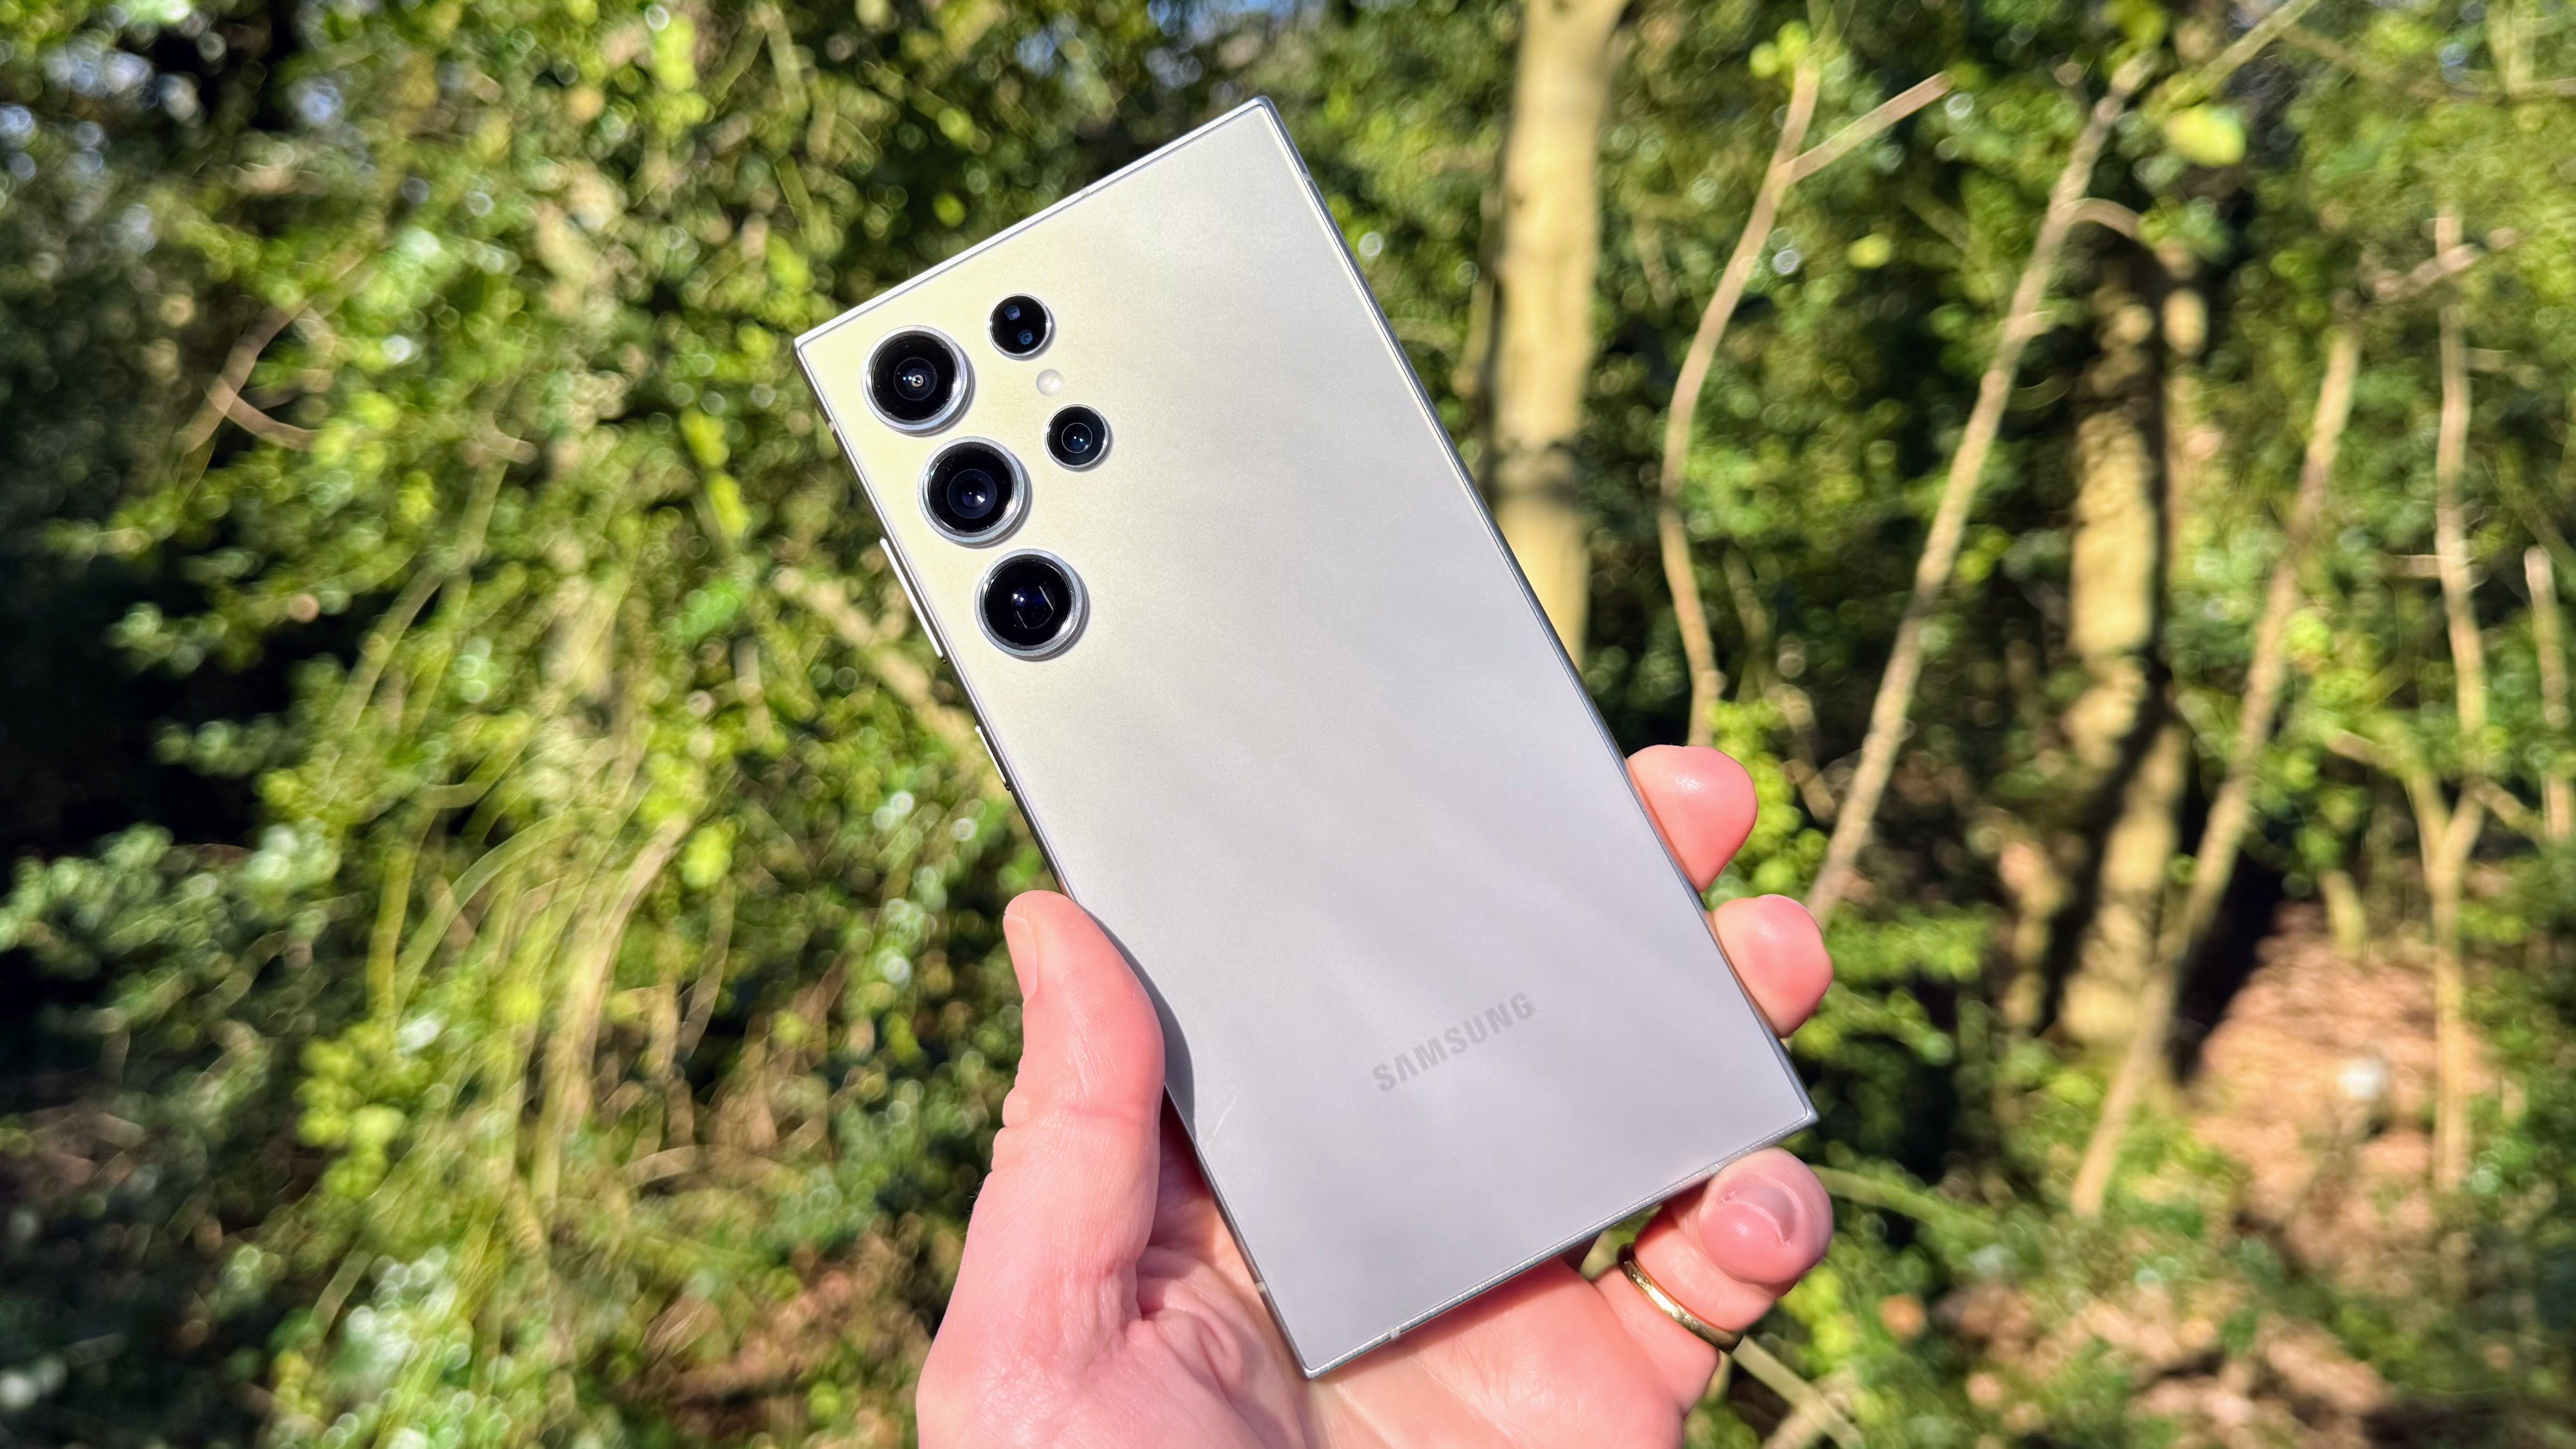
It’s fair to say the Samsung Galaxy S24 Ultra‘s cameras haven’t had the smoothest of launches since the phone came out – but it sounds as though a fix is on the way to deal with the final three outstanding problems.
As per serial tipster @UniverseIce (via SamMobile), Samsung‘s engineers are on the case with solutions for below-par telephoto image quality, inaccurate white balance problems, and issues with abnormal red coloring in some situations.
While we’ve not heard a huge number of complaints about these problems specifically, they are out there. However, it’s worth noting that no timeframe has been given for this next update.
In our Samsung Galaxy S24 Ultra review, we were very impressed with the performance of the camera modules, as well as the handset overall. While we didn’t notice any major issues like the ones this rumored update will address, other users clearly have.
Third time lucky
Samsung Galaxy S24 Ultra will improve many camera problems in the next “camera firmware update”, Including telephoto image quality, inaccurate white balance and abnormal red color.but they have not given an accurate timetable.I hope they can solve it in AprilApril 7, 2024
See more
You could say this is a case of third time lucky for Samsung and software updates for the Galaxy S24 camera: the first update in February improved shutter speed, video clarity, and automatic exposure and color selections.
Then we had a second update at the end of March, which included more improvements to camera quality and usability. One of those improvements was apparently to white balance – although this still seems to be a problem for some.
With so much image processing now done by smartphones after a photo is taken, there can be a wide variety of end results in terms of colors, brightness, white balance, and exposure. To some extent, it’s down to personal preference in how you want these settings managed – making it difficult for phone makers to please everyone simultaneously.
Get the hottest deals available in your inbox plus news, reviews, opinion, analysis and more from the TechRadar team.
However, for it to take months for a flagship phone’s camera to get up to its full potential isn’t ideal, and Samsung will be well aware of that. What’s more, the camera isn’t the only component that problems have been reported with.
April 7, 1997: Apple’s System 7 operating system receives its last update with the shipping of Mac OS 7.6.1.
The update brings a few bug fixes and support for Apple’s new PCI Power Macs and the PowerBook 3400. Most importantly, it marks the end of the System 7 era, which dawned way back in 1991.
Mac OS System 7
Unlike today, when we receive an ostensibly new version of macOS every year, things moved at a slower pace in the 1990s. System 7 arrived in May 1991, bringing some great features and introducing QuickTime to Macs.
It was the first Apple operating system available on compact discs. (Customers also could buy it on a set of 15 floppies. Remember those?) System 7 was also the Mac operating system that eventually faced off against the world-conquering (at least in terms of popularity) Windows 95.
Before Windows 95 hit shelves on August 24, 1995, Cupertino employees rode around with bumper stickers reading, “Windows 95 = Macintosh ’89.” The joke likened Microsoft’s new operating system to a 4-year-old Mac OS.
The Mac OS 7.6 update, which Apple released on January 7, 1997, brought with it a name change from “System 7” to “Mac OS.” It also added virtual memory and memory management, a new caching system for File Manager, PowerPC Resource Manager routines, and performance improvements.
Unlike today’s free macOS updates, users who wanted System 7.6.1 paid for it — even if they already bought an earlier version of System 7. Considering that it added only minor improvements, this became a point of contention.
The quest for something new
Inside Apple, System 7’s days had been numbered for some time by early 1997. Ever since March 1994, Apple talked up the operating system’s follow-up. Named “Copland,” Apple envisioned it as a full top-to-bottom rethink of Mac OS.
Cupertino’s desire to introduce a replacement operating system continued, however. That quest ultimately led to Apple acquiring NeXT for its NeXTSTEP operating system (then called OpenStep). This resulted in Steve Jobs returning to Apple in 1996, and ultimately displacing Amelio as CEO.
Mac OS 7.6.1: The clone Mac era’s last gasp
In the meantime, however, Apple had a good (if slightly underhanded) reason for abandoning System 7 and replacing it with Mac OS 8, which shipped a few months after Mac OS 7.6.1 on July 26, 1997.
That update came at the height of the “clone Mac” era. Apple had licensed Mac OS to a select few companies like Power Computing and Radius to try and boost Mac market share. However, this flawed strategy actually cost Apple money. The $50 fee Apple received for every clone Mac sold did not come close to recouping the money lost from people buying third-party Macs instead of more-expensive official ones.
As a result, Apple decided to release its next operating system update as “Mac OS 8” instead of “Mac OS 7.7.” This name change meant Cupertino could end its deals with clone-makers, since the agreements signed with them only extended to System 7 updates. By calling the update Mac OS 8, Apple figured it could negotiate new, more favorable terms with third parties licensing its operating system.
For an even deeper look at System 7.6.1, check out this website. Do you remember using it at the time? Let us know in the comments below.
The cost of ditching Windows 10 at your business and upgrading to the latest software might end up being a rather expensive process, Microsoft has revealed.
Microsoft is ending support for Windows 10 on October 14, 2025, with businesses then needing to pay out for its Extended Security Updates (ESU).
The company has now unveiled details on how much businesses will need to have to pay if they want to keep using Windows 10 after its official end of support deadline without being left open to security attacks.
Costly Windows 10 upgrade
In a blog post explaining the changes, Microsoft reminded businesses that will need to keep using Windows 10 after support ends that they will need to enroll those PCs in the ESU program.
There will be three paid options for businesses looking to extend their support, Microsoft said – the traditional 5-by-5 activation key method, a cloud-based activation method, and activation included with your Windows 365 subscription.
The former is the base license package, costing $61 per device for Year 1, with users simply downloading an activation key and applying it to whichever individual Windows 10 devices they have selected for the ESU program.
Companies will also be able to access ESU through their existing Windows 365 subscription at no extra cost, with devices automatically be activated to receive security updates without any additional steps.
Sign up to the TechRadar Pro newsletter to get all the top news, opinion, features and guidance your business needs to succeed!
Finally, Microsoft also has a “special offer” for organizations using a Microsoft cloud-based update management solution such as Microsoft Intune or Windows Autopatch, who can access a 25% discount, meaning their ESU will cost $45 per user for up to five devices for Year 1.
“ESUs allow you to receive critical and/or important security updates for Windows 10 PCs when you need extra time to move to Windows 11,” the company noted.
“Organizations that run legacy software are at a higher risk of security breaches and potential compliance violations. While Windows 10 PCs will continue to function after they reach end of support, they will no longer receive security updates, bug fixes, feature improvements, or security issue resolutions. Upgrading to Windows 11 or transitioning to a new Windows 11 PC will help you deliver the best, most secure computing experience to your employees—and help protect your organization.”
Google Pixel phones look set to get a new smart feature called “look up” which allows you to identify unknown callers.
Tipster Assembler Debug spotted the feature in the Google Phone app beta version 127.0.620688474, and explained how it captures an unknown number in the ‘Recents’ tab of the app, which when selected prompts users to select an appropriate app like Google Search to check the web for the number.
This should then serve up results for an unidentified number query and help users discover who’s been calling. For now, the look up feature appears to work best for finding businesses that have listed details online rather than private individuals and scam callers.
This currently limits the feature’s use, but hopefully we’ll see the integration of features like automatically filtering and blocking untrustworthy calls in the final version, like those seen in apps like Truecaller, which prevent potential fraudsters.
The look up feature went live in Japan as part of the March Feature Drop and could roll out globally in the next drop, which is expected to be around May/June.
Google Pixel Phone app to get ‘Lookup’ feature to identify recent unknown callers and some UI tweaks for the emergency in-call screenRead – https://t.co/QSHpOqzlV1🏳️ Flags are shared in the post for rooted users ✓#Google #Android pic.twitter.com/gIMJhT8dNXApril 5, 2024
See more
Pixel connectivity problems
Google Pixel phones are often the first to receive the latest smart features and frequent updates, however, they’re also known for having more glitches and software hiccups, such as the update that led to users needing to wipe their phones back in January.
The flip side of having access to the latest features like look up is that it can also occasionally lead to more serious problems like the connection issues some Pixel owners claim to have been experiencing since the March 2024 update.
This intermittent connection problem is preventing some Pixel users from being able to receive calls and is causing text messages to arrive delayed. According to posts on the Google Support forums and Reddit, the connectivity problem appears to be affecting Google Pixel 7 and Pixel 8 series users worldwide and across multiple networks.
One Reedit user says phone calls on his Pixel 7 Pro are going straight to voicemail without the phone ringing. He also says text messages are coming through in batches throughout the day and not when they were sent.
Get the hottest deals available in your inbox plus news, reviews, opinion, analysis and more from the TechRadar team.
This leads to suddenly receiving multiple voicemails for calls and delayed text responses from multiple individuals and group messages that were sent over the previous two to three hours, causing him to miss important calls.
Several other users have said they are experiencing the same problem and have tried workarounds. One of these suggestions involves cycling between turning airplane mode on/off to get their reception back, which worked with limited success. Some users also claim a factory reset has worked, while others say it hasn’t solved the issue, which certainly points to the problem being on Google’s end.
Google Forum user Gazaka claims Google suggested: “Go to settings > about phone > Send feedback about this device and report there with the phone logs”. This apparently will lead to engineers checking the information, followed by a fix on the next patch update, which the user says is roughly the fifth of each month.
We contacted Google for comment on this story and will update it when we hear back.
For now, no permanent solution for everyone has been found, and Pixel users will need to keep a close eye on their phones for messages and missed calls until a fix is found.
This week, Samsung started rolling out a new update to its pro-grade mobile photography app, Expert RAW. The update pushes the app to version 3.0.05.12 and brings one major feature photography enthusiasts should find very useful.
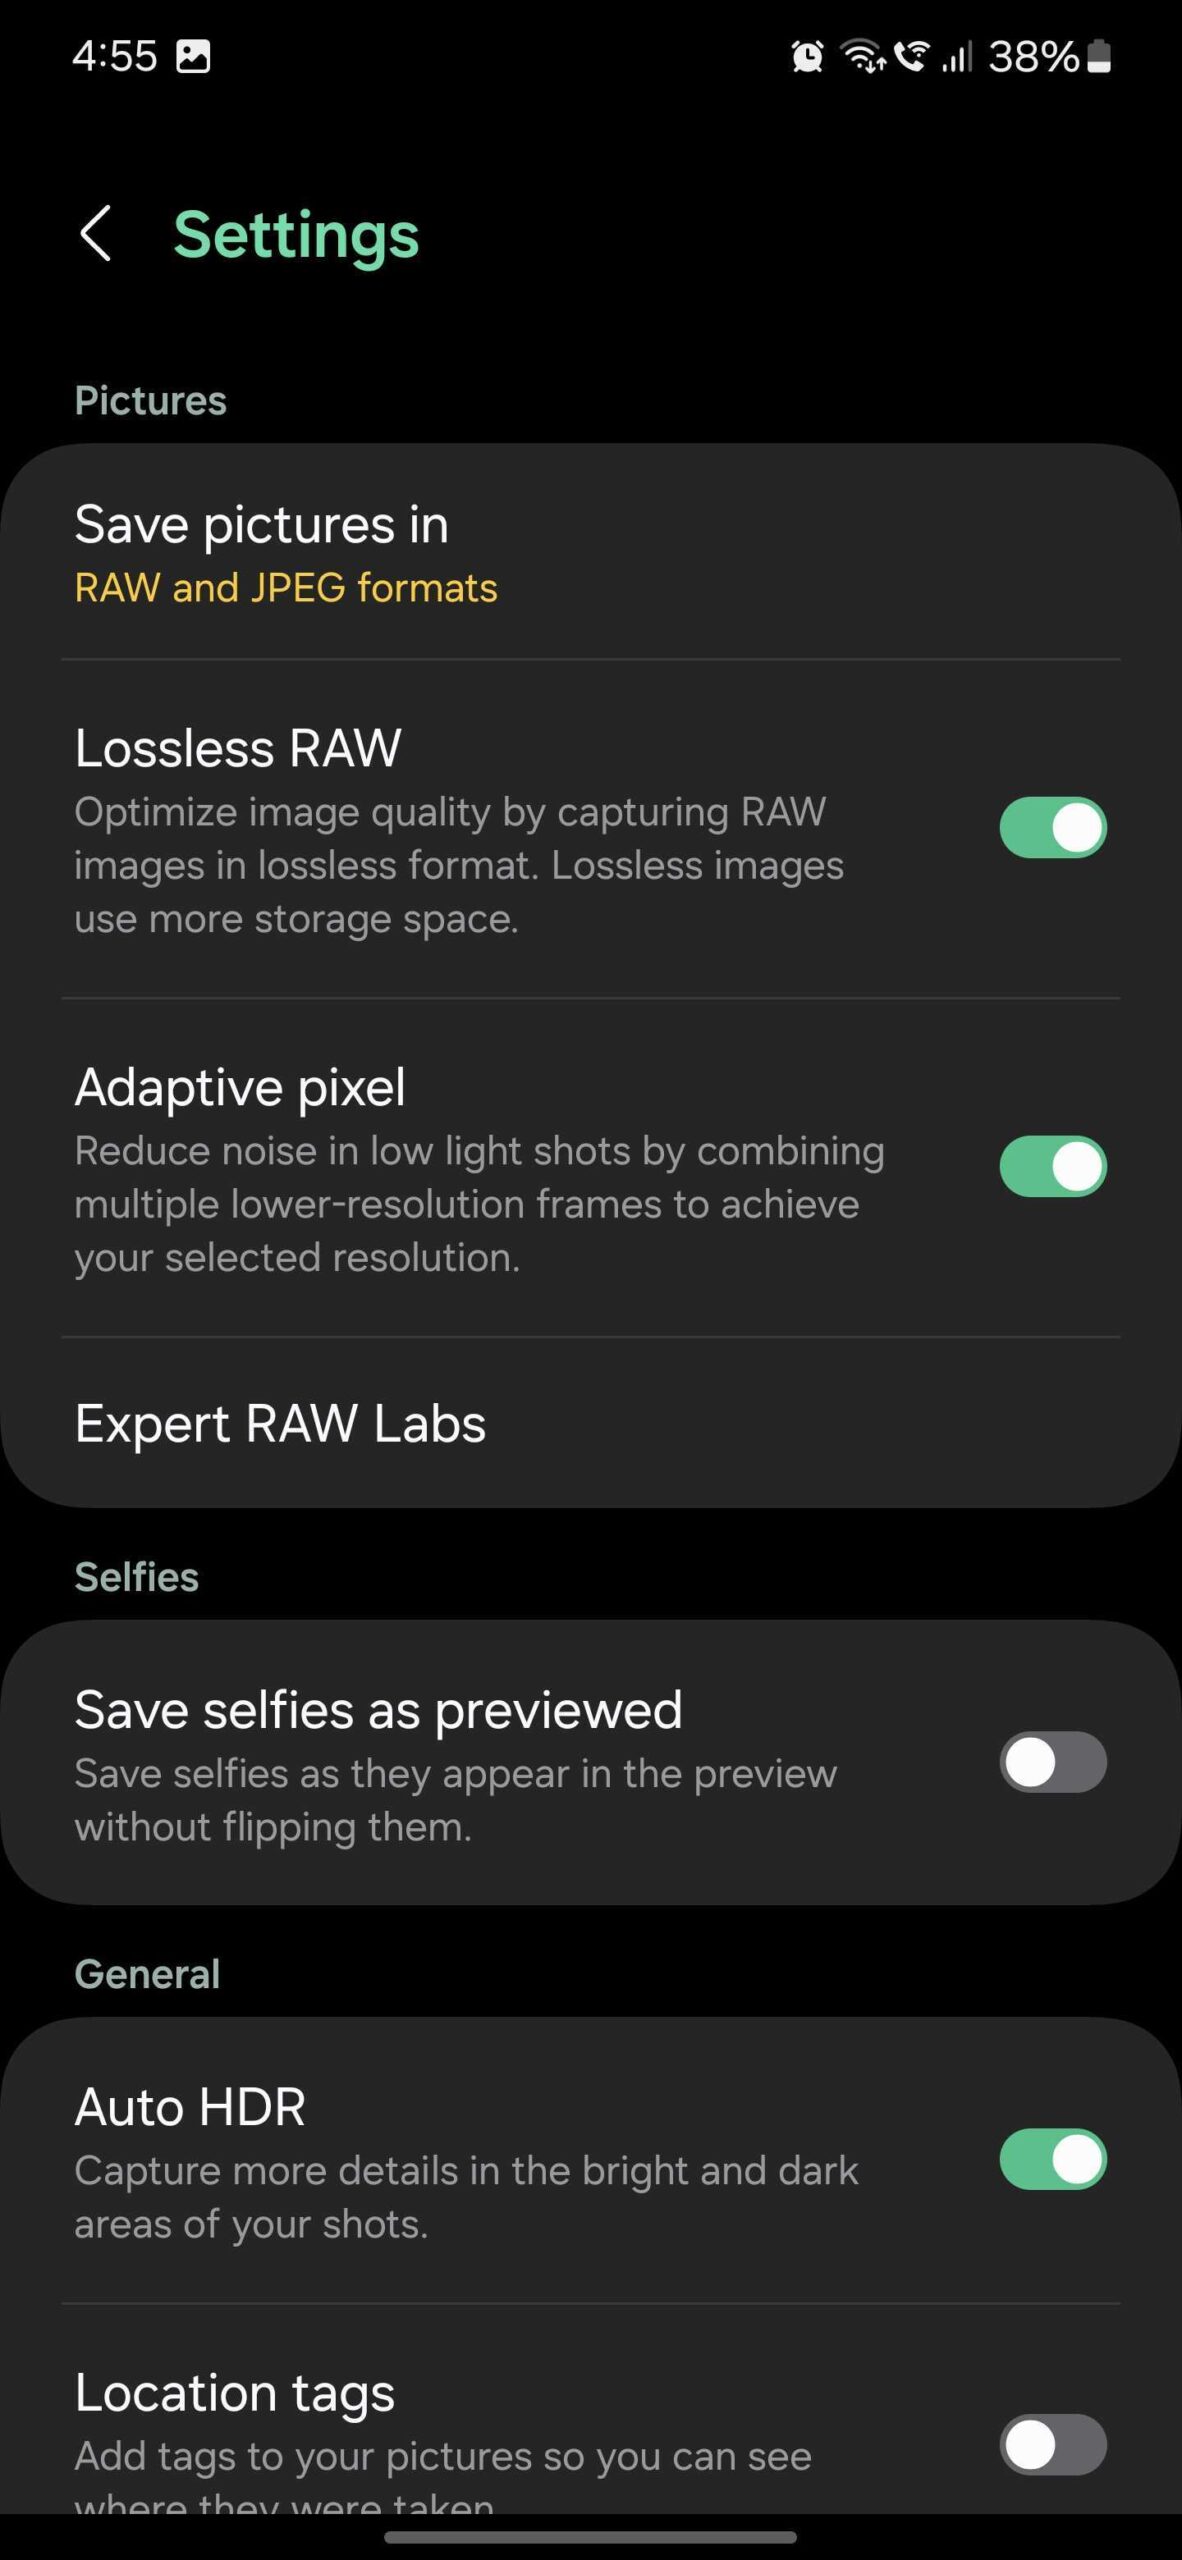
Namely, Expert RAW v3.0.05.12 now lets users capture lossless RAW photos. This new option optimizes image quality by capturing RAW images in lossless format. However, the downside is that lossless photos use more storage.
You can grab this new Expert RAW update from the Galaxy Store. Once you have it, you can try this new feature by opening the app, accessing the app’s settings menu, and ensuring the “Lossless RAW” quick toggle is ON.
One thing to keep in mind is that the Lossless RAW option is available only for some resolutions, not all. We tested this feature on a Galaxy S24+, and we can confirm it is grayed out when using the 50MP shooting mode.
However, you can turn Lossless RAW ON or OFF on the Galaxy S24+ if you have the 12MP or 24MP shooting mode selected in the viewfinder. Needless to say, your mileage with this Lossless RAW option might vary depending on which Galaxy phone you use.
Samsung is adding more camera options to the Galaxy S23 series with its Expert RAW app. While Galaxy S23 series phones already support features like astrophotography and ND Filter, Samsung is adding more adjustment possibilities to the ND Filter option.
Expert RAW update brings the Auto option for ND Filter
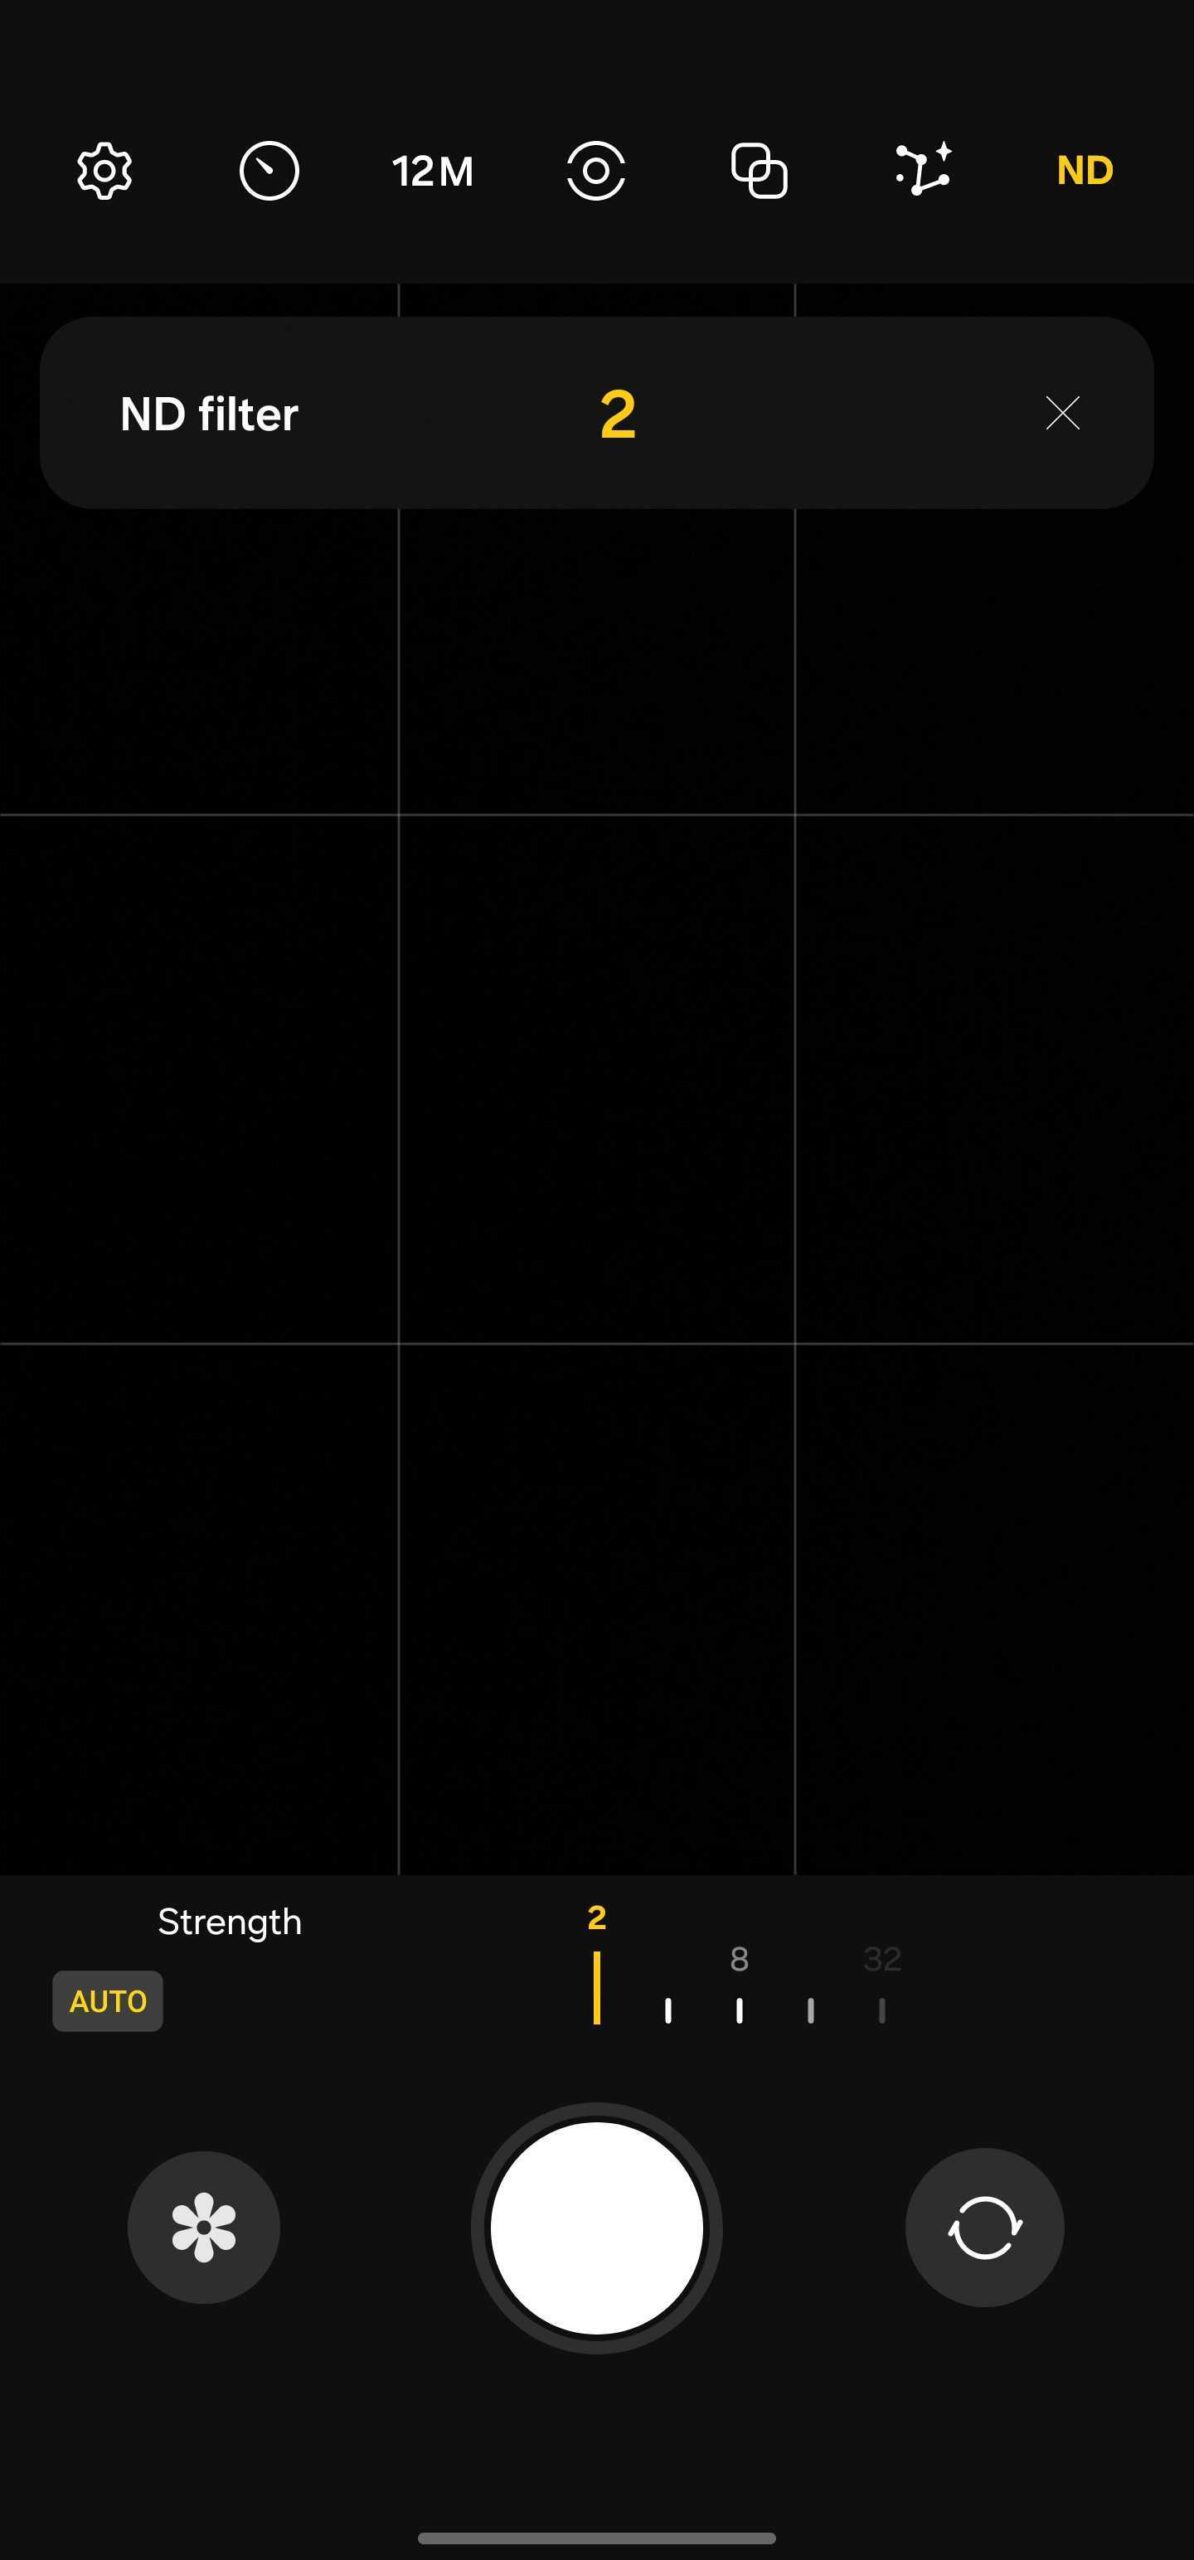
The latest version (3.0.05.12) of the Expert RAW app brings the Auto option for ND Filter on the Galaxy S23, Galaxy S23+, and Galaxy S23 Ultra. Earlier, the ND Filter feature only had the manual option. Things might get hard for someone getting started with the ND Filter feature, and it may take some time to zero in on the perfect ND Filter intensity. The new Auto option for ND Filter will help such users.
Users who are well-versed in manual ND filter settings can continue using the slider to manually choose its intensity. A small tag towards the left side of the ND Filter intensity slider displays whether the Auto or Manual option is active.
The newest version of the Expert RAW app wasn’t available on the Galaxy Store when we checked, but you can download it via APKMirror if you consider it safe. Once you download the latest version on your Galaxy S23 series phone, you should see the Auto option after you activate the ND Filter option.
What is an ND Filter, and why is it used?
ND stands for Neutral Density Filter, and professional photographers use it to reduce the amount of light coming into the camera sensor. This allows them to adjust exposure and shutter speed to avoid overexposure, slow down the movement of clouds or water, reduce depth of field, and retain more color and detail in bright areas of a scene.
This feature is often used in landscape and nature photography. You might have seen some photos with a silky smooth flow of water in waterfalls or water streams or photos of still water in the sea. Such images are captured using ND Filter and some camera setting adjustments. You can create such images with your Galaxy S23 series phone as well.
Google just released a new version of ChromeOS which comes laden with some impressive improvements, including the ability to implement custom keyboard shortcuts and to do the same with your mouse buttons.
ChromeOS M123 delivers these new powers, and more besides, but the ability to actually define your own keyboard shortcuts will be the most welcome feature for owners of the best Chromebooks.
If you’re familiar with working a certain way with a particular shortcut, you can now change over to that – and as Google points out (via The Verge), you can also change shortcuts to, say, make it easier to trigger them using just one hand (stretch that thumb and finger).
Similarly, any of your mouse buttons can be redefined to trigger various functions outside of basic clicking, like taking a screenshot. That’s going to be really handy for those who have a mouse with plenty of side buttons.
With the latest update for ChromeOS, tethering is now a thing, allowing the Chromebook to share its cellular connection with other devices. There’s now a switch in Network Settings to turn on the Hotspot, which is all you need to do before searching for and finding the network on your other device(s).
Finally, ChromeOS 123 has new voices for its text-to-speech functionality – reading out text aloud – that are more natural sounding. These work offline and Google notes that they are available in 31 different languages.
Analysis: Some handy additions, with the odd catch
(Image credit: Future)
There are some very useful goodies here, particularly for those newer to ChromeOS who are maybe more accustomed to using a Mac or Windows PC.
Get the hottest deals available in your inbox plus news, reviews, opinion, analysis and more from the TechRadar team.
Those users will have the shortcuts from those desktop operating systems ingrained in their muscle memory, no doubt, and so getting used to a whole new way of working might be an uphill struggle. Luckily, there’s no need to relearn anything now, as you can simply switch the default ChromeOS shortcuts to whatever you’re used to.
The tethering feature could be pretty handy as well, although there is a slight catch here. Right now, the only network supported is T-Mobile in the US, so unless you have your phone with that provider, then you’re out of luck.
However, Google says it is “working to add other networks in future releases” and we’d imagine it won’t be too long before support is expanded. If you’re not seeing the update yet, fear not – Google says it’s going to be “progressively rolling out over the coming days”, so you should see it soon if your Chromebook supports it.
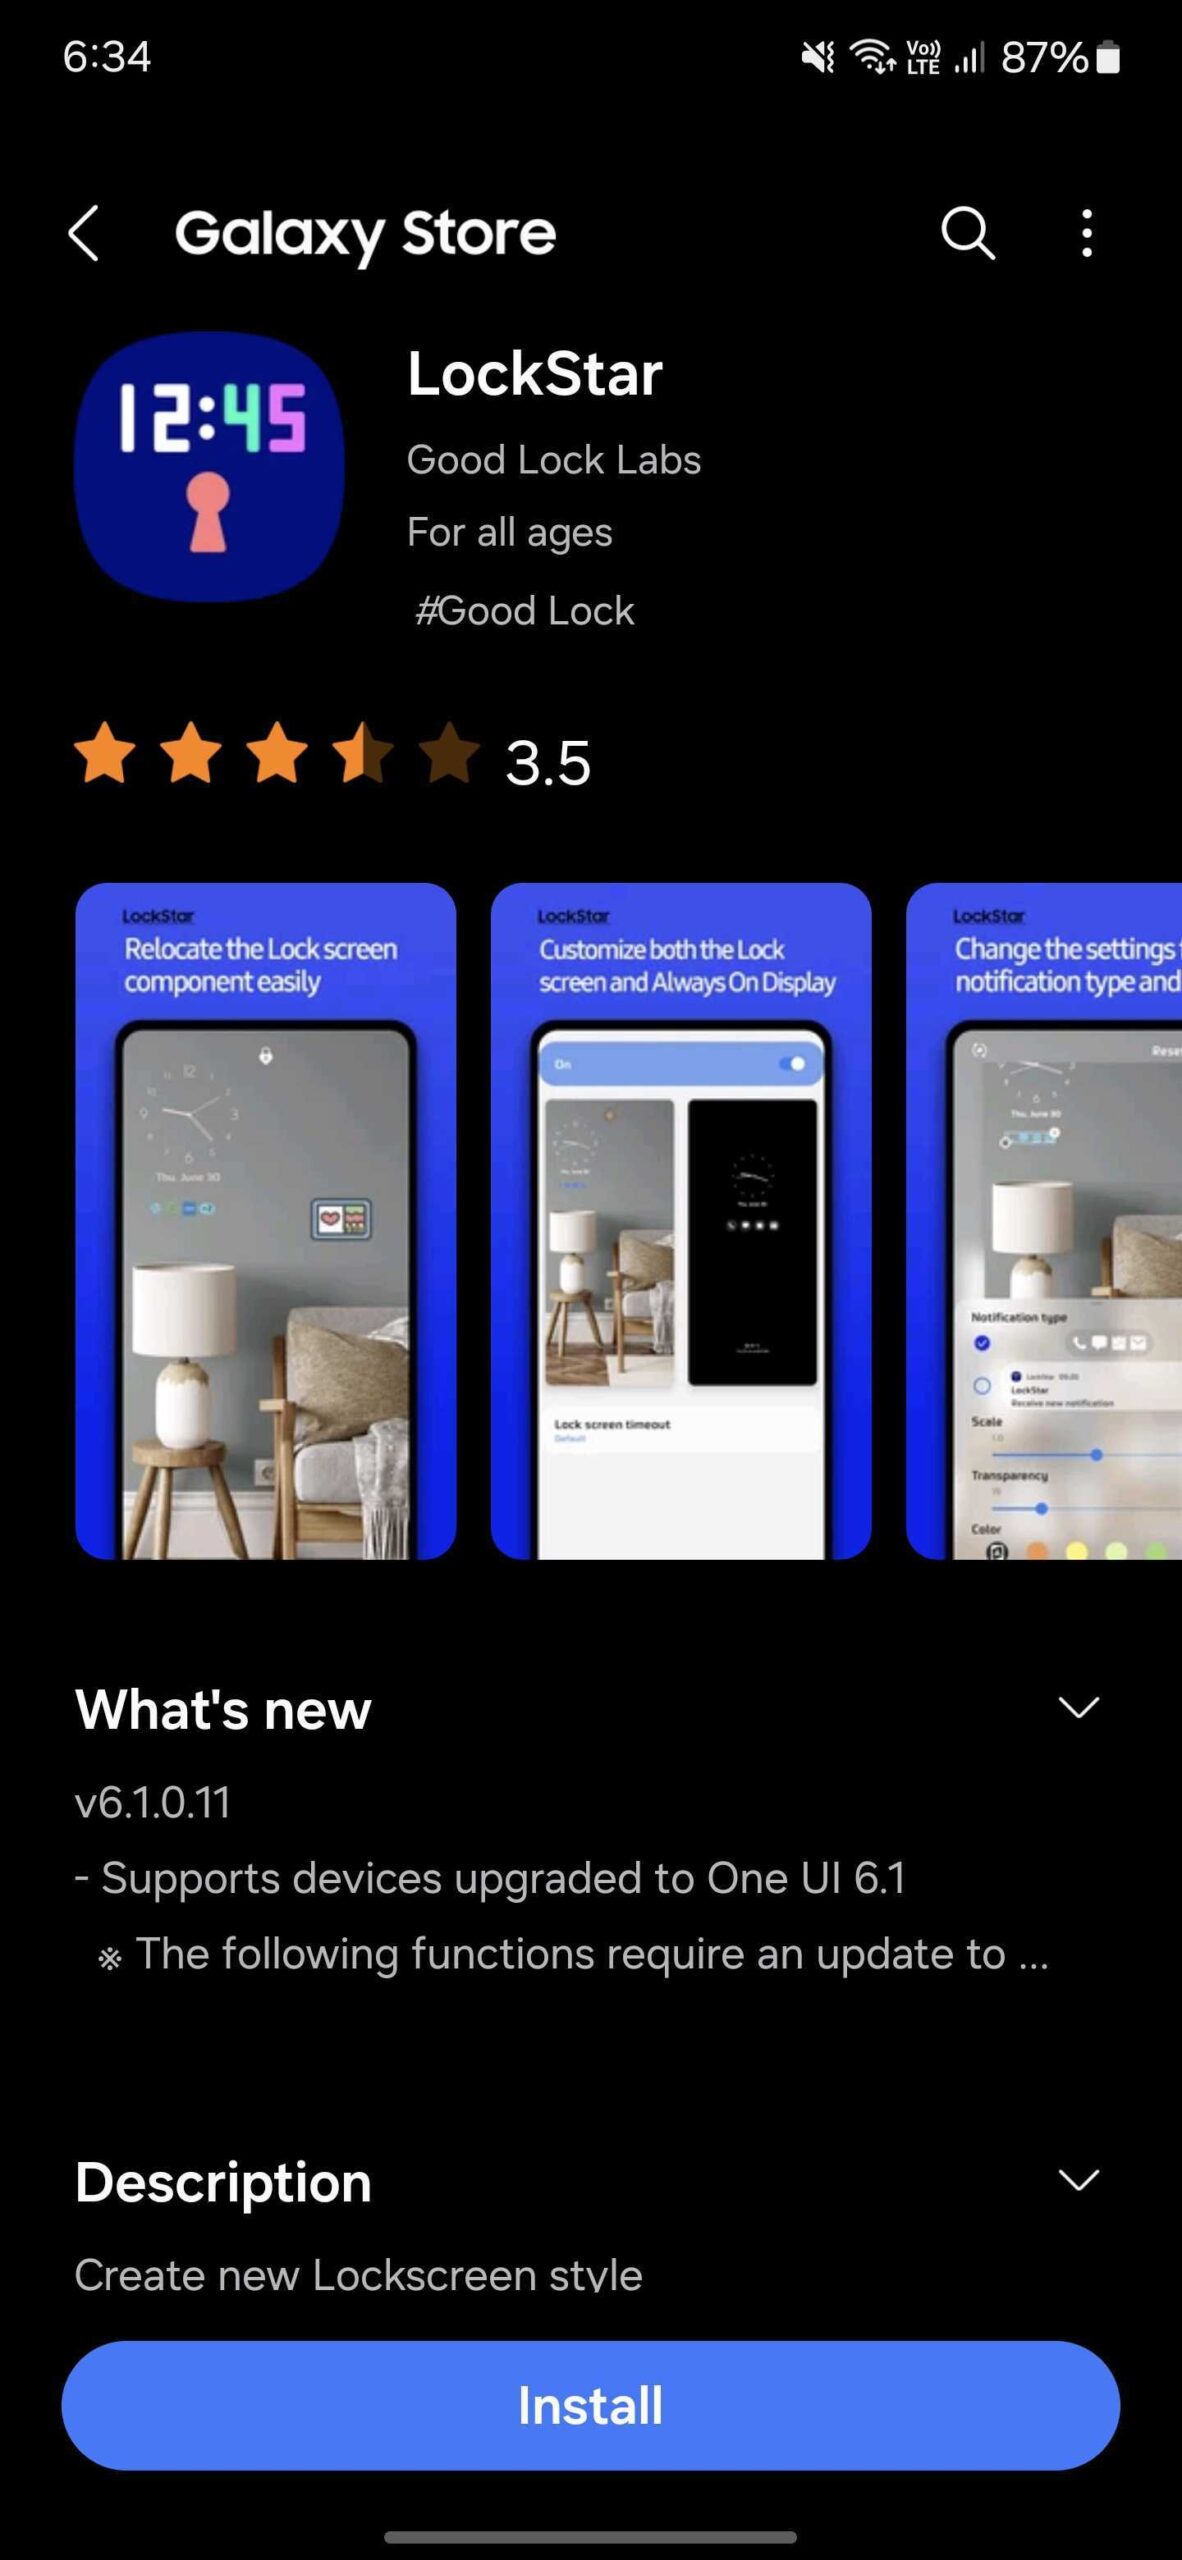
Samsung has solved that issue with an update to Good Lock’s LockStar module.
LockStar can be used to manually set the brightness of the AoD mode
A few days ago, Samsung revealed that it will bring manual brightness settings for the AoD mode for phones running One UI 6.1. The company has released that update now. The new version (6.1.0.11) of LockStar (46.4MB) is now available in the Galaxy Store and you can install it on Galaxy phones running One UI 6.1. It brings the option to adjust the brightness of the AoD mode manually.
The new functionality requires the device to have version 8.7.99.11 (or later) of the Always On Display app. If you don’t find it on the Galaxy Store or the Google Play Store, you can find it on APKMirror or other safe sources.
This change of moving manual brightness settings for the AoD mode to LockStar was reportedly done due to the use of different APIs in Android 14 compared to Android 13. The newer version of Android uses a new security architecture and requires regular maintenance work for all the Good Lock modules.
You can watch all the changes and improvements introduced with the One UI 6.1 update in our in-depth video below.
Go ahead and make fun of the Apple iPad on your favorite social network, I dare you. You will be swarmed by iPad fans, defending their favorite tablet to the death, which always seems to be just over the horizon for the tablet market. We got no new iPads in 2023, making it one of the hardest ever for iPad fanatics, but I say fear not! The iPad is healthy, and I see a brighter future than ever for Apple’s tablet.
Is the iPad really healthy? Well, according to Canalys, iPad sales declined year-on-year by quite a bit, as much as 24%. That still left Apple in a distant first place among tablet makers. Samsung’s sales declined only 11%, but it still shipped less than half of the tablets that Apple delivered, according to Canalys estimates.
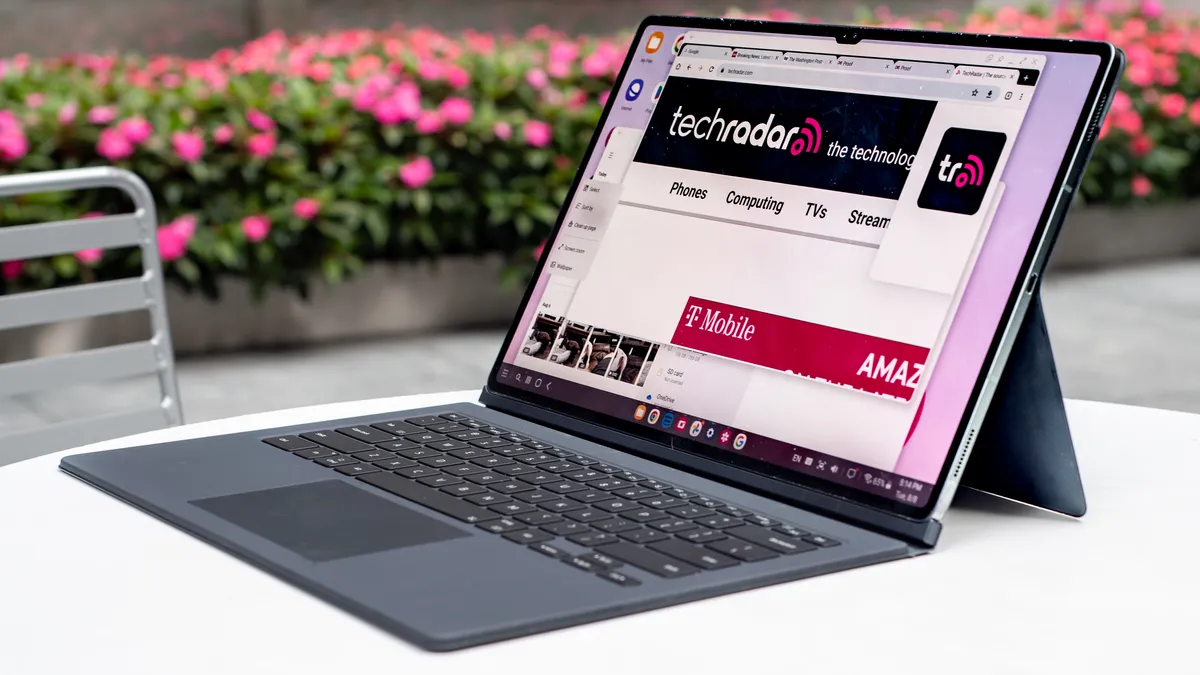
The Samsung Galaxy Tab S9 Ultra is incredibly capable (Image credit: Future / Philip Berne)
That’s gotta be tough news for Samsung. The latest Galaxy Tab S9 series, including the more affordable Galaxy Tab S9 FE, are some of Samsung’s best tablets ever. The entire lineup is IP68 water resistant, which is a first for tablets that aren’t sold as rugged business tablets. They come with an S Pen, which is a better stylus than the Apple Pencil, a $79 / £79 / AU$139 implement that doesn’t even work with every iPad.
The iPad didn’t need an update to stay up-to-date
The iPad, on the other hand, has languished on shelves for a long time. There were no iPad updates in 2023. After endowing the iPad Pro with the M2 chip, and the iPad Air with the M1 chip, in late 2022, Apple left the tablet alone.
The base model iPad was updated in 2022, and it still uses a mobile A14 Bionic chipset, while the even older iPad mini, last updated in 2021, inexplicably uses a faster A15 Bionic. Apple also still sells the iPad 10.2-inch model from 2021 as a new device.
You can still buy this 2021 iPad 10.2 from Apple brand new (Image credit: TechRadar)
Here’s the thing – the iPad was already more than a year ahead of other tablets on the market. Samsung’s Galaxy Tab S is a powerful, capable Android tablet with a fantastic display. Its Snapdragon processor can’t come close to the iPad Air’s M1 chip. The M1 chipset can power a professional laptop. The Snapdragon is strictly mobile.
Even the A14 Bionic chipset in the base model iPad gives the latest Snapdragon 8 Gen 2, found in the Galaxy Tab S9, a run for its money.
The iPad is so overpowered it sticks around longer
How could Apple improve the iPad? Maybe a better question would ask, what improvements do we need? The iPad is already powerful, well-designed, and long-lasting. I mean it lasts a long time in battery tests, and it also lasts a long time as a product you’ll own. When it comes to longevity, the iPad puts the iPhone to shame, though maybe that should change.
I owned the very first iPad, and I used it for at least six years before I broke it accidentally by dropping it. By then, it wasn’t worth fixing, but I felt I’d gotten plenty of value out of that purchase. On the last day it was alive, I was able to do everything I wanted, including playing games, watching movies, and browsing all of my favorite websites. A six-year-old iPad was completely capable, and I couldn’t have asked for more.
The original iPad lasted a very long time, years and years
A big reason why the iPad market has stalled is because the market is saturated. People keep iPads and tablets much longer than they keep phones. On inspection, we should probably all just hold onto our phones longer. If a five-year-old iPad is a powerhouse, then a five-year-old iPhone is probably much more capable than we all imagine.
The difference is that Apple and our mobile carriers offer us financial incentives to trade in our old phones for new ones. That’s how we buy phones, on contracts and payment plans. That’s not how most people pay for tablets.
Do you really need a fourth screen? Of course you do
The iPad is the best of all of those worlds, and iPad fans know it
That’s the real problem with the iPad: it’s another expenditure on a device that replaces… well, nothing. If you have an iPhone, you can do everything the iPad can do, and more. If you have a laptop, too, then you really don’t need a third screen. What about that smart TV on your wall? Now, an iPad makes four screens, and there’s nothing it offers that your other screens can’t manage.
The iPad isn’t an impulse buy, either. It isn’t a hundred bucks or so. You can’t buy it with the gift card you won in a work raffle like you might buy an Amazon Fire tablet for $100. The iPad costs hundreds, and that’s before you add accessories like the Apple Pencil, a keyboard, or even just a nice folio cover.
Still, there is something undeniable about its appeal. The iPad is more powerful and capable than a smartphone. It’s more portable than a laptop. It’s more personal than the TV hanging on the wall. The iPad is the best of all of those worlds, and iPad fans know it.
The iPad’s bottom line is much lower this year
Of course a new iPad Air with an OLED screen would be sweet (Image credit: Apple)
Here’s what truly made this past year a boon for iPad fans. Every iPad model can be found for the lowest price ever. The iPad 10.9 is $429 / £307.62 right now on Amazon, down from $449 / £499 at launch. The iPad Air is $449 / £438.02, down from $599 / £569. Sorry, Australian friends, Amazon isn’t giving you the same iPad discount these days.
The iPad Pro hasn’t dropped as much as the rest, but the 64GB M1 iPad Air now costs $150 / £120 less on Amazon than it did when it launched. That’s a 25% discount in the US. Maybe Apple was doing the right thing by delaying any iPad update as long as possible. The iPad didn’t need an update. It needed a price cut.
First off: There’s no direct way to update AirPods firmware. When Apple updates AirPods software — as it just did for AirPods Max — the update happens automatically, in the background.
However, there is a way to speed up the update process. Plus, it’s a good idea to manually check you’re running the latest version, which brings bug fixes and sometimes great new features.
As noted, Apple most recently released fresh firmware for AirPods Max, taking the over-the-ears headphones to 6A325. (You can find other current AirPods firmware versions below.)
Here’s how to check if your AirPods are running the latest firmware on iPhone, iPad, and Mac. Plus what to do if they aren’t, and how to force AirPods firmware to update.
How to update AirPods firmware
Apple periodically brings out new firmware with improvements and bug fixes. It’s well worth installing these updates because they fix bugs and sometimes contain significant new features. The 6A300/6A301 update last fall, for example, added new features to the entire AirPod line.
Apple typically doesn’t bother to announce AirPods updates. However, the company recently started publishing release notes so users know what’s changed.
Firmware updates are conducted automatically when your AirPods are charging and in Bluetooth range of an iPhone, iPad, or Mac that’s connected to Wi-Fi.
Table of contents: How to update AirPods firmware
What is the latest AirPods firmware?
AirPods (3rd generation): 6A321
AirPods (2nd generation): 6A321
AirPods (1st generation): 6.8.8
What is the latest AirPods Pro firmware?
AirPods Pro (2nd generation) with MagSafe Charging Case (USB-C): 6B34
AirPods Pro (2nd generation) with MagSafe Charging Case (Lightning): 6B34
AirPods Pro (1st generation): 6A321
What is the latest AirPods Max firmware?
Apple introduced firmware version 6A324 for AirPods Max on January 30, replacing 6A300 from last fall. The release notes say it simply offers “bug fixes and other improvements.”
At this time, only AirPods Max are on version 6A324. AirPods Pro 2 are on 6B34 from December 5, whether the earbuds are from 2022 or the new 2023 edition.
How to check AirPods’ current firmware version on iPhone or iPad
It’s pretty easy to quickly check if your AirPods are up to date in iOS and iPadOS.
1. Connect your AirPods to your iPhone or iPad
Connect your AirPods to your device by opening the case — or pop them in your ears. Photo: Leander Kahney/Cult of Mac
Start by establishing an active connection to your AirPods by opening the lid of the charging case. Or put the earbuds on, whichever you prefer.
2. Go to Settings
Open Settings, then select the name of your connected AirPods to see the current firmware version. Screenshot: Leander Kahney/Cult of Mac
Open the Settings app on your iPhone or iPad. When connected, your AirPods should be right at the top of settings, just below your Apple ID settings. Just tap the name of your AirPods, and on the next screen scroll almost to the bottom where you’ll see Version, which lists the current firmware number.
For many AirPods models, look for Version to say 6A321. The same is true for first-gen AirPods Pro. The latest AirPods Pro should read 6B34, and so on. See the chart above.
3. Alternatively, go to Settings -> Bluetooth
Open Settings, then Bluetooth, then select the information icon to see your AirPods firmware number. Screenshot: Leander Kahney/Cult of Mac
Another way to check AirPods firmware is to go to Settings -> Bluetooth and look under My Devices for the name of your AirPods.
Tap in the blue ⓘ icon — it’s an i with a circle around it next to the name. On the resulting page, look for Version. Again, the latest version for most AirPods is 6A321, while the newer AirPods Pro are on 6B34. You can also check Apple’s list of current firmware versions.
How to force an update
You can hurry up an AirPods firmware update. Photo: Leander Kahney/Cult of Mac
If the firmware version isn’t up to date, you can hurry along the process. Unfortunately, you can’t push a button or toggle a setting to tell your AirPods to update.
The best you can do is put your AirPods in their case and plug the case into a power cable (Lightning or USB-C). Same thing for AirPods Max: just plug the headphones into a charging cable. Or if you have a wireless charging case, put your AirPods on a wireless charger.
Then make sure the iPhone or iPad they are paired with is close by, and wait. The firmware should update. Typically, the process takes five to ten minutes but can take up to 30 minutes. Be patient!
There are theories on how to get a faster update, like plugging the AirPods case into a Mac, but none of these have ever been definitively proven to work any quicker.
Realistically, this is a problem only for people who get antsy about controlling firmware updates, and who want the latest as soon as they can get it. For everyone else, just keep using your AirPods. The update will happen without you having to do a thing.
How to check AirPods’ current firmware version on Mac
You can also check your AirPods firmware on a Mac. Your Mac will need to be running macOS Ventura or later.
1. Go to System Settings
Open System Settings under the Apple menu. Screenshot: Leander Kahney/Cult of Mac
Click the Apple menu icon in the upper left corner of your Mac’s screen, and select System Settings.
2. Select Bluetooth
Select Bluetooth, then the name of your connected AirPods Screenshot: Leander Kahney/Cult of Mac
Click Bluetooth in the left-hand sidebar. Then find your AirPods in the My Devices list and select the blue ⓘ icon (an i with a circle around it next to the name). Be sure that your AirPods are connected to your Mac. It’ll say Connected. If not, open the lid of the case, or select Connect next to their name.
3. Check the firmware version
Check the firmware version. Screenshot: Leander Kahney/Cult of Mac
After clicking on your AirPods, a popup will show information about them, including the firmware number next to Version. Check it against the firmware numbers listed above, or against Apple’s list of current AirPod firmware updates.
4. Force an update
If the firmware version isn’t up to date, pop your AirPod into their case, and plug them into a charging cable. You can put the other end of the charging cable into your Mac. The firmware should update itself. Again, it takes five to 10 minutes, but may take longer. If you have a wireless charging case, you can also put your AirPods on a charger.
Can you update AirPods firmware on Android or Windows?
Even though you can connect your AirPods to an Android device or a Windows computer, you cannot update the firmware on Android or Windows. You can only update AirPods firmware on iOS, iPadOS and macOS.
There is currently no third-party software that can do an AirPods firmware update.
More firmware update guides
Editor’s note: This is an updated version of an article first published on November 14, 2019, and refreshed periodically since then with successive new AirPods firmware versions. Leander Kahney contributed to this post.


 April 7, 1997: Apple’s System 7 operating system receives its last update with the shipping of Mac OS 7.6.1.