Motorola Moto G Power 5G 2023 for $200: My main problem with Motorola phones is that there’s no NFC (6/10, WIRED Review), which means you can’t use them to pay your ticket fare on the off chance you left your wallet at home. Motorola also only promises one OS upgrade (with three years of security updates). You can get a much better deal with the devices above. However, there is a headphone jack, a microSD card to expand the 256 GB of storage, and a charger in the box.
I tested Samsung’s Galaxy A23 5G and found its performance annoyingly slow, which shouldn’t be the case for a $300 smartphone these days. I also don’t recommend Motorola’s Moto G Play 2023, Moto G Stylus 2023, Moto G Power 2022, and Moto G Pure 2022 because the above phones trounce them in every way and don’t cost much more.
The Nokia G400 5G (6/10, WIRED Review) is a fine phone, but its software policy just isn’t as good as our top recommended devices above and its performance can be stuttery when you juggle multiple apps. The Nokia G100 was OK until the display started locking up and wouldn’t accept touch input. I tried a second unit and ran into the same issue. I have also tested the Doogee S89 Pro, a rugged smartphone. While I didn’t run into any glaring flaws, it’s a pain in the butt to carry around and uncomfortable in the hand, too. Sure, there’s a massive 12,000-mAh battery, but it didn’t last as long as I expected. The company has a spotty record with software updates, too.
Sort of. Any of our top picks are excellent choices, but if you can wait until May or June, we’ll have a broader lineup to choose from. Motorola will likely unveil more of its budget Moto G lineup soon. TCL will release its 50-series this summer, HMD Global might have some budget devices in tow by July, and we will likely see a Pixel 8A at Google I/O in May.
Consider Last Year’s Flagship Phones
If none of these phones have the features you want or they aren’t as powerful as you’d like, your best option is to look for last year’s flagship smartphones, which might be steeply discounted. Sometimes they’re easy to find, but manufacturers may stop selling them altogether. Keep in mind that you’ll lose a year of software support, but that’s often still better than the software support available on cheap phones anyway. The OnePlus 11, for example, has dipped as low as $499. Samsung’s Galaxy S23 has started to creep down toward $600.
5G is the latest cellular network and it’s widespread enough that you should try to stick to phones that support it. It’s not completely replacing 4G LTE, so you’ll see this in your status bar as you roam around the country. You can read more about it here, but in short, 5G comes in two major types: sub-6 and millimeter wave (mmWave). The latter is usually only available in flagship phones and allows you to access superfast speeds, but you’ll rarely encounter mmWave (think select areas in major cities and certain venues, like stadiums and airports). Sub-6 isn’t much faster than 4G LTE, but it has a broader range and is more widely accessible these days. Most of the smartphones we recommend here support sub-6 5G, even ones as low as $200.
Check Network Compatibility
If you buy an unlocked phone on this list and try to take it to one of your wireless carrier’s retail stores, they may tell you it isn’t compatible with the network. It likely is. Just use a paper clip or SIM ejection tool to pop the SIM card out of your current phone, then slide that SIM into your new phone. If it doesn’t work at first, reboot the phone or wait a couple of hours.
If you need a new SIM, try ordering one online from your carrier or see if they’ll give you a SIM when you activate a line in the store (if you’re starting coverage). Tell them you have a phone. Many times, reps will want to sell you a phone; that’s one potential reason they might hassle you into buying a different device in the store. Having said that, please make sure whatever phone you buy will work on your wireless network. Listings on retailers like Amazon should state clearly which networks a device will be compatible with. Also, make sure the listing says the phone is being sold “unlocked.”
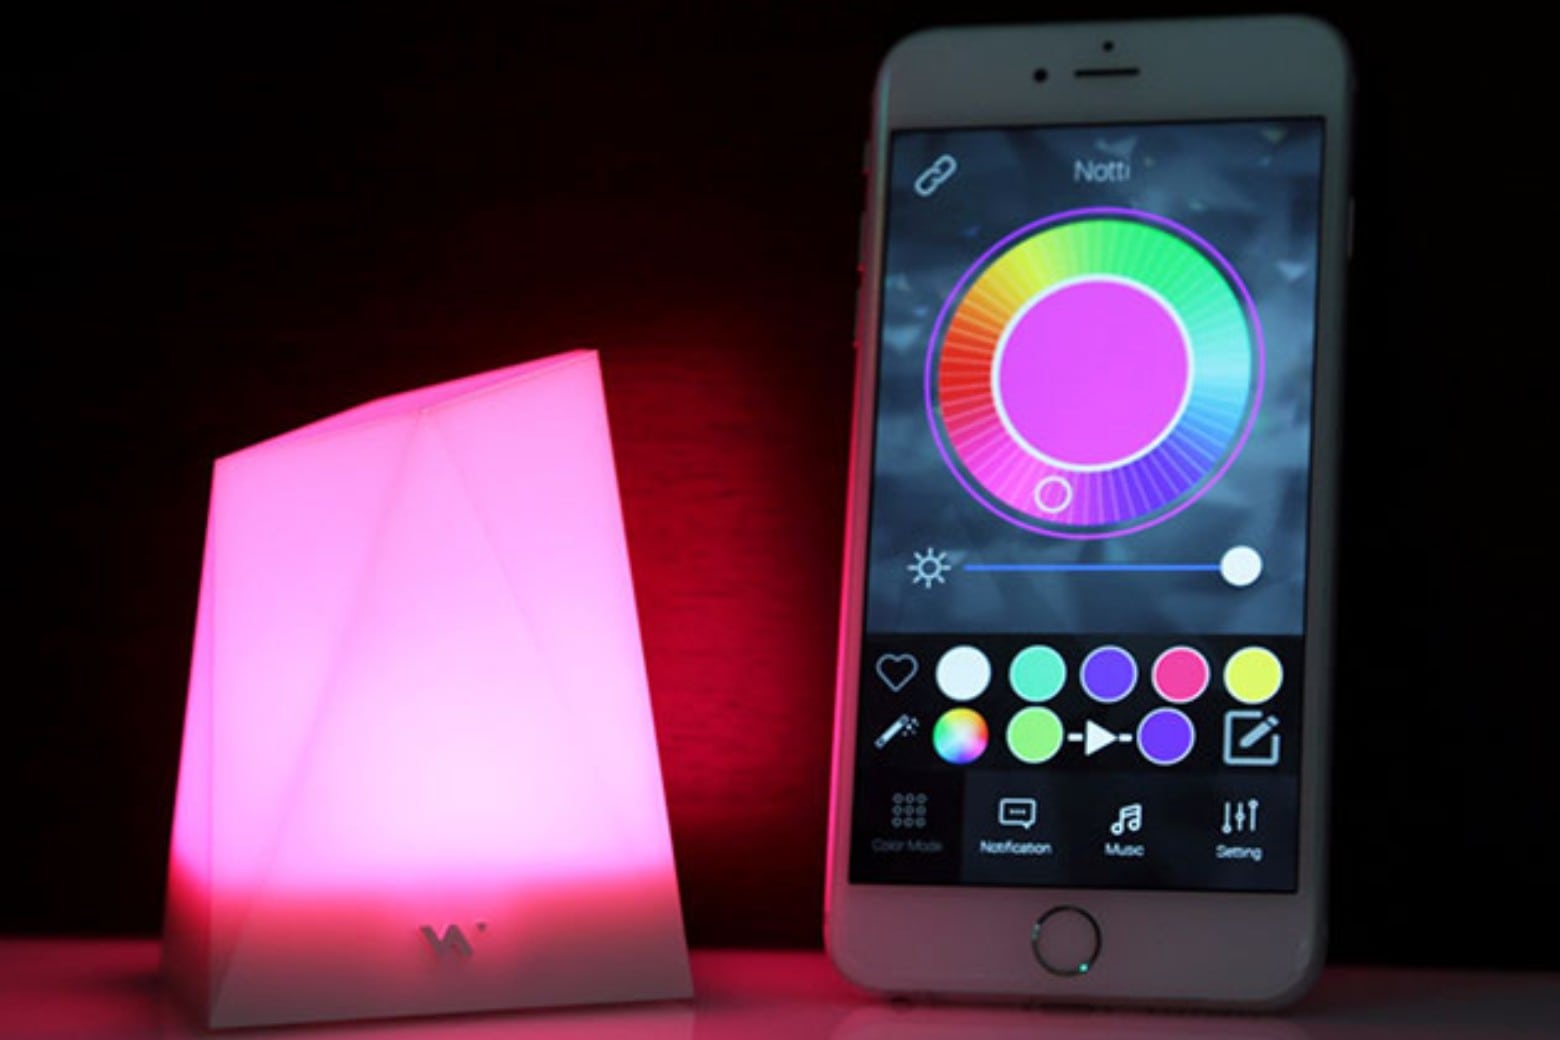
Save $15 on this smart light that pairs with your iPhone. Photo: Cult of Mac Deals
If you’re looking for a stylish new LED table lamp that can set any mood, this one delivers — and it gives you notifications right from your iPhone. The Notti smart light hooks up to your smartphone through Bluetooth to give you a heads-up with a pop of color for calls, texts, Facebook updates and more.
For a limited time, you can get the Notti smart light on sale for just $24.99.
Notti smart light gives you iPhone notifications with a colorful twist
LED lamps (like this modern floor lamp) are all the rage these days. They’re both useful and fun, because they can turn your home or office lighting into something spectacular.
The Notti table lamp boasts an elegant white design that blends in with any room’s aesthetic even when it’s turned off. It offers 16 million colors to play with, lighting up your space however you want. With this LED light, you can set the mood for a quiet evening or get the vibes just right for a party. You can even sync this smart light to your music, letting it groove to the beat with you.
Plus, it lights up for your iPhone notifications
It also allows you to turn your iPhone’s (sometimes) annoying rings and buzzes into something more fun and visually appealing. Plus, it comes with an alarm function to make waking up a bit more bearable.
The Notti’s battery life stretches more than 720 hours in notification mode and more than five hours when used for continuous light. Power up with a micro USB, and pair with your device via Bluetooth 4.0 BLE up to 15 meters away. You can connect iPhone models starting from the iPhone 5 and later, iOS versions from 8 onward. It works with Android devices running 4.3 or above.
Save on an LED table lamp that offers 16 million colors
Level up your decor with the Notti smart light, on sale for just $24.99 for a limited time (regularly $39.99).
Buy from: Cult of Mac Deals
Prices subject to change. All sales handled by StackSocial, our partner who runs Cult of Mac Deals. For customer support, please email StackSocial directly.
There are lots of questions about how to take solar eclipse photos with your iPhone. Firstly, can a solar eclipse harm your iPhone’s camera or lenses? Won’t the sun’s rays damage the camera?
Not according to Apple. Cupertino says it’s safe to photograph a total solar eclipse with your iPhone; but be sure to protect your eyes.
However, photographing the solar eclipse is hard without the right tools. To get a good picture of the solar eclipse with your iPhone, you’re going to need a 12-18x telephoto lens attachment, a solar filter and a tripod. Make sure you have everything you need before the big day next month.
Here’s how you can get prepared. Watch our new video or keep reading below.
This post contains affiliate links. Cult of Mac may earn a commission when you use our links to buy items.
How to take solar eclipse photos on iPhone
A total solar eclipse is one of the most awe-inspiring sights in all of nature. It’s dramatic and beautiful, especially when the moon’s shadow finally blots out the sun. The sudden darkness of the totality is stunning and unlike anything you’ll have ever seen.
To photograph it, preparation is key. The more prepared you are now, the more you can live the moment as the eclipse is happening without worrying about capturing it on your iPhone.
The Great American Eclipse
April 8, 2024 is the Great American Eclipse, so called because the path of totality will cover Mexico, Texas, the Midwest and the border between New England and Canada. There won’t be another total solar eclipse like it until 2044 and 2045. Check NASA’s website for maps of its path across the United States.
Taking a good picture of a total solar eclipse is a big challenge. Even your best iPhone shot is not going to rival images made by pros. Nonetheless, you can still get good snaps with proper preparation.
Never look at the sun directly
Note: Never look at the solar eclipse through a camera lens, telescope or binoculars: This will fry your eyes instantly. Don’t even look at the sun with your naked eyes. Doing so can damage your eyesight permanently, even when the sun is mostly eclipsed. It’s only safe to look at the eclipse during totality, when the sun is entirely blocked by the moon.
Prepare to photograph the eclipse now
If you want to get good pictures of the total eclipse — especially the spectacular ring of fire — pulling out your iPhone at the last second isn’t going to cut it.
Now is the time to stock up on filters, lenses and tripods — all of which can be acquired pretty inexpensively — and make sure your Apple Watch is set up to act as a remote. It’s also a good idea to practice photographing the sun now, preferably in the same location you’ll be watching the eclipse.
Pro tip: The full moon will give you a good idea of how large the sun will appear during the eclipse. Practice photographing the moon now, and it’ll give you a good idea of how big the sun will appear with your iPhone’s standard lenses or a telephoto attachment.
1. Avoid blur; get a tripod
A compact tripod might be all you need. Photo: SwitchEasy
A tripod will keep your phone steady at the perfect angle. You can pay better attention to everything else going on if you don’t need to worry about holding the phone in your hands.
2. Attach iPhone with a tripod phone mount
If you have a tripod but you don’t have a way to mount your phone, I highly recommend a MagSafe tripod mount.
For getting a good video of the darkness in the middle of the day, a tripod and a phone mount is all you’ll need. But if you want to try to get solar eclipse photos of the sun itself, here are three more things you’ll want to pick up.
3. Make your own iPhone solar filter
Just tape one of the lenses over your phone cameras. Image: Kesseph
Pointing your phone camera at the sun won’t hurt your phone’s camera sensor — it’ll just be really hard to get a picture that isn’t blurry. If you want a good, clear picture of the sun, you’ll need a solar filter.
If you have a spare pair of solar eclipse glasses, you already have one! Just cut it up and tape the filter over the lens of your phone. Don’t use sunglasses — they’re nowhere near strong enough.
If you don’t have any old eclipse glasses, these VisiSolar Smartphone Photo Filters are well suited for use with an iPhone. The large circular filter entirely covers the three-lens camera setup of the latest Pro models. For best results, remove your case first.
Note: You’ll want to remove any filters during totality. You’ll need filters right up to the moment the sun is blotted out, but when the sun is fully eclipsed, you should ditch the filters. The sun’s corona is much fainter than the photosphere, so any pictures taken at this time with a filter will be extremely murky. It’s also safe to look at the eclipsed Sun with your naked eye. In fact, you won’t see much of anything if you’re still looking through your eclipse glasses or a filter.
4. Get way better eclipse shots with a zoom lens
With the Moment case, you can just screw an additional telephoto lens onto your phone. Photo: D. Griffin Jones/Cult of Mac
If you want a good picture of the solar corona (the white ring of light called the “ring of fire”), you’ll need a bit more zoom than you get out of the box with your iPhone.
If you put a 2× zoom lens over the iPhone 15 Pro Max 5× Telephoto lens, then you’ll get an impressive 10× optical zoom for a great shot of the sun.
The Moment Tele Lens is the easiest way to get more zoom, using their simple screw-on system.
It’s a lot to buy, but when you have the whole system, you’ve effectively doubled the capability of your iPhone camera.
5. Use a camera app with manual controls
Halide gives you the manual controls the iPhone camera app doesn’t. Screenshot: D. Griffin Jones/Cult of Mac
Sometimes, the stock Camera app on the iPhone doesn’t play nicely with the Moment lenses — much less the weird lighting conditions of a solar eclipse.
If you want fine-tuned manual controls, just like a full-size dedicated camera, I recommend using Halide. This app lets you manually set the lens, the focus, the exposure, the resolution and more.
Tap the 1× button in the bottom corner to manually set the lens; drag your finger up or down on the camera screen to set the exposure. Tap AF to turn off autofocus and set the focus manually. For capturing the sky, you can drag it all the way to 1.0 for maximum distance.
Halide packs in loads of pro features, but thanks to its clever design, it isn’t impossible for novices to figure out like a DSLR camera.
Price: $2.99/month, $11.99/year or $59.99 lifetime Download from: App Store
6. Mount your iPhone on a telescope
Mount your iPhone in an actual telescope. Image: Celestron
Even better than zoom lenses is a telescope. You’ll need an iPhone mount like Celestron’s $80 NexYZ DX Kit, which holds your iPhone next to the eyepiece and includes a Bluetooth shutter release remote. You can even pick up a cheap scope, like the Celestron EclipSmart, for $130, which includes a solar filter.
7. Trigger eclipse pictures with Apple Watch — Siri is even better
Control your iPhone camera from your Apple Watch. Photo: D. Griffin Jones/Cult of Mac
Once you’ve got everything set up — tripod, lenses, and filters — you’ll want to make sure your Apple Watch can act as an iPhone camera remote. Luckily, it’s easy. Open the Camera Remote app on your Apple Watch. Twist the Digital Crown to zoom. To adjust exposure, just tap on the key area of the photo on your Apple Watch’s face. To take the shot, tap the Shutter button. By default, there’s a three-second delay.
Even better, use Siri. Just tell your Apple Watch: “Take a picture” and it’ll snap a shot with your iPhone. Make sure this works beforehand and you won’t have to take your eyes off the eclipse as it is happening.
You can also try using your iPhone’s timer setting.
8. To get a great eclipse shot, practice beforehand
For many of us, this upcoming total solar eclipse is literally going to be a once-in-a-lifetime event. Don’t ruin it by futzing about with your iPhone. Best to practice now, before the big day. Luckily, the sun is going to be the same brightness as the sun during an eclipse, so play around with filters and lenses now.
You’ll want to figure out the best composition for your photos, so try to figure out where the sun will be in the sky during the total eclipse.
Can a solar eclipse damage iPhone cameras?
Photographing the sun will not damage your iPhone’s camera or lens. The cameras and lenses are designed to capture light — that’s the sea they swim in — and even direct rays from the sun won’t harm them.
However, leaving your iPhone camera and lens pointed directly at the sun may cause your iPhone to overheat. According to Apple, iPhones are designed to operate at temperatures between 32º to 95º F. Apple explicitly advises against “leaving your device in direct sunlight for an extended period of time.”
If your iPhone overheats, it’ll automatically regulate its behavior to prevent damage, including shutting off the screen, dialing back charging and disabling wireless. If your iPhone overheats, you should see a warning message on the screen.
To avoid overheating, use your iPhone only for short stretches of time, and definitely try shading it when not in use.
Can you look at a solar eclipse with your iPhone?
Theoretically, yes, you could watch the total solar eclipse on your iPhone’s screen instead of looking at it directly. But why would you want to?
Watching the eclipse onscreen is going to be blurry, wobbly and overexposed. Plus, holding your iPhone up to the eclipse, you greatly risk looking directly at the sun instead. Plus, you’re going to need a solar filter for your iPhone, and if you have one, you might as well use it to look at the sun directly. It’s not worth the trouble.
Don’t forget to take pictures around you
To be honest, the best pictures you’ll likely take during the total solar eclipse won’t be of the sun. It’ll be the landscape and people around you. Be sure to get pictures of your friends and family watching the eclipse with you. Take a selfie with the eclipsed sun behind you. Or get a Reservoir Dogs shot of everyone in their eclipse glasses.
Again, it’s a good idea to practice. Before the big day, take some photos of people and your surroundings just before or after sunset. The light level at twilight will be similar to the totality.
Check out more tips on how to take the best pictures.
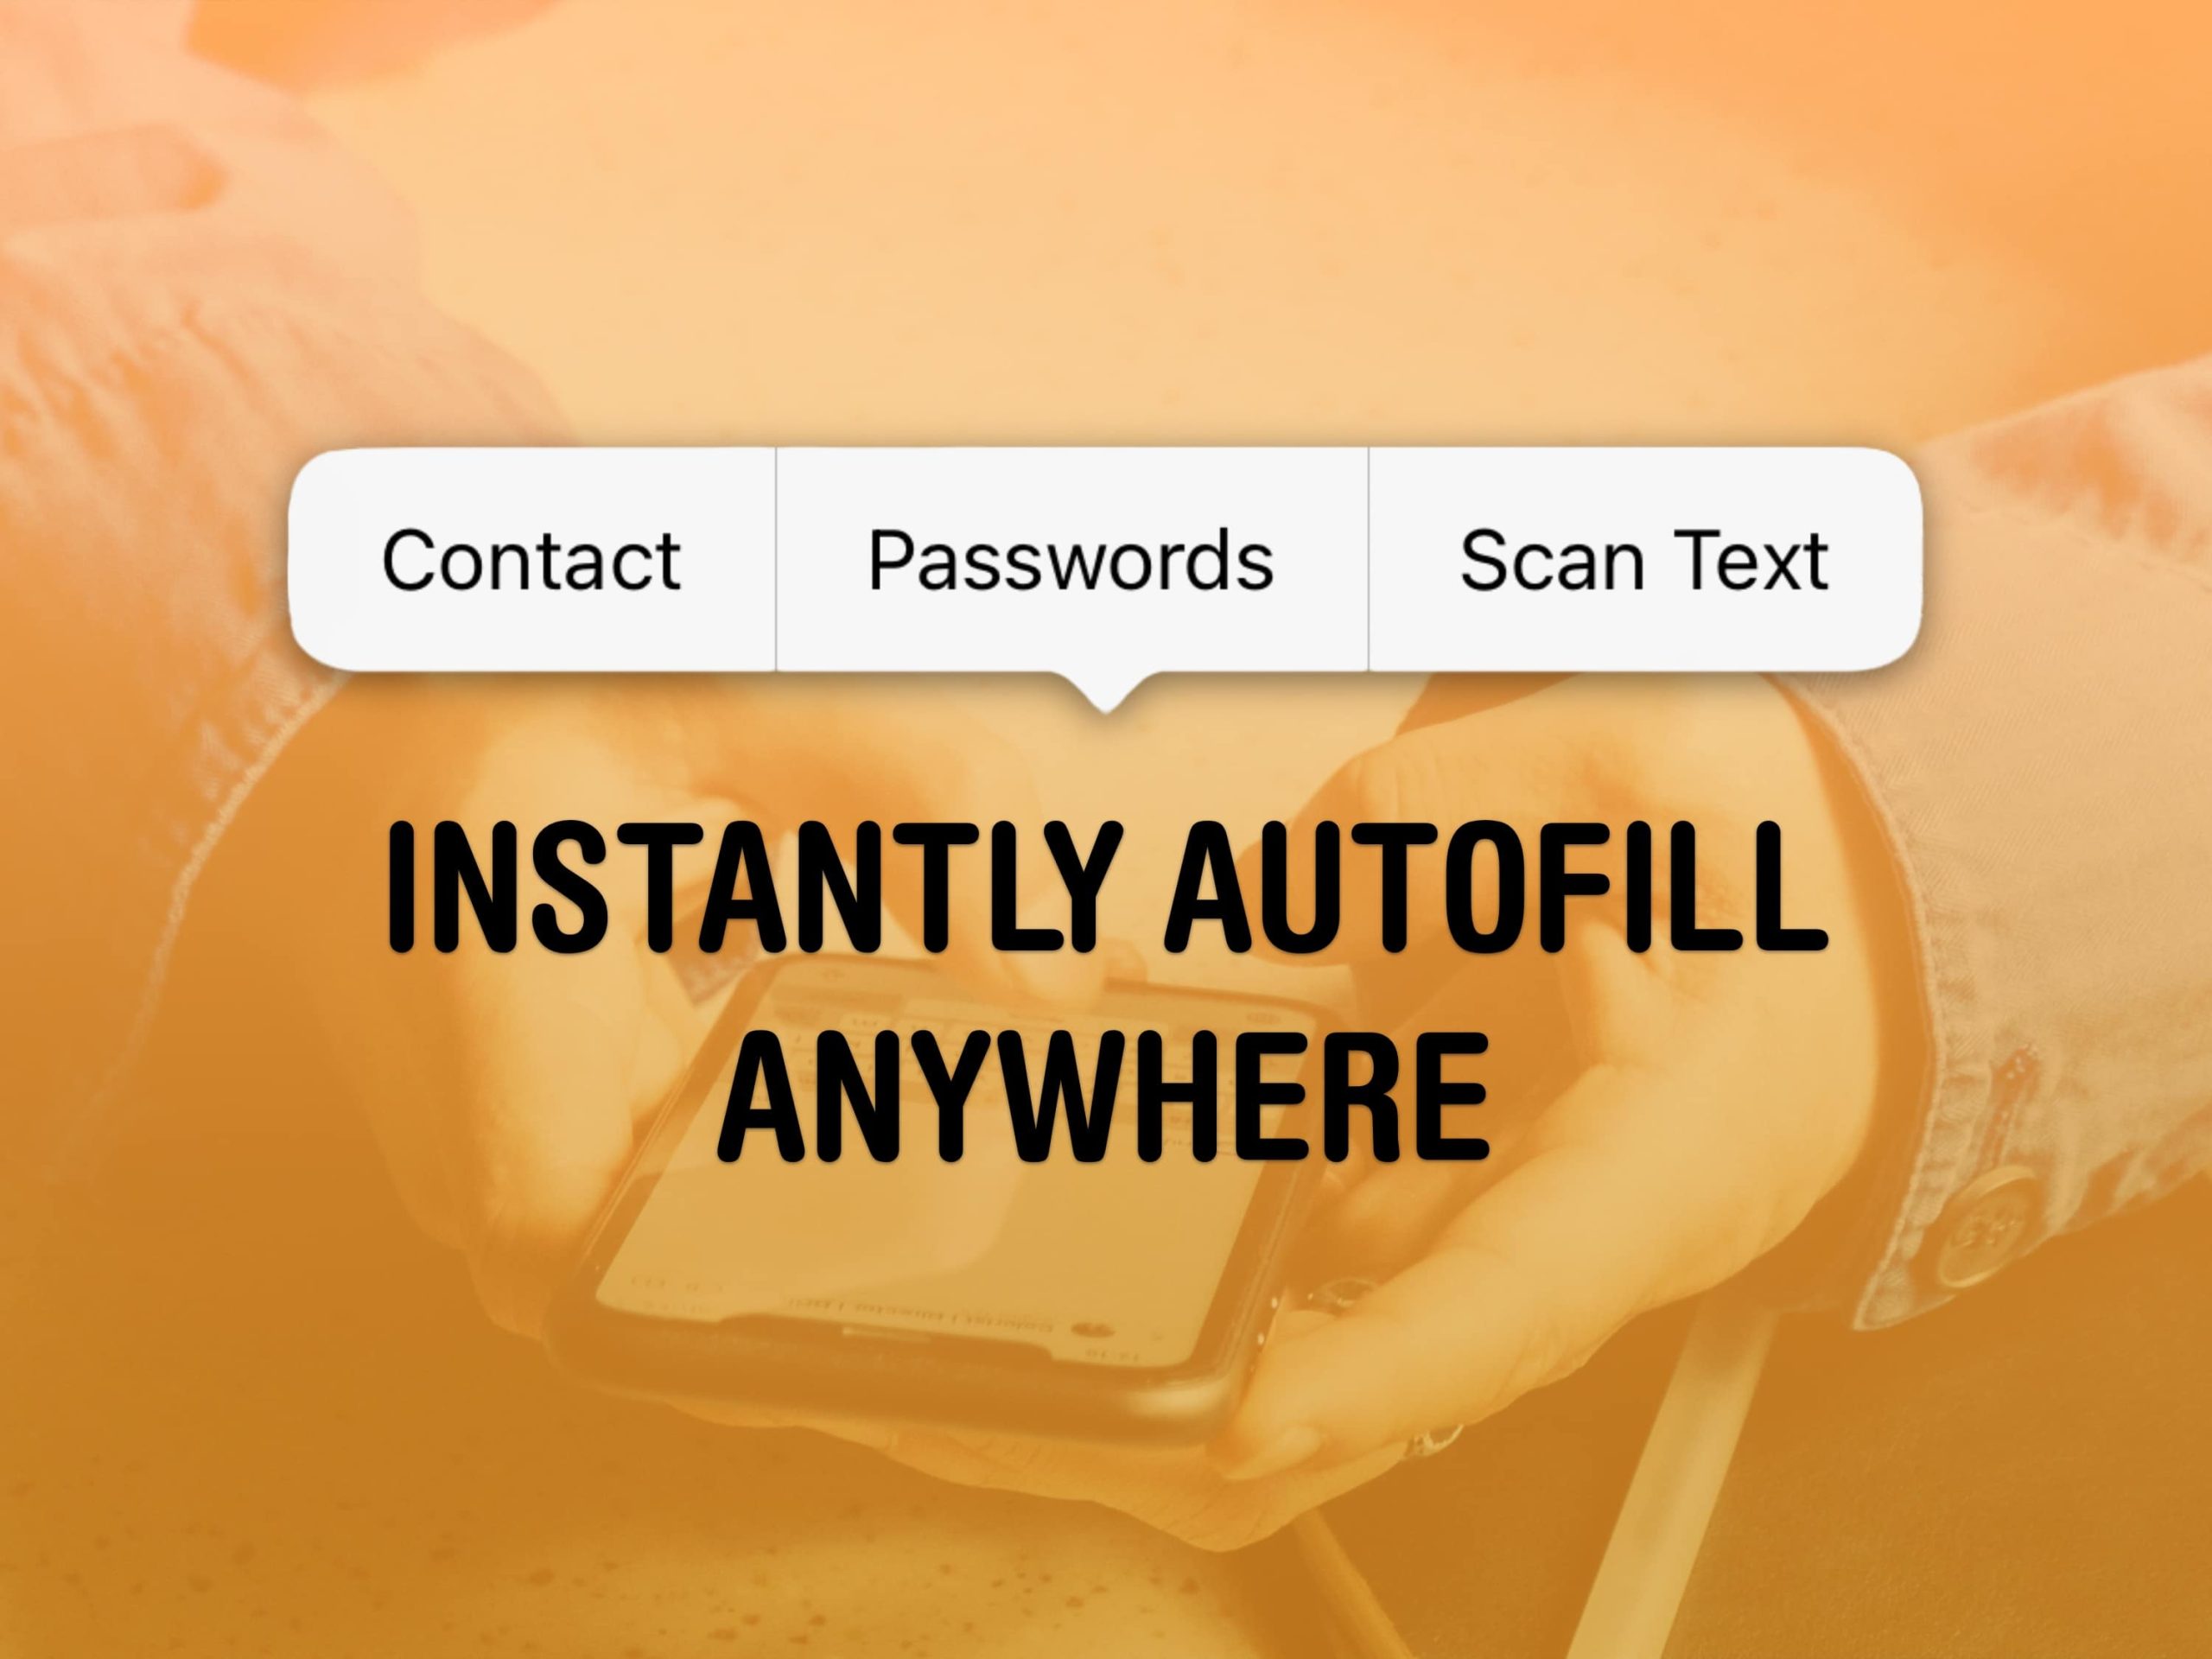
AutoFill on iPhone is supposed to help you out when you’re entering a password or typing in your email. When it doesn’t work, it can be incredibly frustrating — especially if you don’t know some complicated password offhand. The phone’s supposed to remember it so you don’t have to!
Now, in iOS 17, AutoFill has been put on steroids. The new AutoFill is much more expansive than the old, and unlike previous versions, works anywhere you can input text, including third-party browsers. To autofill passwords, credit cards, contacts and more, you no longer have to dig through Settings > Passwords or through the Contacts app to pull out the information.
You can even autofill scanned text from documents, signs and more using the camera. Here’s how it’s done.
How to autofill passwords on iPhone
AutoFill a password from the pop-up menu. Screenshot: D. Griffin Jones/Cult of Mac
In Safari, tap on a text box. There should be an option to autofill a saved password in a toolbar above the keyboard. You can tap on a username (and authenticate with Face ID) to fill it in, or you can tap the Passwords key icon to pick a different one.
If no such menu or option shows up, you may be frustrated, but there’s another option. Tap on the text field again and you should see a pop-up menu. Tap AutoFill > Passwords and authenticate with Face ID to bring up saved passwords. Scroll through the list or search.
If you want to look through and edit or clean up your saved passwords, you can always find them inside Settings > Passwords.
If you want easier access, you can make it its own standalone icon your Home Screen. Download this Shortcut, tap the ⋯ button to edit it, hit the Share button and tap Add to Home Screen.
How to autofill email addresses and phone numbers on iPhone
The fastest way to type in an email or phone number from a contact. Screenshot: D. Griffin Jones/Cult of Mac
You can just as easily autofill your phone number, email address, home or work address and more (or that of another contact).
Tap on a text field and tap again to bring up the pop-up menu. Hit AutoFill > Contact. Pick a contact and tap on a field to autofill.
This works anywhere you can enter text, not just in email and phone number fields in Safari.
Need to send someone a friend’s phone number? You don’t need to switch from Messages to Contacts, dig through, copy it and paste it back. Directly inside Messages, tap to bring up the pop-up menu and tap AutoFill > Contact.
Need to send someone the Netflix password? Tap AutoFill > Passwords. It can save you a lot of hassle.
AutoFill scanned text using the camera
Type in text directly from the camera. Screenshot: D. Griffin Jones/Cult of Mac
There’s one more trick up the AutoFill menu’s sleeve. Say you need to Google a really long serial number, or you need to type in your car’s VIN on an insurance website.
Any time you need to type something exact that isn’t easily human-readable, tap the text box and hit AutoFill > Scan Text. The keyboard will be replaced with a small camera — just point it at the text you want to scan, hold it steady and tap Insert.
You can also tap the Live Text button in the bottom-right. In this mode, you can drag your finger along the scanned text to choose precisely what to enter in.
Tap on the text field to bring the keyboard back up to make precise edits.
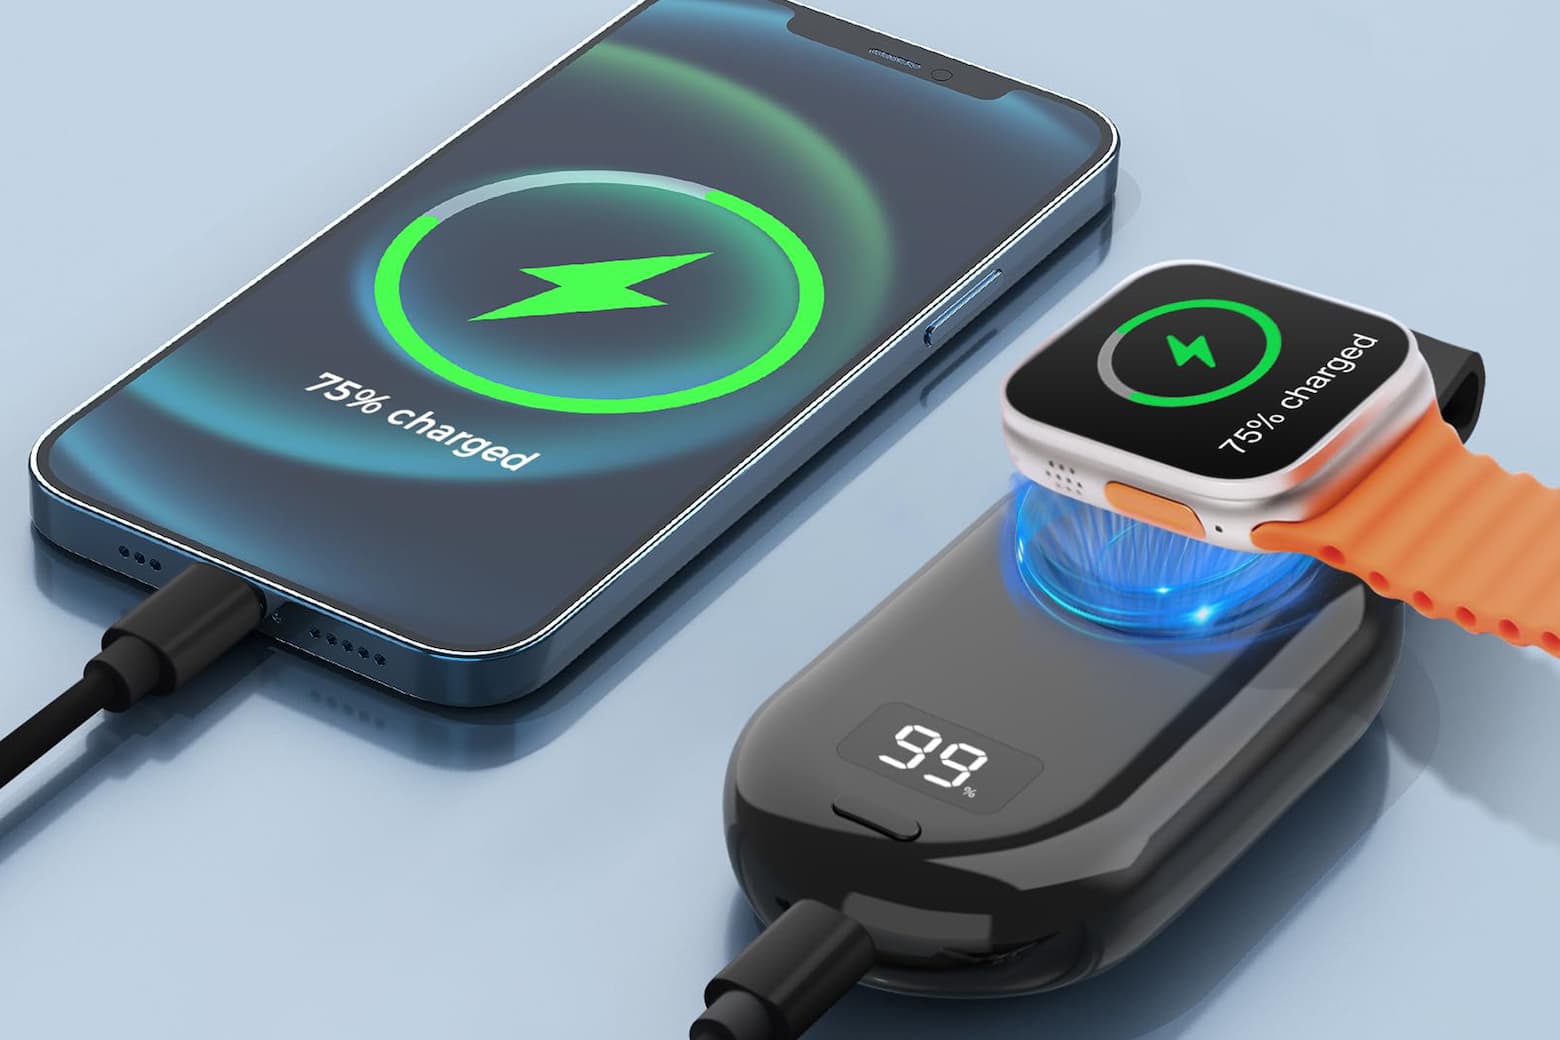
At just $16, this versatile keychain charger is a crazy-good deal. If you want to ensure your iPhone, Apple Watch and AirPods remain juiced up and ready no matter where you go, this portable charging solution is a must. There’s nothing more portable than this 2-in-1 Wireless Keychain Charger, which can efficiently charge both an iPhone, Apple Watch and AirPods no matter where you are.
It’s small enough to fit in a pocket. And for a limited time, it’s available at a pint-size price, too. Through March 10, it’s on sale for only $15.19 with code ENJOY20.
Keychain charger for iPhone and Apple Watch
Measuring just 3.54 inches by 1.95 inches by 0.78 inches, and weighing only 2.45 ounces, this high-tech magnetic keychain charger for iPhone, Apple Watch and AirPods is ultraportable and just the thing for on-the-go use. Simply attach it to your keys, backpack or purse, and take it wherever you go.
This dual-purpose keychain charger packs a 2,500mAh battery that can charge your Apple Watch between three and five times, and it is fully compatible with all Apple Watch series. Simply place your device on the magnetic charging pad and let the magic of wireless charging handle the rest. It’ll also work with AirPods with a wireless charging case.
The LED display even tells you exactly what’s going on with your charge in real time.
To charge up your iPhone, simply connect via the Type-C input/output port. (You can charge other compatible devices, too.) Whether you’ve depleted your battery snapping vacation photos, playing games during your commute or FaceTiming a friend, you can enjoy a quick, easy charge wherever you are.
Save on a handy accessory for any Apple Watch or iPhone owner
Say goodbye to low batteries in your Apple Watch, AirPods and iPhone with this trusty, ultra-portable charging solution.
You can get this 2-in-1 Wireless Keychain Charger for your iPhone and Apple Watch at an extra 20% off its regular price of $25.99 when you use code ENJOY20. That drops the price to just $15.19.
Note: The price drop on this combo keychain charger is only available through March 10 at 11:59 p.m. Pacific.
Buy from: Cult of Mac Deals
Prices subject to change. All sales handled by StackSocial, our partner who runs Cult of Mac Deals. For customer support, please email StackSocial directly.
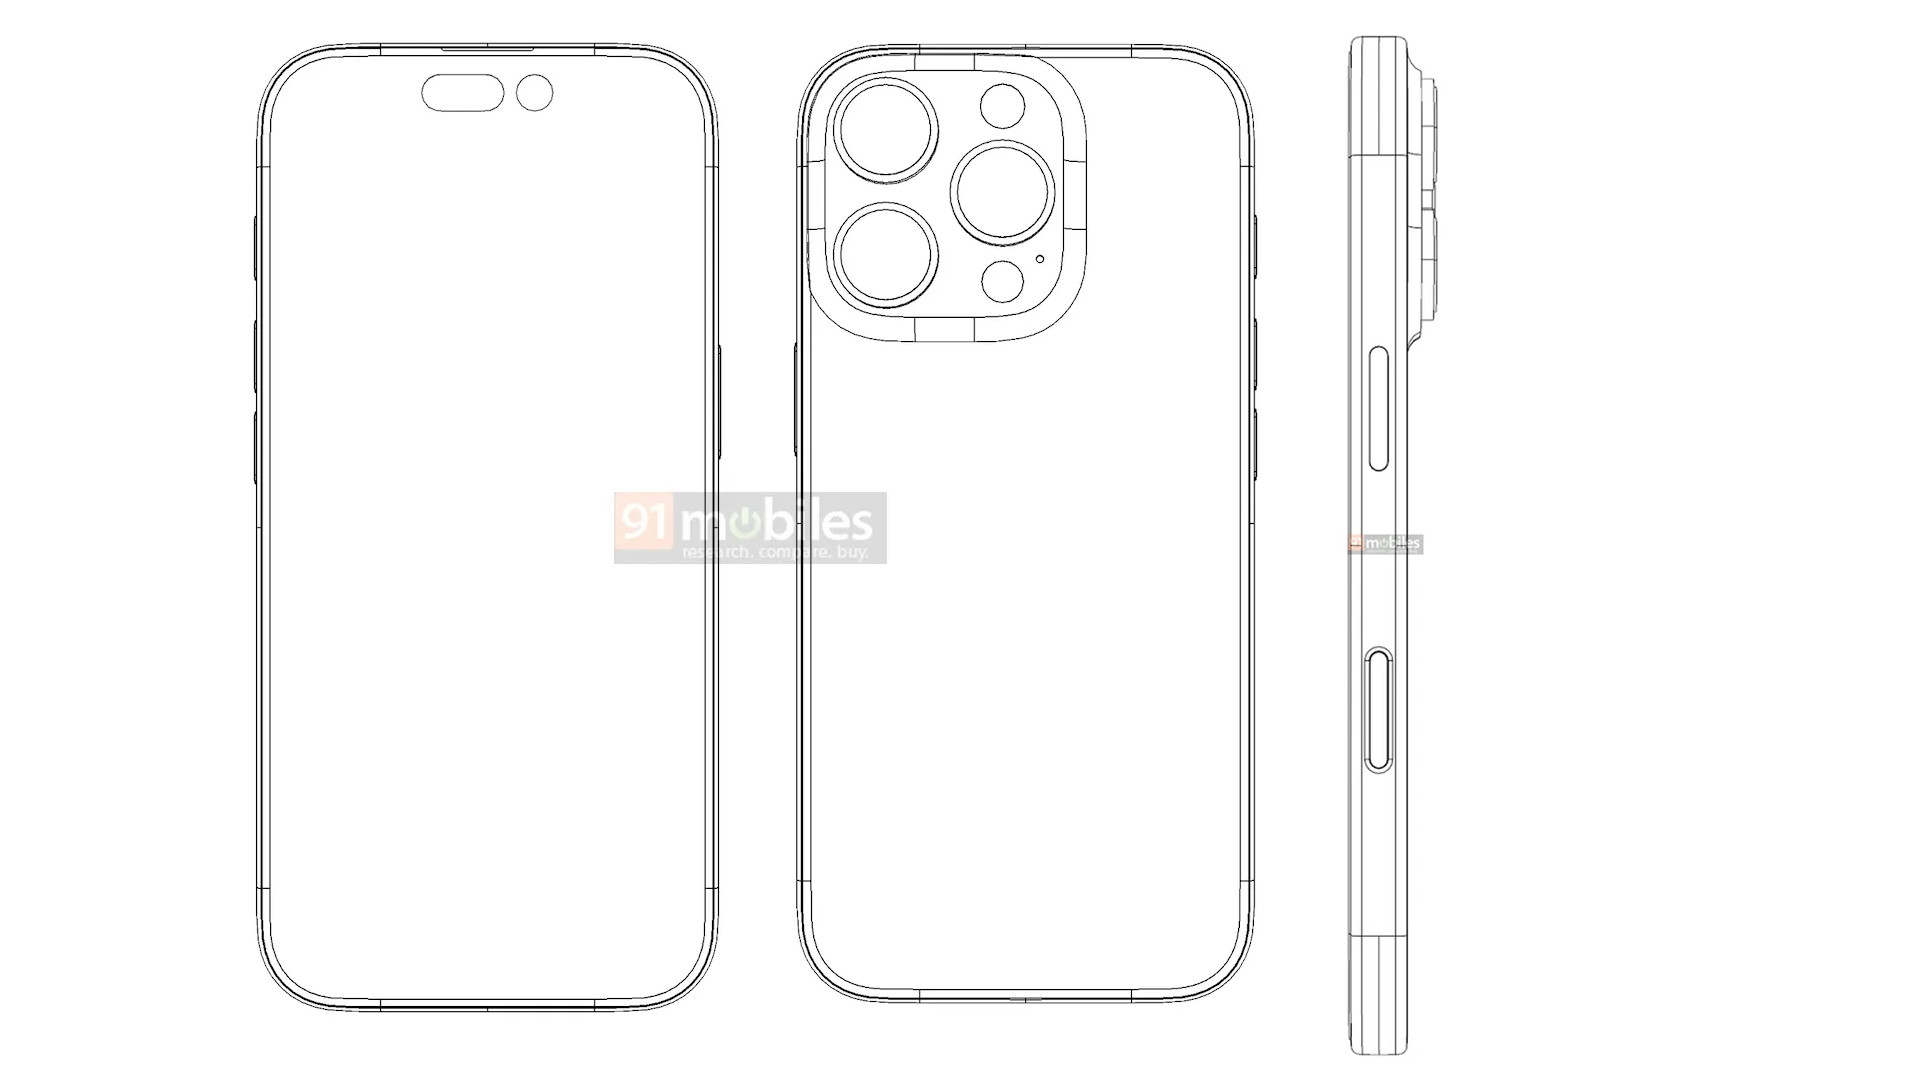
CAD files for what is purported to be the iPhone 16 Pro have recently surfaced online, giving people an idea of what Apple’s upcoming flagship may look like.
According to tech news site 91mobiles, the smartphone will look similar to the iPhone 15 Pro with a few notable differences. First off, the 16 Pro is potentially slated to be slightly larger than the current model, measuring 149.6 x 71.4 x 8.4 mm. The website’s industry sources go on to say it’ll have a 6.1-inch display. There is a discrepancy with this as older leaks claim the mobile device will have a 6.3-inch screen. 91mobiles, however, leans more toward the larger display due to the newly listed dimensions and the fact that the renders show thinner bezels around the glass.
(Image credit: 91mobiles/Apple)
The biggest revision found in the files is the inclusion of the rumored Capture Button which will be located below the power button on the right side. The Capture Button, if you’re not familiar with it, is supposed to help users take better photographs by making the process more comfortable. You won’t have to tap the screen to take it.
The Capture Button’s full capabilities have been a mystery although a report from January offers some insight. Lightly tapping the Capture Button would cause the camera to focus while a complete press takes a photo – much like the shutter button on a traditional camera.
Keeping the best
On the back, the rear camera array apparently retains the same three-lens design as seen on the iPhone 15 Pro. Normally, this wouldn’t be important news, but another rumor from February claimed Apple was going to ditch the round camera platform, replacing it with a triangular one. People thought this would be the new design moving forward. However, it appears Apple may be sticking with the tried and true look.
91mobiles continues stating the “iPhone 16 Pro is expected to gain a 5X tetraprism telephoto camera”. The iPhone 15 Pro Max has the same type of lens and images taken by it are stunning. It’s unknown if the 16 Pro will have optical image stabilization. The tech isn’t mentioned in the leak. Presumably, it will since zoomed-in shots benefit greatly from robust stabilization. Other potential features for the iPhone 16 Pro include a 48MP ultra-wide camera and a 3,355mAh battery.
Apple holds a major event every September where it announces all of the new iPhone models. Not only do we expect to see the iPhone 16 Pro revealed six months from now, but also the fourth-generation iPhone SE and the Apple Watch X.
So it’s going to be a while until we get official info. While you wait, check out TechRadar’s roundup of the best iPhones for 2024.
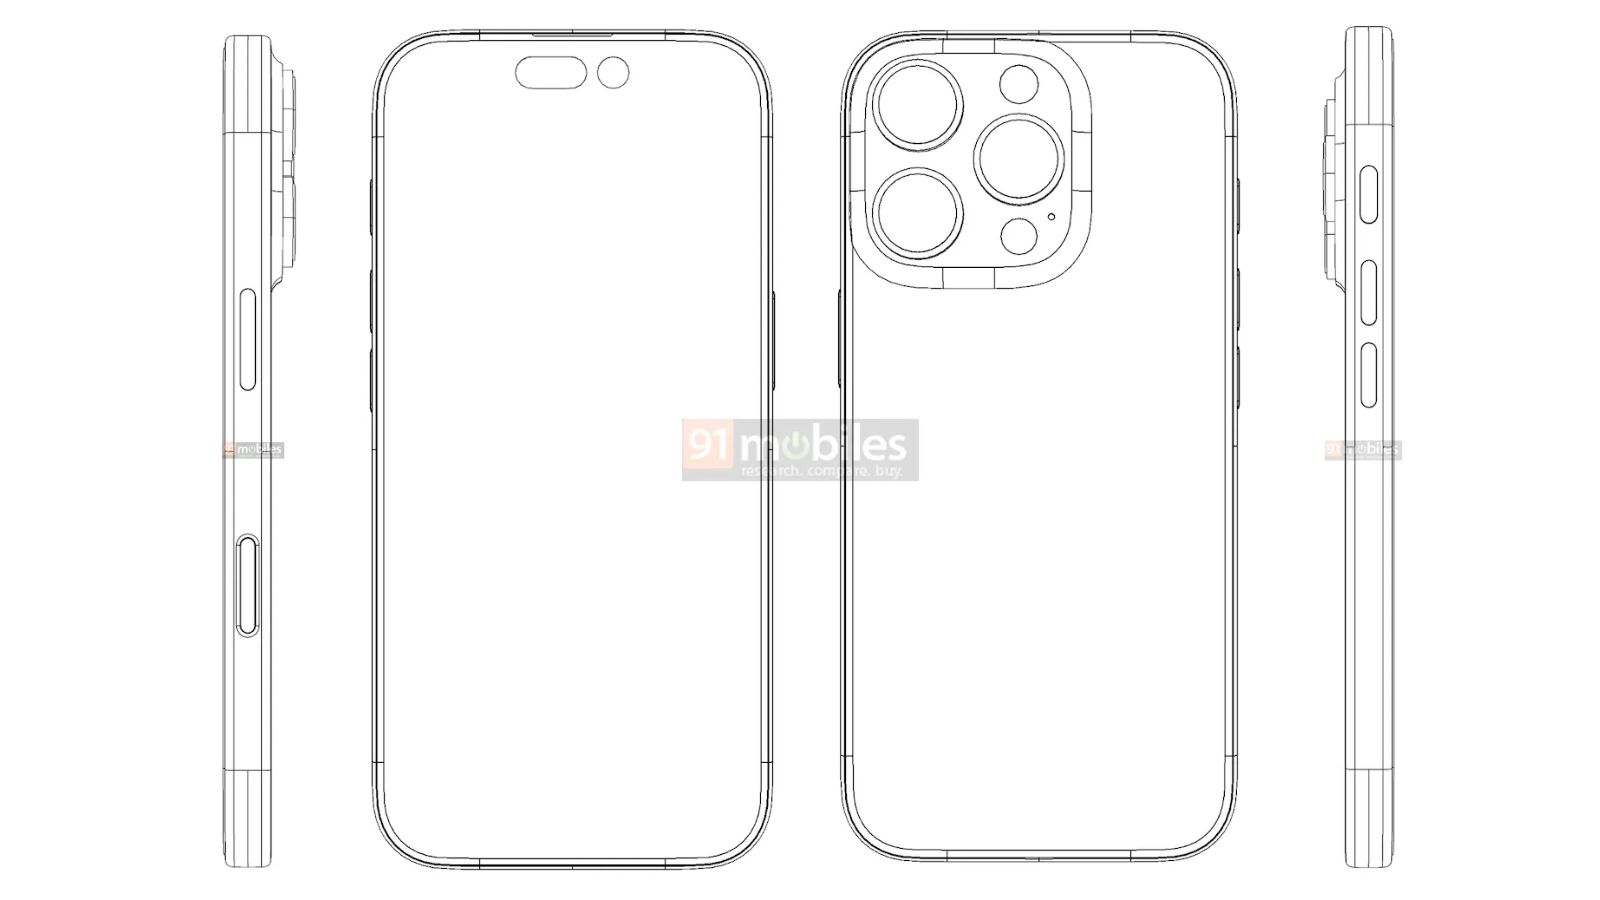
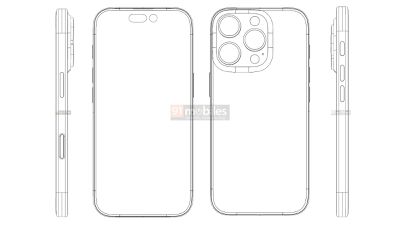
The alleged design of the iPhone 16 Pro was today showcased in new CAD renders shared by 91Mobiles.
The drawings show a design that is similar to that of the iPhone 15 Pro, with a small number of changes relating to some of the buttons. The Action button is slightly longer, now resembling a similar length to one of the volume buttons, but with a slightly wider shape to distinguish it. The all-new “Capture” button is present on the left-hand side of the device where the mmWave antenna was located on previous models. While it is a similar length to the Side button, it is completely flush with the device.
91Mobiles previously revealed accurate CAD renders of the iPhone 13 Pro and iPhone 14 Pro, but its Apple Watch Series 7 designs were ultimately incorrect. The website recently shared renders purporting to depict the design of the upcoming 12.9-inch iPad Air and the fourth-generation iPhone SE.
In January, MacRumors provided the first look at the design of the iPhone 16 Pro, including a Capture button that is flush with the side of the device, which was today broadly corroborated by 91Mobiles‘ CAD file. MacRumors subsequently obtained information suggesting that while Apple tested a longer Action button design, it has since scrapped the idea and the Action button is now expected to look virtually the same as on the iPhone 15 Pro.
The main change to the design of the iPhone 16 Pro and iPhone 16 Pro Max is rumored to be larger displays, increasing from 6.1- to 6.3-inches and 6.7- to 6.9-inches, respectively. Following a significant redesign with the switch to a titanium frame and more rounded edges on the iPhone 15 Pro last year, little else is expected to change with the look of the new devices this year this year. The iPhone 16 lineup is expected to launch in the fall.
Popular Stories
Apple Changes Trade-In Values for iPhones, iPads, and Apple Watches
Apple today adjusted its estimated trade-in values for select iPhone, iPad, and Apple Watch models in the U.S., with the changes reflected on its website. Apple slightly increased trade-in values for the iPhone 14 Pro Max, second-generation iPhone SE, Apple Watch Series 4, and first-generation Apple Watch SE, while trade-in values slightly decreased for the entry-level iPad, Apple Watch…
Source: Apple to Announce New Products This Week
Apple plans to announce new products with press releases on its website this week, a proven source familiar with the matter told MacRumors. While the products that Apple plans to announce have not been disclosed, there are rumors about new iPads, Macs, and accessories. It is unclear exactly what will be announced this week. Bloomberg’s Mark Gurman today reiterated that Apple is planning new…
iOS 17.4 Out Now: 10 New Things Your iPhone Can Do
Apple has released iOS 17.4, its biggest iPhone software update of the year so far, featuring a number of features and changes that users have been anticipating for quite a while. Below, we’ve listed 10 new things that your iPhone will be able to do after you’ve installed the update, which became available on Tuesday, March 5. Be sure to check Settings ➝ General ➝ Software Update on your …
Apple Announces New MacBook Air Models With M3 Chip
Apple today announced new 13- and 15-inch MacBook Air models with M3 chip, improved external display support, Wi-Fi 6E, and more. Apple says that the new MacBook Air is up to 60% faster than the M1 model and up to 13x faster than the fastest Intel-based MacBook Air. With a faster and more efficient Neural Engine, Apple says that the MacBook Air continues to be “the best consumer laptop for…
In today’s digital era, where data privacy has become a paramount concern, understanding the intricacies of your iPhone privacy settings is crucial. For iPhone users, navigating through its privacy configurations can seem daunting at first glance. However, you will be pleased to know that with a bit of guidance, mastering these settings is within reach. This video below from Stephen Robles gives us a rundown of the iPhone’s privacy features, offering a clear, engaging, and comprehensive overview to ensure your information remains secure.
First and foremost, the iPhone privacy settings are designed to give you control over your personal information. Whether you’re a tech enthusiast or someone who uses their phone for basic needs, knowing how to adjust these settings can make a significant difference in your digital footprint.
Location Services: At the heart of privacy concerns for many users is the management of location services. Your iPhone allows you to customize which apps have access to your location and when. If you are wondering how to restrict this access, it’s quite straightforward. Navigate to Settings > Privacy > Location Services. Here, you can adjust permissions for each app individually, choosing between options like ‘Never’, ‘Ask Next Time’, ‘While Using the App’, or ‘Always’.
App Permissions: Beyond location, apps request access to various other data types, such as your contacts, calendars, photos, microphone, and camera. To review and manage these permissions, head to Settings > Privacy, where you will find a list of features. Tapping on any of these allows you to see which apps have requested access and modify their permissions accordingly.
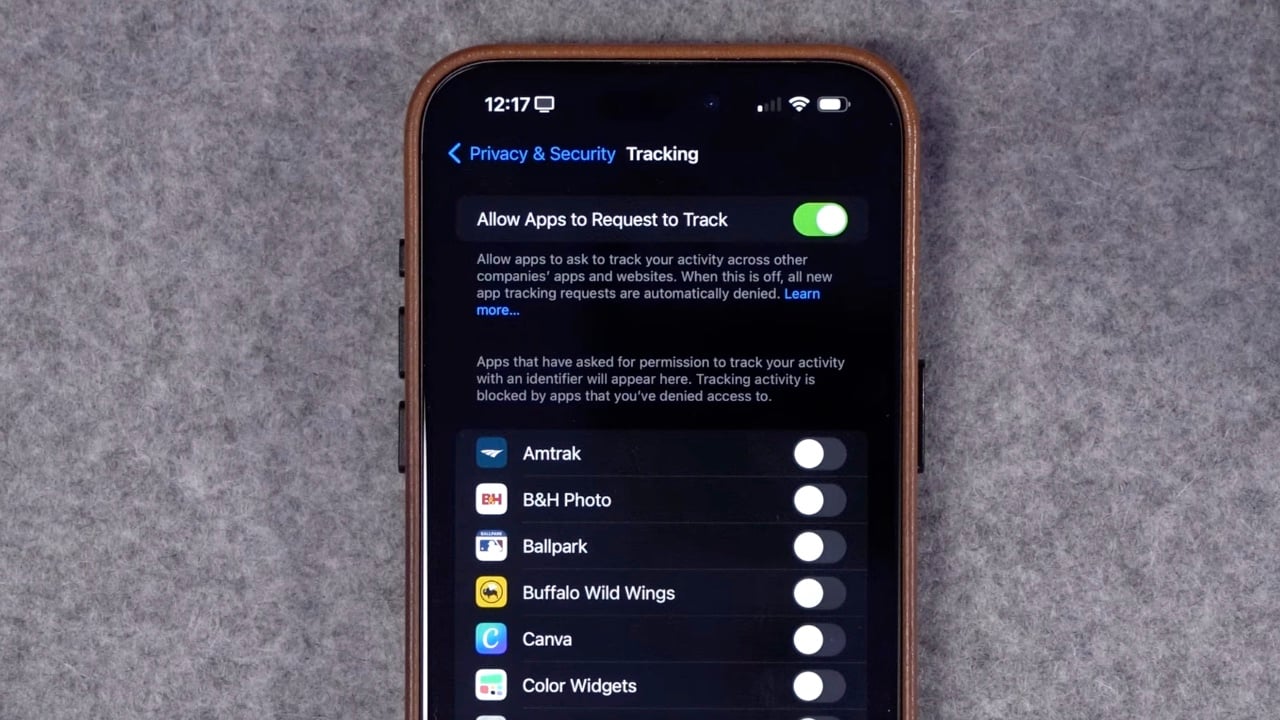
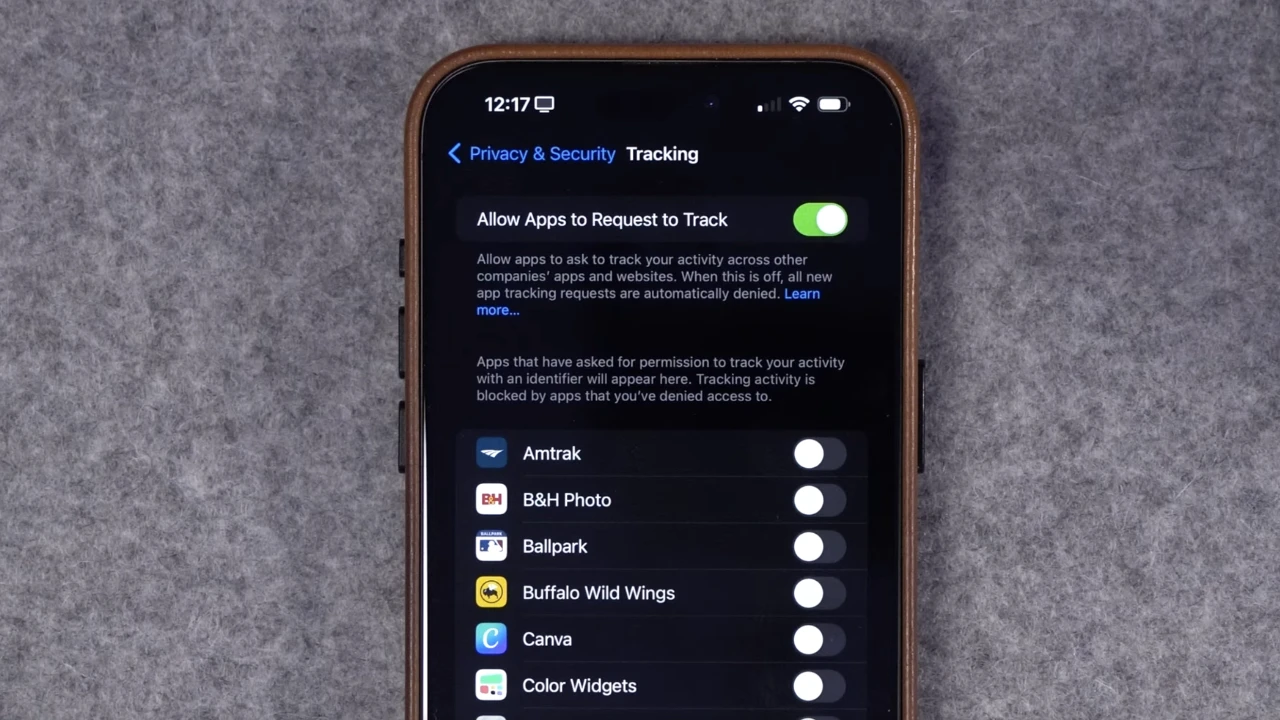
Tracking: With increasing concern over apps tracking our activities for advertising purposes, Apple has introduced a feature that requires apps to ask for your permission to track you across other apps and websites. You can control this by going to Settings > Privacy > Tracking, where you can enable or disable the permission for apps to request to track you.
Analytics and Improvements: If you prefer not to share device analytics with Apple, you can opt-out easily. These analytics help Apple improve products and services but may contain information about how you use your device. To disable this, go to Settings > Privacy > Analytics & Improvements and toggle off the options you prefer not to participate in.
Significant Locations: A lesser-known feature is Significant Locations, which tracks places you frequently visit to provide personalized services, such as predictive traffic routing. If this feels too intrusive, you can clear your history and turn off this feature by navigating to Settings > Privacy > Location Services > System Services > Significant Locations.
Empowering Your Privacy
Understanding and configuring your iPhone’s privacy settings empowers you to take charge of your personal information. While the options might seem overwhelming at first, taking the time to familiarize yourself with them can greatly enhance your privacy and security. Remember, it’s not just about preventing external threats; it’s also about understanding what you’re sharing and with whom.
By adjusting your location services, managing app permissions, controlling ad tracking, opting out of analytics sharing, and being mindful of significant locations, you can significantly reduce your digital footprint. It’s about finding the right balance that works for you, ensuring that your privacy preferences are respected.
The journey to mastering the iPhone’s privacy settings is an ongoing one, as features and options evolve with each software update. Staying informed and regularly reviewing your settings can make all the difference in safeguarding your privacy in the digital age. Your iPhone is a powerful tool, and with the right configurations, you can enjoy its myriad benefits while maintaining control over your personal information.
Source & Image Credit: Stephen Robles
Filed Under: Apple, Apple iPhone, Guides
Latest Geeky Gadgets Deals
Disclosure: Some of our articles include affiliate links. If you buy something through one of these links, Geeky Gadgets may earn an affiliate commission. Learn about our Disclosure Policy.
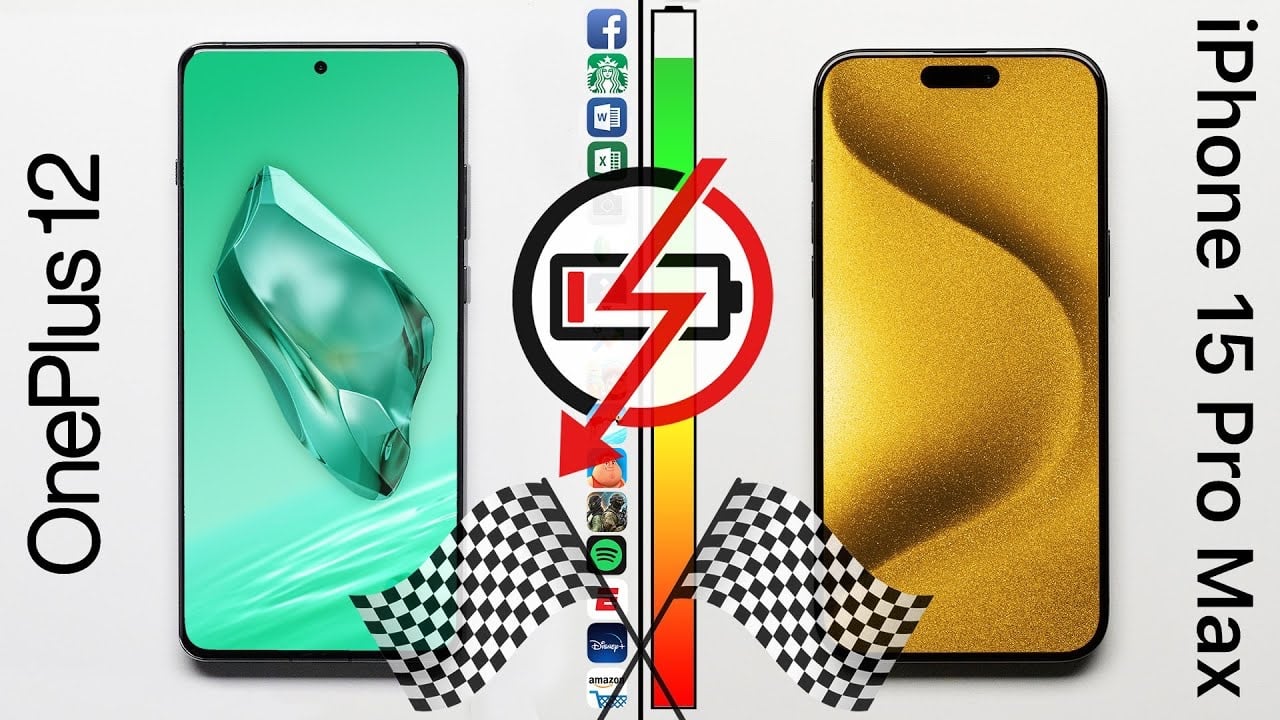
In the ever-evolving landscape of high-end smartphones, two giants stand out for their remarkable performance and cutting-edge technology: the OnePlus 12 and the iPhone 15 Pro Max. As you navigate through the myriad of options in the market, understanding the nuances of these two models becomes crucial. This article aims to shed light on the speed and battery performance of these devices, guiding you through a detailed comparison.
Speed Test Showdown
At the heart of the OnePlus 12 lies the Snapdragon 8 Gen 3 processor, complemented by a robust 16 GB of RAM and UFS 4.0 storage. This powerhouse setup is designed to handle heavy processing tasks with ease. On the other side, the iPhone 15 Pro Max boasts the A17 Pro chip and NVMe storage, running on the seamless iOS 17. When it comes to speed, both phones start on equal footing, showcasing their prowess in app loading and basic processing tasks.
However, the OnePlus 12 slightly pulls ahead in photo processing and exporting tasks, thanks to its high-end specifications. Despite this, the iPhone 15 Pro Max is not far behind. It shines particularly in gaming, where it eventually overtakes its competitor. The iPhone completes the speed test with a slim lead, clocking in at 2 minutes and 8 seconds, against the OnePlus 12’s 2 minutes and 16 seconds.
Battery Performance Battle
Battery life is a critical aspect for users who depend on their smartphones for extended periods. The OnePlus 12 brings a 5,400 mAh battery to the table, significantly larger than its counterpart. This size difference sets the stage for an intense battery life showdown. In the initial phases of the test, the OnePlus 12 demonstrates its efficiency, leading in phone calls, messaging, and web browsing tasks.
Its prowess continues across various tasks, including YouTube viewing and gaming, where it maintains its lead over the iPhone 15 Pro Max. Despite the iPhone’s renowned optimization, the OnePlus 12 emerges victorious in the battery life test, lasting a remarkable 28 hours and 9 minutes. This not only surpasses the iPhone 13 Pro Max’s previous record but also establishes the OnePlus 12 as the new champion of battery life.
Balancing Speed with Stamina
The showdown between the OnePlus 12 and the iPhone 15 Pro Max reveals that both devices offer exceptional performance in their respective fields. While the iPhone 15 Pro Max slightly edges out in speed, especially in gaming performance, the OnePlus 12 shines with its superior battery life. This comparison highlights the OnePlus 12’s commitment to merging high-end specifications with affordability, challenging the dominance of iPhones in the market.
If you are pondering over which device to invest in, consider what matters most to you. Is it the raw speed and seamless experience of the iPhone 15 Pro Max, or the endurance and value proposition of the OnePlus 12? Both smartphones stand as formidable contenders in the high-end market, each with its unique strengths.
Choosing between the OnePlus 12 and the iPhone 15 Pro Max comes down to prioritizing what features are most important to you. Whether it’s the cutting-edge speed and gaming performance of the iPhone or the remarkable battery life and value of the OnePlus 12, you will be pleased to know that both devices offer a compelling package for tech-savvy users.
Navigating the nuances of these two models can indeed feel overwhelming. However, armed with the knowledge of their performance metrics, you are now better equipped to make an informed decision. Remember, the best smartphone for you is the one that aligns with your personal needs and lifestyle preferences.
Source & Image Credit: Phone Buff
Filed Under: Android News, Apple, Apple iPhone
Latest Geeky Gadgets Deals
Disclosure: Some of our articles include affiliate links. If you buy something through one of these links, Geeky Gadgets may earn an affiliate commission. Learn about our Disclosure Policy.
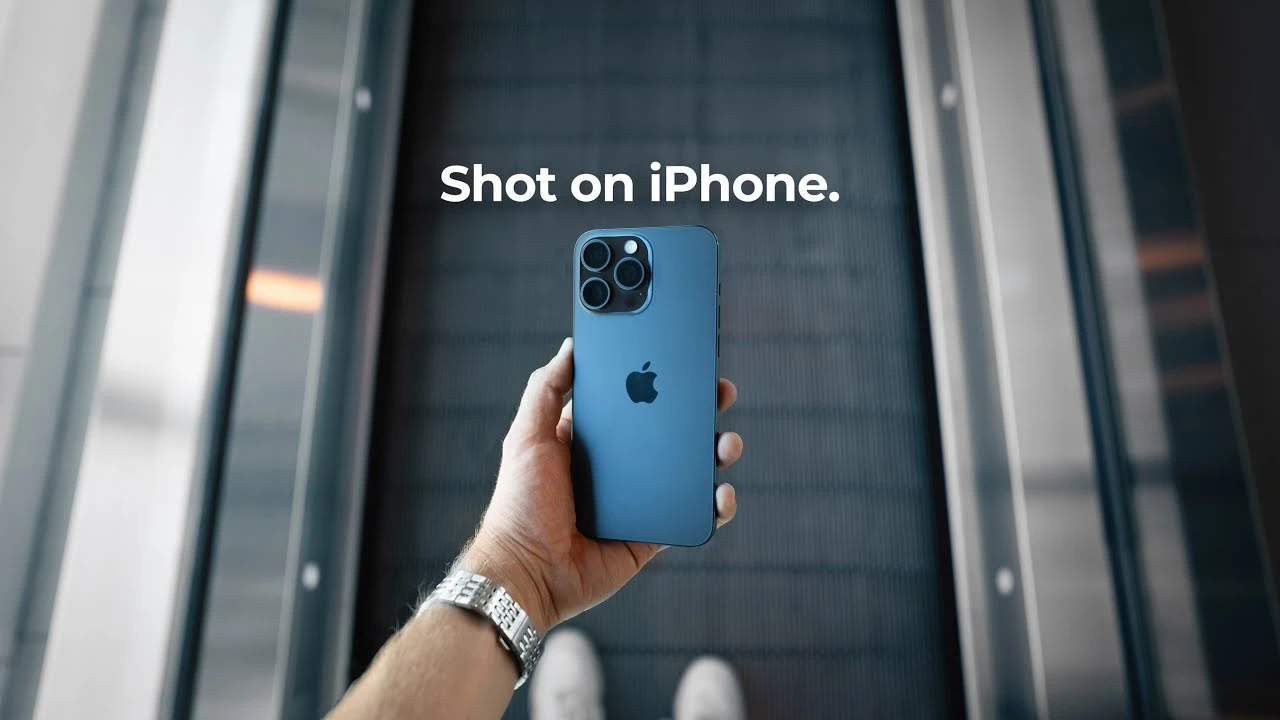
In this article we look at a range of iPhone camera settings that you can change to improve the videos you create. Are you eager to elevate your iPhone videography to the next level? You’ll be pleased to know that mastering a few key camera settings can significantly enhance the quality of your videos, making them appear more professional and visually appealing. The video below from Zac Watson delves into the ultimate iPhone camera settings that will help you capture stunning videos, ensuring every frame is worth a thousand words.
Understanding Your iPhone’s Camera Capabilities
Before we dive into the settings, it’s essential to grasp the capabilities of your iPhone’s camera. iPhones are renowned for their high-quality cameras, offering a range of features that can rival traditional cameras. By tweaking a few settings, you can unlock the full potential of your device, making your videos stand out.
Essential iPhone Camera Settings for Video
To achieve the best video quality, here are the key settings you should focus on:
Resolution and Frame Rate: The first step to capturing stunning videos is to adjust the resolution and frame rate. Higher resolutions, such as 4K, provide more detail and clarity, while a higher frame rate, like 60 fps (frames per second), ensures smoother motion. Navigate to your iPhone’s camera settings to select the optimal resolution and frame rate for your project.
Focus and Exposure: Manual control over focus and exposure can dramatically improve your video’s visual quality. Tap the screen to set the focus point, and adjust the exposure by sliding your finger up or down. This allows you to manage how light or dark the video appears, giving you creative control over the ambiance and mood of your footage.
Stabilization: To avoid shaky videos, stabilization is crucial. While the iPhone’s built-in optical image stabilization does an excellent job, using additional stabilizing gear or software can further enhance smoothness, especially for moving shots or action scenes.
Composition and Framing: Paying attention to composition and framing can transform an ordinary video into a cinematic masterpiece. Utilize the rule of thirds by enabling the grid lines in your camera settings. This helps in composing well-balanced shots that are more engaging to the viewer.
Lighting: Good lighting is the cornerstone of high-quality video. Whenever possible, use natural light and avoid harsh direct sunlight or dark, underlit scenarios. External lighting accessories can also be beneficial in controlling the lighting conditions, ensuring your subject is well-lit.
Sound Quality: Often overlooked, sound quality is equally important in video production. Use external microphones when possible to capture clear and crisp audio, free from background noise and interference.
Enhancing Your Videos with Advanced Techniques
Once you’ve mastered the basic settings, explore advanced techniques to further improve your video quality:
Manual Controls: Apps that offer manual camera controls can give you greater flexibility over settings like ISO, shutter speed, and white balance, allowing for more precise adjustments tailored to the shooting environment.
Editing and Post-Production: Utilizing video editing software can enhance your footage post-shooting. From color grading to adding effects and transitions, the editing process is where your creative vision comes to life.
Continuous Learning and Experimentation: The world of iPhone videography is constantly evolving. Stay informed about the latest trends, tools, and techniques. Experimenting with different styles and settings will help you discover what works best for your projects.
By focusing on these key iPhone camera settings and techniques, you can significantly enhance the quality of your videos. Remember, the best tool you have is your creativity, so don’t be afraid to experiment and push the boundaries of what your iPhone camera can achieve.
Source & Image Credit: Zac Watson
Filed Under: Apple, Apple iPhone, Guides
Latest timeswonderful Deals
Disclosure: Some of our articles include affiliate links. If you buy something through one of these links, timeswonderful may earn an affiliate commission. Learn about our Disclosure Policy.