Categories
News

Knowledge Graphs in AI beginners guide

Knowledge Graphs in AI beginners guide

In the realm of Artificial Intelligence (AI), knowledge graphs stand as a crucial innovation, particularly influential in areas like machine learning and natural language processing (NLP). These structures serve as complex maps, illustrating the intricate relationships between different data elements, thereby equipping AI systems with a deeper understanding and more nuanced processing capabilities.

Understanding Knowledge Graphs

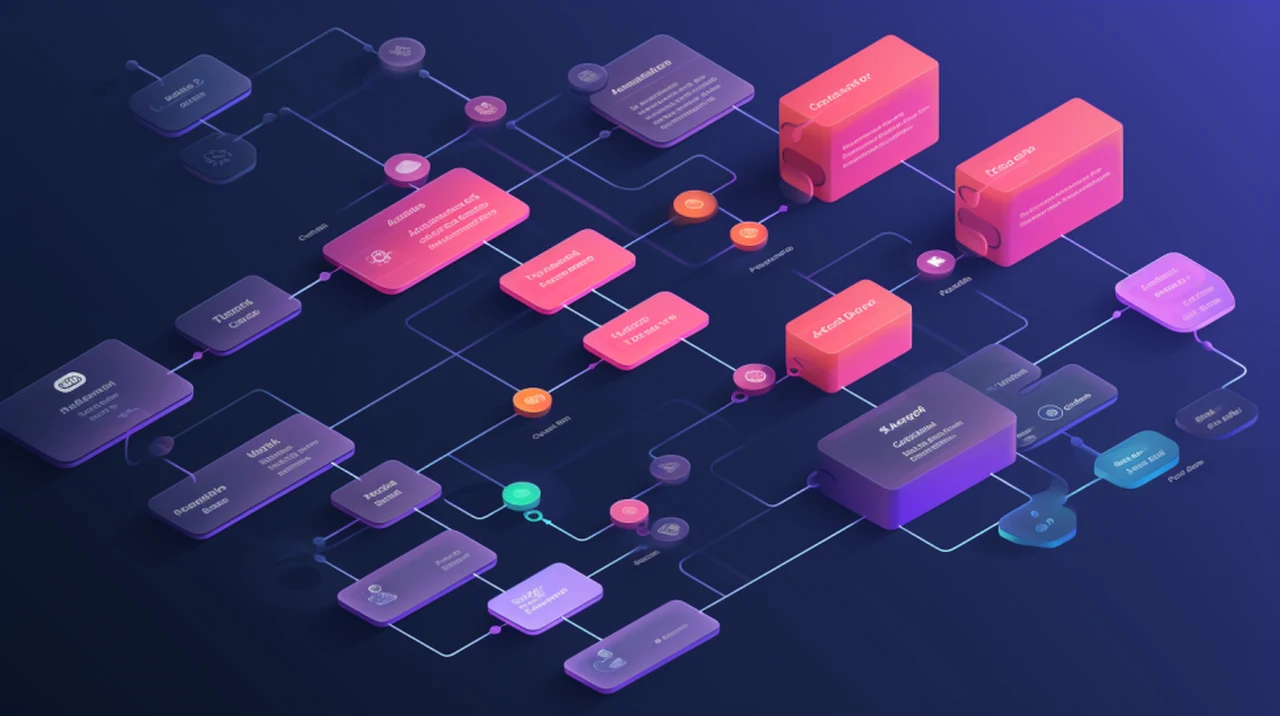
Knowledge graphs represent a leap in how AI systems comprehend and structure information. Imagine a vast web where each point, or ‘node,’ symbolizes an entity – be it a person, place, or concept. The lines connecting these nodes, known as ‘edges,’ depict the relationships and associations between them. This complex network mirrors the multifaceted nature of real-world data, enabling AI to navigate and interpret it effectively.

Historically, the evolution of knowledge graphs has been closely tied to the demands of AI’s growing sophistication. Early AI models relied on simpler data structures. However, as AI began tackling more intricate problems, the need for a robust system to manage and represent complex information led to the emergence of knowledge graphs.

What is an AI Knowledge Graph

A knowledge graph is a way to show information using a picture or diagram. In this diagram, different things (like people or places) and how they are connected to each other are shown using lines and points.

  • Structural Components:
    • Nodes: Represent entities such as people, places, objects, or concepts.
    • Edges: Denote the relationships or connections between these entities.
  • Data Representation:
    • Encodes complex information in a structured and interconnected format.
    • Facilitates the mapping of relationships and hierarchies within data.
  • Functionality in AI:
    • Enhances the understanding of context and relationships in AI applications.
    • Supports advanced data processing, from simple retrieval to complex reasoning.
  • Applications:
    • Used in machine learning for context-aware data analysis.
    • Integral to NLP for understanding language semantics and user intents.
  • Advantages:
    • Provides a more natural and intuitive way to represent real-world information.
    • Enables more efficient and accurate information retrieval and analysis in AI systems.

How do you make a Knowledge Graph

Constructing and creating a knowledge graph involves several steps and considerations, each critical to ensuring that the graph accurately represents and connects relevant information. Here’s a breakdown of the process:

  1. Identifying Data Sources:
    • Determine the sources from which to extract data. These can include databases, websites, documents, and other data repositories.
    • Ensure data diversity and reliability for a comprehensive and accurate knowledge graph.
  2. Data Extraction and Preprocessing:
    • Extract relevant data from identified sources. This might involve scraping web data, querying databases, or processing text documents.
    • Preprocess the data to clean, normalize, and prepare it for integration into the knowledge graph. This step often involves removing duplicates, correcting errors, and standardizing formats.
  3. Entity Recognition and Disambiguation:
    • Identify entities (people, places, things, concepts, etc.) within the data.
    • Disambiguate entities to ensure that each one is uniquely identified. This step is crucial to avoid confusion between entities with similar or identical names but different meanings or contexts.
  4. Defining Relationships and Properties:
    • Establish the relationships between entities. These relationships are the edges in the knowledge graph and can represent various types of associations, like ‘works at,’ ‘located in,’ or ‘is a type of.’
    • Define properties or attributes of entities, such as age, location, or specifications, which provide additional context and detail.
  5. Graph Construction:
    • Construct the graph using the identified entities and relationships. This involves placing entities as nodes and connecting them with edges that represent their relationships.
    • Utilize graph databases or specialized graph construction tools to facilitate this process.
  6. Integration of Ontologies:
    • Apply or create ontologies, which are formal representations of knowledge within a domain, including definitions of various entities and the relations between them.
    • Ontologies help standardize the knowledge representation and enhance the graph’s utility in AI applications.
  7. Continuous Updating and Maintenance:
    • Regularly update the knowledge graph to reflect new information, changes in existing data, and corrections.
    • Implement mechanisms for the ongoing maintenance and quality control of the graph.
  8. Validation and Refinement:
    • Validate the accuracy and completeness of the knowledge graph.
    • Continuously refine the graph based on feedback, new data, and evolving requirements.
  9. Integration with AI Systems:
    • Integrate the knowledge graph into AI systems for various applications like recommendation systems, search engines, or NLP tasks.
    • Ensure that the AI systems can effectively query and utilize the knowledge graph.

Knowledge Graphs in Machine Learning

In machine learning, the saying “data is king” holds true, and knowledge graphs reign by providing rich, interconnected data landscapes. These structures endow machine learning models with context, enhancing their ability to discern patterns and make predictions. For instance, in recommendation systems, knowledge graphs enable AI to not just see individual choices but understand the network of preferences, drawing smarter, more personalized recommendations.

Knowledge Graphs in Natural Language Processing

In NLP, knowledge graphs have revolutionized the way machines interpret human language. They offer a framework that captures the subtleties of language, such as context-dependent meanings of words. This capability is crucial in applications like voice assistants, where understanding the difference in meaning between ‘Apple the company’ and ‘apple the fruit’ depends on the conversational context provided by the knowledge graph.

The Future of Knowledge Graphs in AI

Looking ahead, the potential of knowledge graphs in AI is vast. As AI continues to advance, knowledge graphs are expected to evolve, offering even more sophisticated ways for machines to interpret and interact with data. Their influence is likely to extend across various sectors, reshaping how AI systems are developed and deployed.

Knowledge graphs are more than just a data structure; they are a fundamental tool that allows AI to mirror the complexity of the real world. Their ability to contextualize information elevates AI’s capabilities, making interactions and decisions more accurate and relevant. As AI progresses, knowledge graphs will undoubtedly play a central role in its evolution, driving innovations and enhancing the depth of AI’s understanding of the world.

Filed Under: Guides, Top News


Latest timeswonderful Deals

Disclosure: Some of our articles include affiliate links. If you buy something through one of these links, timeswonderful may earn an affiliate commission. Learn about our Disclosure Policy.

Categories
News

Creating viral videos using AI tools – Beginners guide

beginners guide to creating videos using artificial intelligence

The world of videography is currently experiencing a significant transformation, thanks to the rise of AI video tools. These tools are not just changing how videos are made; they’re also making it possible for more people to become creators. If you’re interested in the media industry, you might have noticed that AI-generated videos are bringing a new dimension to storytelling and content creation.

AI technologies in video production are becoming as important as the large language models that have reshaped text-based AI. These video AI technologies are trained on huge amounts of data, which allows them to understand and predict video sequences with amazing accuracy. For creators, this means being able to put together complex visual stories with much less effort.

Consider Runway’s Gen 2 model, which is leading the way in innovation. It can turn a single image into a full video sequence. Plus, its selective animation feature lets you animate just parts of an image, making still pictures come alive. This level of control is groundbreaking and opens up new possibilities for your creative projects.

How to make viral videos using artificial intelligence

AI video tools have also evolved to work offline, recognizing that not everyone has access to fast internet all the time. Stable Diffusion’s open-source video model is a great example of this, allowing you to work on video projects without needing to be online. With the option to change frame rates, your creative process becomes more flexible and accessible.

Here are some other articles you may find of interest on the subject of creating videos and animations using artificial intelligence:


The development of web interfaces and tools has made it easier to create AI video clips. These platforms help you produce and extend video clips with ease, making high-quality video content available to more people, not just industry professionals with expensive equipment.

However, improving video quality is still a challenge, similar to the law of diminishing returns in professional video production. Despite this, there’s a constant effort to push AI capabilities further to achieve higher resolution, frame rate, and more realistic videos.

The release of Pika Labs 1.0 model has been a milestone, much like ChatGPT’s impact in the text domain. This model allows for the creation of professional-looking AI-generated video content, enabling your videos to stand out without the need for costly resources.

Pika Labs offers a unique and powerful platform that transforms text into captivating videos. This comprehensive guide will walk you through the steps to harness the full potential of Pika, ensuring that your creative ideas are brought to life with ease and precision. Getting Started To begin, you’ll need a Discord account.

One of the most exciting things about AI video tools is how they’re making storytelling available to all. These tools give you the power to create complex visual narratives that used to be possible only for film studios. This change is making the media landscape more inclusive and diverse.

Additional factors to consider when trying to create viral videos :

However using AI is not the only consideration when making videos that you hope will go viral you also need to take into consideration other options such as :

  • Audience Understanding: Know your target audience. What are their interests, online behaviors, and preferences? Tailoring content to resonate with your intended viewers increases the chance of it being shared.
  • Content Originality and Relatability: Original content that viewers can relate to, either emotionally or through shared experiences, often has a higher chance of going viral. It should either entertain, inform, inspire, or evoke strong emotions.
  • Platform Specifics: Different platforms have different audiences and norms (e.g., YouTube, TikTok, Instagram). Understanding the nuances of each platform, like optimal video length and format, is crucial.
  • Trends and Timeliness: Capitalizing on current trends or events can boost the relevance of your video. However, ensure your content remains unique and adds a new perspective to the ongoing conversation.
  • High-Quality Production: While not every viral video is professionally made, ensuring clear audio and visual quality can help. The first few seconds are crucial to retain viewer interest.
  • Engaging and Compelling Storytelling: A clear, engaging narrative or a unique storytelling approach can make your video more memorable and shareable.
  • Strong Opening: Capture attention in the first few seconds. The initial part of your video should be compelling enough to hook viewers immediately.
  • Emotional Connection: Videos that evoke emotions, whether laughter, joy, surprise, or even outrage, are more likely to be shared.
  • Incorporate a Call to Action: Encourage viewers to share, like, comment, or follow. Sometimes a direct appeal can significantly increase engagement.
  • Optimization for Sharing: Make it easy to share your video across various platforms. Ensure the video format is compatible with different social media platforms.
  • Collaborations and Influencers: Collaborating with influencers or other creators can help your content reach a broader audience.
  • Consistency: If you’re building a channel or a brand, consistent posting can help build an audience over time, which in turn can help your videos go viral.
  • Analytics and Feedback: Use analytics to understand what works and what doesn’t. Viewer feedback, through comments and shares, can also provide valuable insights.
  • Promotion Strategy: Beyond the organic reach, consider promoting your video through ads or social media to boost its visibility.
  • Luck and Timing: Sometimes, virality is a matter of being in the right place at the right time with the right content.

For those working in videography, it’s crucial to adapt and learn how to use AI video tools. These tools are not just a passing trend; they’re becoming the foundation of future media creation. By adding AI to your skill set, you can stay competitive in an industry that’s evolving quickly.

The advancements in AI video tools in 2023 mark a key moment for the media industry. As you explore these tools, you’ll find new ways to express your creativity, tell stories, and connect with audiences. The future of videography is here, and AI is driving it forward.

Filed Under: Guides, Top News


Latest timeswonderful Deals

Disclosure: Some of our articles include affiliate links. If you buy something through one of these links, timeswonderful may earn an affiliate commission. Learn about our Disclosure Policy.

Categories
News

Autogen vs Aider AI coding assistants comparison guide

Autogen vs Aider AI coding assistants compared

When it comes to programming, the tools you choose can make a big difference in how quickly and effectively you can complete your projects. Two tools that have caught the attention of developers are Aider and Microsoft Autogen. These tools are especially useful for those who work with advanced large language models (LLMs) like OpenAI’s GPT-4. Understanding the differences between Autogen vs Aider can help you pick the right one for your needs.

Imagine you’re working on a coding problem. With Aider, you can describe your issue in a simple sentence, type it into the tool, and Aider will turn your words into the code you need. This is great for when you need to work fast and accurately, like when you’re updating a project or dealing with complex code. Aider is all about making things easier and quicker for developers, especially when working on small to medium-sized projects.

On the other side, Autogen by Microsoft is more than just a code generator. It’s a whole system that lets LLMs keep track of conversations. This means that LLMs can work together, share information, and get better at their tasks over time. Autogen is not just for coding; it’s about creating a space where LLMs can work together and share knowledge. This makes Autogen a versatile tool that can be used for many different kinds of projects.

Autogen vs Aider AI coding assistants

Aegis Accounting have created a fantastic overview video providing more information on the differences between Autogen vs Aider.

Here are some other articles you may find of interest on the subject of AI coding assistants :

Both Aider and Autogen are made to work with OpenAI’s LLMs, which are known for their impressive ability to reason and generate code. However, Aider is made to work closely with the specific LLM it was designed for, which might limit its use with other LLMs. Autogen, however, is built to work with a variety of LLMs, which could make it a more flexible option for your projects.

How well these tools work for you will depend on how you interact with LLMs. The “personalities” of LLMs, or how they understand and respond to what you ask them, can be very different. It’s important to really understand these differences to get the most out of the tool you choose.

You should also think about privacy and cost. If these are big concerns for you, you might want to use LLMs that run on your own computers. Both Aider and Autogen can be set up to work with LLMs on your own hardware, which can keep your data private and might save you money compared to using cloud services.

While Aider and Autogen aren’t like agent-based systems, where independent agents do tasks in an environment, they do share a similar goal: to make things simpler for users and encourage working together.

Aider is known for being easy to use and for generating code quickly. This has made it popular with programmers who want a straightforward way to make quick changes to their code. I’ll be showing off what Aider can do in an upcoming video, and you’ll see why it’s different from other tools, like GitHub Copilot.

AutoGen is a framework that enables development of large language model (LLM) apps using multiple agents that can communicate with each other to solve tasks. AutoGen agents are customizable, conversable, and seamlessly allow human participation. They can operate in various modes that employ combinations of LLMs, human inputs, and tools, explained Microsoft

  • AutoGen enables building next-gen LLM applications based on multi-agent conversations with minimal effort. It simplifies the orchestration, automation, and optimization of a complex LLM workflow. It maximizes the performance of LLM models and overcomes their weaknesses.
  • It supports diverse conversation patterns for complex workflows. With customizable and conversable agents, developers can use AutoGen to build a wide range of conversation patterns concerning conversation autonomy, the number of agents, and agent conversation topology.
  • It provides a collection of working systems with different complexities. These systems span a wide range of applications from various domains and complexities. This demonstrates how AutoGen can easily support diverse conversation patterns.
  • AutoGen provides enhanced LLM inference. It offers utilities like API unification and caching, and advanced usage patterns, such as error handling, multi-config inference, context programming, etc.

Pros:

  • Automation of Repetitive Code: Efficiently handles large amounts of repetitive code, reducing manual coding effort.
  • Error Reduction: Minimizes the risk of human error in repetitive coding tasks.
  • Time-Saving: Speeds up the development process by automating routine tasks.
  • Consistency: Ensures uniformity in code patterns and structures.

Cons:

  • Limited Flexibility: Primarily focused on repetitive tasks; may not be suitable for complex, unique coding challenges.
  • Learning Curve: Requires understanding of templates and automation scripts.

Use Cases:

  • Ideal for projects with extensive repetitive coding requirements, such as UI elements or database operations.

Aider is a command line tool that lets you pair program with GPT-3.5/GPT-4, to edit code stored in your local git repository. Download the AI pair programming assistant that can be called from your terminal from the official GitHub repository.

  • Chat with GPT about your code by launching aider from the command line with set of source files to discuss and edit together. Aider lets GPT see and edit the content of those files.
  • GPT can write and edit code in most popular languages: python, javascript, typescript, html, css, etc.
  • Request new features, changes, improvements, or bug fixes to your code. Ask for new test cases, updated documentation or code refactors.
  • Aider will apply the edits suggested by GPT directly to your source files.
  • Aider will automatically commit each changeset to your local git repo with a descriptive commit message. These frequent, automatic commits provide a safety net. It’s easy to undo changes or use standard git workflows to manage longer sequences of changes.
  • You can use aider with multiple source files at once, so GPT can make coordinated code changes across all of them in a single changeset/commit.
  • Aider can give GPT-4 a map of your entire git repo, which helps it understand and modify large codebases.
  • You can also edit files by hand using your editor while chatting with aider. Aider will notice these out-of-band edits and keep GPT up to date with the latest versions of your files. This lets you bounce back and forth between the aider chat and your editor, to collaboratively code with GPT.

Pros:

  • AI-Driven Pair Programming: Offers real-time coding assistance using GPT-3.5/GPT-4, suitable for a variety of coding tasks.
  • Supports Large Codebases: Capable of handling edits in pre-existing, larger codebases.
  • Integration with Git: Automatically commits changes with descriptive messages, enhancing version control.
  • Language Versatility: Supports multiple programming languages like Python, JavaScript, HTML, CSS, etc.
  • Interactive Development: Allows for a conversational approach to coding, potentially improving understanding and efficiency.

Cons:

  • Dependence on AI Accuracy: Quality of code suggestions depends on the AI’s current capabilities and understanding of the context.
  • Requires Active Supervision: Users need to guide the AI, especially in complex scenarios.
  • Potential Learning Curve: Understanding how to effectively communicate with the AI for optimal results.

Use Cases:

  • Suitable for both new projects and modifications to existing ones, offering a more dynamic and interactive coding experience.

Overall Considerations:

  • Scope of Use: Autogen is more focused on automating repetitive code, whereas Aider is geared towards a more interactive, AI-assisted coding experience.
  • User Interaction: Autogen requires initial setup but runs autonomously, while Aider involves continuous interaction with the AI.
  • Complexity Handling: Aider may be better suited for complex, multi-file changes and debugging, leveraging the AI’s capabilities.
  • Project Size and Nature: Autogen is ideal for large projects with repetitive elements, while Aider shines in diverse coding scenarios, from small to large codebases.

The choice between Autogen and Aider depends on the specific needs of the project. Autogen excels in automating repetitive tasks, reducing manual effort, and ensuring consistency. In contrast, Aider offers a more versatile and interactive approach, suitable for a range of coding tasks, including working with large and complex codebases, with the added benefit of AI-driven insights and suggestions.

Aider and Autogen each have their own benefits when it comes to coding with LLMs. Aider is perfect for developers who want a simple way to make fast code changes. Autogen, with its ability to handle complex interactions with LLMs, is better for projects that need a more detailed setup. As LLM technology gets better, the advanced reasoning they provide will make tools like Aider and Autogen even more valuable. These tools are becoming essential for developers who want to use the latest AI in their programming work.

Filed Under: Guides, Top News


Latest timeswonderful Deals

Disclosure: Some of our articles include affiliate links. If you buy something through one of these links, timeswonderful may earn an affiliate commission. Learn about our Disclosure Policy.

Categories
News

How to use ComfyUI for AI image creation – Beginners Guide

How to use ComfyUI for AI image creation

If you have been dabbling creating AI imagery with artificial intelligence models such as DallE 3, Midjourney, Stable Diffusion and others. You might be interested in learning more about ComfyUI a powerful and modular Stable Diffusion graphical user interface GUI that can be used to make image generation more creative and rewarding. The user interface has been specifically designed to enable you to design and execute advanced Stable Diffusion pipelines using a graph, notes and flowchart based interface.

ComfyUI’s new innovative workflow builder is reshaping how we interact with artificial intelligence. This innovative platform is more than just a technological advancement; it’s a gateway to unleashing your creativity and tapping into lucrative opportunities. With ComfyUI, you have the power to create, customize, and monetize AI workflows, all while joining a vibrant community of like-minded individuals.

ComfyUI opens doors for anyone to craft custom nodes and models, turning your imaginative ideas into reality. It doesn’t matter if you’re an experienced developer or just starting your journey; ComfyUI provides an accessible environment for exploration and innovation. You can experiment with different settings, refine your workflows, and produce unique outcomes that reflect your personal touch.

Using ComfyUI AI artwork generation user interface

Here are some other articles you may find of interest on the subject of Stability AI’s Stable Diffusion AI art model

But ComfyUI isn’t just about feeding your creative appetite; it also presents a world of economic potential. By designing and selling your workflows, you can tap into a growing market of businesses and individuals looking to leverage AI for their needs. This platform offers more than a chance to earn—it’s a way to position yourself at the forefront of a technological wave and capitalize on your expertise.

To kick things off, ComfyUI invites you to participate in a workflow competition with a generous prize pool of $133,000. This contest is your chance to showcase your skills to respected judges from the AI industry and vie for various categories and exclusive rewards. Winning is great, but the real prize is the recognition and respect you’ll gain within the AI community.

ComfyUI on GitHub

If you’re eager to dive in, getting started with ComfyUI is straightforward. Simply download and install the platform. The setup process is easy, and once you’re in, you can begin managing custom nodes and models with ease. For those who need a little guidance, there’s a comprehensive tutorial to walk you through the basics, ensuring a smooth and enjoyable experience.

As you become more adept at using ComfyUI, you’ll discover that it supports both your artistic and financial aspirations. The platform is thoughtfully crafted to foster your creative spirit while providing a genuine path to earning money. It’s a harmonious blend of passion and profit, all available to you.

You’re not alone on this journey. A welcoming Discord community is ready to receive you with open arms. Here, you can engage in discussions, seek advice, and exchange insights with fellow ComfyUI users. This community is a center for collaboration, learning, and shared progress.

ComfyUI also doubles as an educational tool, enhancing your understanding of AI. Through hands-on experimentation, you can delve into AI concepts and apply them in innovative, practical ways. It’s an educational adventure that’s as rewarding as it is enlightening.

ComfyUI is more than just an AI workflow builder; it’s a nurturing platform for creativity, a means for monetization, and a promoter of community interaction and learning. Whether you aim to channel your artistic skills, generate income, or broaden your AI knowledge, ComfyUI is your key to a world brimming with possibilities. Join the community, enter the contest, and start crafting your AI-driven future today.

Filed Under: Guides, Top News


Latest timeswonderful Deals

Disclosure: Some of our articles include affiliate links. If you buy something through one of these links, timeswonderful may earn an affiliate commission. Learn about our Disclosure Policy.

Categories
News

Learn how to use Procreate Dreams animation app – Beginners Guide

Learn how to use Procreate Dreams Beginners Guide

Procreate Dreams a newly released animation app that is incredibly user-friendly. Provides a wide range of powerful tools for creating hand-drawn animations, motion graphics, and adding enhancements such as photos, videos, and sound. With Procreate Dreams, you can effortlessly create breathtaking 2D animations, expressive videos, and captivating stories.

Are you an artist, ready to bring your characters to life with the magic of movement? You’ve heard about Procreate, a powerful tool that can help you animate your creations with ease. But where do you start? This practical guide is here to walk you through the ins and outs of Procreate’s animation features, ensuring that you can make the most of this incredible app.

How to use Procreate Dreams

First things first, you’ll need to set up a new canvas. This is a crucial step, as it lays the foundation for your entire animation project. You’ll want to choose the right dimensions and frame rate to make sure your animation runs smoothly. Think of it as setting the stage for your characters to perform.

Once your canvas is ready, it’s time to sketch out your first frame. Procreate offers a wide array of brushes and tools that give you the freedom to draw with precision and style. You’ll learn how to manage your layers effectively, which is essential for making changes and refining your artwork without a hassle.

Here are some other articles you may find of interest on the subject of AI art and animation :

Now, let’s talk about onion skinning. This technique is a game-changer for animators. It lets you see several frames at once, which is incredibly helpful for creating fluid motion. You’ll discover how to adjust the onion skin settings to fit the needs of your project, making it easier to craft smooth transitions between frames.

Understanding loops and frame dynamics is next on the agenda. Even something as simple as animating a blinking eye can teach you a lot about looping animations. You’ll figure out how to create loops that are seamless and how to adjust the timing of frames to convey the right tempo and movement for your characters.

When your animation is complete and ready to be shared with the world, exporting is your final step. Procreate offers a variety of export options, so you can save your work in the best format for your needs. This guide will help you choose the right export settings to maintain the quality of your animation.

Procreate Dreams Deep Dive

Bringing characters and scenes together is what truly brings your animation to life. You’ll learn how to make sure your characters interact with their environments in a believable way. This not only adds depth to your animation but also helps to tell your story more effectively.

For those working on more complex animations, Procreate’s performance mode is a lifesaver. It helps you manage your project more efficiently. You’ll also explore how to add cinematic effects, like simulated camera movements and dynamic backgrounds, to give your animation that extra touch of drama and excitement.

Procreate Dreams Beginners Guide

To really polish your work, you’ll want to use keyframes and effects. These advanced features can take your animation to a professional level. This guide will show you how to apply them, allowing you to create animations that are not only smooth but also visually stunning.

Procreate is committed to supporting your learning journey. The app comes with a range of resources, including a detailed guide PDF and sample files. These are designed to help you practice and improve your animation skills.

Procreate Dreams animation app

Procreate Dreams is a versatile platform that can turn your 2D animation dreams into reality available to purchase from the Apple App Store priced at $20. By following this guide and using the resources provided, you’re well-equipped to explore the full capabilities of the software. So dive in, experiment with different techniques, and watch as your animations come to life in this exciting digital world. To learn more about the newly launched animation application jump over to the official website.

Filed Under: Apple iPad, Guides, Top News


Latest timeswonderful Deals

Disclosure: Some of our articles include affiliate links. If you buy something through one of these links, timeswonderful may earn an affiliate commission. Learn about our Disclosure Policy.

Categories
News

DallE 3 advanced prompting guide for amazing results every time

DallE 3 advanced prompting guide

Now that the OpenAI DallE 3 AI art image generator has been available for a few weeks creators are now revealing prompting secrets that can take your AI art to the next level. As you will properly already know it’s really easy to create AI artwork using DallE 3 by simply asking it to to draw something. However a number of AI artists have discovered ways to enhance DallE 3’s creations by tweaking the prompt slightly as well as using Custom Instructions. In this guide we will provide a selection of advanced tips and tricks to help you take your DallE 3 prompting from beginner to advanced. Enabling you to create more complex AI artwork using the ChatGPT image creator.

One of the most interesting features of DallE 3 is its ability to modify generated images. Users can add elements, change colors, and even remove elements from the image to suit their specific requirements. This flexibility allows for endless creativity and customization, making DallE 3 a versatile tool for various applications.

Advanced DallE 3 prompts

Interestingly, DallE 3 can generate professional images without the need for complex prompts. This feature significantly simplifies the image generation process, making it accessible even to those with limited technical knowledge. The tips and tricks, shared in the video below, have been a game-changer for many DallE 3 users. Enabling them to create more specific AI art to suit their exact requirements rather than just generic images that are created from simpler prompts.

Other articles we have written that you may find of interest on the subject of OpenAI DallE 3 AI art dementia generator:

Here are a few things to consider when trying to create more complex DallE 3 AI images. Each of these tips is aimed at enhancing the creative process and output when using Dall-E 3. The key lies in understanding how to effectively communicate your vision to the AI model, enabling it to translate your ideas into compelling visual AI art to answer your brief perfectly.

  • Understanding Styles and Influences: When referencing art styles or historical periods, clarity and precision in your description are key. Instead of naming a contemporary artist or style, use descriptive phrases and adjectives that capture the essence of that style. For example, instead of saying “like Van Gogh,” describe the style as “post-impressionistic with bold, swirling brushstrokes and vibrant colors.” This approach not only adheres to guidelines but also pushes you to think more deeply about the style’s characteristics.

If you need more inspiration using different styles we have created a selection for AI art generator such as Midjourney which will work just as well for DallE 3 now it is available.

  • Balancing Abstract and Concrete Elements: Combining abstract and concrete elements requires a delicate balance. If your concept is abstract, like “freedom” or “chaos,” grounding it in concrete imagery can help the AI generate a more coherent image. Conversely, if your prompt is highly concrete or literal, introducing abstract concepts can add layers of meaning and depth to the image. The trick is to find a harmonious blend that conveys your idea effectively without becoming too obscure or overly literal.
  • Specificity in Prompts: The level of detail in your prompts plays a crucial role in shaping the output. A detailed prompt should ideally encompass various elements of the desired image. For instance, if you’re envisioning a landscape, describe not just the basic elements like trees and rivers, but also the type of trees, the state of the water (calm or turbulent), the time of day, the weather conditions, and the overall atmosphere you wish to capture. The specificity extends to even minute details like the texture of surfaces, the play of light and shadows, and the presence of any living creatures. Such precision guides the AI in generating an image that mirrors your envisioned scene with greater accuracy.
  • Use of Descriptive Language: Leveraging vivid and descriptive language enriches the visual quality of the generated image. Descriptive language isn’t just about adjectives; it’s about using words that create a sensory experience. For example, instead of saying “a bright day,” you could say “a day drenched in the golden glow of a late afternoon sun, casting long shadows.” Such language enhances the depth and richness of the image, allowing the AI to interpret and visualize your ideas more effectively.
  • Incorporating Symbolism and Metaphors: Dall-E 3’s ability to interpret symbolism and metaphors adds a powerful dimension to image generation. When using these, think about how abstract concepts can be represented visually. For example, the concept of “time” could be symbolized by clocks, hourglasses, or even the transition from day to night in a landscape. The use of metaphors and symbols can infuse your images with deeper meanings and layers, offering a richer narrative or thematic depth.
  • Layering Concepts: Combining multiple concepts or themes can yield intriguing and complex images. This approach is akin to storytelling through visuals. For instance, you might combine a futuristic cityscape with elements of nature, suggesting a theme of harmony between technology and the environment. By layering these themes, you create a narrative and a visual richness that a single concept might not achieve. This technique demands not just creativity but also a thoughtful consideration of how different elements and themes interact and complement each other in a single frame.
  • Iterative Approach: The process of refining prompts is a critical aspect of working with DallE 3. Your first attempt might not always yield the perfect result, but each iteration brings you closer to your vision. Analyze the output, identify elements that align or deviate from your expectations, and modify your prompt accordingly. This process is akin to sculpting, where each modification helps in chiseling out the desired outcome. It’s a learning curve, where both you and the AI evolve to understand each other better.
  • Size and Composition: The orientation and composition of an image play a significant role in its impact. Specify whether you need a portrait (vertical) or landscape (horizontal) orientation, or a particular aspect ratio to fit specific requirements like a web banner or a book cover. Mentioning the desired shot type, such as a close-up for detailed expressions or a wide shot for landscapes, helps in setting the right frame for your subject. Additionally, specifying compositional styles, like the rule of thirds or symmetry, can guide the AI in creating visually pleasing images.
  • Inclusion of Time and Movement: Capturing a specific time of day can drastically alter the mood of the image. A morning scene has a different feel than a twilight one. Likewise, indicating movement or stillness can add dynamism or serenity to the image. For example, a dancing figure or a still portrait each tells a different story. This temporal and kinetic dimension adds life to the images and should be considered while crafting prompts.
  • Cultural and Contextual Awareness: Creating images that represent specific cultures, historical periods, or communities requires sensitivity and accuracy. Misrepresentation can lead to stereotypes or cultural inaccuracies. When crafting prompts, it’s important to be informed and respectful of the nuances of different cultures and contexts, ensuring that the images are not only aesthetically pleasing but also culturally appropriate and respectful.
  • Ethical Considerations: Ethics play a crucial role, especially when dealing with sensitive subjects. Avoid prompts that could lead to harmful, offensive, or stereotypical imagery. The responsibility lies in using the tool in a way that promotes respect and sensitivity. Always be mindful of the implications your image might have in various social and cultural contexts.
  • Experimentation: The field of AI-generated art is still largely unexplored, and experimentation can lead to surprising and innovative results. Don’t shy away from unconventional or whimsical prompts. Sometimes, the most creative outputs come from thinking outside the box and challenging the norms of conventional artistry.
  • Utilizing Negative Space: Negative space, or the space around and between subjects, is a powerful tool in composition. It can be used to create a sense of openness, isolation, or balance in an image. Explicitly mentioning how you want the negative space to be utilized can lead to more intentional and impactful compositions.
  • Requesting Textures and Materials: Textures and materials bring a tactile dimension to visual imagery. If the texture of an object or the material it’s made of is crucial to your concept (like the roughness of a rock, the sheen of metal, or the transparency of glass), including these details in your prompt can significantly enhance the realism and sensory appeal of the image.
  • Feedback and Learning: Observe how DallE 3 responds to different phrases, styles, or descriptive elements in your prompts. This observation can become a valuable feedback loop, informing future prompt crafting. Understanding the nuances of how the AI interprets language and transforms it into visual elements is key to mastering the art of AI-assisted image generation.

Mastering DallE 3 prompt seeds and more

DallE 3 offers a unique feature that allows users to generate varied images from the same prompt by using different seeds. By incorporating specific text in their custom instructions, users can unlock a new level of customization, leading to a diverse range of image outputs. This functionality enhances the creative possibilities, enabling users to explore a multitude of visual interpretations of a single idea.

Additionally, the tool provides advanced parameters within its ‘do’ function, which empowers users to exert greater control over the image generation process. This sophisticated feature facilitates a high degree of customization, allowing users to fine-tune various aspects of the image to ensure that the final product aligns seamlessly with their envisioned concept. Whether it’s adjusting color schemes, perspectives, or thematic elements, this feature caters to the specific creative needs of the user.

Character creation

In the realm of character creation, DallE 3 introduces an impressive capability. Users can not only generate different poses of the same character within a single image but can also delve into intricate descriptions to bring their characters to life with remarkable precision. Consistent characters in DallE 3 opens up avenues for detailed character sheets, which can then be modified and iterated upon. This capability is immensely beneficial for a range of creative projects, such as storyboarding, animation, graphic novels, or any endeavor that necessitates a consistent and detailed character representation.

Logo creation

Expanding its versatility, DallE 3 also excels in logo generation. The tool is adept at understanding and replicating the stylistic nuances of a user’s preferred logos, enabling it to create new logos that resonate with the user’s aesthetic preferences. This is particularly advantageous for businesses and entrepreneurs who are looking to forge a unique brand identity.

By iteratively prompting the ChatGPT and utilizing DallE 3’s adaptability, users can evolve their logo designs, achieving a professional look without necessarily requiring the expertise of a graphic designer. This functionality not only saves time but also provides a platform for creative experimentation in logo design, making it an invaluable asset for branding and marketing endeavors.

DallE 3 offers a suite of features that make image generation and modification a breeze. Whether you’re looking to create professional images, consistent characters, or unique logos, DallE 3 has the tools and features to bring your vision to life. With its user-friendly interface and advanced capabilities, it’s no wonder that DallE 3 is quickly becoming the go-to tool for image generation and modification.

Filed Under: Guides, Top News


Latest timeswonderful Deals

Disclosure: Some of our articles include affiliate links. If you buy something through one of these links, timeswonderful may earn an affiliate commission. Learn about our Disclosure Policy.

Categories
News

How to make GPTs using ChatGPT in minutes – Beginners Guide

How to create personal GPTs using ChatGPT

OpenAI has just made available its new custom AI model creation tool in the form of GPTs. Enabling anyone with ChatGPT Plus or Enterprise subscriptions to create their very own custom AI workflows built on the OpenAI ChatGPT large language model. The system builds on the Custom Instructions which was ruled out a few months ago and allows you to save your workflows for easy access within your ChatGPT browser interface.

Don’t worry if your first GPT build is not  producing the exact results you expected, because you can easily go in and edit it at any time tweaking its workflow and continually improve its results.

GPTs allow you to create custom ChatGPT instances for specific purposes and allow anyone to create a tailored version of ChatGPT with no coding required. The process allows you to customize the ChatGPT AI model to be more helpful at specific tasks for personal and work situations. Analyzing documents and generating reports on-the-fly from Excel spreadsheets and more.

If you can’t wait to build your first GPT will be pleased to know that it only takes a couple of minutes and ChatGPT will guide you through the process even creating the profile picture for you using the DallE 3 AI image generator. Recently added to the ChatGPT service by OpenAI a few weeks ago. Below is an image of the first screen welcoming new to the GPT  creation process.

building your first GPT with ChatGPT

Once you start building your first GPT you can decide on three main areas that you can include in it for added functionality such as web browsing, file upload for data analysis and also Code Interpreter that lets your GPT run code. When enabled your GPT can analyze data work with files you’ve uploaded to mathematical calculations and more. Furthermore once you have set up your GPT you can then add “Actions” to make your workflows more complicated by retrieving information or taking actions outside of ChatGPT.

How to make GPTs

Quick Start Guide

  1. Make sure you have a subscription for either a ChatGPT Plus or ChatGPT Enterprise account
  2. Once subscribed go to the official https://chat.openai.com/gpts/editor (or click on “Explore” in the left menu and then “My GPTs”)
  3. Select “Create a GPT”
  4. In the Create tab, you can message the GPT Builder to help you build a new GPT. You can say something like, “Make a creative who helps generate visuals for new products” or “Make a software engineer who helps format my code.”
  5. To name and set the description of your GPT, head to the Configure tab. Here, you will also be able to select the actions you would like your GPT to take, like browsing the web or creating images.
  6. When you’re ready to publish your GPT, select “Publish” and share it with other people if you’d like.

Other articles you may find of interest on the subject of ChatGPT :

Getting Started with GPT Creation

To start making your very first GPT, navigate to the official GPTs editor or access it via “My GPTs” under the Explore tab. Here, you’re presented with the option to “Create a GPT.” This initial step leads you to the GPT Builder, a user-friendly interface that assists in the construction of your GPT. Imagine telling the Builder, “Make a creative assistant for designing new products,” or “Create a software engineer bot to format my code.” This flexibility is the cornerstone of GPTs, allowing for a wide array of functional applications.

Configuring Your GPT

The next critical phase is in the Configure tab. This is where you infuse your GPT with identity and purpose, assigning it a name and a description. It’s also where you select the actions your GPT will perform. These can range from web browsing to creating images, depending on your needs.

Publishing and Sharing Your GPT

Once your GPT is ready, the “Publish” option allows you to bring your creation to life. You can choose to keep it for personal use or share it with others, expanding its utility within your community or organization.

ChatGPT GPT advanced configuration screen

Advanced Customization Options

For those seeking a deeper level of customization, the GPT Editor offers advanced settings. These include:

  • Image Integration: You can request the GPT Builder to generate an image for your GPT or upload one of your choice.
  • Additional Instructions: This section is crucial for imparting detailed instructions or guidelines on the GPT’s behavior, functionalities, and constraints.
  • Prompt Starters: These serve as conversation initiators, guiding users on how to interact with your GPT.
  • Knowledge Base: Here, you can provide additional context and information for your GPT to reference, including content from uploaded files.
  • New Capabilities: Enabling advanced functionalities like Web Browsing, DALL·E Image Generation, and Advanced Data Analysis, broadens the horizon of what your GPT can achieve.
  • Custom Actions: By integrating third-party APIs and importing actions from an OpenAPI schema, you can further enhance the GPT’s capabilities.

screenshot of the ChatGPT GPT menu to add actions to your workflow

The creation of a GPT is not just about programming an AI; it’s about breathing life into a  personal digital assistant that can assist you with specific needs and objectives. Whether you’re a developer looking to streamline coding processes, a creative professional seeking a more streamlined way to create those monthly reports, or an educator aiming to enhance learning experiences, the power to create custom GPT AI models tailored to your exact needs is now at your fingertips.

Don’t forget OpenAI will be continually adding new features so you can expect the features and applications and what is capable using the GPTs  to expand on a monthly or even a weekly basis.  As always as soon as more features and tips and tricks are discovered we will keep you up to speed as always.

Filed Under: Guides, Top News


Latest timeswonderful Deals

Disclosure: Some of our articles include affiliate links. If you buy something through one of these links, timeswonderful may earn an affiliate commission. Learn about our Disclosure Policy.

Categories
News

How to use ChatGPT Vision – Beginners Guide

Using ChatGPT Vision a comprehensive Beginners Guide Nov 2023

If you have not yet tried out the new ChatGPT vision and audio updates on the official OpenAI ChatGPT iOS and Android applications or via the official ChatGPT website and chatbot. Or would simply like to know more about the features and functionality, to make sure you’ve not missed anything that could help improve your results or workflow. This quick beginner’s guide will take you through everything you need to know about the latest audio and visual updates rolled out to ChatGPT by OpenAI.

As most of us already know OpenAI’s ChatGPT large language model is a powerful AI tool that uses artificial intelligence (AI) to except, analyze and respond to user inputs. It’s was originally designed to understand and generate text that mirrors human communication, based on user prompts. The technology behind ChatGPT is a machine learning model called GPT (Generative Pretrained Transformer), which uses AI to understand context and generate relevant and meaningful responses.

Now thanks to the development team at OpenAI, a significant advancement in ChatGPT has been rolled out with the addition of the new ChatGPT Vision features. which gives the AI the ability to interpret and respond to photographs, diagrams or images uploaded by users, adding a new dimension to its capabilities. The speed at which the new image recognition ability has been rolled out to ChatGPT is a testament to the progress made in AI technology by OpenAI, allowing it to not just understand text, but also visual data now as well.

The Vision feature has numerous applications. For instance, users can upload images depicting issues they’re facing, and ChatGPT can offer potential solutions or explanations. This AI-driven problem diagnosis can be applied in various fields, from technical support to solving math’s problems or even finding locations around the world, by providing instant, accurate solutions dependent on the image uploaded.

How to use ChatGPT Vision online and in the app

The Vision feature is included in ChatGPT 4, the latest version of the AI. Users can access this feature by selecting the image icon in the prompt bar when the default ChatGPT 4 version is selected in the online version. The AI’s responses can be further customized using the Custom Instructions feature which we have covered previously, allowing users to tailor the AI’s responses to their specific needs. Other articles you may find of interest on the subject of customizing your Custom Instructions to improve your results.

Users can embrace the power of AI and Vision to even request styling advice, by uploading images of their rooms or web pages, and ChatGPT can offer suggestions for improvement. This AI styling advice can mimic the thought process of a professional interior designer or a web developer, offering personalized advice based on the uploaded image. It is also been demonstrated that you can upload sketches, flowcharts and diagrams and ask ChatGPT to start building a program to complete the process. Without you having to know any coding at all.

Another interesting use of the Vision feature is in character description. Users can upload images of people or characters, and ChatGPT can provide detailed descriptions and suggest potential roles for them. This feature can be very useful for writers and filmmakers who need help with character development.

Official OpenAI ChatGPT apps for iOS and Android

ChatGPT isn’t limited to desktops or laptops; it can also available on mobile devices via the official OpenAI ChatGPT applications which are available for both iOS and Android. It is worth mentioning that make sure you download the official app and not any third parties that may be set up to access your private data or worse. Once you’ve installed the ChatGPT app it can be used to take photographs of documents, images, diagrams, reports and more all of which can be uploaded directly from your camera or tablets camera roll, making it more convenient and accessible for many.

Using ChatGPT Vision apps on mobile

This is perfect if you’re travelling need to quickly translate a menu, document or road sign. Although Google translate is also very good at this and is properly faster in some circumstances. On a side note you can also use ChatGPT to help you plan your next travel adventure. Now ChatGPT has visual recognition you can upload images you may have found in magazines or online and ask where they may be in the world you to plan your itinerary.

As explained earlier ChatGPT also has applications in design, where it can provide users with feedback on designs such as website layout, illustrations, logos and more. Using OpenAI’s DallE 3 integration you can even start creating your very own logos within ChatGPT. all of which allows users to create more visually appealing and user-friendly products, designs, illustrations and websites.

A few uses of ChatGPT vision and AI image recognition both now and in the near future

  • Agriculture: Farmers can diagnose plant health by taking pictures of crops, with AI suggesting treatment for diseases or pests.
  • Translation: By pointing their phone camera at text, users can get instant translation in various languages, which is particularly useful for travelers.
  • Shopping: Users can take photos of products to search for them online, compare prices, or find similar items.
  • Education: Students can use AI vision to get information about plants, animals, historical landmarks, or even solve math problems by pointing their camera at them.
  • Healthcare: Skin scanning apps can help in early detection of skin conditions by analyzing photos of skin lesions.
  • Safety: Real-time facial recognition or object detection can enhance personal security by identifying known threats or dangerous items.
  • Nutrition: Users can track their food intake by taking pictures of their meals, and AI can analyze the nutritional content.
  • Fitness: AI vision can track exercises and form, providing feedback to improve workouts.
  • Home Improvement: By capturing images of a room, users can visualize furniture placement, wall colors, or other design elements before making changes.
  • Event Planning: AI can recognize faces in photos, helping users to organize and tag photos after events automatically.
  • Social Media: Filters and effects that respond to facial movements or add contextual information to a scene are powered by AI vision.
  • Navigation: Visual recognition can assist in understanding complex scenes and providing context-based navigation indoors where GPS is limited.
  • Document Scanning: Smartphones can be used as portable scanners to digitize documents, with AI helping to enhance the text and correct angles.

ChatGPT is a robust tool that uses the power of AI to offer a wide range of services. From image recognition to problem diagnosis, styling advice, and character description, ChatGPT is changing the way we interact with technology. With the ongoing advancements in AI technology, the potential applications for ChatGPT are vast. It demonstrates the transformative power of AI, and its ability to reshape our interaction with technology. Here are a few other articles you may find of interest on the subject of ChatGPT vision :

Filed Under: Guides, Top News


Latest timeswonderful Deals

Disclosure: Some of our articles include affiliate links. If you buy something through one of these links, timeswonderful may earn an affiliate commission. Learn about our Disclosure Policy.

Categories
News

Guide to Safely Withdraw and Deposit Funds at Online Casinos

In this article, we will explore the importance of secure transactions in online gambling and provide a step-by-step guide on how to safely deposit and withdraw funds at online casinos. We will also discuss recommended payment methods, tips for choosing a reliable venue, common security risks, and additional security measures for enhanced online casino transactions. By following these guidelines, you can enjoy safe and secure transactions at gambling sites.

In online gambling, security should be a top priority for players. The internet is filled with potential threats, including hackers and fraudsters who are constantly looking for opportunities to exploit vulnerabilities in online transactions. It is crucial to ensure your funds and personal information are protected when depositing or withdrawing funds from online casinos.

One of the key aspects of secure transactions is the use of SSL encryption. SSL stands for Secure Sockets Layer and is a standard security technology used to establish an encrypted link between a web server and a browser. This ensures that all data transmitted between the two remains private and secure. By using SSL encryption, platforms can protect your financial details and personal information from unauthorized access.

Understanding SSL Encryption and Its Role in Secure Transactions

When you visit a secure website, such as an online casino, you will notice a padlock icon in the address bar of your browser. This indicates that the website is using SSL encryption to protect your data.

When you initiate a transaction at the site, such as depositing funds into your account, SSL encryption ensures that the information you provide, such as your credit card details, is securely transmitted to the casino’s servers. This encryption makes it extremely difficult for hackers to intercept or access your data, providing an additional layer of protection for your funds and personal information.

Step-by-Step Guide to Safely Deposit Funds

Now that we understand the importance of secure transactions and SSL encryption, let’s discuss how to safely deposit funds at online casinos. Follow these steps to ensure a secure and hassle-free deposit process:

  • Choose a reputable venue: Look for casinos that are licensed and regulated by reputable authorities like https://jugabet.cl, as this ensures that they adhere to strict security standards and fair gaming practices.
  • Create an account: Make sure to choose a strong password and enable two-factor authentication if available, as this adds an extra layer of security to your account.
  • Select a secure payment method: Options such as credit cards, e-wallets, and bank transfers are commonly accepted. Research the security features of each payment method and select one that best suits your needs.
  • Navigate to the cashier section: This is where you will find options for depositing funds into your account.
  • Enter the deposit amount: Specify the amount you wish to deposit and select your preferred payment method. Follow the on-screen instructions to provide the necessary payment details. Make sure to double-check the information before submitting the transaction.
  • Confirm the transaction: After entering the payment details, you will usually be asked to confirm the transaction. This may involve entering a one-time code sent to your mobile device or providing additional authentication information. This step adds an extra layer of security to ensure that only authorized individuals can make deposits into your account.
  • Wait for the funds to be credited: Once the transaction is confirmed, you will typically have to wait for a short period for the funds to be credited to your account. The time taken may vary depending on the payment method you have chosen.

By following these steps, you can safely deposit funds into your account and enjoy a seamless gambling experience.

Recommended Payment Methods for Secure Transactions

Not all payment methods are created equal in terms of security. Some payment methods offer enhanced security features, making them more suitable for online gambling transactions. Here are some recommended payment methods for secure transactions:

  • Credit cards: Credit cards are widely accepted and offer a high level of security. Most credit card companies have robust fraud protection measures in place, allowing you to dispute unauthorized transactions if needed. However, it is important to ensure that the venue you choose has a secure payment gateway to protect your credit card information.
  • E-wallets: E-wallets, such as PayPal, Neteller, and Skrill, provide an added layer of security for online transactions. These payment methods act as intermediaries between your bank account or credit card and the portal, reducing the risk of exposing your financial information to the casino directly.
  • Cryptocurrencies: Cryptocurrencies, such as Bitcoin and Ethereum, are becoming increasingly popular in the online gambling industry due to their enhanced security and anonymity. By using cryptocurrencies, you can keep your financial information private and enjoy secure transactions on platforms.

Tips for Choosing a Reliable Online Technology for Secure Transactions

Here are some tips to help you select a trustworthy online casino:

  • Licensing and regulation: This ensures that the casino operates under strict guidelines and is held accountable for its actions.
  • Security measures: Look for venues that employ advanced security measures, such as SSL encryption and secure payment gateways. These measures protect your funds and personal information from unauthorized access.
  • Reputation and reviews: Research the reviews and testimonials from other players. This will give you insights into the casino’s track record and help you make an informed decision.
  • Customer support: A reliable platform should have responsive customer support to assist you with any queries or concerns you may have. Prompt and helpful customer support is a sign of a trustworthy casino that values its players.

How to Safely Withdraw Funds from Online Casinos

Here is a guide on how to safely withdraw funds from venues:

  • Check the withdrawal options: Look for casinos that offer secure and convenient withdrawal methods, such as e-wallets and bank transfers.
  • Verify your account: This involves providing identification documents, such as a copy of your passport or driver’s license, and proof of address. Verifying your account adds an extra layer of security and helps prevent fraud.
  • Navigate to the cashier section: Once your account is verified, navigate to the cashier section of the online casino. Look for the withdrawal options and select your preferred method.
  • Enter the withdrawal amount: Specify the amount you wish to withdraw and provide any additional information required, such as your bank account details or e-wallet address. Double-check the information before submitting the withdrawal request.
  • Confirm the withdrawal: After entering the withdrawal details, you will usually be asked to confirm the transaction. This may involve entering a one-time code sent to your mobile device or providing additional authentication information. This step ensures that only authorized individuals can initiate withdrawals from your account.
  • Wait for the funds to be processed: Once the withdrawal request is confirmed, you will have to wait for the casino to process the transaction. The time taken may vary depending on the withdrawal method and the casino’s processing times.

By following these steps, you can safely withdraw funds from online casinos and have peace of mind knowing that your transactions are secure.

Common Security Risks and How to Avoid Them

While platforms strive to provide secure transactions, there are still some common security risks that players should be aware of. By understanding these risks and taking appropriate precautions, you can minimize the chances of falling victim to fraud or other security breaches. Here are some common security risks and how to avoid them:

  • Phishing scams: Phishing scams involve fraudsters posing as legitimate entities to trick players into revealing their personal information. To avoid falling victim to phishing scams, never click on suspicious links or provide your personal information to unverified sources. Always visit the official website of the online casino directly.
  • Weak passwords: Weak passwords are a common security vulnerability. To protect your account, choose a strong password that includes a combination of letters, numbers, and special characters. Avoid using easily guessable passwords, such as your birthday or name.
  • Unsecured Wi-Fi networks: When accessing platforms or performing transactions, avoid using unsecured Wi-Fi networks, such as those in public places. These networks can be easily compromised, allowing hackers to intercept your data. Instead, use a secure and private internet connection when conducting transactions.
  • Unlicensed venues: Playing at unlicensed casinos can put your funds and personal information at risk. Always choose reputable platforms that are licensed and regulated by recognized authorities. This ensures that the casino operates under strict security standards and fair gaming practices.

Additional Security Measures for Enhanced Online Technology Transactions

In addition to following the steps mentioned earlier, there are some additional security measures you can take to enhance your transactions:

  • Enable two-factor authentication: Two-factor authentication adds an extra layer of security to your account. By enabling this feature, you will be required to provide a second form of authentication, such as a unique code sent to your mobile device, in addition to your password.
  • Regularly update your software: Keep your computer, smartphone, and other devices up to date with the latest security patches and software updates. This ensures that you have the latest security features and protection against known vulnerabilities.
  • Use antivirus software: Install reputable antivirus software on your devices to protect against malware and other cyber threats. Regularly scan your devices for any potential risks and ensure that your antivirus software is always up to date.
  • Monitor your transactions: Regularly review your transactions and statements to detect any unauthorized activity. If you notice any suspicious transactions or discrepancies, contact the customer support immediately.

By implementing these additional security measures, you can further enhance the safety of your online casino transactions and protect your funds and personal information from potential security risks.

Categories
News

Your Guide To Launching a Private-Label Vitamin Line

Launching a private-label vitamin line can be a lucrative enterprise. You get the chance to add quality to people’s lives while making a significant profit. However, it’s a venture that involves complex considerations such as regulatory guidelines, manufacturing processes, branding, and marketing strategies. So, where should you start on this rewarding journey?

Essential Steps for Launching a Private-Label Vitamin Brand

Getting your private-label vitamin line to market involves several steps. Initially, conduct a market study to understand customer preferences, industry trends, and potential competition. Use this information to define your target customer and determine what kind of private-label vitamins to create.

Next, establish a business plan detailing your strategies for branding, marketing, financing, and distribution. This step is necessary to secure funding and map out your business journey. Furthermore, it can help you anticipate obstacles and devise ways to overcome them.

Once business planning is complete, turn your focus to finding a reliable vitamin manufacturer to produce your product. The manufacturer you choose should adhere to stringent quality standards and deliver on your production timeline.

Your ultimate step involves marketing your brand. Create an effective advertising campaign to increase brand awareness and drive sales. Ensure to leverage multiple marketing channels for broader reach, including social media, search engine optimization, and email marketing.

How to Choose the Right Vitamin Manufacturer for Your Private Label

The success of your private-label vitamin line largely depends on the quality of your product. Finding a reputable vitamin manufacturer can assure you of consistent quality. Begin by examining the company’s manufacturing processes and quality control measures.

Consider the manufacturer’s certifications. Manufacturers with certificates such as Good Manufacturing Practice (GMP) and the International Organization for Standardization (ISO) are likely to produce high-quality vitamins.

Investigate the manufacturer’s lead time, minimum order requirements, and pricing structure. Furthermore, inquire if they offer extra services like product packaging and label design. These added values can save you time and money.

Keep in mind that partnering with a responsive, transparent, and collaborative manufacturer contributes to a successful private-label vitamin business relationship.

Developing a Profitable Marketing Strategy for Your Vitamin Line

Once you’re done with manufacturing your product, you need to get it into the hands of the consumers. Developing an effective marketing strategy is critical to make this happen. Start by identifying your target market and understanding their needs, preferences, and habits.

Next, position your brand in a way that appeals to your target market. Craft a compelling brand story and clearly communicate the benefits of your vitamins to attract potential customers.

Consider diversifying your marketing channels. While digital marketing channels like social media and email marketing offer a broader reach, incorporating traditional marketing methods such as print ads can also be beneficial.

Remember, customer feedback can be an invaluable information source for improving your vitamins and marketing strategy. Therefore, create avenues for customer engagement and regularly solicit feedback.

Tips for Maintaining Quality and Consistency in Your Private-Label Vitamin Line

When running a private-label vitamin line, quality and consistency are paramount. They help build consumer trust in your brand and encourage repeat purchases. Start by partnering with a reliable manufacturer who practices stringent quality control measures.

In addition, keep a keen eye on the input materials. Ensure they meet your specifications in terms of quality, safety, and potency. Regularly conduct third-party testing of your vitamins to verify their quality and consistency.

Labeling is another important element in maintaining product consistency. Always ensure that the information on the labels is accurate and consistent with what’s in the product.

Finally, invest in training your team on quality control procedures and the importance of consistently producing top-tier vitamins. Regular quality audits can also help in maintaining a high standard of production.

Indeed, launching a successful private-label vitamin line is a challenging yet rewarding venture. However, with the right knowledge, reliable partners, and a sound strategy, you can build a profitable business while enhancing the health and wellness of customers.