OpenAI has just made available its new custom AI model creation tool in the form of GPTs. Enabling anyone with ChatGPT Plus or Enterprise subscriptions to create their very own custom AI workflows built on the OpenAI ChatGPT large language model. The system builds on the Custom Instructions which was ruled out a few months ago and allows you to save your workflows for easy access within your ChatGPT browser interface.
Don’t worry if your first GPT build is not producing the exact results you expected, because you can easily go in and edit it at any time tweaking its workflow and continually improve its results.
GPTs allow you to create custom ChatGPT instances for specific purposes and allow anyone to create a tailored version of ChatGPT with no coding required. The process allows you to customize the ChatGPT AI model to be more helpful at specific tasks for personal and work situations. Analyzing documents and generating reports on-the-fly from Excel spreadsheets and more.
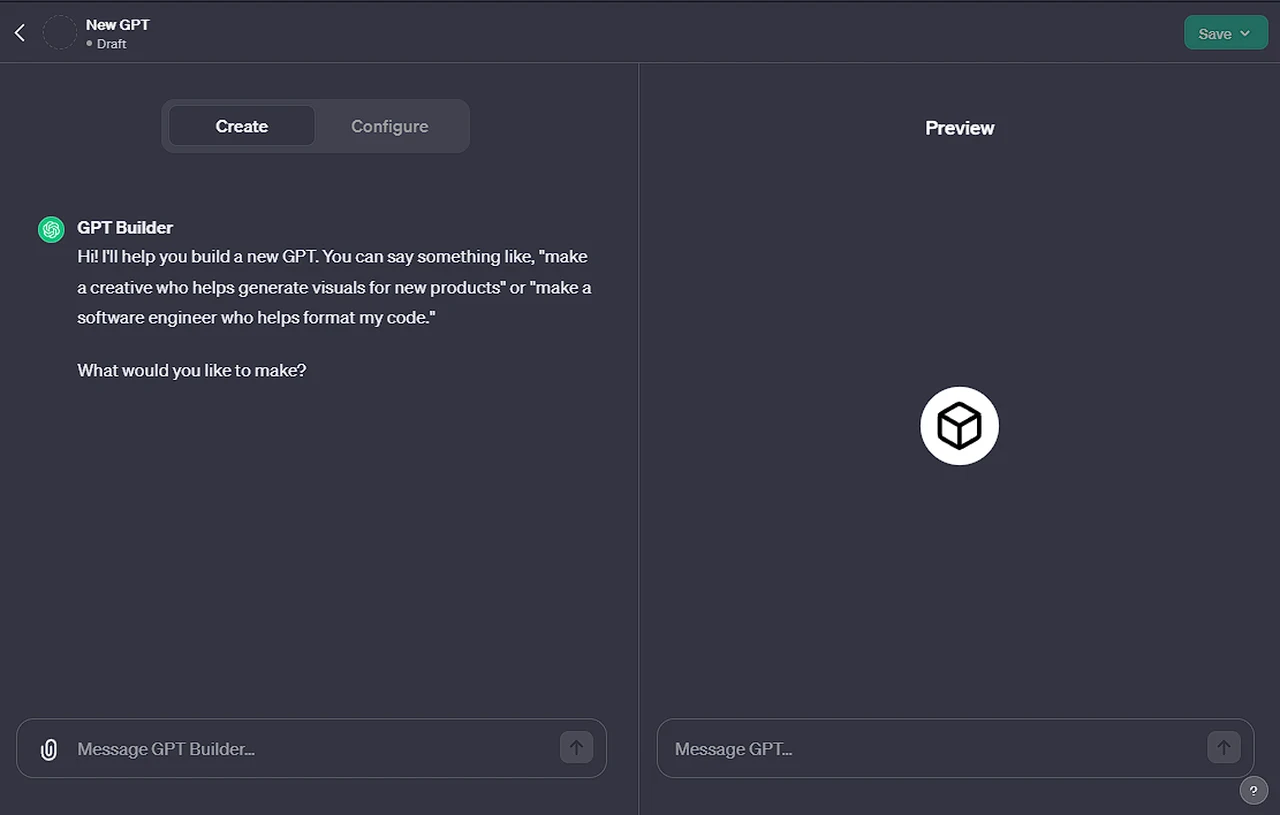
If you can’t wait to build your first GPT will be pleased to know that it only takes a couple of minutes and ChatGPT will guide you through the process even creating the profile picture for you using the DallE 3 AI image generator. Recently added to the ChatGPT service by OpenAI a few weeks ago. Below is an image of the first screen welcoming new to the GPT creation process.

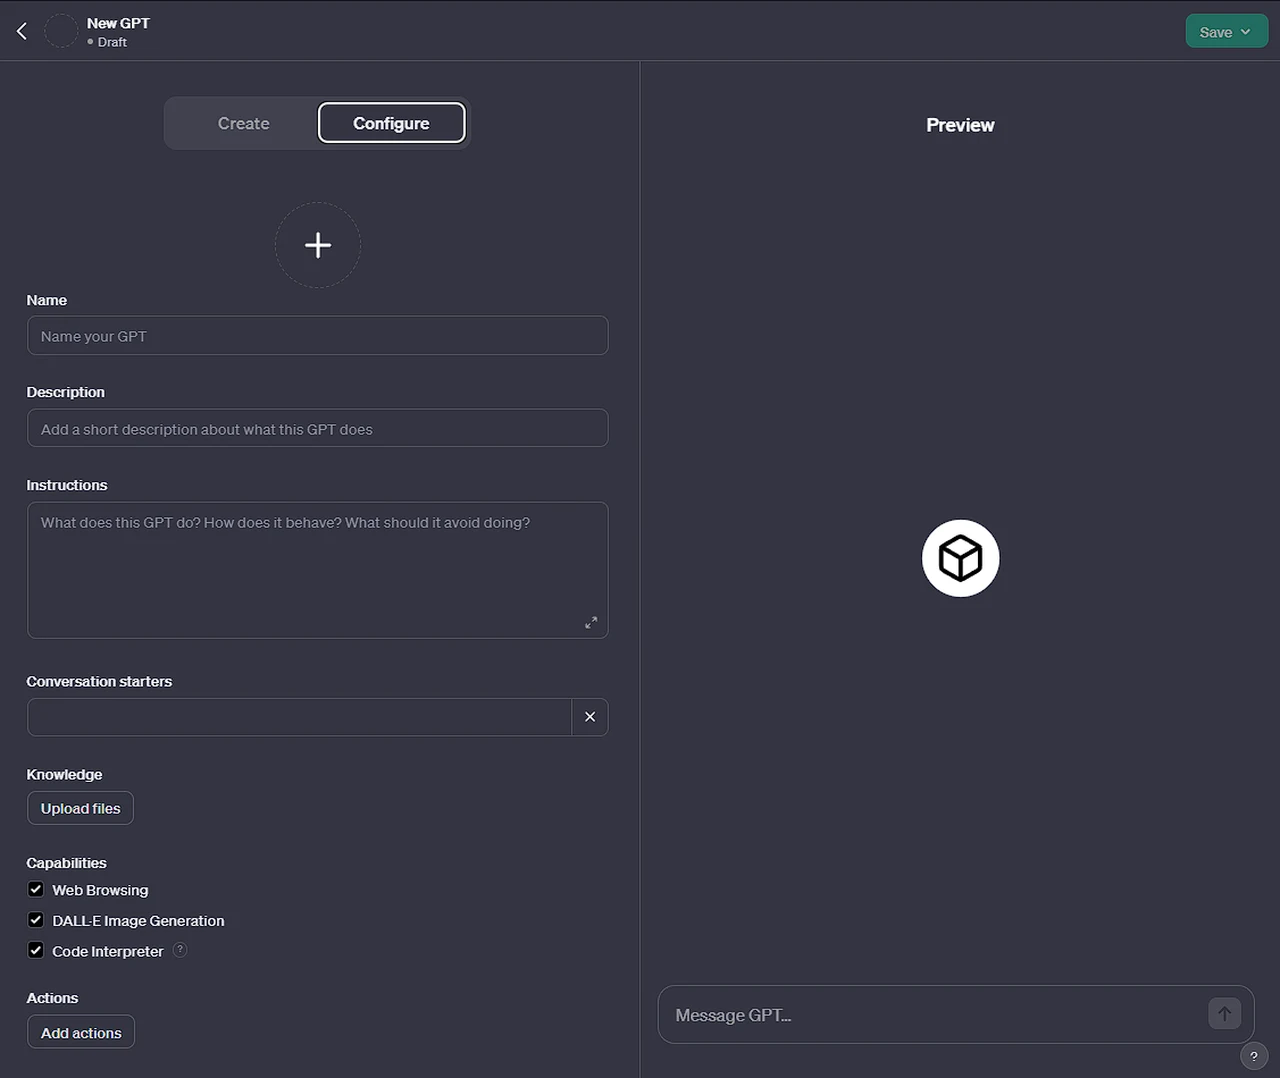
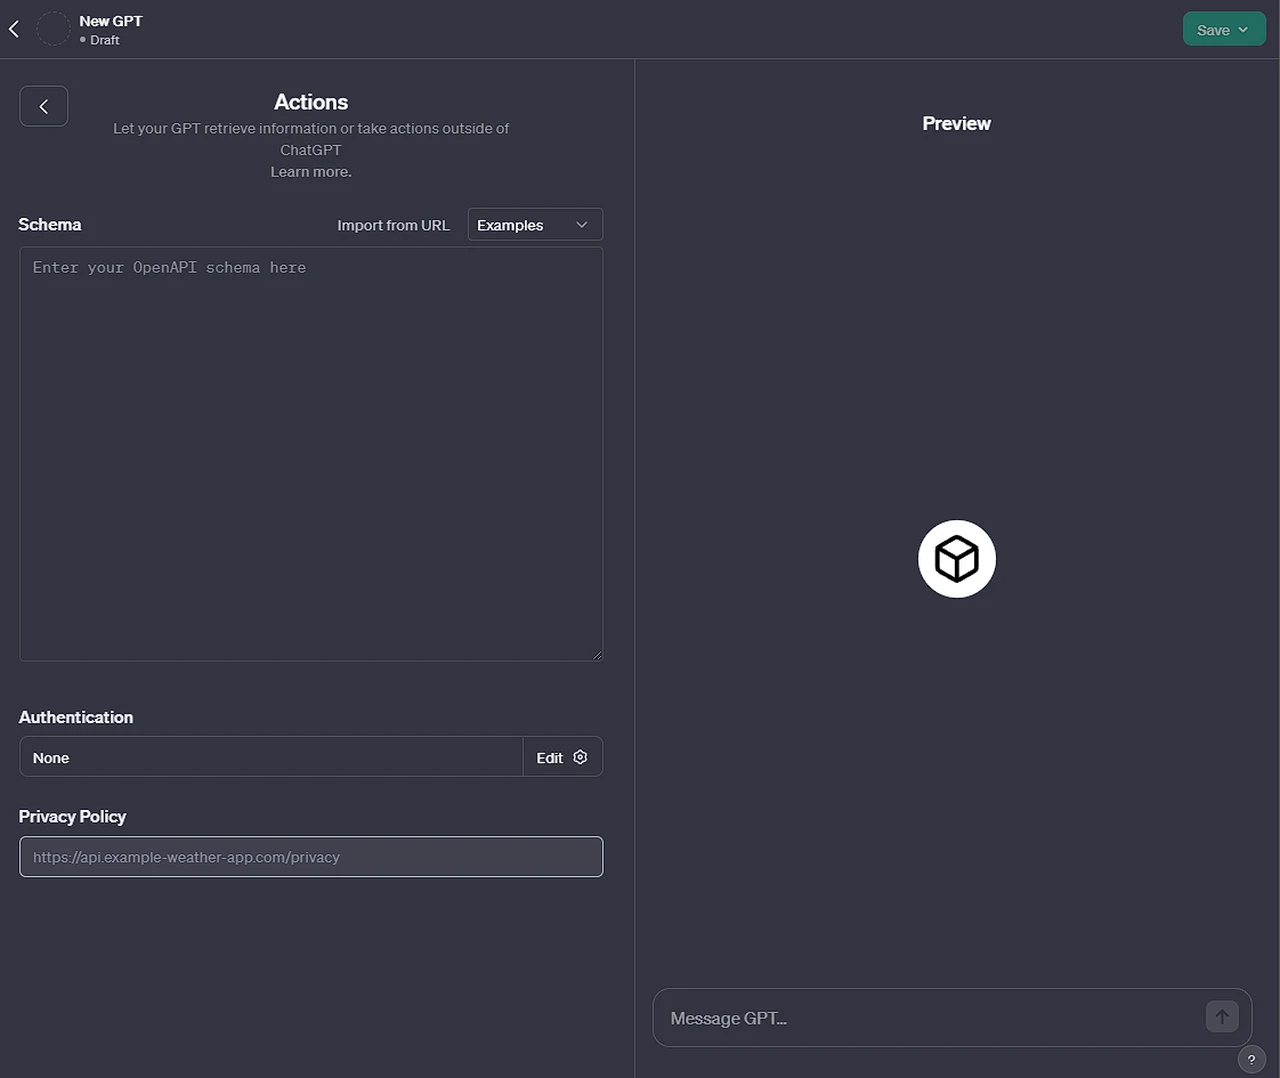
Once you start building your first GPT you can decide on three main areas that you can include in it for added functionality such as web browsing, file upload for data analysis and also Code Interpreter that lets your GPT run code. When enabled your GPT can analyze data work with files you’ve uploaded to mathematical calculations and more. Furthermore once you have set up your GPT you can then add “Actions” to make your workflows more complicated by retrieving information or taking actions outside of ChatGPT.
How to make GPTs
Quick Start Guide
- Make sure you have a subscription for either a ChatGPT Plus or ChatGPT Enterprise account
- Once subscribed go to the official https://chat.openai.com/gpts/editor (or click on “Explore” in the left menu and then “My GPTs”)
- Select “Create a GPT”
- In the Create tab, you can message the GPT Builder to help you build a new GPT. You can say something like, “Make a creative who helps generate visuals for new products” or “Make a software engineer who helps format my code.”
- To name and set the description of your GPT, head to the Configure tab. Here, you will also be able to select the actions you would like your GPT to take, like browsing the web or creating images.
- When you’re ready to publish your GPT, select “Publish” and share it with other people if you’d like.
Other articles you may find of interest on the subject of ChatGPT :
Getting Started with GPT Creation
To start making your very first GPT, navigate to the official GPTs editor or access it via “My GPTs” under the Explore tab. Here, you’re presented with the option to “Create a GPT.” This initial step leads you to the GPT Builder, a user-friendly interface that assists in the construction of your GPT. Imagine telling the Builder, “Make a creative assistant for designing new products,” or “Create a software engineer bot to format my code.” This flexibility is the cornerstone of GPTs, allowing for a wide array of functional applications.
Configuring Your GPT
The next critical phase is in the Configure tab. This is where you infuse your GPT with identity and purpose, assigning it a name and a description. It’s also where you select the actions your GPT will perform. These can range from web browsing to creating images, depending on your needs.
Publishing and Sharing Your GPT
Once your GPT is ready, the “Publish” option allows you to bring your creation to life. You can choose to keep it for personal use or share it with others, expanding its utility within your community or organization.

Advanced Customization Options
For those seeking a deeper level of customization, the GPT Editor offers advanced settings. These include:
- Image Integration: You can request the GPT Builder to generate an image for your GPT or upload one of your choice.
- Additional Instructions: This section is crucial for imparting detailed instructions or guidelines on the GPT’s behavior, functionalities, and constraints.
- Prompt Starters: These serve as conversation initiators, guiding users on how to interact with your GPT.
- Knowledge Base: Here, you can provide additional context and information for your GPT to reference, including content from uploaded files.
- New Capabilities: Enabling advanced functionalities like Web Browsing, DALL·E Image Generation, and Advanced Data Analysis, broadens the horizon of what your GPT can achieve.
- Custom Actions: By integrating third-party APIs and importing actions from an OpenAPI schema, you can further enhance the GPT’s capabilities.

The creation of a GPT is not just about programming an AI; it’s about breathing life into a personal digital assistant that can assist you with specific needs and objectives. Whether you’re a developer looking to streamline coding processes, a creative professional seeking a more streamlined way to create those monthly reports, or an educator aiming to enhance learning experiences, the power to create custom GPT AI models tailored to your exact needs is now at your fingertips.
Don’t forget OpenAI will be continually adding new features so you can expect the features and applications and what is capable using the GPTs to expand on a monthly or even a weekly basis. As always as soon as more features and tips and tricks are discovered we will keep you up to speed as always.
Filed Under: Guides, Top News
Latest timeswonderful Deals
Disclosure: Some of our articles include affiliate links. If you buy something through one of these links, timeswonderful may earn an affiliate commission. Learn about our Disclosure Policy.

