Categories
News

Build a virtual AI workforce using AutoGen and GPT-4

Build a virtual workforce of AI helpers using AutoGen and GPT-4

We have covered plenty of projects that have been created over the past few months using the new Microsoft AutoGen framework which was quietly rolled out to GitHub. offering a framework that enables the development of LLM applications using multiple agents, capable of communicating with each other to solve tasks. The beauty of AutoGen agents is that they are customizable, conversable, and seamlessly allow human participation. They can operate in various modes that employ combinations of LLMs, human inputs, and tools.

If you’ve ever been captivated by the idea of automating complex workflows using artificial intelligence, you will be pleased to know that AutoGen is at the forefront of this emerging landscape. Imagine a world where your projects are not just assisted by a single language model, but an entire team of specialized AI agents, conversing amongst themselves and executing tasks at an unprecedented scale. Intrigued? Let’s delve deeper into how you can build a virtual workforce of AI helpers using AutoGen and GPT-4.

“GPT-4, the latest milestone in OpenAI’s effort in scaling up deep learning. GPT-4 is a large multimodal model (accepting image and text inputs, emitting text outputs) that, while less capable than humans in many real-world scenarios, exhibits human-level performance on various professional and academic benchmarks.”

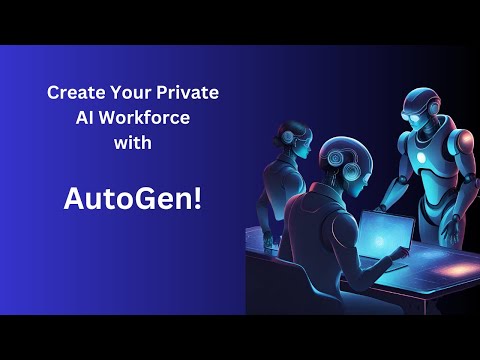
Team of AI agents working together

At the core of AutoGen lies its capability to simplify the orchestration, automation, and optimization of intricate workflows involving language models like GPT-4. While there are other contenders in this space—think MetaGPT or ChatDev—AutoGen stands out for its focus on multi-agent conversations. What this means is that you can have several agents, each programmed for specific roles or tasks, working in concert. Not only does this make the system more robust by offsetting individual limitations of single agents, but it also enables a level of customization that is hard to match.

Other articles we have written that you may find of interest on the subject of Microsoft’s AutoGen AI Agent framework :

Microsoft AutoGen AI agent framework

If you are wondering how to adapt this to suit your specific needs, AutoGen provides tools for customizing the conversational patterns of your agents. Whether you’re considering one-to-one, multi-agent, or even complex tree-like conversational topologies, it’s all within reach. You get to decide the number of agents involved and the degree to which they can converse autonomously. This is highly beneficial for applications requiring a diversity of conversational styles and structures, from customer service to project management and beyond.

AutoGen is versatile in its application, able to accommodate a multitude of use-cases across various sectors. Be it healthcare, finance, or retail, the framework has pre-built, working systems that can be adapted to different complexities and requirements. This is an invaluable asset for those wanting to integrate AI into specialized domains without reinventing the wheel.

In terms of technical infrastructure, AutoGen brings several advantages to the table. It offers enhanced performance tuning options, API unification, and caching functionalities. Advanced features like error handling, multi-config inference, and context programming are also part of the package. Essentially, you get a plethora of utilities to ensure that your virtual workforce performs optimally.

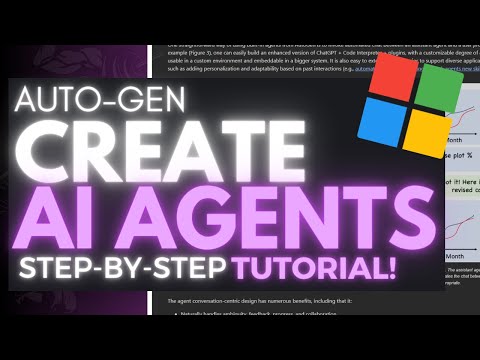
How to build a virtual AI workforce

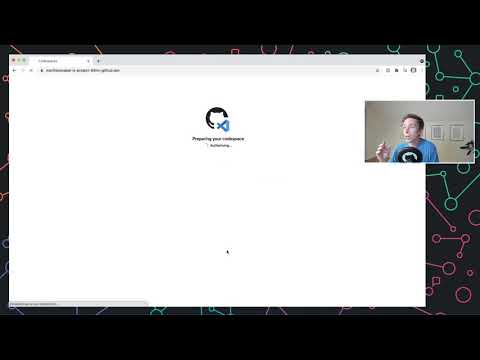
If you’re eager to dive in, the easiest entry point is through Github Codespace. Simply copy the sample OAI_CONFIG_LIST to the /notebook folder, rename it to OAI_CONFIG_LIST, and set the configurations as needed. From there, you’re all set to explore and experiment with the example notebooks. Full instructions on how to use Microsoft’s AutoGen and Codespaces can be found over on GitHub.

“Create a codespace to start developing in a secure, configurable, and dedicated development environment that works how and where you want it to.”

While automating tasks is compelling, there are instances when human intuition and expertise cannot be replicated by machines. Recognizing this, AutoGen is designed to seamlessly integrate human input and feedback into the system. You, or any other human user, can interact with the agents, guiding them towards better solutions or intervening when necessary.

So there you have it—an intricate yet user-friendly guide to creating a virtual team of AI helpers, effortlessly amalgamating the individual strengths of multiple agents into a coherent and efficient workforce. If you are invested in leveraging AI for complex problem-solving, AutoGen, coupled with GPT-4, offers a promising avenue to make this a reality.

Filed Under: Guides, Top News


Latest timeswonderful Deals

Disclosure: Some of our articles include affiliate links. If you buy something through one of these links, timeswonderful may earn an affiliate commission. Learn about our Disclosure Policy.

Categories
News

How to build a super small 4060 gaming PC

Worlds smallest 4060 gaming PC you can build yourself

Devyn Johnston has released a fantastic instructional video on how you can build your very own super small 4060 gaming PC. The video below shows the process of building one of the smallest 4060 gaming PCs possible in the Velka 3 case from Velkase which is available to purchase priced at $160 and is the smallest case with ITX length graphics card and internal power supply support at a volume of just 3.99 litre volume.

The latest Velka case revision 3.0 features a more eye-pleasing top appearance with a bottom PSU orientation, motherboard compatibility fixes, a more durable textured powdercoat, and full steel construction. Features include a 3.99 L volume (3.81 L internal), 182 cm² footprint, 37 mm CPU cooler clearance, it is compatible with the Flex ATX power supply, although not not compatible with SFX, and features 175 mm dual-slot graphics card compatible and 42 mm memory clearance and is Mini ITX compatible.

High-performance super small gaming PC

Building super small gaming PCs has become a popular trend for gamers who want high performance in a compact package, that can easily be  transported if needed. This build features an Intel i5 13400 CPU and 4060 GPU, a DDR5 system and DDR5 compatible motherboard, a 1TB m.2 SSD from Samsung, and 32GB of Corsair’s Vengeance DDR5 5600 memory. Together with aa Noctua L9A CPU cooler, a dual-slot single fan 4060 from Zotac for the GPU, a 600 W Flex ATX power supply, and the use of the Gkey Shadowcast 2 to enable the use of an iPad as a display.

Powering all these components is a 600 W Flex ATX power supply. This power supply offers enough power to run all the components smoothly, and its small form factor fits perfectly in the Vela 3 case.

The DDR5 system offers greater bandwidth and improved power efficiency compared to its predecessor, DDR4. For this build, 32GB of Corsair’s Vengeance DDR5 5600 memory is chosen. This high-performance memory kit will ensure that the gaming PC can handle any game or application thrown at it.

For storage, a 1TB m.2 SSD from Samsung is used. SSDs offer faster read and write speeds compared to traditional hard drives, which can significantly reduce game load times and improve overall system responsiveness. The m.2 form factor also saves space, which is crucial in a small form factor build like this.

Cooling is another crucial aspect of building a super small 4060 gaming PC. The Noctua L9A CPU cooler is chosen for this build due to its low-profile design and excellent cooling performance. Despite its small size, the Noctua L9A is capable of keeping the Intel i5 13400 CPU cool even under heavy load.

The Vela 3 case from Velkase is the home for all these components. Its sleek, compact design makes it an excellent choice for a small form factor build. Despite its size, the Vela 3 case can accommodate a dual-slot single fan 4060 from Zotac for the GPU, ensuring that the graphics card gets ample airflow for optimal performance.

Features revisions of the latest Velka 3 mini ITX case :

  • Textured powdercoat with improved scratch and fingerprint resistance
  • Better rubber foot adhesion
  • Full powdercoated galvanized steel construction
  • Symmetrical top vents when PSU is on the bottom
  • Motherboard compatibility fixes
  • Slightly fewer screws involved in assembly
  • Larger power button without LED
  • 5 mm optional side panel offset instead of 2/4 mm. Cleaner appearance when used

Building a super small 4060 gaming PC requires careful selection of components to ensure high performance in a compact package. The combination of the Intel i5 13400 CPU and 4060 GPU, DDR5 system and compatible motherboard, 1TB m.2 SSD, Corsair’s Vengeance DDR5 5600 memory, Noctua L9A CPU cooler, Vela 3 case, dual-slot single fan 4060 from Zotac, 600 W Flex ATX power supply, and Gkey Shadowcast 2 for iPad display integration, offers a powerful yet compact gaming PC that can handle any game or application with ease.

Image Credit: Devyn Johnston

Filed Under: Hardware, Top News


Latest timeswonderful Deals

Disclosure: Some of our articles include affiliate links. If you buy something through one of these links, timeswonderful may earn an affiliate commission. Learn about our Disclosure Policy.

Categories
News

Build your own ChatGPT Chatbot with the ChatGPT API


ChatGPT ChatBot

This guide is designed to show you how to build your own ChatGPT Chatbot with the ChatGPT API. Chatbots have evolved to become indispensable tools in a variety of sectors, including customer service, data gathering, and even as personal digital assistants. These automated conversational agents are no longer just simple text-based interfaces; they are increasingly sophisticated, thanks to the emergence of robust machine learning algorithms. Among these, ChatGPT by OpenAI stands out as a particularly powerful and versatile model, making the task of building a chatbot not just simpler but also far more effective than ever before.

For those who are keen on crafting their own chatbot, leveraging Python, OpenAI’s ChatGPT, Typer, and a host of other development tools, you’ve come to the perfect resource. This article aims to serve as an all-encompassing guide, meticulously walking you through each step of the process—from the initial setup of your development environment all the way to fine-tuning and optimizing your chatbot for peak performance.

Setting Up the Environment

Before you even start writing a single line of code, it’s absolutely essential to establish a development environment that is both conducive to your workflow and compatible with the tools you’ll be using. The tutorial video strongly advocates for the use of pyenv as a tool to manage multiple Python installations seamlessly. This is particularly useful if you have other Python projects running on different versions, as it allows you to switch between them effortlessly.

In addition to pyenv, the video also recommends using pyenv virtualenv for creating isolated virtual environments. Virtual environments are like self-contained boxes where you can install the Python packages and dependencies your project needs, without affecting the global Python environment on your machine. This is a best practice that ensures there are no conflicts between the packages used in different projects.

By taking the time to set up these tools, you’re not just making it easier to get your project off the ground; you’re also setting yourself up for easier debugging and less hassle in the future. Ensuring that you have the correct version of Python and all the necessary dependencies isolated within a virtual environment makes your project more manageable, scalable, and less prone to errors in the long run.

Initializing the Project

After you’ve successfully set up your development environment, the subsequent crucial step is to formally initialize your chatbot project. To do this, you’ll need to create an empty directory that will serve as the central repository for all the files, scripts, and resources related to your chatbot. This organizational step is more than just a formality; it’s a best practice that helps keep your project structured and manageable as it grows in complexity. Once this directory is in place, the next action item is to establish a virtual environment within it using pyenv virtualenv.

By doing so, you create an isolated space where you can install Python packages and dependencies that are exclusive to your chatbot project. This isolation is invaluable because it eliminates the risk of version conflicts or other compatibility issues with Python packages that might be installed globally or are being used in other projects. In summary, setting up a virtual environment within your project directory streamlines the management of dependencies, making the development process more efficient and less prone to errors.

Coding the Chatbot

Now comes the exciting part—coding your chatbot. The video explains how to import essential packages like Typer for command-line interactions and OpenAI for leveraging the ChatGPT model. The video also explains how to set up an API key and create an application object, which are crucial steps for interacting with OpenAI’s API.

Basic Functionality

With the foundational elements in place, you can start building the chatbot’s basic functionality. The tutorial employs Typer to facilitate command-line interactions, making it easy for users to interact with your chatbot. An infinite loop is introduced to continuously prompt the user for input and call the OpenAI chat completion model, thereby enabling real-time conversations.

Adding Memory to the Chatbot

One of the limitations of many basic chatbots is their inability to understand context. The tutorial addresses this by showing how to give your chatbot a “memory.” By maintaining a list of messages, your chatbot can better understand the context of a conversation, making interactions more coherent and engaging.

Parameter Customization

To make your chatbot more flexible and user-friendly, the video introduces parameter customization. Users can specify parameters like maximum tokens, temperature, and even the model to use. This allows for a more personalized chat experience, catering to different user needs and preferences.

Optimizations and Advanced Options

Finally, the video covers some nifty optimizations. For instance, it allows users to input their first question immediately upon running the command, streamlining the user experience. It also briefly mentions Warp API, a more polished version of the chatbot, which is free to use and offers advanced features.

Conclusion

Building a chatbot using Python, OpenAI, Typer, and other tools is a rewarding experience, offering a blend of coding, machine learning, and user experience design. By following this comprehensive tutorial, you’ll not only create a functional chatbot but also gain valuable insights into optimizing its performance and capabilities.

So why wait? Dive into the world of chatbots and create your own ChatGPT-powered assistant today! We hope that you find this guide on how to build your own ChatGPT Chatbot helpful and informative, if you have any comments, questions, or suggestions, leave a comment below and let us know.

Video Credit: warpdotdev

Filed Under: Guides, Technology News


Latest timeswonderful Deals

Disclosure: Some of our articles include affiliate links. If you buy something through one of these links, timeswonderful may earn an affiliate commission. Learn about our Disclosure Policy.

Categories
News

Build a personal AI assistant running on your laptop with LM Studio

build a custom personal AI assistant on your laptop

If you are interested in learning more about how you can easily create your very own personal AI assistant running it locally from your laptop or desktop PC. You might be interested in a new program and framework called LM Studio. LM Studio is a lightweight program designed to make it easy to install and use of local language models on personal computers rather than third-party servers. One of the key features of LM Studio is its user-friendly interface making it easy to manage a variety of different AI models depending on your needs all from one interface

Thanks to its minimalist UI and chatbot interface LM Studio has been specifically designed to provide users with an efficient and easy-to-use platform for running language models. This feature is particularly beneficial for users who are new to the world of large language models, as it simplifies the process of running these models locally. Which until a few months ago was quite a tricky undertaking to do but has now been simplified thanks to the likes of LM Studio and other framework such as Ollama and others.

How to run personal AI assistance locally on your laptop

One of the standout features of LM Studio is the ability for users to start their own inference server with just a few clicks. This feature offers users the ability to play around with their inferences, providing them with a deeper understanding of how these models work. Additionally, LM Studio provides a guide for choosing the right model based on the user’s RAM, further enhancing the user experience.

Other articles we have written that you may find of interest on the subject of large language models :

Benefits of running LLM is locally

The benefits of running large language models on your laptop or desktop PC locally :

  • Hands-On Experience: Working directly with the model code allows you to understand the architecture, data preprocessing, and other technical aspects in detail.
  • Customization: You have the freedom to tweak parameters, modify the architecture, or even integrate the model with other systems to see how it performs under different conditions.
  • Debugging and Profiling: Running models locally makes it easier to debug issues, profile computational performance, and optimize code. You can get a clear picture of how resources like memory and CPU are utilized.
  • Data Privacy: You can experiment with sensitive or proprietary datasets without sending the data over the network, thus maintaining data privacy.
  • Cost-Efficiency: There’s no need to pay for cloud-based machine time for experimentation, although the upfront hardware cost and electricity can be significant.
  • Offline Availability: Once downloaded and set up, the model can be run without an internet connection, allowing you to work on AI projects anywhere.
  • End-to-End Understanding: Managing the entire pipeline, from data ingestion to model inference, provides a holistic view of AI systems.
  • Skill Development: The experience of setting up, running, and maintaining a large-scale model can be a valuable skill set for both academic and industrial applications.

Another significant feature of LM Studio is its compatibility with any ggml Llama, MPT, and StarCoder model on Hugging Face. This includes models such as Llama 2, Orca, Vicuna, Nous Hermes, WizardCoder, MPT, among others. This wide range of compatibility allows users to explore different models, expanding their knowledge and experience in the field of large language models.

LM Studio also allows users to discover, download, and run local LMS within the application. This feature simplifies the process of finding and using different models, eliminating the need for multiple platforms or programs. Users can search for and download models that are best suited for their computer, enhancing the efficiency and effectiveness of their work.

Ensuring privacy and security is a key focus of LM Studio. The program is 100% private, using an encryption method and providing a clear statement that explains how it uses HTTP requests. This feature provides users with the assurance that their data and information are secure.

User feedback and continuous improvement are key components of LM Studio’s approach. The program has a feedback tab where users can provide constructive feedback and request features. This feature ensures that LM Studio continues to evolve and improve based on user needs and preferences. Furthermore, LM Studio has a Discord where users can get more information, provide feedback, and request features.

LM Studio is a comprehensive platform for experimenting with local and open-source Large Language Models. Its user-friendly interface, wide range of compatibility, and focus on privacy and security make it an ideal choice for users looking to explore the world of large language models. Whether you’re a seasoned professional or a beginner in the field, LM Studio offers a platform that caters to your needs.

Filed Under: Guides, Top News


Latest timeswonderful Deals

Disclosure: Some of our articles include affiliate links. If you buy something through one of these links, timeswonderful may earn an affiliate commission. Learn about our Disclosure Policy.

Categories
News

Build a custom programable keypad to control your tech

Build a custom programable keypad to control your tech

If you find you have lots of different remote controls to perhaps turn on or adjust your lighting, desk, PC or other tech gadgetry on your desktop. It might be time to build a custom programmable keypad to control all your gadgets from a single remote. This approach consolidates multiple controllers into a single, programmable device, enhancing efficiency and making it much easier for you to access everything and program each button as required.

The idea of programming a single remote to control all devices is a game-changer. Imagine having a single controller that can switch HDMI and USB inputs, control desk height, manage lights, toggle the microphone, manage windows, and even launch the web browser and file explorer. This not only simplifies the user experience but also enhances productivity by reducing the time spent on managing different controllers.

The problem with multiple separate controllers for a desk setup is that they can be inconvenient to use individually. Each device, from the monitor to the standing desk, the lights to the microphone, has its own controller. This not only clutters the workspace but also interrupts workflow as one has to reach for different controllers for different functions.

Build a custom programable keypad to control your tech

The addition of macros to the keypad for window management is another significant feature. Macros allow for quick window resizing and launching of most-used applications, further enhancing efficiency.

 Previous articles we have written that you might be interested in on the subject Raspberry Pi  mini PC :

Wireless or wired

Possible requirements for the single controller are that it should be wireless, have a long battery life, be quick and responsive, and be simple and intuitive to use. To meet these requirements, an RF wireless number pad from Velocifire was used in the example in the video although you could use any other to suit your needs. You could also make it wired if preferred connecting it to your PC for power using a USB cable.

The USB dongle for the keypad was plugged into a Raspberry Pi Pico flashed with an HID remapper firmware. The Raspberry Pi Pico mini PC sends commands to the desktop PC, which are received by an AutoHotkey script. This setup ensures quick and responsive button presses, fulfilling one of the key requirements of the controller. For controlling lights and the TV screen, the system sends a post request to a home assistant server. This integration of smart devices with the Home Assistant server further simplifies the control process.

Non-smart devices were made smart with a USB power switch and a USB switch. This innovative approach ensures that all devices, smart or not, can be controlled from the single controller. One of the challenges faced was the reverse engineering of the standing desk controller for integration with the Home Assistant. However, overcoming this challenge was crucial to ensure that the standing desk could be controlled from the single controller.

Benefits of a programmable custom keypad

  • Customization: You can tailor the keypad layout, key functions, and even the form factor to your specific needs. Whether you’re optimizing for gaming, coding, or specific workflows, customization can lead to increased productivity.
  • Cost-Efficiency: While commercial keypads can be expensive, using a Raspberry Pi Pico is relatively inexpensive. This allows you to achieve high functionality at a lower cost.
  • Learning Experience: Building the keypad yourself offers hands-on experience with hardware, firmware, and potentially software development. This can be valuable both for educational purposes and for enhancing technical skills.
  • Wireless Flexibility: Implementing wireless functionality makes the device portable and easier to integrate into various setups. You’re not constrained by cables, and you can use the device more freely.
  • Expandability: Once your base platform is built, you can easily update the firmware to add more features or adapt to changing needs. You’re not stuck with a static product; you can modify it over time.
  • Open Source: Using open-source software and hardware for your keypad allows you to benefit from community support and to contribute back to that community with your own improvements or adaptations.
  • Energy Efficiency: The Raspberry Pi Pico is known for its low power consumption, which is especially beneficial for wireless devices that are battery-powered.
  • Speed and Responsiveness: The device’s performance can be optimized since you control the firmware. This could be crucial for applications requiring low latency, such as gaming or real-time control systems.

Creating a wireless macro pad to control a computer desk setup is an innovative solution to the problem of multiple separate controllers. It simplifies the user experience, enhances productivity, and paves the way for a more efficient and intuitive workspace. Despite some limitations, the potential for future improvements makes this an exciting development in the realm of technology.

Filed Under: DIY Projects, Top News


Latest timeswonderful Deals

Disclosure: Some of our articles include affiliate links. If you buy something through one of these links, timeswonderful may earn an affiliate commission. Learn about our Disclosure Policy.

Categories
News

Build your own AI agent workforce – step-by-step guide

Build your own AI agent workforce - step-by-step guide

Building your very own AI workforce of virtual helpers or AI agents is a lot easier than you might think. If you have a computer running over 8 GB of RAM you can easily install your own personal AI using Ollama in just a few minutes. Once installed Ollama allows you to easily install a wide variety of different AI models however you will need more RAM to run the larger models such as Llama 2 13B. As large language models tend to consume a significant amount of RAM. Although if you would like to get more advanced and improve the performance of your LLM this can be done using StreamingLLM.

Microsoft’s AutoGen has emerged as a powerful tool for creating and managing large language model (LLM) applications. This innovative framework enables the development of LLM applications using multiple agents that can converse with each other to solve tasks. The agents are customizable, conversable, and seamlessly allow human participation. They can operate in various modes that employ combinations of LLMs, human inputs, and tools.

AutoGen was developed by Microsoft with the aim of simplifying the orchestration, automation, and optimization of complex LLM workflows. It maximizes the performance of LLM models and overcomes their weaknesses. This is achieved by enabling the building of next-gen LLM applications based on multi-agent conversations with minimal effort.

Build a team of AI assistants using AutoGen

Watch the video below to learn more about building your very own AI workforce to help you power through those more mundane tasks allowing you to concentrate on more important areas of your life or business. Follow the step-by-step guide kindly created by the team over at WorldofAI.

Previous articles you may find of interest on Microsoft’s AuotGen  framework :

One of the key features of AutoGen is its ability to create multiple AI agents for collaborative work. These agents can communicate with each other to solve tasks, allowing for more complex and sophisticated applications than would be possible with a single LLM. This multi-agent conversation capability supports diverse conversation patterns for complex workflows. Developers can use AutoGen to build a wide range of conversation patterns concerning conversation autonomy, the number of agents, and agent conversation topology.

AutoGen’s architecture is highly customizable and adaptable. Developers can customize AutoGen agents to meet the specific needs of an application. This includes the ability to choose the LLMs to use, the types of human input to allow, and the tools to employ. Furthermore, AutoGen seamlessly allows human participation, meaning that humans can provide input and feedback to the agents as needed.

AutoGen features

  • Multi-Agent Conversations: Enables development of LLM applications using multiple, conversable agents that interact to solve tasks.
  • Customizable and Conversable Agents: Agents can be tailored to fit specific needs and can engage in diverse conversation patterns.
  • Human Participation: Seamlessly integrates human inputs and feedback into the agent conversations.
  • Versatile Operation Modes: Supports combinations of LLMs, human inputs, and tools for varied use-cases.

Performance and optimization

  • Workflow Simplification: Eases the orchestration, automation, and optimization of complex LLM workflows.
  • Performance Maximization: Utilizes features to overcome LLM weaknesses and maximize their performance.
  • API Enhancement: Provides a drop-in replacement for openai.Completion and openai.ChatCompletion with additional functionalities like performance tuning and error handling.

Application scope

  • Diverse Conversation Patterns: Supports a variety of conversation autonomies, number of agents, and topologies.
  • Wide Range of Applications: Suits various domains and complexities, exemplified by a collection of working systems.

Technical details

  • Python Requirement: Needs Python version >= 3.8 for operation.
  • Utility Maximization: Optimizes the use of expensive LLMs like ChatGPT and GPT-4 by adding functionalities such as tuning, caching, and templating.

Installation of AutoGen requires Python version 3.8 or higher. Once installed, AutoGen provides a collection of working systems with different complexities. These systems span a wide range of applications from various domains and complexities, demonstrating how AutoGen can easily support diverse conversation patterns.

AutoGen also enhances the capabilities of existing LLMs. It offers a drop-in replacement of openai.Completion or openai.ChatCompletion, adding powerful functionalities like tuning, caching, error handling, and templating. For example, developers can optimize generations by LLM with their own tuning data, success metrics, and budgets. This feature helps maximize the utility out of the expensive LLMs such as ChatGPT and GPT-4.

In terms of its potential, AutoGen stands out in comparison to other AI agents. Its ability to support diverse conversation patterns, its customizable and conversable agents, and its seamless integration of human participation make it a powerful tool for developing complex LLM applications.

Microsoft’s AutoGen is a groundbreaking tool that enables the creation and management of large language model applications. Its multi-agent conversation framework, customizable and conversable agents, and seamless integration of human participation make it a powerful tool for developers. Whether you’re looking to optimize the performance of existing LLMs or create complex, multi-agent applications, AutoGen offers a robust and flexible solution.

AutoGen is an open-source, community-driven project under active development (as a spinoff from FLAML, a fast library for automated machine learning and tuning), which encourages contributions from individuals of all backgrounds.

Filed Under: Guides, Top News


Latest timeswonderful Deals

Disclosure: Some of our articles include affiliate links. If you buy something through one of these links, timeswonderful may earn an affiliate commission. Learn about our Disclosure Policy.

Categories
News

How to build an AI chatbot in just 5 mins

How to build a chat bot in just 5 mins using Watson X and Neural Seek

The evolution and application of artificial intelligence (AI), particularly in the realm of chatbots, has seen a significant transformation over the years. This transformation has been largely driven by the shift from rule-based systems to learning-based systems, with the introduction of large language models (LLMs) and platforms like Watson X Assistant.

This article will delve into the evolution of AI, the role of LLMs, the introduction of Watson X Assistant, and the use of generative AI in enhancing user experiences. In the video below IBM provide a demonstration of setting up Watson X Discovery and Neural Seek, and how these tools can be integrated to improve the accuracy of responses.

The age of AI has brought about significant advancements in various fields, including customer support and code generation. Early AI tools, however, had limitations, such as the inability to understand context or learn and improve independently. Initial chatbots were rule-based, developed on predefined rules or scripts, limiting their capacity to what was programmed into them. This meant that their responses were often rigid and lacked the ability to understand and respond to nuanced queries.

How to build a chat bot in just 5 mins

The evolution of AI-based chatbots has seen a shift from these rule-based systems to learning-based systems. These systems leverage machine learning and deep learning to improve natural language understanding. Large Language Models (LLMs) are at the forefront of this shift. LLMs use vast amounts of data, deep learning algorithms, neural networks, and natural language processing techniques to generate human-like responses. This has significantly improved the capabilities of chatbots, allowing them to understand and respond to a wider range of queries with greater accuracy.

Learn more about building your very own AI chatbots using the latest AI tools at your disposal :

One such platform that leverages the power of LLMs is Watson X Assistant, a conversational AI platform designed to build and deploy AI-powered chatbots. Watson X Assistant not only uses LLMs but also incorporates generative AI to transform user experiences by delivering more intelligent, human-like responses. This has significantly improved the user experience, making interactions with chatbots more engaging and productive.

To further enhance the capabilities of Watson X Assistant, it can be integrated with Neural Seek, a search and natural language generation system. Watson X Discovery is used to store data, which can be tested and improved upon. The Neural Seek extension can be added to Watson X Assistant to enhance its dialog capabilities. This extension can be configured to seek answers from Neural Seek when it can’t match any phrases to those set up in Watson X Assistant. This ensures that the chatbot can provide accurate responses even to complex or nuanced queries.

The integration of Neural Seek with Watson X Assistant significantly improves the accuracy of responses. The Neural Seek extension can help chatbots carry out conversations as effectively as humans due to its generative AI capabilities. This means that chatbots can not only understand and respond to a wide range of queries but also learn and improve over time, making them more effective and efficient.

The evolution and application of AI in chatbots have seen significant advancements with the introduction of learning-based systems, LLMs, and platforms like Watson X Assistant. The integration of Watson X Assistant with Neural Seek further enhances these capabilities, delivering more accurate and human-like responses. For those interested in learning more about leveraging generative AI with Watson X Assistant, more information can be found on the IBM website. This marks an exciting era in the field of AI, with the potential for further advancements and improvements in the years to come.

Filed Under: Guides, Top News


Latest timeswonderful Deals

Disclosure: Some of our articles include affiliate links. If you buy something through one of these links, timeswonderful may earn an affiliate commission. Learn about our Disclosure Policy.

Categories
News

Using Arduino and Elasticsearch to build search powered projects

Arduino and Elasticsearch

The integration of Elasticsearch with Arduino for IoT applications is a significant development in the field of technology. This partnership between Elastic, a leading platform for search-powered solutions, and Arduino, a popular open-source electronics platform, has opened up new possibilities for IoT applications. The collaboration has resulted in the development of an Elasticsearch client library that runs on Arduino modules, enabling direct communication with an Elasticsearch server from an Arduino board.

The partnership between Arduino and Elastic has been instrumental in the development of this new technology. The collaboration has led to the creation of a simple Elasticsearch client library that can run on Arduino modules. This library allows for direct communication with an Elasticsearch server from an Arduino board, thus simplifying the process of data transmission and storage.

IoT applications

The potential of this technology was tested by developing an IoT device that sends temperature data to Elastic Cloud every five minutes. This innovative application of the technology could lead to a solution that provides the current average temperature from all sensors within a 5 km radius, thanks to Elasticsearch’s geo features. This geolocation-based temperature reporting could be particularly useful in industries such as agriculture, where real-time temperature data can be crucial.

What is Elasticsearch?

Other articles you may find of interest on the subject of  Arduino :

Arduino Pro’s industrial-grade offerings, including Cloud services, software libraries, and a variety of components, are compatible with the entire Arduino ecosystem. This compatibility ensures that the integration of Elasticsearch with Arduino can be seamlessly implemented across a wide range of IoT applications.

A use case was designed for a company managing multiple IoT devices in Italy, with each device sending sensor data to Elastic Cloud. The company can manage any scale of IoT devices without needing a dedicated infrastructure, and can adjust internal parameters of each device based on the average temperature of neighboring devices within a 100 km range. This use case demonstrates the scalability and flexibility of the integrated system.

Search powered projects

Elasticsearch provides multiple feedback using search features like filtering, aggregation, multi-match, geospatial, vector search (kNN), semantic search, and machine learning. These features can be used to analyze and interpret the data collected from the IoT devices, providing valuable insights and facilitating decision-making.

Kibana, the UI available in Elastic Cloud, allows for the creation of a dashboard to monitor data from all devices, including geo-data representation on a map. This visualization tool can be particularly useful in monitoring and managing multiple IoT devices.

Setting up Elastic Cloud is a straightforward process. Users need to create an account, choose the size of the Elasticsearch instances they want to use, and generate an API key of Elasticsearch. An index needs to be created to store data from the Arduino boards, including temperature values, device position using geo-location, a device identifier name, and a timestamp. This preparation of the Elasticsearch index for data storage is a crucial step in the integration process.

The integration of Elasticsearch with Arduino for IoT applications is a significant development that offers numerous benefits. The partnership between Arduino and Elastic, the development of the Elasticsearch client library for Arduino modules, and the potential for geolocation-based temperature reporting are just a few of the many exciting aspects of this integration. With the use of Elasticsearch’s search features for feedback and Kibana for data monitoring and visualization, this integration promises to revolutionize the way we manage and utilize IoT devices.

Source &  Image Source :  AB

Filed Under: DIY Projects, Top News


Latest timeswonderful Deals

Disclosure: Some of our articles include affiliate links. If you buy something through one of these links, timeswonderful may earn an affiliate commission. Learn about our Disclosure Policy.

Categories
News

Homeowner’s Financial Toolkit: Saving and Financing a Flat Build

Owning a home is a lifelong dream. The sense of security and accomplishment that comes with homeownership is unparalleled. However, turning this dream into reality often requires careful planning, saving, and financial management. This becomes even more critical when you decide to build a flat or apartment from scratch. In this article, we will explore the homeowner’s financial toolkit, discussing essential steps and strategies for saving and financing a flat build.

Define Your Budget

The first step in your homebuilding project is to set a realistic budget. Building a flat is a significant financial commitment, and understanding your financial limitations is crucial. Begin by assessing your current financial situation, including your income, savings, and existing debts. This will help you determine how much you can comfortably allocate to your flat build without straining your finances.

Remember to account for all potential expenses, including construction costs, permits, utilities, landscaping, and interior furnishing decorations. Have a clear picture of the entire project’s cost to avoid surprises down the road. Consider working with a financial advisor or a homebuilder to provide you with valuable insights into estimating your budget accurately.

Establish an Emergency Fund

Before embarking on a flat build, ensure you have an adequate emergency fund in place. This fund should cover unexpected expenses, such as construction delays, unforeseen repairs, or personal emergencies that could affect your ability to finance the project. Experts recommend that you should have at least three to six months’ worth of living expenses set aside as an emergency fund.

Save for a Down Payment

Saving for a substantial down payment is essential when financing your flat build. A larger down payment reduces the amount you need to borrow, potentially lowering your monthly mortgage payments and interest costs. Aim for a down payment of at least 20% of the total project cost. If you can save more, it will give you greater financial flexibility and may even help you secure a better mortgage rate.

Check your Ownership Eligibility

Eligibility for owning a flat plays a pivotal role in financing the construction of your flat. Prospective flat owners typically need to meet certain criteria, including a stable source of income to cover mortgage payments, satisfactory credit history to secure a loan, and compliance with the legal age for property ownership.

Eligibility criteria vary with different jurisdictions. In Singapore for example, it is important to check your HFE status to understand your loan and grant eligibility. Meeting these eligibility requirements enhances your chances of obtaining favorable financing terms, such as lower interest rates and longer repayment periods. Ultimately, financial eligibility is a crucial starting point for individuals embarking on the journey to construct and own a flat.

Explore Mortgage Options

Once you’ve determined your budget and saved for a down payment, it’s time to explore your mortgage options. There are various types of mortgages available, each with its terms and interest rates. You should research and compare the different lenders to find the best mortgage that suits your needs and financial situation.

Consider whether a fixed-rate or adjustable-rate mortgage is more suitable for you. Fixed-rate mortgages offer stability, with consistent monthly payments, while adjustable-rate mortgages may have lower initial rates but come with the risk of fluctuating payments over time.

Secure Pre-Approval

Before starting the construction process, it’s advisable to secure pre-approval for your mortgage. Pre-approval not only gives you a clearer understanding of your borrowing capacity but also demonstrates your seriousness to potential builders and sellers. Sellers are often more inclined to work with buyers who have pre-approval because it indicates that financing is likely to be secured.

Consider Green Financing

If you’re interested in eco-friendly building practices or energy-efficient upgrades, explore green financing options. Some lenders offer special programs or incentives for environmentally sustainable projects. These initiatives can not only help you save on energy costs in the long run but also reduce your environmental footprint.

Plan for Post-Construction Expenses

Don’t forget to account for post-construction expenses, such as property taxes, homeowners’ association fees, and ongoing maintenance and repairs. These costs can add up over time, so include them in your long-term financial planning.

Conclusion

Building a flat or apartment from scratch is a significant financial undertaking, but with careful planning and the right financial toolkit, it’s a goal that can be achieved. Remember that homeownership is not just about building a flat; it’s also about managing your finances effectively over the long term. By following these steps and staying financially disciplined, you can turn your dream of owning a flat into a reality and enjoy the security and satisfaction that comes with it.

Categories
News

Why You Should Register a Company Today to Build Wealth

Financial security and wealth creation are frequent goals for many people in today’s fast-paced society. While there are numerous approaches to achieving this goal, one option that frequently goes overlooked is registering a company. This essay will look into the secrets of wealth creation through company formation and why it’s a step worth taking.

Introduction

Building wealth entails more than just conserving money; it also entails making your money work for you. Starting and registering your own business is an often-overlooked route to financial success. In this post, we’ll reveal the keys of accumulating wealth through company formation and why it’s a step you should take seriously.

The Influence of Entrepreneurship

Entrepreneurship is one of the most important secrets to wealth creation. By incorporating, you become your own boss and have the ability to start a business that generates income and has the potential to develop to incredible heights.

Protection from Liability

When you form a corporation, you gain the benefit of limited liability protection. This means that your personal assets are distinct from those of your corporation. Your personal money is protected in the event of corporate defaults or legal challenges.

Tax Benefits

Companies frequently benefit from tax breaks that can dramatically lower your tax bill. These tax breaks can help you keep more of your earnings, allowing your wealth to expand more quickly.

Obtaining Funding

Registered businesses have easier access to numerous financial sources, such as loans, investments, and grants. This financial support can help you expand your business and, as a result, increase your wealth.

Developing Business Credit

The formation of a corporation allows you to establish and build a solid corporate credit profile. This credit may be necessary for obtaining finance and favourable terms for your commercial ventures.

Asset Management Made Simple

When you have a registered corporation, managing your assets becomes easier. You can keep your personal and corporate accounts separate, making it easier to keep track of your costs, investments, and revenue.

Creating Long-Term Wealth

Company ownership has the ability to generate long-term prosperity. The worth of your firm might increase dramatically as it grows and becomes more profitable.

Opportunities for Diversification

A registered corporation might provide options for diversification. You can diversify your risk and increase your chances of financial success by exploring several businesses or investment opportunities.

Exit Techniques

When you register a company in HK, you have the freedom to design your exit strategy. Whether you wish to sell your firm for a large profit or pass it on to future generations, company ownership allows for wealth transfer.

Leaving a Legacy

Building a successful business might allow you to leave a lasting legacy for your family and community. It is a way to not only secure your riches but also to constructively contribute to society.

How to Form a Corporation

To register a corporation, you must first choose a business structure, then register with the necessary government authorities and complete legal requirements. Seek professional assistance to ensure a successful registration process.

Common Errors to Avoid

While forming a corporation is a positive start, there are certain frequent blunders to avoid, such as inadequate planning, bad financial management, and ignoring legal compliance. Be conscientious in your commercial endeavours.

Conclusion

Finally, the keys to wealth creation are typically found in the entrepreneurial spirit and the desire to form a company. It provides limited liability protection, tax advantages, funding access, and a slew of additional advantages that can hasten your wealth-building path.

FAQs

1. Is it appropriate for everyone to register a company?

No, it is dependent on your financial objectives and company objectives. Consult a financial counsellor to see if this is the appropriate step for you.

2. What is the ideal business structure for accumulating wealth?

The ideal structure is determined by your unique circumstances. Common possibilities include limited liability companies (LLCs), corporations, and partnerships.

3. How long does it take to set up a business?

The timeline varies depending on the region and type of business. It could take anywhere from a few weeks to a few months on average.

4. Can I form a corporation if I have a tiny business idea?

Yes, many successful firms began as modest businesses. Your business can grow over time with devotion and work.

5. What are the ongoing duties after incorporating a business?

Annual reporting, tax filings, and compliance with relevant rules are ongoing tasks. It is critical to remain informed and organised.

Consider company formation to unlock the possibilities for wealth generation. It’s a calculated decision that can lead to financial security, long-term wealth, and the realisation of your entrepreneurial ambitions.

Tags: Build Wealth