It was expected that Intel‘s LGA1851 socket would house the tech giant’s next-gen Arrow Lake chips, but for now it seems the company might have another use for it.
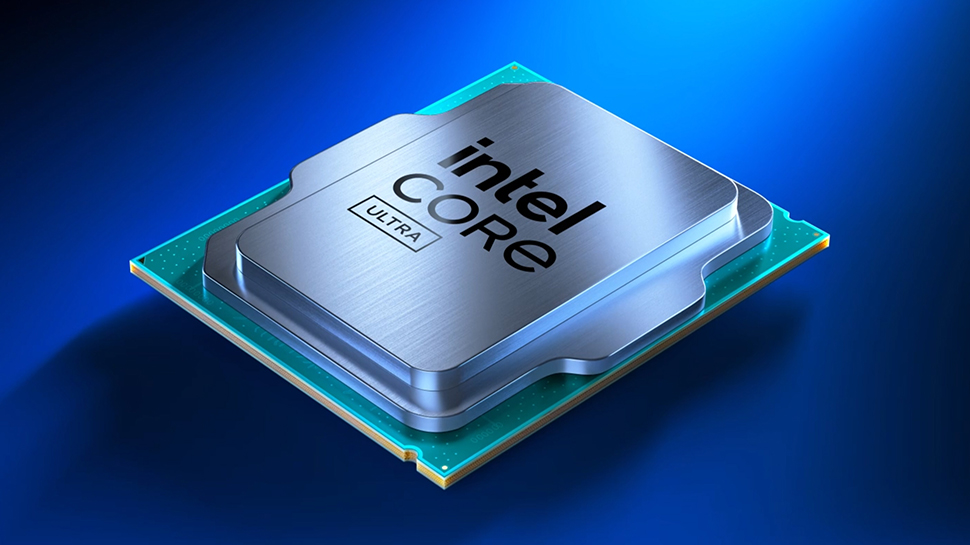
At the recent Embedded World conference, Intel unveiled its Meteor Lake-PS architecture for edge systems, the first Core Ultra processor on an LGA socket.
The new SoC design, which integrates the Intel Arc GPU and a neural processing unit, is aimed at enabling generative AI and handling demanding graphics workloads for sectors such as retail, education, smart cities, and industry.
Ultra low TDP
Intel says its Core Ultra processors offer up to 5.02x superior image classification inference performance compared to the 14th Gen Core desktop processors. Applications for the PS series include GenAI-enabled kiosks and smart point-of-sale systems in physical retail stores, interactive whiteboards for advanced classroom experiences, and AI vision-enhanced industrial devices for manufacturing and roadside units.
The new chips are designed with low-power, always-on usage scenarios in mind. This is evident from the fact that none of these chips have a Thermal Design Power higher than 65W. There’s even a low-power version with a 15W rating (12-28 configurable TDP).
Intel says “Moving away from the conventional setup where Intel Core desktop processors are combined with discrete GPUs, the PS series of Intel Core Ultra processors introduce an innovative integration of GPU and AI Boost functionalities directly within the processors, alongside the flexible LGA socket configuration. Offering four times the number of graphics execution units (EUs) compared to their predecessors in the S or desktop series, these processors deliver a powerful alternative for handling AI and graphics-heavy tasks. This design not only negates the necessity for an additional discrete GPU, thereby lowering costs and simplifying the overall design process, it also positions these processors as the go-to solution for those prioritizing efficiency alongside enhanced performance.”
The desktop LGA1851 socket can support 5600MHz DDR5 memory, two PCIe Gen4 SSDs, and four Thunderbolt 4 devices. There is a notable absence of chipset support for Thunderbolt 5, Wi-Fi 7, and PCIe Gen5, however.
Sign up to the TechRadar Pro newsletter to get all the top news, opinion, features and guidance your business needs to succeed!
The new desktop Intel Meteor Lake chips are not expected to be available until the fourth quarter of 2024. This timeline also coincides with the expected launch of Arrow Lake desktop CPUs, according to the latest industry rumors.
If you’ve been eyeing earbuds but were put off by the steep price tag, now would be the perfect time to pick up a set. The premium earbuds, normally $300, are down to a record low price of $230 on Amazon, for a savings of $70. This deal only applies to the earbuds in black. The Sony WF-1000XM5 earbuds were released in summer 2023 and brought major upgrades over the previous model. They boast the best noise cancellation and call quality of Sony’s earbuds lineup, and have built-in Alexa support.
Sony
The Sony WF-1000XM5 earbuds are our top pick for for this year. They’re more comfortable than the WF-1000XM4s, being 25 percent smaller and 20 percent lighter for a much better fit. The charging case, too, is more compact than its predecessor. In terms of sound quality, they further improve upon the already impressive capabilities of the 1000X line. The speakers are slightly larger than the previous model’s, and their Dynamic Driver X drivers make for rich, clear sound and bassier bass. Sony WF-1000XM5 scored an 87 in last year.
The earbuds offer Adaptive Sound Control, which will automatically adjust your noise cancellation settings to work best for the environment you’re in or activity you’re doing. You may want active noise cancellation on when you’re working from home, but switch to transparency mode when you’re going out for a run. You’ll need to enable location services for this feature using Sony’s Headphones Connect app.
The app allows for other types of customization as well, like changing the controls assigned to the touch sensors on the earbuds. Sony’s WF-1000XM5 earbuds also support multipoint Bluetooth connections, which means you can pair them with two devices at the same time. There’s a Speak-to-Chat mode that pauses audio when it senses you’ve started a conversation, and an equalizer in the app where you can adjust your sound settings.
Here’s a quandary… Say you’ve enjoyed driving an EV for a few years and your lease is ending, or you own an EV and it’s time for an upgrade. You’re already familiar and comfortable living with a battery EV and you’re not going back to internal combustion – not even a hybrid. Alternatively, you’re new to EVs, but you’ve done your homework, and you’re ready to take the plunge and get a battery EV.
What are the must-have features to future-proof your next EV purchase? It’s 2024. There are more battery EV choices than ever before, and access to fast and reliable public charging networks is improving rapidly. This is a particularly difficult question to answer if, like me, you’re driving a Tesla. You love your car and the ecosystem, but you can’t stand Elon and don’t want to support him by giving Tesla your money.
As a two-time Tesla owner, I know I’m biased. But regardless of Elon’s antics, I think that Tesla still delivers the best EV experience on the market today – especially in North America – and the company still makes some of the best EVs when it comes to technology, efficiency, packaging, and value. The Model Y’s popularity worldwide can attest to that. So I asked myself, how close can I get to driving a Tesla without driving a Tesla?
A real-world range of more than 275 miles
Mini Cooper SE (Image credit: TechRadar / Myriam Joire)
The average American drives fewer than 40 miles a day – I know. So, assuming you can charge at home every night, a small, light, and affordable battery EV with a range of about 100 miles makes perfect sense. Look no further than the Mini Cooper SE, upcoming Mini Cooper EV, or new Fiat 500e. Even a Nissan Leaf would get the job done. Problem is, if you live in an apartment like me, you might not be able to charge at home.
Also, the US (and Canada) are big countries. It’s not unusual for folks in North America to travel long distances, be it a few times a year or several times a month. Your EV should be able to replace your internal combustion vehicle without limitations, and that’s why range matters. And I’m not talking about EPA range here, but range measured in real-world conditions taking weather, topology, and driving style into account.
I’ve been doing EV road trips all over the West Coast of the US for six years now with the two Model 3s I’ve owned back-to-back, and in my experience, a real-world range of 275-350 miles is the sweet spot – and something you should consider for your next EV. But range isn’t the only ingredient for worry-free long-distance travel in a battery EV. Charging infrastructure is also critical, which brings us to the next requirement.
Supercharger access and charging rates above 200kW
(Image credit: Tesla)
In the US right now, Tesla’s Supercharger network counts more than 21,800 DC fast chargers. Of those, over 15,000 support charging at up to 250kW (400V), and are open to non-Tesla cars – currently Ford and Rivian EVs via an adapter, with support for more manufacturers to come. The second largest DC fast charging network in the US is Electrify America with over 4,000 chargers, some capable of charging at 350kW (800V).
Get the hottest deals available in your inbox plus news, reviews, opinion, analysis and more from the TechRadar team.
But there’s more to charging on the road than the number of compatible DC fast chargers available for your EV. Up-time is another issue. Based on multiple surveys, the Supercharger network is about 99% reliable, while 23% of chargers from other DC fast charging networks are down at any given time. Worse yet, these chargers are often out of commission for multiple days but are still listed as functional by charging networks.
Obviously, charger reliability is important, but so are charging rates. EVs don’t charge at a constant rate. Assuming the batteries are pre-conditioned (pre-heated for the fastest charging performance), EVs tend to charge faster below 80% charge, and fastest between 30-60% charge. As such, the Chevy Bolt, which supports 55kW charging, will charge much slower than the Hyundai IONIQ 5 which peaks at 230kW.
How much of a difference does this make? The Chevy Bolt will take 70 minutes to charge from 20-80%, while the IONIQ 5 (AWD) will take 20 minutes to charge from 20-80%, and both offer a similar range (about 260 miles EPA). Also, the IONIQ 5 will only charge this fast using a 350kW (800V) charger. So, basically, your next EV should have access to Tesla’s Supercharger network and support 200kW or faster charging.
A software defined vehicle
Rivian (Image credit: Rivian)
Another thing to consider for your next EV is whether it’s a full SDV (software defined vehicle) or not. I’ve written about this before, but basically, SDVs are cars with functions and features that are primarily enabled through software and can improve over time via OTA (over-the-air) software updates. Tesla was the first to popularize SDVs, followed by other EV startups (Rivian, Lucid, and Polestar) and Chinese manufacturers.
While most EVs support OTA software updates, not all are full SDVs. This means that not all hardware components in these cars can be updated OTA. EVs from legacy car manufacturers mostly fall into this category, although things are improving rapidly. It’s one thing for your infotainment system to receive updates OTA, it’s another thing for your BMS (battery management system) to be updated OTA.
Why should you care? Because with SDVs, the manufacturer controls the hardware and software directly. A vehicle that’s designed to function as one cohesive system is more likely to deliver a good user experience. In other words, the reason so many cars don’t provide a good user experience today is because they’re basically a random assortment of hardware and software designed by various suppliers.
Level 2+ ADAS
Polestar 3 interior (Image credit: Polestar)
One essential feature your next EV should include is a proper Level 2+ ADAS (advanced driver assistance system). The good news is that basic Level 2 functionality is pretty much standard on most EVs these days. Level 2 ADAS is defined by the SAE (Society of Automotive Engineers) as partial driving automation (including automatic steering, acceleration, and braking) that requires the driver’s full attention at all times.
Ideally, you’ll want an EV equipped with Level 2+ ADAS, where the car mostly drives itself – like changing lanes and taking exits by itself based on the current navigation route – but requires the driver to regularly touch the steering wheel and look at the road. Some of these systems – like GM’s Super Cruise and Ford’s BlueCruise – are even hands-off (but still eye-on) on certain sections of road, conditions permitting.
Direct-to-consumer sales
This is not tthe experience you’re going for (Image credit: Getty Images)
Ask around, and it’s pretty clear that most of the time, buying or leasing a car from a dealership is a major PITA. What if you could purchase or lease your EV directly from the manufacturer – like you buy an iPhone from Apple – online or in a store, with a set price? That’s exactly what Tesla, Rivian, and Lucid offer, and having experienced it myself, it’s something you should seek for your next EV purchase.
So there you have it – five must-have features to future-proof your next EV purchase. If, like me, you’re someone who prefers cars over crossovers, the EVs closest to meeting these five conditions are the Rivian R3/R3x, Lucid Air Pure, and Polestar 4. Ford’s Mustang Mach-E GT, VW’s ID.Buzz, Kia’s EV6, Hyundai’s IONIQ 5 and 6, and Volvo’s EX30 are also in the running if you’re willing to compromise a little.
Best Buy this weekend has a big sale on Apple MacBooks and iPads, including new all-time low prices on the M3 MacBook Air, alongside the best prices we’ve ever seen on MacBook Pro, iPad, and more. Some of these deals require a My Best Buy Plus or My Best Buy Total membership, which start at $49.99/year. In addition to exclusive access to select discounts, you’ll get free 2-day shipping, an extended 60-day return window, and more.
Note: MacRumors is an affiliate partner with Best Buy. When you click a link and make a purchase, we may receive a small payment, which helps us keep the site running.
9th Gen iPad
Starting with the cheapest iPad in this sale, you can get the 64GB Wi-Fi 9th generation iPad at $249.99, down from $329.00. My Best Buy Plus/Total members can also get a low price on the 256GB Wi-Fi model this weekend at $379.99.
10th Gen iPad
For a more recent model, Best Buy has the 64GB Wi-Fi 10th generation iPad at $349.00, which is an all-time low price at $100 off. You’ll find every model of the 10th generation iPad on sale at a record low price during this sale. This includes all Wi-Fi and cellular tablets, in all colors.
13-inch M2 MacBook Air
Every model of the 2022 13-inch MacBook Air is available for $150 off this weekend at Best Buy. The 256GB model is on sale for $849.00 and the 512GB model is available for $1,049.00. These deals beat the previous prices by about $50, and you don’t need to be a My Best Buy Plus or Total member to get them.
15-inch M2 MacBook Air
The 256GB M2 15-inch MacBook Air is priced at $999.00, down from $1,299.00. You can also get the 512GB M2 model on sale at $1,199.00, down from $1,499.00. Across the board these are the best prices we’ve ever seen on the M2 MacBook Air.
15-inch M3 MacBook Air
For the latest M3 model of the 15-inch MacBook Air, you can get the 8GB RAM/256GB SSD 15-inch M3 MacBook Air for $1,149.00, down from $1,299.00. The 8GB RAM/512GB SSD model is available for $1,349.00, down from $1,499.00, and the 16GB RAM/512GB SSD model is available for $1,549.00, down from $1,699.00. These deals require a My Best Buy Plus/Total membership.
Note: You will need a My Best Buy Plus/Total membership to see this low price.
M3 MacBook Pro
These deals are focused on the 14-inch models of the MacBook Pro, and only a select few are being discounted for My Best Buy Plus/Total members. If you don’t have a membership, you can still get these computers for solid second-best prices this weekend.
Note: My Best Buy Plus/Total membership required to see final deal price.
Our full Deals Roundup has more information on the latest Apple-related sales and bargains.
April 13, 2005: The tech world gets excited when a sketchy rumor suggests Apple is building a tablet computer.
The Chinese-language report claims Quanta will build a 15-inch touchscreen tablet PC with detachable keyboard. Apple will supposedly ship the device in the first quarter of 2006. Things don’t turn out quite like that, but the rumor offers the first hint about Apple’s secret iPad project.
The first iPad rumor?
The idea of developing a tablet fascinated Apple co-founder Steve Jobs for a long time, although he denied it when asked by journalist Walt Mossberg in May 2003.
“We have no plans to make a tablet,” Jobs said at the time.
However, a tablet appealed to Jobs’ love of minimalism, since it was basically a screen with nothing else.
The iPad: Inspired by Alan Kay’s Dynabook
Alan Kay’s Dynabook concept was for a personal computer simple enough for children to use. Photo: Alan Kay
In particular, Jobs was inspired by the Dynabook, a concept dreamed up in 1968 by Xerox PARC (and later Apple) engineer Alan Kay.
During Jobs’ absence from Apple, the company experimented with tablet-like mobile devices in the form of the Newton MessagePad (which Jobs ultimately canceled upon his return to Cupertino).
However, by the early 2000s, Apple began working on the iPad, or at least thinking a lot more about the tablet computer form factor.
In March 2004, the company surveyed select customers, claiming it was considering relaunching the Newton. In actuality, Apple was gathering data about demand for future mobile devices.
Apple patent shows iPad-like ‘electronic device’
An Apple patent from 2004 shows designs for an iPad-like device. Photo: USPTO/Apple
That exact same month, the company filed a design patent application for an “electronic device” that looks virtually identical to the iPad that shipped a few years later (with the exception of the smaller display, which looked more like the iPad mini). The patent application listed both Jobs and Apple design chief Jony Ive as inventors.
Apple ultimately opted to develop a touch interface smartphone, the iPhone, before revisiting the iPad concept. It’s not clear whether there was any truth to the Quanta rumor about a possible tablet computer. Perhaps Apple was sourcing components it was unable to put together in its Industrial Design lab back in Cupertino.
Still, this rumor got a lot of people buzzing about a possible Apple tablet back in 2005. Another five years passed before Apple introduced the iPad. However, this rumor revealed definite excitement about what Apple might do with a tablet.
What was the first report you heard about the iPad? Leave your comments below.
The Jabra Elite 10 is the Danish brand’s flagship premium wireless earbuds. They’re its most expensive pair of headphones to date, borrowing smarts from the company’s headset and hearing aid businesses to help it deliver incredibly clear call quality and effective Active Noise Cancellation.
As its most advanced pair of buds yet, the Elite 10s pack in a lot of premium features, like Dolby Atmos with head tracking and multipoint pairing, in a unique new oval design that sits on the outside of your ears, making them incredibly comfortable – even when wearing them for long periods.
But being a premium pair of buds means that the Elite 10 has a lot of competition among the best wireless earbuds. When compared to rivals like Sony‘s, Bose’s or Apple‘s top earbud offerings, it falls short of being the absolute best for sound quality. That said, it’s priced slightly less than its closest competitors so if you want comfortable spatial audio while on the go and are not bothered by best-in-class ANC and hi-res audio quality, the Elite 10 could be a great alternative.
Jabra Elite 10 review: Price and release date
(Image credit: Future)
Announced on August 31, 2023
Became available to buy in September 2023
Priced at $249 / £229 / AU$379
Jabra first announced the Elite 10 back in August 2023 alongside a more fitness-focused model called the Jabra Elite 8 Active, which sells for $199 / £199 / AU$329. As its flagship earbuds, the Elite 10 costs more than its sporty offering at $249 in the US, £229 in the UK and AU$379 in Australia. This means it’s also more expensive than its predecessor’s, the Elite 7 Pro, launch price of $199 / £199 / AU$299.
The jump in cost means the Elite 10s are going head-to-head with the biggest players, but they undercut the competition in the premium market on price. They’re less than both Sony’s WF-1000XM5 ($299 / £259 / AU$499) and the Technics EAH-AZ80 ($299 / £259 / AU$499) that launched at the end of 2023. And they are squarely in line with two premium releases from 2022: Apple’s AirPods Pro 2 and the Bose QuietComfort Earbuds 2, which cost $249 / £229 / AU$399 and $199 / £199 / AU$299, respectively, at the time of writing.
Jabra Elite 10 review: Specs
(Image credit: Future)
Swipe to scroll horizontally
Drivers
10mm dynamic driver
Battery life
Up to 21 hours
Weight
5.7g each bud
Waterproofing
IP57
Codecs
AAC; SBC
Connectivity
Bluetooth 5.3
Jabra Elite 10 review: Features
(Image credit: Future)
Immersive Dolby Atmos with head tracking
ANC is decent but not best-in-class
Crystal clear call quality
Since launching its first pair of wireless earbuds in 2016, the Elite Sport, Jabra has released seven generations of buds, and the Elite 10 is its most advanced yet. It’s the step-up from the Elite 7 Pro, which had targeted the lower to mid-range market but still had premium features like ANC, adjustable EQ settings, an IP57 rating and wireless charging. The Elite 10 builds upon all of its predecessor’s features, and Jabra has a few more tricks up its sleeve to make sure it can hold its own among the market’s premium offerings.
The newest feature to be included in the buds is also a first for Jabra earbuds: support for Dolby Atmos with head tracking. This makes the buds have a wider soundstage when turned on and listening to Atmos content that’s like hearing each instrument in a track as if they’re placed all around you. When head tracking is turned on, this virtual soundstage moves with you but I found this to have a slight delay when you readjusted your head to a new position. I found it worked better when watching a show or movie rather than listening to music. Conveniently, you can toggle both spatial audio and head tracking on and off in the Jabra Sound+ app as well as adjust the HearThrough mode, Advanced ANC, EQ settings and more.
Outside of the app, you can also control the Jabra Elite 10 by pressing the buttons on the buds themselves. Pressing the surface of the left bud will rotate through HearThrough and ANC, while pressing the right can pause and play a song (you can switch to different variations of this in the app). Tapping the right bud twice skips tracks, while holding down either button increases (right) and decreases (left) the volume. Holding down both at the same time also activates pairing mode.
As for other features, there’s also in-ear detection, automatic muting settings, Bluetooth Multipoint pairing for listening to two devices at the same time, voice assistant support that lets you control your buds with voice commands and FindMy for when you’ve misplaced them. And while the Elite 10’s six hours of battery life (21 hours with the case) does outlast Bose’s QuietComfort Ultra Earbuds, it’s beat by Sony’s WF-1000XM5s.
One of the biggest standout features for me is the Elite 10’s exceptionally clear call quality, especially while out and about, and that’s down to the six mics inside them. Jabra says that the external mics are active all the time, while the internal mics activate when wind is detected. The extra mics make the Elite 10’s call quality far better than the AirPods Pro 2, which only has two mics. Jabra’s Advanced ANC is also on by default during calls to help cancel out unwanted background noises, which is a feature that was improved on in a March 26 software update (Jabra claims that the update helps cancel background noises twice as easily). There’s also an adjustable sidetone setting so you can hear your voice more, which is not something we see a lot of.
Just like Apple’s Adaptive Noise Control, Jabra’s Advanced ANC uses scanning tech and noise leakage detection to automatically adjust the ANC to your surroundings. It’s the brand’s most advanced ANC mode, and is claimed to deliver two times more noise cancellation than its standard ANC. And it does work, cancelling out the screeching banshees along the Northern Line of the London Underground. However, compared to the Sony WF-1000XM5 and Bose QuietComfort Ultra Earbuds, it doesn’t quite match up.
Features score: 4 / 5
Jabra Elite 10 review: Sound quality
(Image credit: Future)
A balanced listen, with some minor adjustments
No hi-res support (only AAC and SBC)
Immersive Dolby Atmos tracks
There’s a strong confidence to the Jabra Elite 10’s sound performance. If I were to summarize it in one word, I’d say it was effectively balanced. From the trebles to the mid-range and through to bass, the sound is tonally steady when streaming via Apple Music on a FiiO M11S (keep in mind there’s only support for AAC and SBC).
But when listening with a keener ear to a more bass-heavy track like Black Eye by Allie X, there was a lack of oomph that I’m used to hearing. This was easily improved upon by adjusting the EQ settings but for an out of box listen, the Elite 10 wasn’t completely ready to go. I found this again when testing the bud’s treble. Again, tracks like Rains Again by Solji benefited from a slight EQ adjustment to really come alive for me personally.
As a whole, I’d say the earbud’s audio quality is still generally great, it’s just not exceptional, especially when compared to the likes of the AirPods Pro 2, which offers a more dynamic listen. Even with smaller drivers, the Sony WF-1000XM5 can deliver an “agile, meaty and fun listen” that’s packed with enthusiasm. If you’re an audiophile looking for flawless hi-res sound quality, I’d recommend looking to its rivals for a more detailed listen.
Sound quality score: 3.5 / 5
Jabra Elite 10 review: Design
(Image credit: Future)
Proprietary ‘ComfortFit’ technology
Ergonomic, uniquely designed earpieces
Jabra found during the research and development of its latest earbuds range – the Elite 10 and Elite 8 Active – that comfort was the most valued feature by most people. A survey conducted by the company saw 47% of participants valued comfort over all else, with sound quality and battery life coming next. For this reason, Jabra has developed what it calls ‘ComfortFit’ technology, which is a new type of unique oval-shaped design.
Jabra calls it “EarGels” and the best way I can describe the semi-open fit is that instead of sitting completely inside your ear canals – like the in-ear monitors in our best wired headphones guide – the buds sit in the outside of your ear, snugged up inside the middle part of your ear. Jabra says it scanned 62,000 ears to get the unique shape and the results are effective, as they’re some of the comfiest earbuds I’ve worn to date (the silicon is softer than the plastic used in the AirPods Pro 2).
The design of the buds’ earpieces is similar to that of the Sony WF-1000XM5, which we’ve found to fit most people – and the same is true for the Elite 10s. The only time I briefly had trouble with the fit was while out, when I could feel them coming loose from walking around and moving my head, but a quick readjust made them feel secure again.
Aside from the unique oval shaped buds, the Elite 10s have a simple design that you can personalize by choosing from one of five different colors, including cocoa, cream, black, matte black and titanium black. The case is slightly bulkier than the likes of the AirPods Pro 2 but this is quickly outweighed by the softer materials used for the buds. The Elite 10s also don’t have poky stems that dig into the bottom of your ear, making them a lot more comfortable to wear for longer periods of time.
Design score: 5 / 5
Jabra Elite 10 review: Value
(Image credit: Future)
Cheaper than premium rivals
ANC and sound quality can be beaten
There are trade-offs when it comes to earbuds. If you want ANC, don’t expect flawless sound quality. If you want a portable earbud design, then they’re not going to be as comfortable as a pair of over-ear headphones. And so it goes without the Elite 10.
The ANC is by no means the best in the business (instead we’d recommend looking at the Bose QuietComfort Ultra Earbuds) but the comfort is the best I’ve experienced in a while and the call quality was far better than the AirPods Pro 2 I tested them against. The sound performance is also not going to beat the Technics EAH-AZ80 but if you value other features like spatial audio and a good control app more highly, the Jabra Elite 10 offers a great middle ground.
Value score: 4 / 5
Should I buy the Jabra Elite 10?
(Image credit: Future)
Swipe to scroll horizontally
Attributes
Notes
Score
Features
Wide-ranging premium features that work and give more all-round control.
4/5
Sound quality
A sonically balanced performance but it’s not best-in-class.
3.5/5
Design
A unique oval design that allows for a supremely comfortable fit.
5/5
Value
Undercuts the current leaders in the premium earbuds market.
4/5
Buy it if…
Don’t buy it if…
Jabra Elite 10 review: Also consider
Swipe to scroll horizontally
Header Cell – Column 0
Jabra Elite 10
AirPods Pro 2
Sony WF-1000XM5
Price
$249 / £229 / AU$379
$249 / £229 / AU$399
$299 / £259 / AU$499
Drivers
10mm dynamic drivers
11mm dynamic drivers
8.4mm dynamic drivers
Active Noise Cancellation
Yes
Yes
Yes
Battery life
Up to 27 hours with case
Up to 30 hours with case
Up to 24 hours with case
Weight
5.7g each bud
5.3g each bud
4.2g each bud
Waterproofing
IP57
IP54
IPX4
Codecs
AAC; SBC
AAC; SBC
SBC; AAC; LDAC; LC3
Connectivity
Bluetooth 5.3
Bluetooth 5.3
Bluetooth 5.3
How I tested the Jabra Elite 10
(Image credit: Future)
Tested for more than two weeks and compared to AirPods Pro 2
Streamed music from Apple Music, Spotify and Deezer
iPhone 13, MacBook Pro and FiiO M11S as source players
I tested the Jabra Elite 10s for more than two weeks, during which time I alternated between connecting them to my phone, laptop and a digital audio player. I used them mostly at home to listen to music, make phone calls and watch the odd show, but also took them out with me while commuting to test the ANC.
To test the sound quality, I listened to a playlist that we test earbuds with at TechRadar. I did this with both the ANC on and off. In addition to music, I also listened to podcasts and watched a YouTube video to see how the audio quality compared between sources.
To keep my overall judgement of the earbuds fair, I also conducted a blind listening test, comparing them to the AirPods Pro 2 while streaming music via two iPhones on Apple Music and Spotify simultaneously.
Apple’s hardware roadmap was in the news this week, with things hopefully firming up for a launch of updated iPad Pro and iPad Air models next month while we look ahead to the other iPad models and a full lineup of M4-based Macs arriving starting later this year.
We also heard some fresh rumors about iOS 18, due to be unveiled at WWDC in a couple of months, while we took a look at how things are going with the iPhone 15 Pro now that it’s halfway through its flagship lifecycle, so read on below for all the details on these stories and more!
Macs to Get AI-Focused M4 Chips Starting in Late 2024
The report says that the MacBook Pro and iMac lines will be the first to be updated with the M4 series of chips later this year, while other models like the MacBook Air, Mac mini, Mac Studio, and Mac Pro are expected to be updated with M4 series chips throughout 2025.
Gurman said the chips are “designed to highlight artificial intelligence” capabilities on the Mac.
New iPads Likely to Launch During Second Week of May
It’s been a bit over six months since the iPhone 15 lineup came out in September, and MacRumors videographer Dan Barbera has been using an iPhone 15 Pro Max sans case since launch. Over on our YouTube channel, Dan did a long-term review to demo how his phone has held up and his thoughts on the Action button, battery life, and camera features.
If you’re an iPhone 15 Pro owner, let us know how your battery life is holding up, whether you’re regularly using the Action button, and anything else you’ve found interesting about your experience with Apple’s latest high-end flagship phone!
At least two new color options are rumored for the lower-end iPhone 16 and iPhone 16 Plus models, including Purple and White, while the Pro models could gain new Space Black and Rose Gold titanium finishes.
iOS 18 May Feature All-New ‘Safari Browsing Assistant’
One of the new generative AI features rumored to be coming to the iPhone with iOS 18 could be a browsing assistant in Safari, according to backend code discovered on Apple’s servers.
While no specific details about the browsing assistant are known, the feature could allow Safari to better compete with other AI-infused web browsers available on the iPhone, such as Microsoft Edge and Arc Search.
The MacRumors Show: Apple Shortcuts and iOS 18 ft. Matthew Cassinelli
Matthew Cassinelli, one of the minds behind Workflow, joined Dan and Hartley on this week’s episode of The MacRumors Show to talk Apple Shortcuts and potential improvements and AI features coming to the app in iOS 18.
Each week, we publish an email newsletter like this highlighting the top Apple stories, making it a great way to get a bite-sized recap of the week hitting all of the major topics we’ve covered and tying together related stories for a big-picture view.
Setting up a new Mac is an experience in itself. But once you finish your initial setup, you should change these Mac system settings for a better experience. These five easy tweaks to default Mac system preferences will speed up your workflow and save you time.
Irrespective of whether you are a new or long-time Mac user, below are five settings to change on your Mac. Keep reading or watch our latest video.
Change these Mac system settings now
The initial Mac setup process only covers the basics, like moving over all your data from your old computer to your new one, and ensuring you signed into your Apple account. But there are a lot more Mac system settings and options you can play around with. This includes turning off unwanted features and customizing some key elements of macOS for a better experience.
Table of contents: 5 Mac system settings to change
1. Turn off True Tone
Like iPhones and iPads, modern Macs come with True Tone support. With True Tone turned on, your Mac will automatically change the display’s color, warmth and intensity based on the ambient light in your room. This will reduce eye strain and ensure that the on-screen content appears natural.
On paper, True Tone sounds like an impressive feature. However, once you start using your Mac daily, you might not like the True Tone experience. Personally, I deactivate it on any new Mac. I find it makes the display look too warm.
True Tone on a Mac only sounds good on paper. Screenshot: Rajesh/CultOfMac
Here’s how you can turn off True Tone on your Mac:
Open System Settings on your Mac and select Displays from the left sidebar.
2. Change Mac trackpad settings and gestures to suit your needs
If you just started using a new MacBook, you should customize the trackpad’s behavior. It’s a key way you interact with your Mac, and your preferences should drive the settings you choose.
By default, you must press down on your MacBook’s trackpad to register a click — the same behavior as on a Windows laptop. But there’s a better option: You can set it to substitute a quick tap on the trackpad’s glass surface for a click. Just enable the relevant option first.
Play around with the trackpad options on your Mac. Screenshot: Rajesh/CultOfMac
Here’s how to do it:
Open System Settings on your Mac and navigate to Trackpad from the sidebar.
Enable the Tap to click toggle.
Once you’ve changed this preference in your Mac system settings, you can tap once or twice with a finger to register a single or double-click. Besides this, there are plenty of Mac trackpad gestures you should learn. The Trackpad options window provides an overview of all of them, alongside some customization options.
3. Add more items to the Control Center for quick changes to your Mac system preferences
Your Mac utilizes a Control Center, just like your iPhone or iPad. If you find yourself using your Mac’s Control Center only sparingly, consider customizing the modules it contains to increase its usefulness. The Control Center provides quick access to some commonly used Mac settings, which you likely use daily, helping you save precious time.
If you own a MacBook, for instance, you can customize the Control Center to show the remaining battery percentage. (Then you can hide this item from your Mac’s menu bar to free up precious space there.) Other functional modules you can add to the Control Center include Focus modes, multi-user switching, screen mirroring options, and a Stage Manager toggle that lets you turn Apple’s alternative desktop manager on and off.
Customize the Control Center in macOS to get the most out of it. Screenshot: Rajesh/CultOfMac
You can find the Control Center customization options in System Settings > Control Center. Oh, and if you want to access the Control Center quickly, use the keyboard shortcut fn + C.
4. Add AirDrop to Finder’s toolbar
Do you frequently use AirDrop to share files from your Mac to other Apple devices? You can add a direct AirDrop shortcut to the Finder’s toolbar to speed up the process. This will save you a few clicks — and precious time.
Add an AirDrop shortcut to Finder’s toolbar for easy file sharing. Screenshot: Rajesh Pandey/CultOfMac
Here’s how to set it up:
Open a new Finder window on your Mac.
Navigate to View > Customize Toolbar from the menu bar at the top.
Drag and drop the AirDrop shortcut to your desired location in the Finder’s toolbar.
Then, the next time you want to share a file using AirDrop from your Mac, click on the file in the Finder. Then click on the AirDrop option from the Finder toolbar to bring up the list of devices available nearby.
5. Change settings for the Mac Dock
As a Mac user, you undoubtedly rely heavily on the Dock to open and switch between apps. By default, the Dock sits at the bottom of your Mac’s display. However, you can customize it to your heart’s liking. To do so, open your Mac’s System Settings and select Desktop & Dock from the sidebar.
From there, you should first change your Mac’s Dock size and magnification level to suit your preferences. Then, use the Position on screen option to move the Dock to the left or right of the display. I prefer to keep it on the left of my MacBook’s display.
Additionally, enable the Automatically hide and show the Dock toggle. This will free up precious screen space by automatically hiding the Dock when unnecessary. To bring up the hidden Dock, move your mouse to its position.
You also can customize the action when you double-click a window’s title bar. By default, it will zoom, but you can set it to minimize the window instead.
In the same menu, you will find some Desktop and Stage Manager-related customizations. To stop macOS Sonoma from flashing your desktop — a new feature that some people love but others hate — change the Click wallpaper to reveal desktop setting to Stage Manager.
Customize the Mac’s Dock to your heart’s content. Screenshot: Rajesh/CultOfMac
Out of the box, the macOS Dock houses all your frequently used apps, such as FaceTime, Messages, Safari and more. If you prefer a minimalistic experience, remove the unwanted apps from the Dock. You can instead access them from the Applications folder or Mission Control.
Right-click on a Dock item to quickly access some everyday actions. Screenshot: Rajesh/CultOfMac
For the apps in the Dock, you can right-click on many of them to access their commonly used actions. For example, you can favorite, repeat or toggle shuffle in the Music app directly from the right-click menu.
More Mac pro tips and how-tos
After you change these settings, check out more of our tips and how-tos that will help you customize your Mac system preferences.
The E10s is Eureka’s mid-range robot vacuum, offering every feature you need. Its vacuuming and mopping capability is complimented by a bagless self-emptying dust station, real-time mapping, and customizable cleaning schedules.
The vacuum strength can be adjusted to suit the debris that needs picking up, but even at the strongest 4,000Pa of suction, there was still litter left behind. Freshly dropped crumbs and dirt were generally fine, but more stubborn walked-in dirt couldn’t be captured. The noise at this level of suction also becomes a problem, especially if you’re trying to relax at the same time or make sure the children stay asleep. This lack of high-end performance means you’ll still need one of the best vacuum cleaners for those deeper cleans, though generally speaking no robotic cleaner can ever live up the the best vacuum cleaners in terms of suction power.
The E10s took a while to map my house, but once it was finished, it was able to predictably find its way around each room without too much trouble. As with most vacuums of this type, getting into corners was a little tricky, although the rotating dual brushes helped extend the capture range.
At the end of a clean, the E10 found its way back to its charging station and emptied its contents. It did this reliably and without any mess spilling out onto the floor. Unfortunately, the vacuum was rarely able to deposit the full contents of its clean into the base station. This resulted in the need for fairly regular maintenance cleaning to keep everything running smoothly. The base station itself looks great, with a clear perspex front, enabling users to see whether it needs emptying without having to tamper with it, though some may prefer vacuum debris to be left unseen.
(Image credit: Future)
The mop pad feels like a half-hearted attempt at providing a premium feature. In essence, all it is doing is running a wet cloth along the floor behind the vacuum. The app allows you to control how much water it uses, something you’ll need to be conscious of with hardwood floors. The mop was able to clean up fresh spills but couldn’t push through deeper stains. I don’t particularly mind this, as any mop that excels at this is likely to risk damaging the top layer of the floor.
The mop automatically lifts when it’s working in a ‘no mop zone’ which means the vacuum can move between surfaces without the user having to remove or insert the mop pad. That being said, the pad does attract a lot of unwanted dirt when traveling across carpets, which substantially limits its effectiveness when it then moves on to a hard floor.
Despite these small setbacks, the E10s is still a fantastic mid-range robot vacuum that will keep your house clean and tidy. At only $699, you’ll get a largely effective robot vacuum, which will only require you to get out a standard vacuum cleaner or mop when performing deep cleans.
Where is it available? Available in the US and Australia
The Eureka E10s costs $699.99 / AU$1,099, and you can buy it in the US at various retailers, including Amazon and Walmart. The E10 is also available in Australia. There are no plans at the moment for a UK release.
This price point puts it firmly in the middle of the market between the super-budget options and premium alternatives. For the price, you’ll get a fantastic all-rounder robot vacuum cleaner that includes a mop pad for basic mopping capabilities. Its bagless technology means owners will also avoid the cost of replacement bags, making this an even more affordable option.
The Eufy Clean X9 Pro is a little more expensive, but delivers better mopping performance. If mopping is important to you, then the Ecovacs DEEBOT T20 Omni is another great option. If you want one of the best robot vacuums that excel at everything, then check out the Roborock S8 Pro Ultra for $1,599 / AU$2,699.
Value score: 4.5 out of 5
Eureka E10s robot vacuum specs
Swipe to scroll horizontally
Here are the Eureka E10s specifications
Watt:
55 Watts
Suction power
4,000pa
Speeds
Gentle, Quiet, Standard, Turbo
Bin volume
0.2L for Robot vacuum; 2L for station dust cup
Battery life
180 minutes
Filtration
Yes
Noise volume
65Db (vacuum)
Mop water volume
Not specified
Water levels
Dry, Low, Standard, High
Mapping
Yes
Obstacle avoidance
Yes
Base
9.87″x7.1″x17.4 in
Smart support
App and voice activation
Tools
None
Weight
17.6lbs
Eureka E10 robot vacuum review: design & features
Bagless Self-Emptying Dust Station
2-in-1 Vacuum and Mop System
Multi-Level Cleaning
The Eureka E10s vacuum and base station are fairly compact and were well packaged inside a relatively small box. Having unboxed everything, I proceeded to plug the device in, download the app, and connect the two, which took no more than 10 minutes. After leaving the device to charge for a few hours, it was ready to map my house.
The robot vacuum is a beautiful round shape made of premium-quality powder-coated dark grey plastic. The color and material will help to keep the case looking great and free from scuff marks compared to white plastic alternatives.
Image 1 of 2
(Image credit: Future)
(Image credit: Future)
At 13.8 x 13.8 x 3.8 inches, it is a little larger than I expected, but it really looks the part. However, it is on the taller side of the robot vacuum spectrum, so it’s worth considering if there will be enough clearance room for the E10s to venture beneath lower furniture. The top of the robot includes three neat buttons for quickly turning it off, setting it to clean, or sending it back to the base station for charging. More specific and targeted cleaning tasks can be carried out through the app.
Two side brushes are easily inserted into the vacuum, which helps it cover a greater area of dust and dirt. This was particularly effective at the edges and corners of rooms. Without them, I think it would have struggled in these areas.
(Image credit: Future)
The mop pad sits at the back of the device and is attached with velcro and a thin rod that you slide into the main unit. The pad can be easily removed for cleaning and re-applying. The dust box is easy to remove and clean out, something that is regularly necessary due to the middling performance of the self-emptying process.
Moving on to the base station, we find an identical design ethos with pleasing curved edges and the same powder-coated dark grey plastic. At a size of 9.87 x 7.1 x 17.4 inches, it sits next to the wall and, after a while, just blends into the background.
(Image credit: Future)
The debris receptacle is easily removed by pulling on the top handle and is largely made of see-through plastic, so you know when it needs emptying. The presence of a small LED light on the front of the base station tells you that it is connected to a power source.
The robot vacuum includes two metal connection points, which, when connected to the base station, allow the device to be charged. I found that the robot had no problems finding its way back to its home.
(Image credit: Future)
The vacuum is complemented by an easy-to-use, powerful app. This makes it possible to see the mapped area, specify rooms, and dictate the suction power and water level. You can also set up a cleaning schedule for automated cleaning at set times.
I found it funny that there was a ‘Find My Robot’ feature. I’m not sure whose house is so big that it might get lost, but maybe it could get stuck under a sofa or chair. I can’t say I needed it, but the option is certainly nice to have.
Eureka E10 robot vacuum review: performance
Easy-to-use app
Vacuuming for everyday cleaning
Sub-par mopping
For the first test, I sprinkled a mix of crushed digestives and flour onto my carpet and hard floor before setting it to clean on its lowest suction power. At this level of power, the E10s was unable to pick up any of the debris. The flour and biscuits just got compacted into the carpet, meaning I needed to wipe the carpet afterward.
It fared slightly better on a hard floor, although it still struggled to collect a meaningful amount of dirt. After changing the power modes all the way from gentle through to turbo, I found that at the highest power setting, it was able to collect most of the debris, although it needed two or three turns to do it adequately.
(Image credit: Future)
The second test with oats was very much the same story. The dual brushes helped to direct the oats into the vacuum, but the lowest suction wasn’t strong enough to draw them up. The highest suction power was able to get up most of the oats.
The mop pad cleaned fresh spills nicely, although its effectiveness in mopping up spills rather than just spreading them around was completely dependent upon how wet the pad already was. More stubborn stains weren’t effectively removed, largely due to the lack of oscillating or rotating mops.
In terms of noise, the robot vacuum reached 55dB on its lowest suction and 70dB on its highest. The former noise level just blends into the background, whereas the latter ruins a nice, relaxing evening. Because you’ll want to use the highest suction level most of the time, you’ll need to run this vacuum when you’re out and about, during the daytime, or when you’re doing other jobs around the house and are less likely to be bothered by the volume.
(Image credit: Future)
The E10s boasts self-emptying technology that negates the need for bags. I was excited to use this feature but was disappointed by its performance. Dust, dirt, and debris became stuck along the route from capturing to emptying, and it quickly became clogged.
This made the vacuum largely ineffective, even at the highest suction power. This problem meant that I had to get in the habit of cleaning out the various parts of the robot vacuum before setting it going. I don’t mind a certain amount of maintenance, but when you expect your robot vacuum to remove these tasks, it becomes a little annoying.
(Image credit: Future)
The performance of the mapping and navigation technology was second to none. The robot vacuum took a while to map out our house, taking a lot of wrong turns and stumbling over table legs, but after it was finished, the map was surprisingly accurate. The software did a good job of straightening out edges and producing a reliable map for the robot to follow.
These types of vacuums can have a hard time navigating around the edges of rooms, constantly readjusting themselves to try and access all areas. The E10s was able to detect objects and brush up alongside them with a high level of accuracy. Rather than rotating and readjusting, it opted to push alongside these edges and therefore perform more efficient routes.
There are, of course, times when the robot became confused or tried to repeatedly travel in a set direction, but on the whole, it proved to be both reliable and predictable.
Performance score: 3.5 out of 5
Eureka E10 robot vacuum review: app
Easy-to-use app
Room and zone mapping
Cleaning scheduling
The Eureka app offers a high level of functionality while maintaining a relatively simple and intuitive interface. After performing the initial mapping, the app gives a full display of the scanned rooms and enables users to name rooms as well as set no-go or no-mop zones. The map also shows where the base station is to help you orient yourself.
Setting the robot to clean can be done in a number of ways. The easiest way is to select specific rooms on the map and hit the clean button. It is also possible to use the zones feature and create a cleaning area. For more stubborn dirt, it is possible to set the clean to be carried out up to three times.
(Image credit: Future)
The final way to set a clean going is to use the Scheduled Cleaning feature. This lets you specify a time, a repeat schedule, and a number of cleaning cycles. It also allows you to specify which rooms are to be cleaned on that particular schedule. Finally, multiple schedules can be created to create a highly customized schedule.
Another feature is multi-floor mapping and thankfully, the robot is clever enough to not throw itself down the stairs. The only downside, albeit an understandable one, is that the robot can’t move between floors and so will require manual moving before a clean occurs. This gets tricky when partnering multi-floor cleaning with a cleaning schedule.
I found the mapping and customizing of the resulting maps pretty intuitive, but after showing my parents how it worked, I realized that the process is not as straightforward as it needs to be for less tech-savvy people. There were times when the app went wrong or the robot struggled, requiring a certain level of intervention and troubleshooting.
Eureka E10 robot vacuum review: battery life
Battery lasts up to three hours
Takes around 4 hours to recharge
The E10s is equipped with an internal lithium-ion battery that is advertised to last as long as 3 hours. The maximum battery life is only applicable when using the quiet setting for suction, and the life drops to 100 minutes when set to high suction power.
In practice, I found the battery lasted just over an hour when at its highest suction setting. Considering that the effectiveness of the vacuum requires it to be on this level, you shouldn’t expect it to be able to clean much more than 600-800 square feet per charge.
It took around four hours to charge the battery from empty to full, an amount of time that is fine considering most people will only perform a maximum of one clean per day.
The robot will return to its base station whenever it needs a charge and will return to cleaning automatically when it has finished charging.
Battery life score: 3.5 out of 5
Should I buy the Eureka E10?
Swipe to scroll horizontally
Eureka E10s report card
Attribute
Notes
Score
Value
Mid-range price with some higher end features.
4.5 / 5
Design
Modern design with robust materials. Dual brushes help direct dirt into the vacuum and a mop pad cleans easy spills.
4 / 5
Performance
Most dirt was picked up on the highest suction setting although it struggled with more stubborn walked-in dirt.mop pads work great, but the vacuum pick up and edge clean up are mediocre
3.5 / 5
App
The app is simple to use and offers multi level home mapping.
4.5 / 5
Battery life
Battery lasts over an hour on the highest suction power.
3.5 / 5
Buy it if…
Don’t buy it if…
Eureka E10: Also consider
If the Eureka E10s isn’t for you, have a look at these alternatives.
Swipe to scroll horizontally
Here are the Eureka E10s specifications
Header Cell – Column 0
Eureka E10s
Narwal Freo
Eufy Clean X9 Pro
Price:
$699.99 / AU$1,099 (about £555)
$1,399.99 / AU$1,999 (about £1,100)
$899.99 / £899.99 / AU$1,499.95
Watt:
55 Watts
45W(vacuum) / 72W (base)
Row 1 – Cell 3
Suction power:
4,000pa
Quiet, Normal, Strong, Super Powerful
5,500Pa
Bin volume:
0.2L for Robot vacuum; 2L for station dust cup
480 ml
13.9 oz (410 ml)
Battery life:
180 minutes
180 minutes (Freo Mode)
150 min (standard vacuum/mop setting)
Filtration:
Yes
Yes
Row 5 – Cell 3
Noise volume:
65Db (vacuum)
65Db (vacuum), 50Db (base)
65dB (vacuum), 50dB (base)
Mop water volume:
Not specified
Not specified
1.1 gallons (4.1L)
Water levels:
Dry, Low, Standard, High
Slightly dry, normal, wet mopping
Row 8 – Cell 3
Mapping:
Yes
Yes
Yes
Obstacle avoidance:
Yes
Yes
Yes
Base:
9.87″x7.1″x17.4 in
14.6 x 16.3 x 17.1 in (370 x 415 x 435 mm)
17.4 x 16.6.2 x 16.4 in (44.3 x 42.2 x 41.6 cm)
Smart support:
App and voice activation
Siri
Amazon Alexa, Google Assistant
Tools:
None
None
Row 13 – Cell 3
Weight:
17.6lbs (7.98 kg)
9.59 lbs (4.35 kg)
31.7 lbs (14.4 kg)
How I tested the Eureka E10s
Tested over several weeks
Used all vacuum and mopping settings
Tests included all floor types, including carpet and hardwood
I tested the Eureka E10s in my 600-foot home, which includes a mixture of carpet, hardwood materials, and a low-pile rug. Over several weeks, I set the robot out on several whole house cleans, and as much as possible, I tried to leave the vacuum to get on with the job itself. These cleans enabled me to see how the vacuum handled a wide variety of different debris and types of navigation situations.
I carried out some more defined tests, including a fine dust and larger debris test to check its vacuuming capabilities. The former was made up of crushed digestives and flour, with the latter consisting of oats. These helped me see how well the vacuum was able to handle different types of mess.
We pride ourselves on our independence and our rigorous review-testing process, offering up long-term attention to the products we review and making sure our reviews are updated and maintained – regardless of when a device was released, if you can still buy it, it’s on our radar.
It may seem like 4K Blu-ray (and physical media in general) is dying, but many still like to collect their favorite movies in physical format. That’s not surprising since streaming sites are not only raising their prices, meaning people have to resort to ‘subscription hopping’ (subscribing to streaming sites for certain shows and movies each month before canceling) to save money, but they can’t be relied upon to keep movies on their platforms. How many times does Spider-Man (the 2002 version with Tobey Maguire) have to change from Netflix to Prime Video before it settles?
If you have bought one of the best TVs, it’s a shame not to feed it the best quality. But what does that mean? 4K Blu-ray and 4K streaming are both the same, right? Sadly, that’s not the case. With 4K streaming, data is transferred at a rate of 17-25 Mbps whereas 4K Blu-ray can transfer data at 128 Mbps. That means with 4K Blu-ray you’re getting a more detailed picture thanks to substantially lower data compression.
If you’re getting into 4K Blu-ray, you’ll need one of the best 4K Blu-ray players. Below, I’ve listed two players I recommend, along with five movies I believe can be the perfect launch pad for your new addiction: 4K Blu-ray collecting.
4K Blu-ray player: Panasonic DP-UB150/154
The Panasonic DP-UB154 (pictured) is easily one of the best budget 4K Blu-ray players on the market. (Image credit: Future)
Panasonic makes some of the best 4K Blu-ray players on the market, and these can vary in price dramatically. The first player I recommend checking out is the Panasonic DP-UB150/154, one of its budget models. (The UB150 and UB154 are identical and their availability depends on your region.)
Even though the UB150/154 is a budget model, you’ll still be getting HDR10 and HDR10+ HDR support and effective upscaling for lower-resolution sources. Performance is also fantastic, with excellent contrast and a natural, life-like quality to images.
With no smart features or Wi-Fi capabilities, the UB150/154 may not be as feature-packed as more premium 4K Blu-ray players, but it can still pass through Dolby Atmos and DTS:X soundtracks. For budding home theater enthusiasts on a budget, the UB150/154 is a great place to start – you can expect to pay under £160/$200 for this brilliant 4K Blu-ray player.
4K Blu-ray player: Panasonic DP-UB820
The Panasonic DP-UB820 (pictured), the best 4K Blu-ray player, balances features for price perfectly. (Image credit: Future)
The Panasonic DP-UB820 is the gold standard of value for money in a 4K Blu-ray player. It offers outstanding picture reproduction, with refined details and textures, punchy colors and contrast, and effective upscaling of regular Blu-ray discs and DVDs.
It also comes brimming with features, including both Dolby Vision and HDR10+ support. That means no matter what TV you have, the UB820 has you covered when it comes to HDR, whereas other players around this price such as the Sony UBP-X800m2 only support Dolby Vision and not HDR10+. It also features 7.1-channel analog, optical digital and dedicated HDMI audio outputs plus smart features such as streaming.
You’ll need to stretch the budget a bit further on the DP-UB820 – you can expect to pay $449/£349, though we’ve seen it lower – but it is a significant step up over more budget players and even rivals in its price category.
4K Blu-ray disc 1: Top Gun: Maverick
Top Gun: Maverick (pictured on the Panasonic MZ1500 TV) is great for motion and textures. (Image credit: Future)
Top Gun: Maverick (2022), starring Tom Cruise, is a phenomenal 4K Blu-ray disc, and one that will show you the capabilities of your 4K Blu-ray player. Stacked with plenty of fast-paced action and quick, panning shots as jets zoom through the air, Maverick is an excellent resource for evaluating motion handling in any home theater setup and will quickly reveal any display-induced picture judder or blur.
Maverick is also a great reference disc for evaluating skin tones and textures. With its many well-lit close-up shots of characters’ faces, both in the cockpit and in the California sun, it will effectively demonstrate the level of detail you can get from a 4K Blu-ray disc.
Thanks to its many flight sequences, Maverick also showcases 4K Blu-ray audio, and how well the best soundbars or home theater systems handle lossless soundtracks on disc. When I did a comparative test of Blu-ray vs streaming, audio was an area where Blu-ray shined.
4K Blu-ray disc 2: The Batman
The Batman (pictured on the Philips OLED808 TV) is fantastic for showing shadow detail and black levels. (Image credit: Future)
One movie I find essential for testing TVs at TechRadar and for showcasing what 4K Blu-ray can do is The Batman (2022) starring Robert Pattinson. A dark, grainy movie with plenty of muted colors, The Batman is perfect for evaluating a TV’s black depth and shadow detail.
Throughout the movie, there are long sequences with low light or near darkness, and only the best TVs and 4K Blu-ray players can handle these darker tones without losing detail. Mastered at 400 nits instead of the more typical 1,000 nits, The Batman can easily reveal any imperfections in an LED-based TV’s backlight. The Panasonic players mentioned above do an excellent job with The Batman. Plus, it’s the best Batman movie ever made in my opinion.
4K Blu-ray disc 3: Blade Runner: 2049
Blade Runner: 2049 (pictured on a 98-inch TCL C805 TV) is an extremely popular 4K Blu-ray. (Image credit: Future)
Wonderfully shot and beautifully detailed, Blade Runner: 2049, released in 2017 and starring Ryan Gosling and Harrison Ford, is another fantastic disc for demonstrating 4K Blu-ray’s potential. Directed by Denis Villenueve and with cinematography by the legendary Roger Deakins, Blade Runner: 2049 was destined to look incredible on a 4K disc.
The movie is packed with scenes that have changing lighting conditions, which makes it perfect for evaluating contrast and color. The night market scene is perfect for testing contrast and the Dolby Atmos soundtrack is powerful. Blade Runner: 2049 is a slam-dunk disc to add to your collection if you want to see the benefits of 4K Blu-ray.
4K Blu-ray disc 4: Alien
Alien on the Panasonic MZ1500 TV (pictured) shows how older movies can be given new life on 4K Blu-ray. (Image credit: Future)
The sci-fi/horror classic movie Alien (1979), starring Sigourney Weaver, is an example of an older movie getting new life through a proper 4K treatment on disc. On 4K Blu-ray, Alien gains refinement and detail, which enhances the tired and almost ghostlike complexions of the Nostromo crew.
A recent spate of James Cameron-directed 4K Blu-ray releases including Aliens met with mixed reception, as people felt the color palette was heavily altered and the movies looked too digitized and clean. The 4K Blu-ray of Alien, on the other hand, demonstrates how an older movie can be cleaned up and revitalized without going too far. Alien on 4K Blu-ray lacks a Dolby Atmos soundtrack, but its DTS-HD Master Audio 5.1 track is nonetheless an excellent example of atmospheric and tension-inducing movie sound.
4K Blu-ray disc 5: Star Wars: The Last Jedi
Star Wars: The Last Jedi (pictured on the Philips OLED808 TV) is good for testing colors, particularly the throne room fight scene. (Image credit: Future)
Now, hear me out. Despite its polarizing nature (most opinions fall on the side of bad), Star Wars: The Last Jedi (2017) looks very good on 4K Blu-ray, and so do all of the sequel Star Warsmovies for that matter. There are plenty of reference scenes here for testing different aspects of a 4K Blu-ray player and TV, but there’s one sequence in particular that I frequently return to.
The throne room fight scene in Star Wars: TLJ is punctuated with plenty of vibrant reds – a lightsaber, the walls, the guards’ uniforms – and in 4K this scene has a dynamic, punchy look. It’s also a good example of how sharpness and subtlety can combine, with plenty of refined detail in objects and faces. Star Wars: TLJ may not be to everyone’s tastes, but it’s an excellent ambassador for the 4K Blu-ray format.
Final thoughts
Collecting 4K Blu-ray can be expensive and all those discs can be a real space-stealer, but it offers the best video and audio quality most people can get in a home theater setup. For any movie fan, adding a 4K Blu-ray player to your 4K TV is a no-brainer.


 Note: MacRumors is an affiliate partner with Best Buy. When you click a link and make a purchase, we may receive a small payment, which helps us keep the site running.
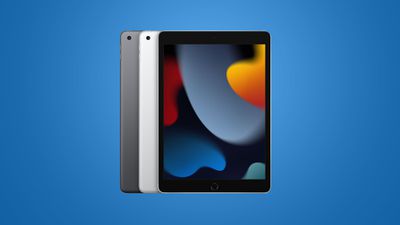


 April 13, 2005: The tech world gets excited when a sketchy rumor suggests Apple is building a tablet computer.