Categories
News

Tailored Excellence: Features to Consider Before Investing in Custom Suits

Investing in a custom suit is a decision that can elevate your style and confidence to new heights. A well-fitted suit makes a lasting impression and reflects your personality and attention to detail. However, choosing the right tailored suit involves careful consideration of various features to ensure it meets your expectations. This article will discuss the features to contemplate before investing in custom suits.

Fabric Quality and Composition

The foundation of any exceptional suit lies in the quality and composition of the fabric. When selecting, pay close attention to the fabric’s weave, weight, and material. Different occasions and climates call for different fabric choices. A lightweight wool or wool-blend fabric is a timeless choice for formal events. Consider a wool-silk blend that balances comfort and elegance if you want versatility. Be sure to inquire about the fabric’s composition and suitability for your intended use.

Suit Style and Silhouette

Custom suits come in various styles and silhouettes, each designed to cater to different preferences and body types. Some common styles include:

Single-Breasted: A versatile and classic option, single-breasted suits feature a single row of buttons down the front, suitable for most occasions.

Double-Breasted: These suits offer a more formal and structured look with two rows of buttons. They are excellent choices for formal events or power dressing.

Two-Piece vs. Three-Piece: Decide whether you want a two-piece suit (jacket and trousers) or a three-piece suit (jacket, trousers, and vest). Three-piece suits add an extra layer of sophistication and warmth.

Slim Fit vs. Regular Fit: Consider your body type and style preference when choosing between slim and regular suits. Slim fit suits offer a tailored and modern look, while regular fit suits provide more room and comfort.

Customisation Options

The essence of this suit lies in its customisation options. Look for a tailor who offers choices, including:

Lapel Style: Choose between notch, peak, or shawl lapels to define the suit’s neckline.

Buttons: Customise the number of buttons on the jacket, as well as their styles, such as one-button, two-button, or three-button configurations.

Pockets: Decide on the type and placement of pockets, including flap pockets, jetted pockets, or patch pockets.

Lining: Select the inner lining material, colour, and pattern to add a personal touch to your suit.

Vents: Choose between a centre vent, side vents, or no vents based on your preference for mobility and style.

Fit and Measurements

The hallmark of a custom suit is the impeccable fit tailored to your unique measurements. Ensure that your chosen tailor offers a comprehensive measuring process that includes:

Chest and Shoulders: Accurate measurements of the chest and shoulders to determine the jacket fit.

Sleeve Length: Precise sleeve measurements to ensure the sleeves fall at the desired length.

Waist and Hips: Measurements of the waist and hips for a well-fitted jacket and trousers.

Inseam Length: Determination of the inseam length to achieve the ideal trouser length.

Collar Fit: Evaluation of the collar fit to ensure comfort and aesthetics.

Budget Considerations

Custom suits can vary significantly in price, depending on factors like fabric quality, brand reputation, and the level of customisation. Ensure that your investment meets your financial comfort zone, and remember to inquire about any additional costs, such as alterations or rush orders, to avoid surprises.

Tailor Reputation and Reviews

Choosing the right tailor is paramount to the success of your custom suit. Research prospective tailors thoroughly, checking their reputation, experience, and customer reviews. A reputable tailor should have a portfolio of satisfied clients and a history of delivering exceptional craftsmanship.

Even with precise measurements, alterations may be necessary to achieve the perfect fit. Inquire about the tailor’s alteration policy and whether they offer post-purchase adjustments as part of their service.

In conclusion, investing in custom suits is a decision that warrants careful consideration of various features and factors. By focusing on fabric quality, suit style, customisation options, fit and measurements, budget, tailor reputation, and alteration policy, you can ensure that your custom-tailored suit meets your expectations and becomes a cherished addition to your wardrobe. With attention to these details, you’ll be well on your way to sartorial excellence and timeless style.

Categories
News

Leonardo Ai Alchemy 2 and new custom SDXL models announced

Leonardo Ai Alchemy 2 brings more control and detail to your AI art

Leonardo AI has just announced the release of Alchemy 2, a new standard in creative output. This advanced pipeline, which has been a celebrated tool in the creative process, is now stepping up its game with an unprecedented level of detail and control for AI art creators. The release of Leonardo Ai Alchemy 2 is not just an update, but a new standard in the creative industry, say it’s creators.

Alchemy 2 has been designed to enhance designs with remarkable high resolution, contrast boost, resonance, and more. It is the ideal tool for both novice and experienced creators, providing comprehensive understanding of each element of Alchemy. What’s more, this new release comes with a playful feature that promises endless fun.

New custom SDXL models

One of the most exciting updates in this release is the evolution of the signature pipeline Alchemy. This pipeline has consistently been a celebrated tool among creators, and with Alchemy V2, Leonardo AI is taking another significant stride in advancing creative output. To complement this, the company has also unveiled two new custom SDXL models — Leonardo Diffusion XL and Leonardo Vision XL.

The Alchemy V2 represents a big leap in high-quality image generation. Paired with an extensive toolkit that includes Elements, Canvas, and more, it’s a creative powerhouse. High Resolution is an integral feature of Leonardo Alchemy, which toggles between a 1.5x and 2x resolution increase. This feature enhances the output resolution of the Alchemy procedure, delivering richer and denser images.

However, it’s important to note that high-resolution outputs will differ from their normal resolution counterparts due to the diffusion process involved in the generation. Therefore, High Resolution cannot be expected to function as an upscaler.

Leonardo Ai Alchemy V2

The goal of Leonardo AI remains clear: to simplify while elevating creativity. With Alchemy V2, this promise is further strengthened. Users can choose from the above models and Alchemy V2 automatically engages. All that’s required is to prepare the prompts and watch the magic unfold.

Other articles we have written that you may find of interest on the subject of Stable Diffusion XL:

Leonardo Alchemy

With Alchemy, users also have two unique upscalers at their disposal: Alchemy Crisp and Alchemy Smooth. These were developed specifically for Alchemy to enhance the images during the upscaling process. Alchemy Crisp is ideal for images with lots of texture detail, including photos, digital art, and some 3D renders. Alchemy Smooth, on the other hand, is best suited for images with smooth textures, including illustrative, anime, and cartoon-like images.

As with the original Leonardo Ai Alchemy 2 features SDXL, an open source AI art image model created by Stability AI. SDXL 1.0, the flagship image model developed by Stability AI, stands as the pinnacle of open models for image generation. Through extensive testing and comparison with various other models, the conclusive results show that people overwhelmingly prefer images generated by SDXL 1.0 over other open models. With better prompt adherence, image quality, and complexity of output, SDXL 1.0 ticks all the boxes.

“With Stable Diffusion XL, you can create descriptive images with shorter prompts and generate words within images. The model is a significant advancement in image generation capabilities, offering enhanced image composition and face generation that results in stunning visuals and realistic aesthetics.”

The release of Leonardo Ai Alchemy 2 is set to refine and expand the artistic AI workflow of creators even further. With its advanced features and tools, Alchemy V2 and new Leonardo Diffusion XL and Leonardo Vision XL custom SDXL models.

Filed Under: Technology News, Top News


Latest timeswonderful Deals

Disclosure: Some of our articles include affiliate links. If you buy something through one of these links, timeswonderful may earn an affiliate commission. Learn about our Disclosure Policy.

Categories
News

Power up ChatGPT DallE 3 using custom instructions

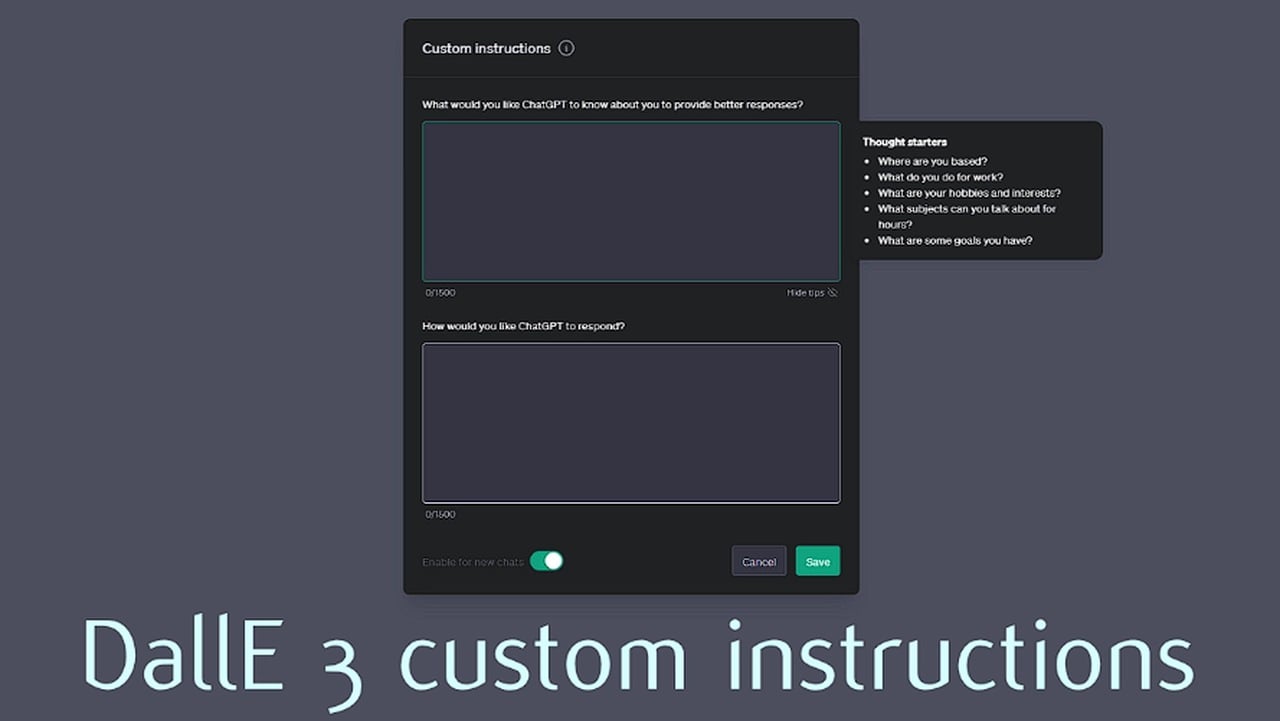
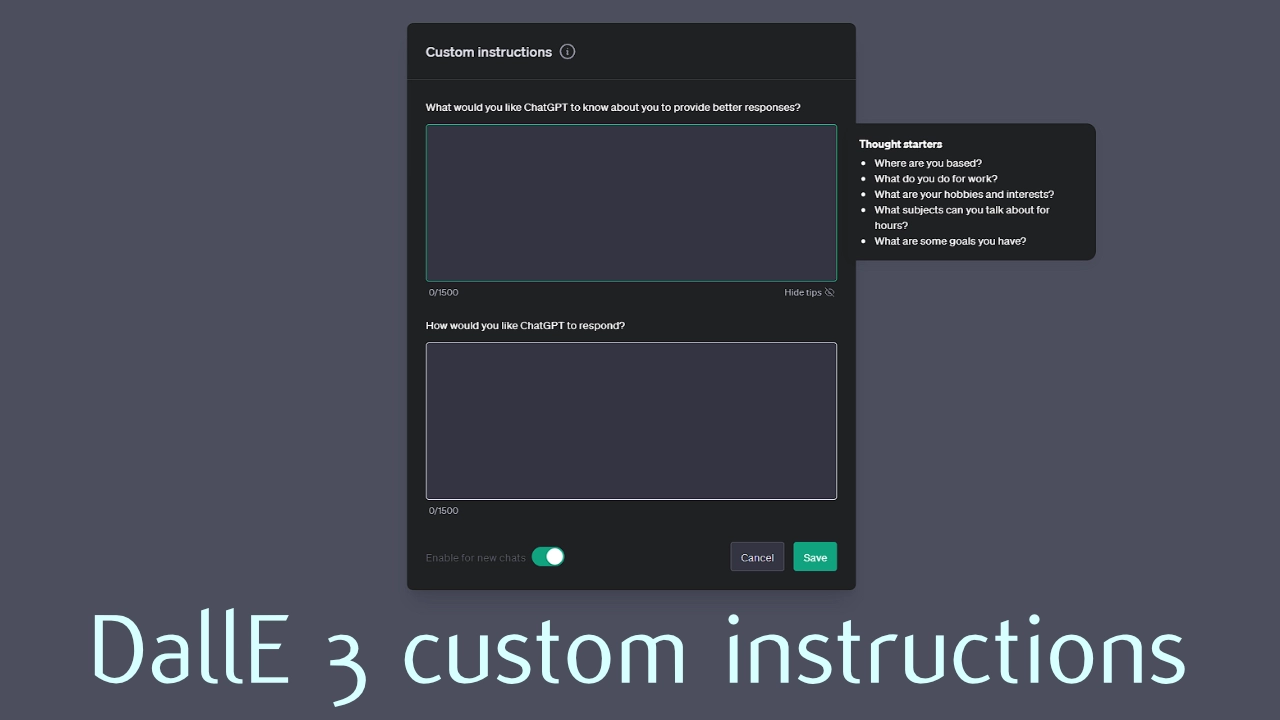
You may have already know about Custom Instructions can help you improve your ChatGPT prompts and results. But did you know that it links directly to DallE 3 The new AI art image generator created by OpenAI? This guide will provide more information on how you can use ChatGPT Custom Instructions to improve the results you get from DallE 3.

If you haven’t yet used the ChatGPT Custom Instructions is a quick recap on how they work. OpenAI has added the feature to enable users to customize your interactions with ChatGPT by providing specific details and guidelines for your chats. Whenever you edit your custom instructions, they’ll take effect in all new chats you create. Existing chats won’t be updated. Your instructions will be used to make our models better unless you’ve opted out and may be shared with any plugins you’ve enabled. Visit our Help Center to learn more.

The latest iteration in the series, DallE 3, has a unique feature—it generates art based on a conversation with the user, rather than using parameters such as Midjourney. This interactive nature of DallE 3 has enabled artists and users to generate AI art easily without having to learn complex prompting methods. But one useful feature the ability to power up DallE 3’s artistic capabilities even further using the custom instructions in ChatGPT.

ChatGPT DallE 3 custom instructions

Custom instructions allow users to have better control over how ChatGPT responds to certain situations. This feature is particularly useful for enhancing the prompts that you use with DallE 3 . By entering a few instructions you can heavily optimized prompts based on simple ideas and suggest creative twists on what has been generated. This results in more detailed and compelling images, making DallE 3 a more powerful art generator. Watch the video below, kindly created by Glibatree to learn more about how you can use the ChatGPT custom instructions to enhance your DallE 3 art generation.

Other articles we have written that you may find of interest on the subject of ChatGPT Custom Instructions :

The versatility of custom instructions is another aspect that makes them invaluable. They can be used to generate images from different angles, add elements like condensation or steam, and mention the color of the light. This level of specificity contributes to the creation of more impressive and nuanced photos. Moreover, the custom instructions can also be used to generate images in any art style, from photographs to paintings. This flexibility opens up a wide array of artistic possibilities, enabling users to explore various styles and techniques.

One of the most appealing aspects of custom instructions is their ability to generate images based on a conversation with ChatGPT. This feature simplifies the process of prompting, making it more intuitive and user-friendly. However, it’s important to note that while DallE 3 has made significant strides in AI-generated art, there are still areas where it could improve. For instance, the tool still struggles with generating photo-realistic faces at a distance. Despite this limitation, the overall capabilities of DallE 3, particularly when enhanced with custom instructions, are impressive.

Availability of custom instructions

The good news is that custom instructions are available on every plan, including the free version, and can be used by everyone using ChatGPT. This accessibility ensures that a wide range of users, regardless of their subscription plan, can benefit from this feature. For those who don’t yet have access to OpenAI’s DallE 3 AI art generator, they can generate prompts using GPT 3.5 and then use Bing Image Creator, which uses DallE 3, to create the image. This option is available for free, making AI-generated art more accessible to a broader audience.

The custom instructions feature in ChatGPT can significantly enhance the capabilities of DallE 3, an AI art generator. By allowing users to have better control over the generation process and offering the flexibility to explore various styles and techniques, custom instructions make DallE 3 a more compelling tool for AI-generated art. As AI continues to evolve and improve, we can expect to see even more exciting developments in the field of AI-generated art.

Filed Under: Guides, Top News


Latest timeswonderful Deals

Disclosure: Some of our articles include affiliate links. If you buy something through one of these links, timeswonderful may earn an affiliate commission. Learn about our Disclosure Policy.

Categories
News

Easily install custom AI Models locally with Ollama

Easily install custom AI Models locally with Ollama

If you are just getting started with large language models and would like to easily install different AI models currently available you should deftly check out Ollama. It’s really easy-to-use and takes just a few minutes to install and set up your first large language model. One word of warning is that your computer will need at least 8GB RAM and as much as you can spare for some models, as LLMs use large amounts of memory for each request.

Ollama currently supports easy installation of a wide variety of AI models including : llama 2, llama 2-uncensored, codellama, codeup, everythinglm, falcon, llama2-chinese, mistral, mistral-openorca, samantha-mistral, stable-beluga, wizardcoder and more. however you can also install custom AI models locally with Ollama as well.

Installing custom AI models locally with Ollama

Ollama is an AI model management tool that allows users to easily install and use custom models. One of the key benefits of Ollama is its versatility. While it comes pre-loaded with a variety of models, it also allows users to install custom models that are not available in the Ollama library. This opens up a world of possibilities for developers and researchers to experiment with different models and fine-tunes.

Other articles we have written that you may find of interest on the subject of Ollama :

One such custom model that can be installed in Ollama is Jackalope. Jackalope is a 7B model, a fine-tuning of the Mistral 7B model. It is recommended to get the quantized version of the model, specifically in GGUF format. Formerly known as GGML, GGUF is a quantized version of models used by the project LLaMA CPP, which Ollama uses for models.

The process of installing Jackalope, or any other custom model in Ollama, starts with downloading the model and placing it in a model’s folder for processing. Once the model is downloaded, the next step is to create a model file. This file includes parameters and points to the downloaded file. It also includes a template for a system prompt that users can fill out when running the model.

After creating and saving the model file, the process of creating a model using the model file begins. This process includes passing the model file, creating various layers, writing the weights, and finally, seeing a success message. Once the process is complete, the new model, in this case, Jackalope, can be seen in the model list and run just like any other model.

While Ollama offers a significant degree of flexibility in terms of the models it can handle, it’s important to note that some models may not work. However, fine-tunes of LLaMA2, Mistral 7B, and Falcon models should work. This limitation, while it may seem restrictive, still allows users to try out a vast array of different models from the hugging face hub.

Ollama provides a user-friendly platform for installing and using custom AI models. The process, while it may seem complex at first glance, is straightforward and allows users to experiment with a variety of models. Whether it’s the Jackalope model or any other custom model, the possibilities are vast with Ollama. However, users should be aware of potential limitations with some models and ensure they are using compatible models for optimal performance.

Filed Under: Guides, Top News


Latest timeswonderful Deals

Disclosure: Some of our articles include affiliate links. If you buy something through one of these links, timeswonderful may earn an affiliate commission. Learn about our Disclosure Policy.

Categories
News

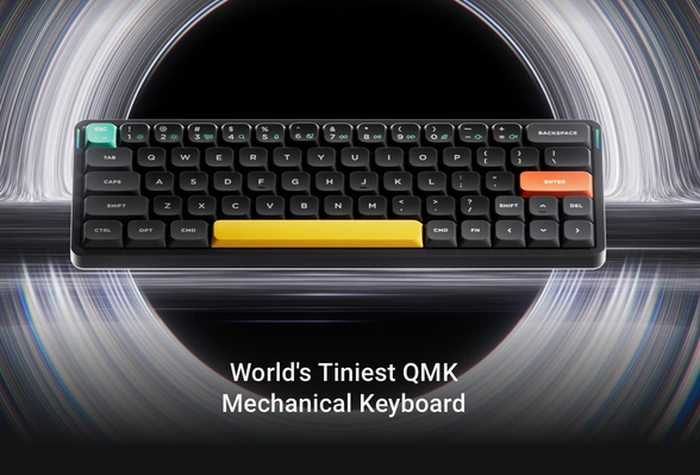
NuPhy Air60 V2 wireless custom mechanical keyboard presale starts

Air60 V2 wireless custom mechanical keyboard presale starts

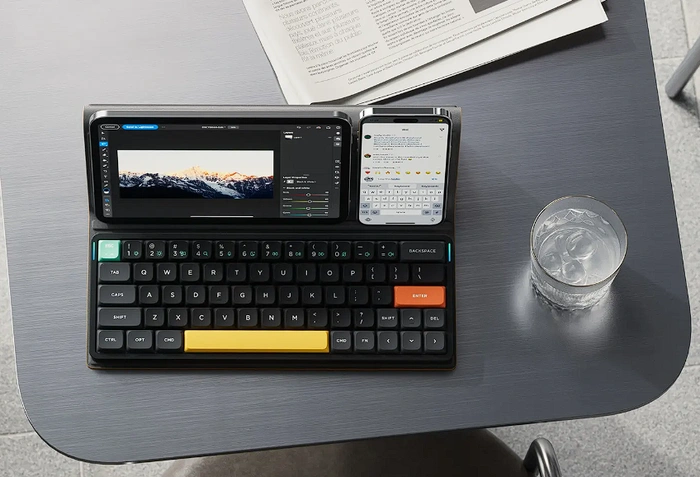
The new Air60 V2, a portable keyboard by NuPhy, is a wireless mechanical keyboard that has been meticulously designed to cater to the needs of modern users. The Air60 V2 is both lightweight and flexible, updated, with the top frame maintaining a minimalistic look and an additional color choice of Basalt Black. This gives the keyboard a sleek and modern appearance that is sure to appeal to users who value aesthetics as much as functionality. The bottom case has also undergone changes due to an improved laser texturing process, making it more transparent and finely textured. This enhances the overall aesthetics of the device, making it not just a tool, but a stylish accessory.

In terms of connectivity, the Air60 V2 continues NuPhy’s tradition of supporting mobile computing devices. It offers a high-quality Bluetooth/2.4G connection and speed, designed to enhance connectivity and adaptability for mobile devices. This makes the keyboard highly portable and adaptable, capable of being used on top of almost any laptop keyboard, leaving space for features like Touch ID. This flexibility makes the Air60 V2 a versatile tool that can be used in a variety of settings, from the office to the coffee shop.

Nuphy Air60 V2 keyboard

The Air60 V2 also boasts improved stability, thanks to the inclusion of AirFeet. This feature ensures that the keyboard remains stable and secure, even when used on uneven surfaces. This stability, combined with the keyboard’s lightweight design, makes the Air60 V2 an ideal choice for users who are constantly on the move.

Nuphy Air60 V2 wireless mechanical keyboard

Other articles we have written that you may find of interest on the subject of Nuphy keyboards :

One of the standout features of the Air60 V2 is its high wireless performance. The wireless mechanical keyboard carries a chip capable of a 1000Hz polling rate, designed to push the limits of wireless performance. This high polling rate ensures that keyboard can keep up with the demands of modern users, offering a seamless and lag-free experience.

The keyboard’s low latency performance is another key feature. The latency of the Air60 V2 depends on factors such as the MCU’s matrix scan rate, processing and debounce time, and the wireless cache size. The keyboard uses Nordic’s NRF52810 SoC with STM32F072 MCU’s high performance and undergoes rigorous testing to ensure minimized total trip delay. Benchmarks on the new Air60’s latency performance have shown impressive results, dispelling the myth that low profile keyboards are unfit for professional gaming and low latency applications.

The Air60 V2 is a fantastic keyboard that combines style, functionality, and performance. Its lightweight and flexible design, enhanced connectivity, improved stability, high wireless performance, and low latency performance make it a standout choice for users who demand the best from their devices. Whether you’re a professional gamer, a mobile worker, or just someone who appreciates quality, the Air60 V2 is a device that is sure to impress.

Filed Under: Gadgets News


Latest timeswonderful Deals

Disclosure: Some of our articles include affiliate links. If you buy something through one of these links, timeswonderful may earn an affiliate commission. Learn about our Disclosure Policy.

Categories
News

Build a custom programable keypad to control your tech

Build a custom programable keypad to control your tech

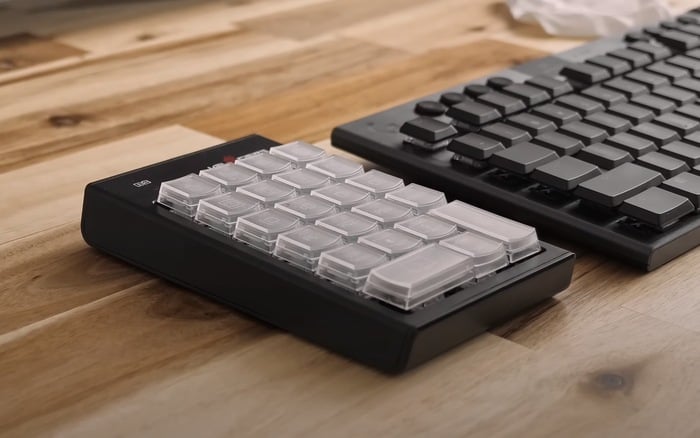
If you find you have lots of different remote controls to perhaps turn on or adjust your lighting, desk, PC or other tech gadgetry on your desktop. It might be time to build a custom programmable keypad to control all your gadgets from a single remote. This approach consolidates multiple controllers into a single, programmable device, enhancing efficiency and making it much easier for you to access everything and program each button as required.

The idea of programming a single remote to control all devices is a game-changer. Imagine having a single controller that can switch HDMI and USB inputs, control desk height, manage lights, toggle the microphone, manage windows, and even launch the web browser and file explorer. This not only simplifies the user experience but also enhances productivity by reducing the time spent on managing different controllers.

The problem with multiple separate controllers for a desk setup is that they can be inconvenient to use individually. Each device, from the monitor to the standing desk, the lights to the microphone, has its own controller. This not only clutters the workspace but also interrupts workflow as one has to reach for different controllers for different functions.

Build a custom programable keypad to control your tech

The addition of macros to the keypad for window management is another significant feature. Macros allow for quick window resizing and launching of most-used applications, further enhancing efficiency.

 Previous articles we have written that you might be interested in on the subject Raspberry Pi  mini PC :

Wireless or wired

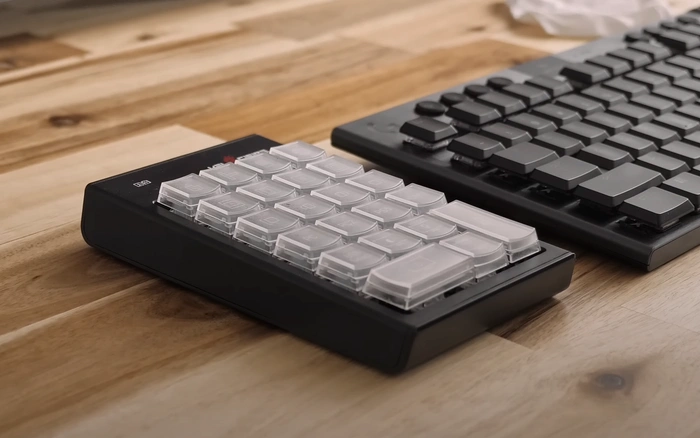
Possible requirements for the single controller are that it should be wireless, have a long battery life, be quick and responsive, and be simple and intuitive to use. To meet these requirements, an RF wireless number pad from Velocifire was used in the example in the video although you could use any other to suit your needs. You could also make it wired if preferred connecting it to your PC for power using a USB cable.

The USB dongle for the keypad was plugged into a Raspberry Pi Pico flashed with an HID remapper firmware. The Raspberry Pi Pico mini PC sends commands to the desktop PC, which are received by an AutoHotkey script. This setup ensures quick and responsive button presses, fulfilling one of the key requirements of the controller. For controlling lights and the TV screen, the system sends a post request to a home assistant server. This integration of smart devices with the Home Assistant server further simplifies the control process.

Non-smart devices were made smart with a USB power switch and a USB switch. This innovative approach ensures that all devices, smart or not, can be controlled from the single controller. One of the challenges faced was the reverse engineering of the standing desk controller for integration with the Home Assistant. However, overcoming this challenge was crucial to ensure that the standing desk could be controlled from the single controller.

Benefits of a programmable custom keypad

  • Customization: You can tailor the keypad layout, key functions, and even the form factor to your specific needs. Whether you’re optimizing for gaming, coding, or specific workflows, customization can lead to increased productivity.
  • Cost-Efficiency: While commercial keypads can be expensive, using a Raspberry Pi Pico is relatively inexpensive. This allows you to achieve high functionality at a lower cost.
  • Learning Experience: Building the keypad yourself offers hands-on experience with hardware, firmware, and potentially software development. This can be valuable both for educational purposes and for enhancing technical skills.
  • Wireless Flexibility: Implementing wireless functionality makes the device portable and easier to integrate into various setups. You’re not constrained by cables, and you can use the device more freely.
  • Expandability: Once your base platform is built, you can easily update the firmware to add more features or adapt to changing needs. You’re not stuck with a static product; you can modify it over time.
  • Open Source: Using open-source software and hardware for your keypad allows you to benefit from community support and to contribute back to that community with your own improvements or adaptations.
  • Energy Efficiency: The Raspberry Pi Pico is known for its low power consumption, which is especially beneficial for wireless devices that are battery-powered.
  • Speed and Responsiveness: The device’s performance can be optimized since you control the firmware. This could be crucial for applications requiring low latency, such as gaming or real-time control systems.

Creating a wireless macro pad to control a computer desk setup is an innovative solution to the problem of multiple separate controllers. It simplifies the user experience, enhances productivity, and paves the way for a more efficient and intuitive workspace. Despite some limitations, the potential for future improvements makes this an exciting development in the realm of technology.

Filed Under: DIY Projects, Top News


Latest timeswonderful Deals

Disclosure: Some of our articles include affiliate links. If you buy something through one of these links, timeswonderful may earn an affiliate commission. Learn about our Disclosure Policy.