Categories
News

Combining GPT-4-Turbo and Bubble to create AI apps and tools

using GPT and Bubble to create AI apps

In the ever-evolving landscape of technology, the fusion of no-code platforms and advanced artificial intelligence offers a new horizon for developers and entrepreneurs alike to easily create AI apps. Particularly, if you’re intrigued by the potential of merging Bubble.io’s no-code platform with the sophisticated capabilities of ChatGPT’s artificial intelligence, you’re in for an exciting journey. This integration opens up a plethora of opportunities for creating diverse AI apps both online and for mobile devices.

First, let’s delve into why this integration is a game-changer. Bubble.io is renowned for its user-friendly interface that allows even those with minimal coding knowledge to build apps. When you combine this accessibility with the advanced AI capabilities of ChatGPT, you empower creators to design applications that are not only functional but also intelligent

No code  AI apps

  • Accessibility: With Bubble.io, you don’t need to be a seasoned coder to bring your app ideas to life. Its intuitive design tools and drag-and-drop functionality make app development accessible to everyone.
  • Customizability: ChatGPT brings a layer of intelligence to your applications. From personalized chatbots to AI-driven data analysis, the possibilities are vast and varied.
  • Efficiency: This combination significantly reduces development time. You can quickly prototype, test, and deploy applications, making the process more agile and responsive to user needs.

Building online apps using Bubble and GPT

Here are some other articles you may find of interest on the subject of AI tools

Applications in the Real World

Imagine creating a mobile app that not only responds to user queries but also learns from interactions to provide better responses over time. Or, consider an online platform that automates complex processes using AI, saving time and resources. These scenarios are not just  if you ideas but entirely achievable with the integration of Bubble.io and ChatGPT to create fully functional AI apps without writing a single line of code.

Getting Started

If you’re wondering how to embark on this journey of building AI apps  it’s extremely simple to get started, here’s a brief guide:

  • Familiarize Yourself: Explore Bubble.io’s interface and understand its components. Simultaneously, get acquainted with ChatGPT and its API documentation.
  • Plan Your Application: Define what you want to achieve. Whether it’s a chatbot, a data analysis tool, or a personalized recommendation system, having a clear objective is crucial.
  • Integration: Leverage Bubble.io to design the app’s interface and workflow. Then, integrate ChatGPT to infuse AI capabilities into your application.
  • Testing and Deployment: Utilize Bubble.io’s testing tools to ensure your app functions smoothly. After thorough testing, deploy your application for users to experience.

Key Considerations

While embarking on this exciting venture, remember to keep user experience at the forefront. The application should not only be intelligent but also intuitive and user-friendly. Also, ensure that you’re adhering to data privacy and ethical guidelines, especially when dealing with AI.

By combining the simplicity and versatility of Bubble.io with the cutting-edge AI of ChatGPT, you unlock a new realm of possibilities in AI app development. This synergy enables you to create applications that are not only innovative but also highly responsive to user needs.

Filed Under: Guides, Top News


Latest timeswonderful Deals

Disclosure: Some of our articles include affiliate links. If you buy something through one of these links, timeswonderful may earn an affiliate commission. Learn about our Disclosure Policy.

Categories
News

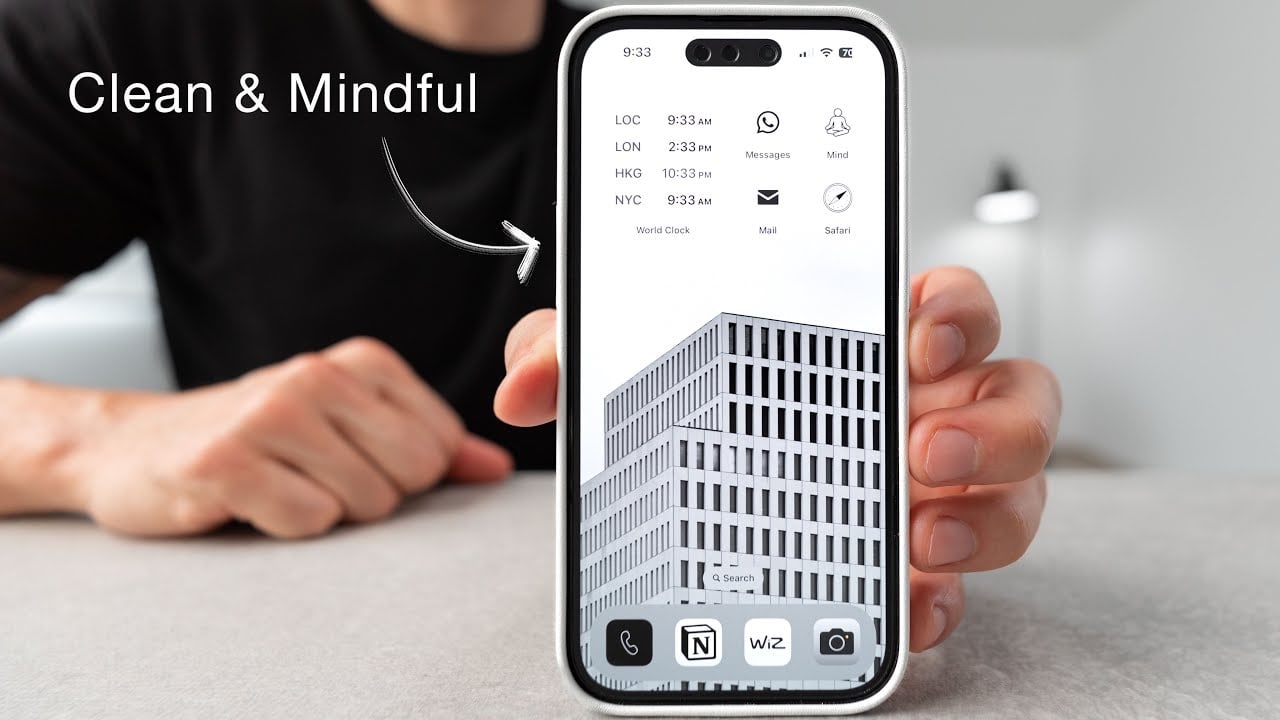
How to create the ultimate iPhone setup

iPhone setup

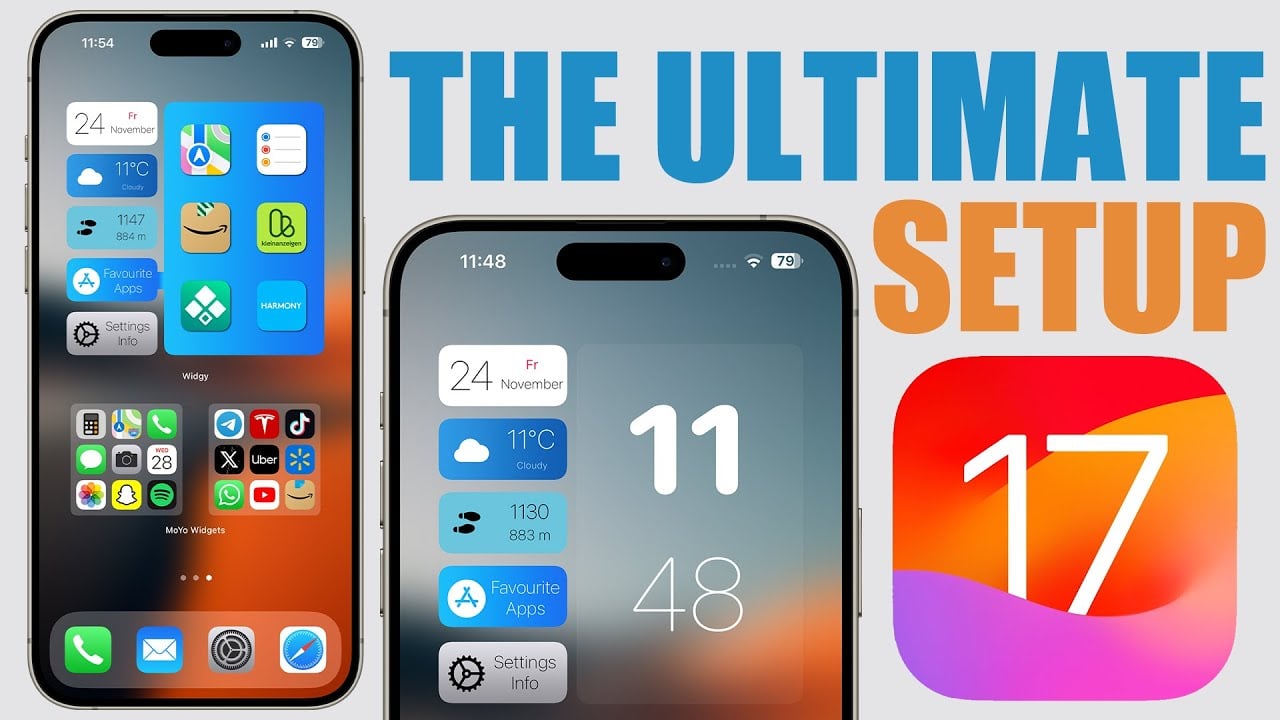
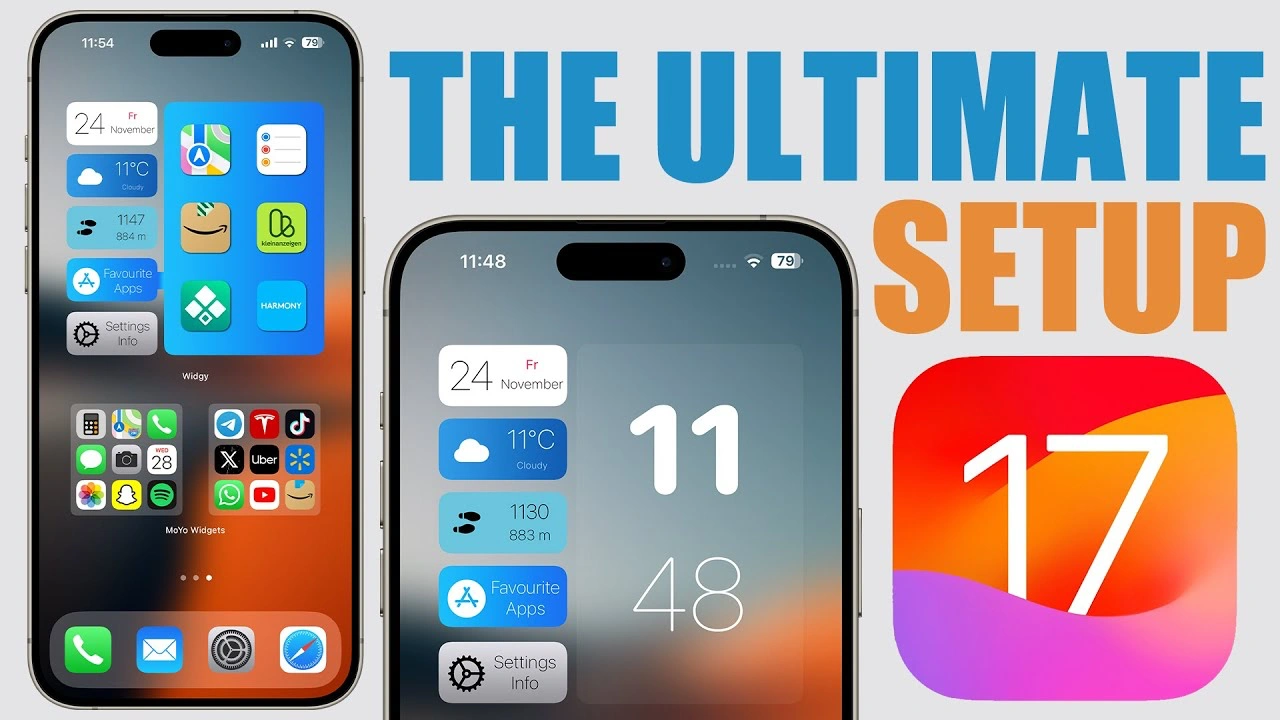
We previously looked at how to create a minimalist iPhone setup. Are you looking to transform your iPhone into a sleek and functional masterpiece? You will be pleased to know that the latest video guide, “Create the Ultimate iPhone Setup,” offers invaluable insights into customizing your iPhone’s lock screen and home screen, blending aesthetics with practicality. The video below from ireviews shows us how to create the ultimate iPhone setup for your Home Screen and Lock Screen.

Lock Screen Customization

Firstly, let’s delve into the lock screen. The video shows two essential widgets. One displays the battery percentages for your various devices – a must-have for those juggling multiple Apple gadgets. The other widget is a hub of information, showing connectivity status, storage, RAM memory, and time. Imagine having all this vital information at a glance!

A pro tip to elevate your lock screen’s look is the smart use of colors. Match the clock and widgets color with your wallpaper for a visually pleasing effect. Achieving this is a breeze with the Color Picker tool found in the customization settings.

Home Screen Customization

Moving on to the home screen, simplicity meets functionality. A widget from ‘Widget’ encompasses everything you need: a calendar, weather forecast, step counter, links to your favorite apps, settings info, and time. With iOS 17, these widgets have become interactive, allowing you to tap them for more detailed information.

A striking feature is the widget’s transparent background, which seamlessly integrates with your chosen wallpaper. The guide provides straightforward instructions to achieve this look, utilizing a screenshot of an empty home screen page.

Additional Home Screen Features

The video doesn’t stop there. It introduces ‘Moo Widgets’, a clever app that allows you to add a hidden page of apps. This feature is not just about aesthetics; it’s about efficiency and accessibility. Swipe on the home screen, and voilà, your apps are there, out of sight but easily reachable.

In combination with ‘Moo Widgets’, ‘Blank Widgets’ plays a pivotal role. It creates a stack that conceals ‘Moo Widgets’, enabling a secret widget on your home screen. This setup maintains a clean look while ensuring your apps are just a swipe away.

Moreover, the guide suggests utilizing the left side of the home screen for practical widgets like shortcuts, a calendar, and a world clock. This is perfect for those who love having quick access to their daily essentials.

Overall Setup Aesthetic and Functionality

The overarching goal of this setup is to achieve a clean and simple look without compromising functionality. You’ll find that this custom setup is not only easy to create but also elevates your iPhone’s usability. The video concludes by reassuring viewers of the setup’s simplicity and provides all necessary links for wallpapers, widgets, and apps in the video description.

By following this information in the video, you can transform your iPhone into a more efficient, aesthetically pleasing device that caters to your personal and professional needs. So, if you are wondering how to give your iPhone a functional makeover without sacrificing style, this video is your go-to resource.

Source & Image Credit: iReviews

Filed Under: Apple, Apple iPhone, Guides


Latest timeswonderful Deals

Disclosure: Some of our articles include affiliate links. If you buy something through one of these links, timeswonderful may earn an affiliate commission. Learn about our Disclosure Policy.

Categories
News

Activepieces lets you create powerful AI Assistants with TypeScript

How to use Activepieces to create powerful AI Assistants using TypeScript

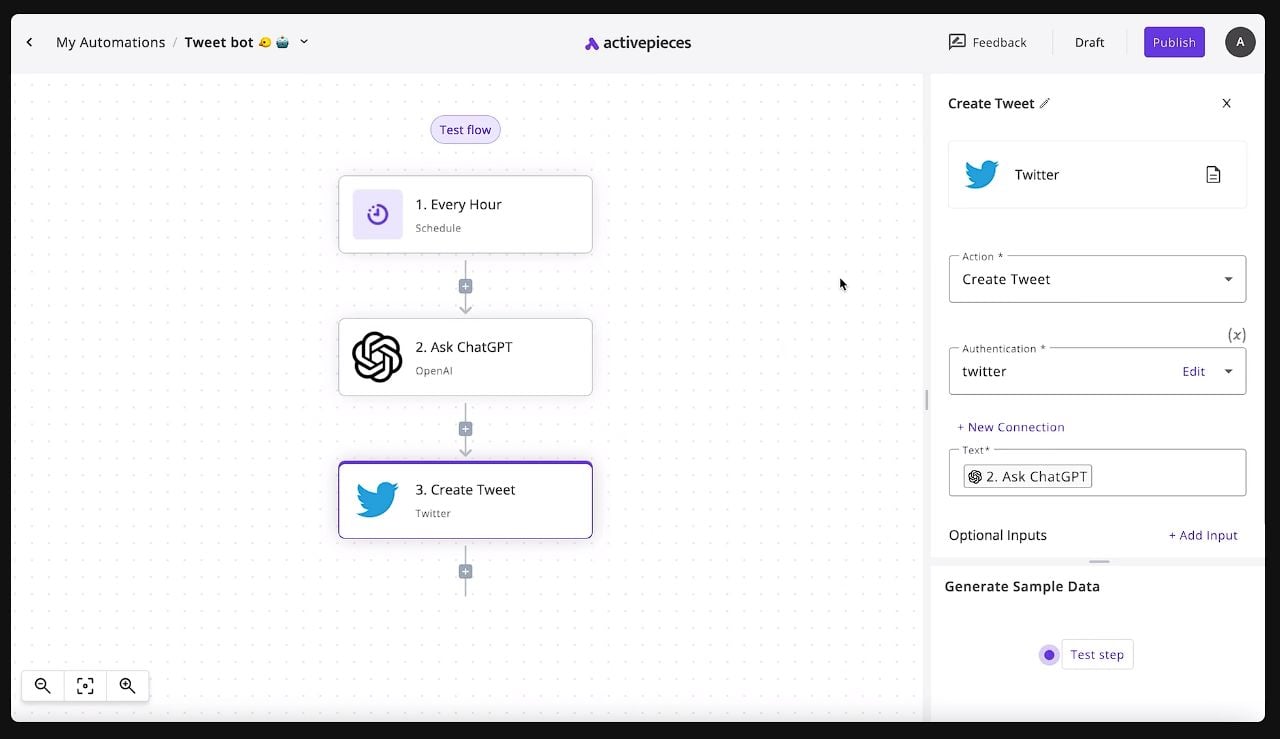
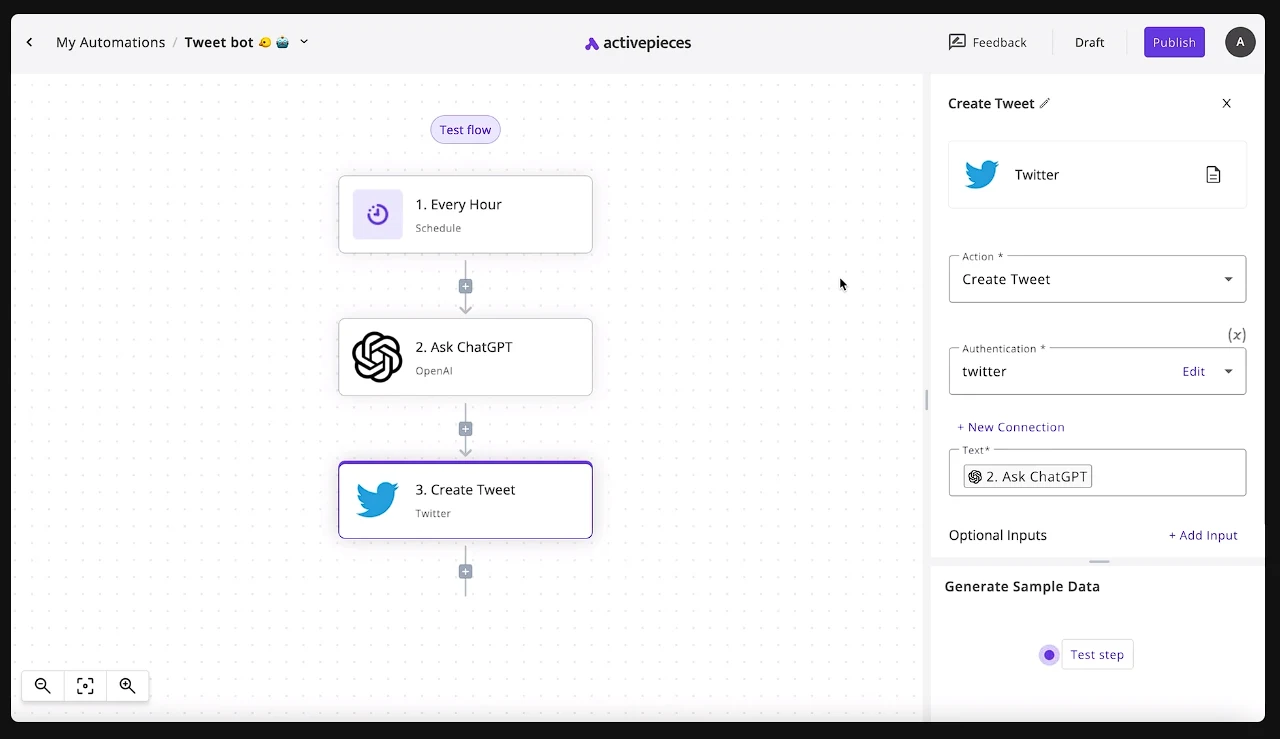
Activepieces is a new open source all-in-one automation tool, “designed to be extensible” say its developers providing users with an easy way to create their own powerful AI assistance using a TypeScript framework. At the heart of Activepieces is a drag-and-drop interface that’s incredibly user-friendly. This means that even if you’re not a tech wizard, you can still create complex workflows without needing to write a single line of code. The beauty of this system is that it allows you to visually piece together different components, making your operational sequence smooth and efficient.

One of the most exciting aspects of Activepieces is its open-source nature. This means that you have the freedom to dive into its TypeScript codebase and tweak it to your heart’s content. As your business evolves, you can add new features and services, ensuring that your automation tool grows with you.

But what really sets Activepieces apart is its ability to harness the power of artificial intelligence (AI). Imagine automating your social media posts or crafting customer service replies with the help of AI. This tool makes it possible, connecting with various language models and APIs to take on tasks that would otherwise require a lot of time and effort. A free package is available for up to 1,000 tasks per month.

Activepieces lets you build AI assistants easily

Activepieces doesn’t just stop at simple automation. It allows you to inject custom logic into your workflows. This means you can set up conditional statements and loops, creating dynamic processes that respond to real-time data. For those who need even more control, the platform supports HTTP requests and JavaScript, giving you the tools for more complex scripting.

Here are some other articles you may find of interest on the subject of building AI assistants :

A key feature of Activepieces is its focus on transparency and teamwork. With its detailed logging system, you can easily keep track of your automated workflows, making monitoring and debugging a breeze. Plus, its collaborative features mean that your team can work together on tasks, ensuring everyone is on the same page.

Benefits of using AI assistants  for workflow automation

AI assistants can significantly enhance daily workflows through automation in several ways:

  • Task Automation: They can automate routine tasks such as scheduling meetings, sending reminders, or managing emails. By handling these tasks, AI assistants free up time for more complex and creative work.
  • Data Analysis and Reporting: AI assistants are adept at analyzing large datasets, identifying trends, and generating reports. This can be particularly useful in fields like finance, marketing, or research, where data-driven insights are key.
  • Customer Service: In customer service, AI assistants can handle basic inquiries, provide instant responses, and route complex issues to human operators. This improves efficiency and customer satisfaction.
  • Project Management: AI assistants can help track project progress, set deadlines, and notify team members of upcoming tasks or changes. This aids in keeping projects on schedule and teams aligned.
  • Personalization: In marketing and sales, AI can automate and personalize customer interactions, from email marketing campaigns to product recommendations, enhancing customer engagement.
  • Learning and Development: AI assistants can facilitate learning by offering personalized educational content, scheduling learning sessions, and providing feedback, making the process more efficient and tailored to individual needs.
  • Health and Wellness: In personal wellness, AI can track health metrics, suggest workouts, remind medication schedules, and even provide mental health support, contributing to overall well-being.
  • Accessibility: AI assists in making technology more accessible through features like voice-to-text, language translation, and personalized interface options, helping a wider range of users.
  • Error Reduction: By automating tasks, AI can reduce human errors, especially in repetitive or detail-oriented tasks, leading to higher accuracy and reliability.
  • Decision Support: AI can provide decision support by analyzing data and presenting possible outcomes or suggestions, aiding in more informed decision-making.

Cloud hosting

When it comes to hosting, Activepieces is flexible. Whether you prefer a cloud service with a set number of free tasks each month or a self-hosted solution that gives you full control, Activepieces has you covered. This flexibility ensures that you can choose the hosting option that best fits your needs.

Documentation

For those who need a helping hand, Activepieces offers extensive documentation to help you get up to speed quickly. It also provides tools for integrating with e-commerce platforms like Shopify and Stripe, making it a valuable asset for online businesses looking to streamline their operations.

Community

The community surrounding Activepieces is another standout feature. Once you create an account, you can start building your automated workflows right away. But you’re not alone; you can join the vibrant Discord community for support, follow “World of AI” on Twitter for the latest AI news, and subscribe to the YouTube channel for educational content.

Activepieces is more than just an automation tool; it’s a comprehensive solution that enhances your workflows with the power of AI. Its open-source framework and robust features make it an indispensable tool for anyone looking to automate their processes. Dive into Activepieces and experience the next level of workflow automation and learn more by visiting the official website.

Filed Under: Guides, Top News


Latest timeswonderful Deals

Disclosure: Some of our articles include affiliate links. If you buy something through one of these links, timeswonderful may earn an affiliate commission. Learn about our Disclosure Policy.
Categories
News

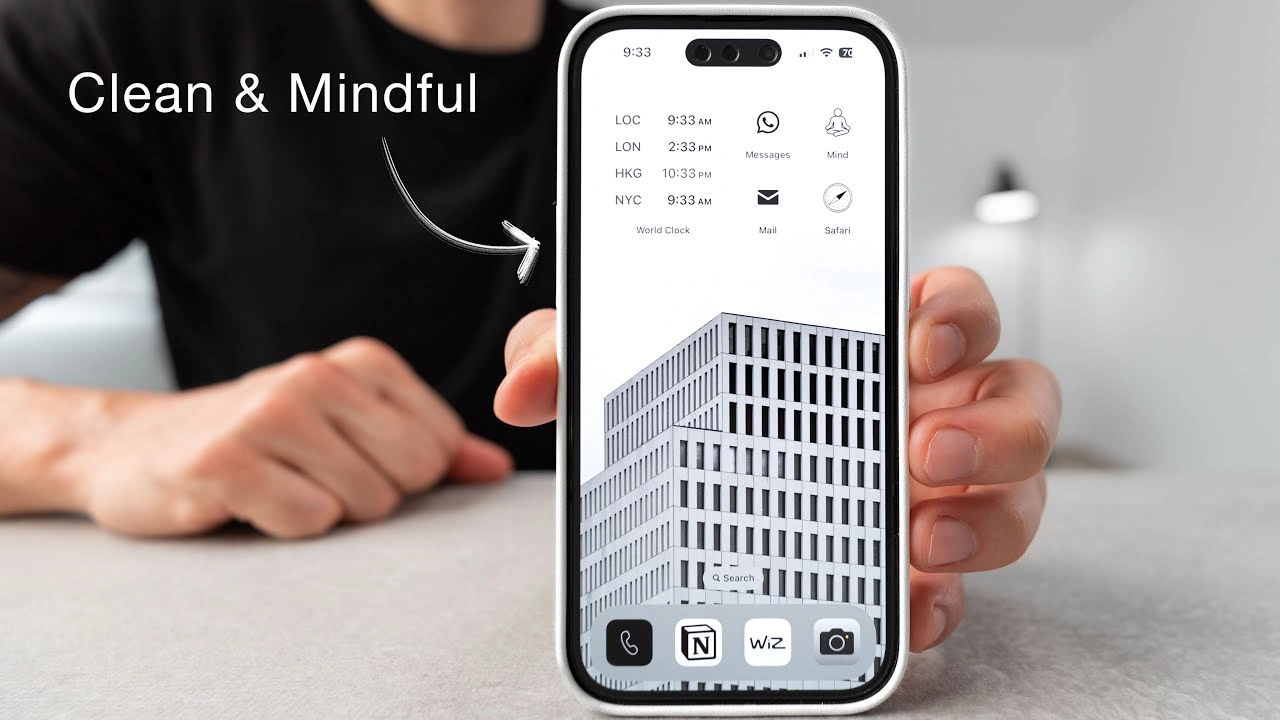
How to Create a Minimalist iPhone Setup with iOS 17

iPhone iOS 17

Are you looking to simplify your iPhone experience with the latest iOS 17? If so, you will be pleased to know that achieving a minimalist setup that balances functionality, aesthetics, and mindfulness is now more accessible than ever. This video below from Robert Creating will walk you through transforming your iPhone into a device that not only looks great but also encourages a healthier, less addictive relationship with technology.

Step 1: Ensure Your iPhone is Updated The journey begins by updating your iPhone to the latest iOS 17. This step is crucial as it unlocks all the new settings and features you’ll need for your minimalist transformation.

Step 2: Aesthetic Customization iOS 17 offers a plethora of aesthetic customizations. A popular choice is the grayscale theme, which provides a cleaner, less distracting look. You can personalize your iPhone with black and white wallpapers that automatically switch based on different modes during the day.

Step 3: Streamlined Lock Screen Setup Your lock screen can be a window to simplicity. Set a serene black-and-white photo, perhaps of a calming landscape or an architectural marvel, along with handy widgets like headphone battery levels and fitness app summaries.

Step 4: Home Screen Customization Echo your lock screen’s photo on the home screen for a cohesive look. iOS 17 allows you to limit your home screen to a single page, showcasing only essential apps. This step significantly reduces clutter and helps maintain focus.

Step 5: Utilize Focus Modes Focus modes are a standout feature in iOS 17. Set up different modes for work, sleep, and mindfulness, each with its own app layout and notification settings.

  • Work Mode: Activate this from Monday to Friday and include apps crucial for your professional tasks.
  • Mindfulness Mode: Include apps that promote a balanced and mindful use of your phone, such as meditation or fitness tracking apps.
  • Sleep Mode: Employ a darker theme with minimal distractions, perhaps just a moon icon, signaling it’s time to put the phone down for the night.

Step 6: Dock Customization Keep your dock limited to frequently used apps like your phone, a notes app, a smart home control app, and the camera. This approach ensures that your most important tools are always just a tap away.

Step 7: Innovative App Integration iOS 17 introduces exciting integrations like an AI assistant tool powered by GPT-4, which can enhance your content creation process and overall productivity.

Step 8: Setting Up New Focus Modes Dive into the settings to fine-tune your Focus modes. You can customize which contacts can reach you, tailor your lock screen for each mode, and even schedule them to activate automatically.

Step 9: Personalizing App Icons Use resources like Pinterest to find unique app icons, and employ the Shortcuts app to apply these custom icons for a truly personalized look.

Step 10: Standby Mode When charging, your phone can display useful information like the time, calendar, or rotating photos. Customize these widgets to suit your needs and preferences.

Step 11: App Blocking for Reduced Distraction Consider using apps like Unplug to block distracting apps during work hours or nighttime, helping you stay focused and maintain a healthy digital balance.

As you embark on this journey of minimalist transformation, remember that the beauty of iOS 17 lies in its flexibility to adapt to your unique lifestyle and preferences. Experiment with different settings and layouts until you find the perfect balance that reflects your personality and enhances your daily life.

Source Robert Creating

Filed Under: Apple, Apple iPhone, Guides


Latest timeswonderful Deals

Disclosure: Some of our articles include affiliate links. If you buy something through one of these links, timeswonderful may earn an affiliate commission. Learn about our Disclosure Policy.
Categories
News

How to create Stable Video Diffusion videos using ComfyUI

How to create Stable Video Diffusion videos using ComfyUI

In the world of video production, the rise of AI-generated videos has opened up a realm of possibilities for creators. At the forefront of this innovation is Stable Video Diffusion and the Comfy User Interface (UI), a tool that simplifies the process of making high-quality videos with the help of artificial intelligence. if you are thinking of starting to use Stable Video Diffusion to make high-quality AI generated videos Comfy UI is definitely worth checking out.

To start off, you’ll need to get ComfyUI up and running on your system, by installing the Comfy UI software and importing the necessary JSON configurations. These configurations are crucial as they dictate the quality and characteristics of your video, such as its resolution and how smoothly it plays. It’s important to always use the latest version of Comfy UI for the best results. For those who want to streamline their workflow, the Comfy UI Manager is a great addition, though it’s not a requirement. It helps manage your models, which can save you a lot of time.

Stable Video Diffusion

Stable Video Diffusion is an AI video generation technology that creates dynamic videos from static images or text, representing a new advancement in video generation.

  • Image Pre-training: Begins with static images to establish a strong foundation for visual representation.
  • Video Pre-training: Trains using a large video dataset (LVD) to enhance the model’s understanding of dynamic content.
  • High-Quality Video Fine-Tuning: Further fine-tunes on high-quality video data to improve the accuracy and quality of video generation.
  • Multi-View 3D Priors: The model can generate multi-view videos, offering a richer visual experience.
  • Text-to-Video Conversion: Capable of transforming textual descriptions into corresponding video content, demonstrating powerful creativity.

Speaking of models, before you can start creating videos, you’ll need to download the model checkpoints and place them in the correct folder. These checkpoints are what the AI uses to understand how to create your video. They are the learned experiences of the AI models. For video diffusion, models like SDXL and SVD are commonly used. The SVD XT models are particularly useful for projects that require a high number of frames, making them ideal for more complex video tasks.

To make the most of your computer’s power, you should run the NVIDIA GPU .bat file. This ensures that your video creation is GPU-accelerated, which significantly speeds up the process. This is especially helpful when you’re working on several videos at once, known as batch processing. For more information on the complete guide through all the stages of setting up the Comfy UI with Stable Video Diffusion watch the video created by My Why AI.

Here are some other articles you may find of interest on the subject of AI video tools and creation :

Once your models and settings are in place, you can start customizing your video. Within ComfyUI, you’ll select the right checkpoints and tensors, and then you’ll enter prompts to begin the video generation. This is where you can really make the video your own. You have the ability to change the motion intensity and select the image format that best fits your vision.

When it’s time to export your videos, tools like the ComfyUI Manager and the Video Helper Suite are incredibly useful. They offer a variety of export formats, which is great for sharing your videos across different platforms. You can also tweak your video’s settings further, adjusting things like the motion bucket ID and frame rate to get the exact look and feel you want.

Finally, with everything set up, you’re ready to generate the output video. This is where your creative ideas come to life, as the AI models work with ComfyUI to produce your video. Once the generation is complete, it’s important to review the video to make sure it meets your expectations.

Filed Under: Guides, Top News


Latest timeswonderful Deals

Disclosure: Some of our articles include affiliate links. If you buy something through one of these links, timeswonderful may earn an affiliate commission. Learn about our Disclosure Policy.
Categories
News

How to create effective custom prompts for ChatGPT

effective custom prompts for ChatGPT

This guide is designed to show you how to create effective custom prompts for ChatGPT. ChatGPT, a cutting-edge language model crafted by OpenAI, marks a significant milestone in the evolution of artificial intelligence interactions. This model stands out for its exceptional capacity to produce text that rivals human quality. It can seamlessly translate various languages and craft a diverse range of creative content, from poetry to technical articles.

These capabilities have unlocked a plethora of new opportunities and applications in numerous fields. Understanding the mechanics behind ChatGPT’s operations is essential for anyone looking to leverage its full potential. The key lies in mastering the art of prompt engineering – the process of designing prompts that effectively communicate the user’s intent to the AI. This skill enables users to guide ChatGPT in generating more accurate, relevant, and creative outputs. Thus, to make the most out of ChatGPT’s remarkable abilities, one must become adept at crafting prompts that are clear, concise, and aligned with the desired outcome.

Understanding ChatGPT Prompts

A ChatGPT prompt is essentially an instruction or question that guides the AI model in generating a desired response. It serves as the starting point for ChatGPT’s creative process, providing context, direction, and parameters. An effective prompt should be clear, concise, and specific, enabling the AI to generate relevant, accurate, and engaging content.

The Anatomy of a ChatGPT Prompt

A typical ChatGPT prompt consists of three main components:

  1. Context: This provides background information on the topic or subject being discussed. It helps ChatGPT better understand the context in which the question or statement is being made, leading to more relevant and informed responses.
  2. Instructions: This refers to the exact question or request being posed. It needs to be straightforward, succinct, and contain sufficient details for ChatGPT to produce a precise and relevant answer.
  3. Keywords: These are specific words or phrases that help ChatGPT narrow down its response and focus on the desired aspects of the topic.

Crafting Effective ChatGPT Prompts: A Step-by-Step Guide

  1. Define Your Objective: Before crafting your prompt, clearly define what you want ChatGPT to achieve. Are you seeking information, generating creative content, or translating a piece of text? Having a clear objective will guide your prompt structure and ensure it aligns with your desired outcome.
  2. Provide Context: Establish the background information relevant to your prompt. This could include relevant facts, figures, or descriptions of the topic or subject matter. Providing context helps ChatGPT understand the broader context and generate more relevant responses.
  3. Use Clear and Concise Language: Employ simple, straightforward language that is easy for ChatGPT to comprehend. Avoid complex sentence structures, jargon, or overly technical terms that might confuse the AI model.
  4. Be Specific: Clearly state your prompt or inquiry. Leave no room for ambiguity or misinterpretation. The more specific you are, the more focused and relevant ChatGPT’s response will be.
  5. Provide Examples: If applicable, provide examples of the type of response you’re looking for. This gives ChatGPT a better understanding of your expectations and helps it generate responses that align with your desired style and tone.
  6. Set Parameters: Specify any parameters or limitations you want to apply to the response. This could include length restrictions, specific formats, or desired tones. Setting parameters helps guide ChatGPT’s response and ensures it meets your specific requirements.
  7. Use Role-Play: If appropriate, incorporate role-play scenarios into your prompt. This can be particularly useful when generating creative content or stimulating conversations. By defining the roles and providing context, you allow ChatGPT to engage in more realistic and immersive interactions.
  8. Utilize References: If you have any relevant references, such as articles, documents, or websites, include them in your prompt. This provides ChatGPT with additional information to draw from and could enhance the quality of its response.

Testing and Refining Your Prompts

Crafting effective ChatGPT prompts is an iterative process. Experiment with different prompt structures, language styles, and parameter settings to observe how they influence ChatGPT’s responses. Use feedback loops to refine your prompts and ensure they consistently deliver the desired outcomes.

Additional Tips for Success

  1. Start with a Strong Action Verb: Begin your prompt with a strong action verb that clearly conveys the desired action or task. This sets the tone for the prompt and helps ChatGPT understand the specific goal.
  2. Use Natural Language: Employ natural language that mimics human conversation. Avoid overly formal or stilted language, as this can hinder ChatGPT’s ability to generate a natural and engaging response.
  3. Train on Relevant Data: If possible, provide ChatGPT with relevant training data on the topic or subject of your prompt. This could include sample text, code, or other relevant materials. Training on relevant data helps ChatGPT better understand the context and generate more accurate and informative responses.
  4. Research Your Topic Thoroughly: Conduct thorough research on the topic or subject of your prompt. This will provide you with a deeper understanding of the topic and enable you to craft more informed and relevant prompts.

Summary

Mastering the art of crafting effective ChatGPT prompts is a journey that involves consistent practice, thoughtful experimentation, and an in-depth comprehension of the AI model’s extensive capabilities. It’s a process akin to learning a new language, where familiarity and skill are developed over time. This guide serves as a comprehensive roadmap, offering detailed guidelines that, when followed meticulously, can significantly enhance your ability to communicate with ChatGPT effectively. The key is to engage in a dynamic process of trial and error, adjusting your prompts based on the responses you receive.

By doing so, you create a feedback loop that progressively refines your approach. Utilizing these strategies enables you to unlock the full potential of ChatGPT, facilitating the generation of high-quality content that can range from informative articles to imaginative stories. Moreover, it empowers you to engage in more meaningful and nuanced conversations with the AI, enriching your interactions. As you grow more adept in prompt crafting, you’ll also discover new creative avenues and possibilities, expanding the horizons of what you can achieve with this advanced language model. This guide aims to be your companion in this exciting journey, providing you with the tools and knowledge necessary to harness the transformative power of ChatGPT.

Filed Under: Guides


Latest timeswonderful Deals

Disclosure: Some of our articles include affiliate links. If you buy something through one of these links, timeswonderful may earn an affiliate commission. Learn about our Disclosure Policy.
Categories
News

How To Create AI Animated Videos with ChatGPT

AI Animated Videos ChatGPT

This guide is designed to show you how to create AI animated videos with the help of ChatGPT and other AI tools. In the ever-evolving landscape of YouTube content creation, the advent of artificial intelligence tools has marked a significant turning point, offering content creators a plethora of new opportunities. Among these, one niche that stands out is the production of uncomplicated, yet lucrative, animated story videos. This trend has been exemplified by the remarkable success of a range of channels that have adeptly utilized AI technology to revolutionize the art of storytelling.

These channels demonstrate that with the right AI tools, even creators with limited resources can produce content that resonates deeply with viewers. In this insightful article, we explore the nuances of leveraging AI technology, particularly ChatGPT, to develop animated story videos. Our focus is on guiding you through the process of using these advanced tools to create content that is not just visually appealing but also rich in narrative, ensuring that your audience remains thoroughly engaged and captivated by your storytelling prowess.

Crafting a Compelling Script with ChatGPT

The foundation of a great animated video is its script. ChatGPT, a versatile AI language model, emerges as a powerful tool for generating unique story ideas. The key here is to feed ChatGPT with original prompts, ensuring your content remains fresh and distinctive. By leveraging this AI, you can quickly develop creative scripts that form the backbone of your animated stories.

Bringing Stories to Life with AI Image Generation

Once your script is ready, the next step is to visualize the story. AI image generation tools come into play here, transforming your written narrative into vivid scenes. By providing detailed scene descriptions to these AI tools, you can create high-quality, relevant images that perfectly align with your story.

Using Leonardo.da for High-Quality Images

Leonardo.da stands out as a user-friendly tool for creating top-notch images. This free platform allows you to input your scene descriptions and effortlessly generate images that capture the essence of your story. The ease of use and quality of output make Leonardo.da an ideal choice for YouTube storytellers.

Animating Your Images with Leop Piix

Animation adds dynamism to your story. Leop Piix is an excellent tool for beginners and experts alike, offering simple animation techniques like panning and zooming. These subtle movements can significantly enhance the storytelling experience without the need for complex animation skills.

Adding Voice to Your Story with Eleven Labs

A compelling voiceover can elevate your animated story Eleven Labs offers a range of AI voices, providing an affordable solution for creators to add engaging narrations to their videos. Although it’s a paid tool, its effectiveness in delivering clear and captivating voiceovers makes it a worthwhile investment.

The Art of Editing: Bringing It All Together

The final stage involves editing – a crucial step in storytelling. Tools like CapCut offer simplicity and effectiveness, while advanced software like Premiere Pro or Da Vinci provides more sophisticated editing capabilities. This phase is where you combine your script, images, and voiceovers to create a cohesive and engaging story.

The Importance of Consistency

Finally, the key to growing your YouTube channel is consistency. Regular uploads, ideally three to four times a week, keep your audience engaged and help in building a loyal viewer base. Consistency in content quality and posting schedule is crucial in the competitive world of YouTube.

Conclusion

The integration of AI tools such as ChatGPT, Leonardo.da, Leop Piix, and Eleven Labs into the realm of digital content creation has ushered in a transformative era, particularly for platforms like YouTube. These tools represent the cutting edge of technology, each serving a unique role in the content creation process. ChatGPT, with its advanced language processing capabilities, acts as a creative partner in scripting narratives, while Leonardo.da excels in transforming textual descriptions into visually stunning images. Leop Piix adds another layer of dynamism by offering user-friendly animation options, and Eleven Labs complements this with its diverse range of AI-generated voiceovers.

By strategically utilizing these AI-powered tools, creators are now equipped to craft animated story videos that are not just visually engaging but also rich in storytelling. These videos have the potential not only to captivate a global audience but also to open new avenues for revenue generation. This fusion of AI technology and creative vision is redefining the bounds of digital storytelling. As you embark on this journey, you are not merely adopting new tools; you are stepping into a world where technology amplifies creativity, allowing you to bring to life stories that resonate and engage on an unprecedented scale. Start your adventure in AI-powered storytelling today, and be at the forefront of this exciting and evolving landscape.

Source Mr Money

Filed Under: Guides


Latest timeswonderful Deals

Disclosure: Some of our articles include affiliate links. If you buy something through one of these links, timeswonderful may earn an affiliate commission. Learn about our Disclosure Policy.
Categories
News

How to create a web user interface for Microsoft’s Autogen

build a web user interface for Microsoft's Autogen

Wouldn’t it be great if you’re complex tasks were managed effortlessly by a team of digital assistants, each one communicating and collaborating to make your workday smoother. Microsoft Autogen is at the heart of this scenario, a framework designed to streamline intricate processes by coordinating these assistant-like agents.

The magic of Autogen truly shines when it’s paired with a user-friendly web-based interface, transforming the way we interact with these digital helpers. This article will guide you through the steps to enhance Autogen’s user experience, making it more intuitive and engaging by using the Panel Python library to craft a superior interface.

The journey to an enhanced Autogen experience starts with the recognition of the importance of a web UI. A well-designed UI can transform the way agents’ outputs are presented, making it easier for users to follow conversations and interact with the system. By integrating a web UI, you’re setting the stage to create a visually appealing interface that efficiently conveys information and encourages user interaction.

Autogen supports various conversation patterns for agents, such as group chats and hierarchical dialogues, which are crucial for mimicking real-life communication dynamics. With a web UI, these patterns become more organized and user-friendly, allowing users to effortlessly navigate the flow of conversation among agents.

Building a web UI for Autogen

Other articles you may find of interest on the subject of Microsoft’s AutoGen :

Autogen is equipped with a range of program templates that are ready to use, which accelerates your development process. Its compatibility with different frameworks and methodologies enhances agent functionality. This flexibility ensures that you can tailor the Autogen environment to meet the specific needs of your project while maintaining strong functionality.

Panel, a Python library known for its dashboard and interactive web app features, is an excellent tool for data professionals. With the latest version of Panel, you gain access to chat components that are ideal for creating a chatbot-style interface for Autogen. This interface skillfully handles multi-agent conversations, with each agent’s responses clearly identified by customizable names and avatars.

To create a simple chatbot interface using Panel, you need to ensure that Panel is installed or updated to the latest version. Then, import and set up widget styles to customize the look of your chat components. Next, use Panel’s chat components to put together the chat interface. Finally, design a callback function that processes user inputs and integrates responses into the conversation interface.

Setting up an AutoGen Web UI:

1. Install the Autogen package and select an appropriate project from Autogen’s repository, such as the group chat research initiative.
2. Set up the language model, like GPT-4 Turbo, to enable automatic response generation.
3. Define the roles of chat participants and adjust their autonomy as needed.
4. Combine these roles into a chat manager that oversees the conversation.
5. Implement Panel’s chat interface with a callback function that manages user questions.
6. Use print functions to display messages from each agent in real-time, complete with unique avatars.

The final step is to launch the server and interact with the chat interface. This interaction results in a more readable and engaging output from Autogen, which may include code snippets, tables, and a clear sequence of conversation. By following these steps, you will have successfully improved the readability of Microsoft Autogen’s output, creating an interactive and user-focused web UI that maximizes the capabilities of the framework.

The beauty of this integration lies in the seamless blend of Autogen’s intelligent agent orchestration with the user-centric design of a web UI. Users can now enjoy a more natural and efficient way to monitor and engage with the system, as the interface brings a level of clarity and accessibility that was previously unattainable. The Panel library serves as the bridge between the complex backend processes and the user, presenting a chatbot interface that feels familiar and easy to use.

Benefits of creating a web user interface for AutoGen

  • Enhanced User Experience: The web UI, especially when designed thoughtfully, makes interacting with Autogen more intuitive and engaging. This ease of use is crucial for users who may not be technically savvy. The UI transforms complex AI interactions into a format that’s more familiar and accessible, akin to everyday web browsing.
  • Organized Conversation Patterns: Autogen’s ability to support various conversation patterns, like group chats or hierarchical dialogues, is vital for simulating real-world communication. A web UI can present these patterns in a more organized and user-friendly manner, allowing users to navigate conversations more easily and intuitively.
  • Visual Appeal and Clarity: A web interface can present information in a visually appealing way, making it easier for users to understand and follow the flow of information. This visual clarity is especially important when dealing with complex data or conversation threads.
  • Real-Time Interaction and Responsiveness: With a web UI, interactions with the AI system become real-time. This immediacy is critical in today’s fast-paced environment where delays can impact productivity and user satisfaction.
  • Flexibility and Customization: Autogen’s compatibility with various frameworks and its range of program templates offer flexibility. This adaptability is further enhanced by the web UI, which can be customized to meet specific user needs and preferences, fostering a more personalized experience.
  • Streamlined Development Process: Using tools like the Panel Python library in the web UI development simplifies the process of creating and modifying the user interface. This efficiency is beneficial for developers, allowing them to focus on core functionalities rather than UI complexities.
  • Enhanced Functionality with Interactive Components: The use of interactive components, such as chat widgets in the Panel library, can significantly enhance the functionality of the UI. These components allow for dynamic, two-way interactions between users and the AI, making the experience more engaging and efficient.
  • Accessibility and Engagement: A well-crafted web UI can make Autogen’s capabilities more accessible to a broader audience, including those who might not have deep technical expertise. This inclusivity can lead to higher engagement and more widespread adoption.
  • Better Representation of Output: The web UI can present Autogen’s outputs, such as code snippets or data tables, in a more readable and structured manner. This clarity helps users to understand and utilize the information more effectively.
  • Innovation and Experimentation: The integration of Autogen with a customizable web UI encourages innovation. Developers can experiment with different UI designs and functionalities, leading to novel ways of interacting with AI systems.

The chat components provided by Panel are not just about aesthetics; they are about functionality. They allow for real-time messaging, where each agent’s contribution to the conversation is instantly visible, making the dialogue dynamic and responsive. This real-time interaction is not just a convenience; it’s a necessity in today’s fast-paced digital environment, where delays can hinder productivity and user satisfaction.

Moreover, the adaptability of Autogen’s templates and the compatibility with various frameworks mean that developers can focus on creating solutions that are tailored to their unique requirements without being constrained by the toolset. This flexibility is crucial for innovation and efficiency, as it allows developers to experiment and iterate quickly, finding the best approach for their specific context.

The integration of Autogen and Panel is more than just a technical exercise; it’s about enhancing the user experience. It’s about taking the powerful capabilities of Autogen and making them accessible to a wider audience. Whether you’re a seasoned developer or someone who’s just getting started with digital assistants, the improved interface will make your interactions with Autogen more enjoyable and productive.

As you embark on this journey of enhancing Autogen’s interface, remember that the goal is to create a space where users can effortlessly communicate with digital agents, where the complexity of the underlying technology is masked by a simple, clean, and engaging UI. The Panel library is your toolkit, and Microsoft’s Autogen is your canvas. Together, they offer a powerful combination that can transform the way we interact with technology, making our digital experiences more human, more intuitive, and ultimately, more effective.

Filed Under: Guides, Top News


Latest timeswonderful Deals

Disclosure: Some of our articles include affiliate links. If you buy something through one of these links, timeswonderful may earn an affiliate commission. Learn about our Disclosure Policy.
Categories
News

How to use DallE 3 to create seamless patterns

How to use DallE 3 to create seamless patterns

Over the past 12 months the world of digital art creation has exploded. One recent AI tool that has been making waves in this field is DallE 3 launched by OpenAI. But is it capable of creating seamless patterns like other AI art generator such as Stable Diffusion and Midjourney. This guide takes a deep dive into the world of DallE 3, exploring how it can be used to create seamless patterns that can be used on a variety of products with remarkable precision and finesse.

Experimentation on just how good DallE 3 was at create seamless patterns and to what accuracy was conducted using Redbubble, a popular platform for customizing products, to upload and evaluate the patterns on items such as graphic T-shirts, phone cases, and spiral notebooks. A tutorial created by the Autopilot Passive Income YouTube channel also provides more insight into how you can use these new AI features within DallE 3 to create patterns for your own uses or to sell online.

The journey begins with the generation of a myriad of seamless patterns using DallE 3. The AI tool was given specific prompts, such as the creation of a seamless floral pattern. To add depth and complexity to the design, a carefully chosen color palette was used, along with additional details like a hand-drawn illustration with a subtle grunge texture. These graphic design elements served to enrich the patterns, enhancing their visual appeal and making them more captivating.

Creating seamless patterns with DallE 3

Once the patterns were created, they were uploaded to Redbubble to evaluate their seamless integration on various products. The patterns were implemented on graphic T-shirts, phone cases, and spiral notebooks. The visibility of seams was then meticulously scrutinized on each product. The goal was to determine how well the patterns maintained their integrity and continuity when applied to different surfaces and shapes.

Seamless pattern prompts

Creating seamless patterns using DALL-E 3 involves crafting prompts that effectively communicate the desired elements, styles, and continuity of the pattern. Remember, DALL-E 3 might require a few attempts to perfectly capture your vision, so be patient and adjust your prompts based on the results you get. Here are some tips for formulating your prompts:

  • Specify the Pattern Type: This involves defining the fundamental nature of the pattern. For instance, geometric patterns can range from simple shapes like squares and triangles to more complex tessellations. Floral patterns might include specific flowers or a mix of foliage and blossoms. Abstract patterns could be more free-form and less representational. By specifying the type, such as “intricate Celtic knot pattern” or “retro 70s swirls and circles”, you guide the AI towards your desired theme.
  • Mention Color Palette: Colors can dramatically change the feel of a pattern. Pastel shades might convey a soft, gentle aesthetic, while bold, primary colors could give a more energetic vibe. Specifying colors like “earth tones including browns and greens” or “monochrome pattern in shades of blue” helps in achieving the desired mood and visual impact.
  • Indicate Style or Era: This adds a historical or cultural dimension to your pattern. An Art Deco style may feature streamlined, geometric forms and rich colors, while a Victorian pattern might include intricate florals and ornate details. By stating something like “a pattern in the style of Japanese Edo period art” or “1960s psychedelic patterns”, you direct the AI towards specific artistic influences.
  • Detail the Scale and Density: The size and spacing of elements in a pattern are crucial for its overall appearance. A dense pattern with small, closely packed elements creates a different effect than a sparse pattern with larger, more spaced-out elements. For example, “a densely packed miniature star pattern” or “a sparse pattern with large, abstract shapes” gives clear guidance on the desired scale and density.
  • Request for Symmetry or Asymmetry: Symmetrical patterns are balanced and orderly, while asymmetrical patterns can appear more dynamic and spontaneous. By specifying your preference, such as “perfectly symmetrical geometric shapes” or “asymmetrical layout with varied plant forms”, you can influence the pattern’s balance and flow.
  • Define Texture or Material: This aspect involves the perceived surface quality or material of the pattern. A pattern that mimics a specific material, like “a seamless pattern that looks like quilted fabric” or “metallic sheen in an industrial-themed pattern”, can add a tactile dimension to the visual design.
  • Consider Repeating Elements: Emphasizing seamless transitions between elements is crucial for a continuous pattern. Phrases like “elements that interlock without visible seams” or “a pattern where shapes blend seamlessly at the edges” ensure the AI understands the need for a cohesive, uninterrupted design.
  • Be Open to Experimentation: Exploring unconventional combinations or novel ideas can lead to unique and creative patterns. Inviting unpredictability with prompts like “a fusion of Art Nouveau and futuristic styles” or “an unexpected mix of organic and digital elements” can yield fascinating results.

Image upscaling

To ensure the high quality of the patterns, an image upscaler was employed. This tool amplifies the resolution of images, making them clearer and more detailed. The upscaler was particularly beneficial for patterns that included intricate details, such as the hand-drawn illustration and grunge texture. The high-resolution images resulted in patterns that were sharp and well-defined, regardless of the product they were applied to.

The use of color palettes and supplementary details played a significant role in personalizing the patterns. The color palette was carefully chosen to complement the design and enhance its visual appeal. Additional details, such as a hand-drawn illustration and a grunge texture, were also incorporated to add depth and complexity to the patterns. These elements contributed to the creation of unique and visually engaging designs that stood out on the products.

Seem visibility

The visibility of seams was a critical factor in evaluating the seamless integration of the patterns. The patterns were inspected on various products to determine the visibility of the seams. The aim was to ensure a seamless transition from one segment of the pattern to the next, regardless of the product’s shape or surface.

To achieve superior seamlessness, several strategies were employed. One such strategy involved adjusting the background color. By choosing a background color that harmonized with the pattern, the visibility of seams was significantly reduced. Another strategy involved the use of image sizing tools to ensure the patterns fit perfectly on the products. These modifications resulted in patterns that were approximately 95% seamless.

The experiment demonstrated that DallE 3 is highly proficient in creating patterns that are nearly seamless. The AI tool was successful in generating unique and visually engaging designs that maintained their integrity and continuity when implemented on various products. However, the seamlessness of the patterns was not perfect, and some adjustments were necessary to achieve superior results. Despite these minor challenges, DallE 3 proved its worth as a tool for creating seamless patterns, offering a fresh and innovative approach to graphic design and those looking to resell a designs perhaps on Etsy or other digital e-commerce sites.

Filed Under: Guides, Top News


Latest timeswonderful Deals

Disclosure: Some of our articles include affiliate links. If you buy something through one of these links, timeswonderful may earn an affiliate commission. Learn about our Disclosure Policy.

Categories
News

How to create advanced custom GPT AI assistants for your website

How to create advanced custom GPT AI assistants for your website

In an era where digital innovation is paramount, AI assistants based on Generative Pre-trained Transformers (GPT) are redefining user interactions on websites. This guide delves into the stages of creating advanced custom GPT AI assistants, a tool that not only responds to queries but also actively engages users in meaningful interactions. By harnessing the power of OpenAI’s Assistants API, this journey introduces a world where AI can transform business interactions and user experiences.

At the core of building custom GPT AI assistants is the Assistants API. This powerful interface allows the integration of various tools such as Code Interpreter, Retrieval, and Function calling, vital in tailoring responses to specific user needs. The Assistants API, still in its beta phase, is constantly evolving, offering a playground for developers to experiment and refine their AI assistants. A typical integration involves creating an assistant, initiating conversation threads, and dynamically responding to user queries, showcasing the flexibility and adaptability of this technology.

Integrating an OpenAI custom GPT into your website

You have the capability to attach up to 20 files to each Assistant, with each file having a maximum size of 512 MB. Additionally, the collective size of all files uploaded by your organization is capped at 100GB. Should you need more storage, an increase in this limit can be requested through the OpenAI help center.

Other articles we have written that you may find of interest on the subject of Assistants API :

Unlike standard chatbots, the Assistant API offers unparalleled customization here are a few of their benefits when compared to the ChatGPT GPT AI model versions :

  • Customizability: Users can build bespoke AI assistants by defining custom instructions and choosing an appropriate model, tailoring the assistant to specific application needs.
  • Diverse Toolset: The API supports tools such as Code Interpreter, Retrieval, and Function calling, enabling the assistant to perform a range of functions from interpreting code to retrieving information and executing specific actions.
  • Interactive Conversation Flow: The API allows for creating a dynamic conversation flow. A ‘Thread’ is created when a user initiates a conversation, to which ‘Messages’ are added as the user asks questions. The Assistant then runs on this Thread, triggering context-relevant responses.
  • Continuous Development: Currently in beta, the API is continually being enhanced with more functionality, indicating an evolving platform that will grow in capabilities and tools.
  • Accessibility and Learning: The Assistants playground, an additional feature, offers a user-friendly environment for exploring the API’s capabilities and learning to build AI assistants without any coding requirement, making it accessible even for those with limited technical expertise.
  • Feedback Integration: OpenAI encourages feedback through its Developer Forum, suggesting a user-centric approach to development and improvements.

This is especially beneficial for niche industries, where the AI can perform specific tasks like calculating potential savings or capturing leads. The key lies in effectively managing the AI’s knowledge base and actions, a process that involves integrating multiple APIs as demonstrated in the tutorial above. Other areas covered in the tutorial include :

Integrating APIs and Coding Your Assistant

Setting up the environment for your custom GPT AI assistant is akin to orchestrating a symphony of different technologies. Each API, with its unique integration process, plays a crucial role in the functionality of your AI assistant. The coding phase is where the magic happens, as you program your GPT to handle knowledge documents and define custom actions, transforming it into a multifaceted tool for your website.

Implementing AI on your website

The transition from coding to implementation is seamless. Embeddable scripts allow for easy integration of the GPT AI assistant into your website, empowering it to engage in conversations, answer FAQs, and perform specific calculations, like assessing solar savings for customers. This step is crucial in making the AI assistant a tangible, interactive element of your digital presence.

The culmination of this process is launching your GPT AI assistant on a server, ensuring it can handle high traffic volumes and provide consistent, reliable interactions. This stage signifies the readiness of your AI assistant to handle real-world interactions, making it a robust tool for lead generation and customer engagement.

Building advanced custom GPT AI Assistants

The Assistants API, currently in its beta phase, is a robust tool designed by OpenAI to aid developers in creating versatile AI assistants. These assistants are capable of performing an array of tasks, each fine-tuned with specific instructions to modify their personality and abilities. One of the key features of the Assistants API is its ability to access multiple tools simultaneously. These tools can range from OpenAI-hosted options like Code Interpreter and Knowledge Retrieval, to custom tools developed and hosted by users via Function calling.

Another significant aspect of the Assistants API is its use of persistent Threads. Threads facilitate the development of AI applications by maintaining a history of messages and truncating them when the conversation exceeds the model’s context length. This means that a Thread is created once and can be continually appended with Messages as users engage in conversation.

Moreover, the Assistants can interact with Files in various formats. This interaction can occur either during their creation or within Threads between the Assistants and users. When utilizing tools, Assistants have the capability to not only reference files in their messages but also create new files, such as images or spreadsheets. This comprehensive suite of features underlines the Assistants API’s potential as a pivotal tool in the realm of AI-assisted development.

Creating an advanced custom GPT AI assistant for your website is more than just a technological endeavor; it’s a strategic move towards enhancing digital interaction and business growth. With the right tools and understanding, such as the Assistants API and integrations with other APIs, you can craft an AI assistant that not only answers questions but also adds tangible value to your business or clients. For more information and full documentation on how to use the Assistants  API created by OpenAI jump over to the official website.

Filed Under: Guides, Top News


Latest timeswonderful Deals

Disclosure: Some of our articles include affiliate links. If you buy something through one of these links, timeswonderful may earn an affiliate commission. Learn about our Disclosure Policy.