Capture amazing aerial footage with this two-drone bundle. Photo: Cult of Mac Deals
Current drone technology is remarkable, and it’s revolutionizing everything from military and humanitarian operations to online sales and even Apple Maps. But unlike groceries, cutting-edge drones for everyday users just keep getting more affordable. And this 4K camera drone bundle is the perfect example.
Whatever you want out of a drone, these models come equipped, whether it’s stunt flying or crisp aerial footage. Both drones come with cameras capable of capturing 4K video — one fully adjustable on the Phantom Eagle and two on the Blade K.
The drones fold up to just 5 inches across. And when you’re ready to launch, they expand and take to the air with a single button press.
Take to the air, anywhere
Their four-channel gyro is aided by optical flow technology that keeps the drones hovering exactly where you want them. When you need speed, they can take off like a shot. You can even do barrel rolls with very little practice. With “headless mode,” you don’t even need to worry about positioning the drones for takeoff.
Both of these 4K camera drones feature additional cameras and sensors that detect solid objects, stopping collisions before they happen. That makes them great devices for first-time flyers, although the Blade K is especially beginner-friendly due to its streamlined control options. With a powerful 1,800 mAh battery, you can enjoy up to 12 minutes of flight time out of either drone.
The Belkin Auto-Tracking Stand Pro can hold up an iPhone, rotate and tilt to keep the camera focused on the user during video calls. It’s wish fulfillment for every TikTok or YouTube creator working alone. The same goes for anyone who’s frequently in video conferences.
I went hands on with the accessory and my iPhone 15. And wow, this thing is impressive.
This post contains affiliate links. Cult of Mac may earn a commission when you use our links to buy items.
Belkin Auto-Tracking Stand Pro review
When video chatting with an iPhone, you can hold your iPhone or put it in a stand. In the first option, the camera moves too much. In the second, it doesn’t move enough. The same is true when making a TikTok or YouTube video without someone handling the camera for you.
Belkin Auto-Tracking Stand Pro can be your camera operator. Place an iPhone 12 or newer model on the MagSafe connector and the stand automatically rotates 360 degrees (and more) or tilts up and down 90 degrees to keep you on camera.
It works with both front and rear cameras, and can charge the iPhone at the same time.
Table of contents
Your robot camera operator pal
Belkin’s new iPhone stand pans and tilts to keep the camera following you. Photo: Belkin
Belkin Auto-Tracking Stand Pro is cylindrical and about 8.5 inches tall. It’s just large enough to do what it needs to do and no bigger. The gadget won’t crowd your desk, though be sure to give it room to move.
The accessory needs to be a cylinder so it can rotate a full 180 degrees. If for some reason you want to film yourself walking around and around, you can.
A MagSafe charging mat sits at the top of a short arm. This magnetically holds your iPhone, and can tilt 45 degrees upward or downward. So yes, you can jump up and down on camera if you want to.
Because the connection is magnetic, you can easily position your handset’s camera in landscape mode to record YouTube videos or in portrait mode for TikTok videos.
I put the dock on my desk so it’s ready for video calls, and to keep my iPhone battery topped off with the wireless charger. It makes a great stand for the handset — just don’t force the motors to move to position the screen.
DockKit enabled
There have been similar products before, but the Belkin Auto-Tracking Stand Pro stands out by using Apple’s own DockKit system. That means it doesn’t require a third-party application — the tech is already built into the iPhone.
DockKit is part of iOS 17 and was unveiled at WWDC2023. “It determines how to best position the iPhone camera to frame and track objects, with improved person tracking using combined body and face tracking for human subjects,” noted Apple.
There are limitations. Most notably, the iPhone video application you want to use must support DockKit. FaceTime does, of course, but Slack does not. I expect more software support soon — Belkin’s recently released iPhone camera dock is the first to be DockKit-enabled.
And the software is intended for video. You can’t use it to center yourself in a still image. For example, when using the Apple Camera app on my iPhone, DockKit only activates in Video mode. Switch to Photo and my iPhone camera stops following me.
I’m hoping Apple changes this in DockKit 2.0. It should stay active when taking a still images. It’s great for selfies.
Belkin iPhone camera dock simply works
Belkin’s iPhone camera dock is right at home helping with a FaceTime call. Photo: Ed Hardy/Cult of Mac
My testing of the Auto-Tracking Stand Pro began even before I realized it. Last autumn, I had a video call with a Belkin spokesperson during which she got up and moved around. The camera smoothly followed her, and I assumed she was calling me from an iPad with Center Stage. No, she then revealed she was demonstrating her company’s upcoming iPhone camera stand.
I was blown away. The camera moved smoothly, and perfectly quietly, too. I really thought it was a fully software solution, not hardware.
Once I got an Auto-Tracking Stand Pro to test for myself, I continued to be impressed because it simply works. I don’t have to do anything complicated — put my phone on the dock, activate it, run a video or conferencing application, and forget about worrying about the camera. It’s going to follow me, no matter how much I move around.
I hesitate to say the system keeps me centered when recording — DockKit is actually smarter than that. In my testing, the iPhone camera dock doesn’t twitch every time I move slightly. That’s good — too much camera movement is distracting and even potentially nauseating for viewers. Instead, I’m kept somewhere near the center of the image, and the dock only moves when I significantly change position.
That said, I don’t want to overstate the capabilities of Belkin Auto-Tracking Stand Pro. Unlike a human running the camera, the device can’t anticipate my actions. When I start walking to one side, the camera follows me, but there’s a brief delay. In other words, it’s a lot better than a static camera, but neither is it perfect.
As for multiple people on camera, my experiments indicate that the Belkin iPhone camera dock follows the first person it sees. When I start a recording then have another person join me, the camera stays on me if they walk off. It’ll angle to try to keep both of us in frame, but if we get too far apart, I take priority.
And DockKit offers a neat trick: when I’m holding something off to one side, the camera keeps me and the object centered in the frame. It’s just what you want if you’re going to use video to demonstrate a product. And if I’m on a FaceTime call while looking at my MacBook, the camera will angle itself to show both me and the laptop so it’s clear I’m not staring off into space.
Both front and rear cameras supported
The system supports recording with both the front- and rear-facing cameras. In my testing, the front camera works perfectly for video conferences — but then, that’s what it’s there for.
Before recording your TikTok or YouTube video with the rear camera, I recommend doing some experiments with the front one to get used to the quirks of Belkin’s accessory and DockKit. Then flip to the rear camera and start filming.
I tested the limits of the hardware/software so you don’t have to. My iPhone and the Belkin Auto-Tracking Stand Pro continue to follow me even when I’m 20 feet away from the camera. That’s as far as I could get in my office.
I also tested to see how quickly I had to move to get off the camera. I literally had to run while only about five feet from the camera to be going too fast for it. So it’s probably ready for you to record an exercise video.
Belkin camera dock vs. Apple Center Stage
Center Stage is a brilliant feature that lets an iPad’s front-facing camera follow someone on a video call. There are a lot of similarities to Belkin’s iPhone camera dock with DockKit, but some significant differences too.
Most notably, Center Stage only works in video conferencing apps. It’s not intended for recording video. And even if it did, the feature only supports the tablet’s front-facing camera, limiting the resolution.
Belkin Auto-Tracking Stand Pro gets power via a 5-foot USB-C cable, and it comes with the necessary wall adapter.
The accessory does not have to be plugged in to operate — it has its own built-in battery — so you can position it wherever you need, including the middle of a large room. However, it will not charge your iPhone without an external source of power.
Belkin says the battery is good for five hours of use. Mine lasts longer than that, so the exact length depends on how much you move around.
Belkin Auto-Tracking Stand Pro final thoughts
The Belkin Auto-Tracking Stand Pro can be your virtual cameraman, whether you’re making a TikTok video or simply on a video call. Photo: Belkin
Belkin and Apple collaborated to make the best iPhone accessory it’s been my pleasure to test in years. It’s not going to replace human camera operators, but it’s a godsend for any video creator working alone.
I regularly watch college lectures on YouTube, and the Belkin Auto-Tracking Stand Pro would be ideal for these. A professor can address the class directly then walk over to a whiteboard and they’ll smoothly stay on camera. Without needing help from anyone.
All in all, it’s a blessing for video creators of almost any type. And it’s great for those who are on frequent video conferences, too.
★★★★★
Frankly, I’d give it more stars if I could.
Pricing
Belkin Auto-Tracking Stand Pro costs $179.99. It’s available now.
It’s fair to say the Samsung Galaxy S24 Ultra‘s cameras haven’t had the smoothest of launches since the phone came out – but it sounds as though a fix is on the way to deal with the final three outstanding problems.
As per serial tipster @UniverseIce (via SamMobile), Samsung‘s engineers are on the case with solutions for below-par telephoto image quality, inaccurate white balance problems, and issues with abnormal red coloring in some situations.
While we’ve not heard a huge number of complaints about these problems specifically, they are out there. However, it’s worth noting that no timeframe has been given for this next update.
In our Samsung Galaxy S24 Ultra review, we were very impressed with the performance of the camera modules, as well as the handset overall. While we didn’t notice any major issues like the ones this rumored update will address, other users clearly have.
Third time lucky
Samsung Galaxy S24 Ultra will improve many camera problems in the next “camera firmware update”, Including telephoto image quality, inaccurate white balance and abnormal red color.but they have not given an accurate timetable.I hope they can solve it in AprilApril 7, 2024
See more
You could say this is a case of third time lucky for Samsung and software updates for the Galaxy S24 camera: the first update in February improved shutter speed, video clarity, and automatic exposure and color selections.
Then we had a second update at the end of March, which included more improvements to camera quality and usability. One of those improvements was apparently to white balance – although this still seems to be a problem for some.
With so much image processing now done by smartphones after a photo is taken, there can be a wide variety of end results in terms of colors, brightness, white balance, and exposure. To some extent, it’s down to personal preference in how you want these settings managed – making it difficult for phone makers to please everyone simultaneously.
Get the hottest deals available in your inbox plus news, reviews, opinion, analysis and more from the TechRadar team.
However, for it to take months for a flagship phone’s camera to get up to its full potential isn’t ideal, and Samsung will be well aware of that. What’s more, the camera isn’t the only component that problems have been reported with.
A future Apple TV box could have a built-in camera for FaceTime and other video calling apps, according to Bloomberg‘s Mark Gurman.
tvOS 17 added a FaceTime app to the Apple TV, allowing for users to have video calls by using the rear camera on a connected iPhone or iPad. If the Apple TV gained a built-in camera, users would no longer need to rely on an external device.
In his Power On newsletter today, Gurman said an Apple TV with a camera would support “gesture-based controls,” but he did not provide any additional details. Starting with updates like iOS 17, macOS Sonoma, and tvOS 17, you can make hand gestures during video calls in the FaceTime app and other video calling apps to fill the screen with 3D effects. For example, you can hold two thumbs up to show fireworks on the screen, or make two peace signs with your hands to show confetti. It is unclear if Gurman is referring to this feature, or if there would be all-new gesture-based controls for tvOS overall.
In other home-related news, Gurman said Apple has also considered a “lightweight smart display” that could be used around the house.
Here’s everything he said about these devices:
Then there’s the smart home segment, where Apple still has grand ambitions. It has discussed automating household functions and offering a revamped Apple TV set-top box with a built-in camera for FaceTime videoconferencing and gesture-based controls. And the technology will all work seamlessly with both the iPhone and Vision Pro.
One piece of the strategy is a lightweight smart display — something akin to a low-end iPad. Such a device could be shuttled from room to room as needed and hooked into charging hubs stationed around the house. Apple has started small-scale test production of the screens for this product, but hasn’t made a decision on whether to move forward.
It is unclear if or when these devices will be released. Gurman previously reported that a new Apple TV would be released in the first half of 2024, but it is unclear if a camera would be added to that particular model, or if it is still further away.
While the iPhone 16 Pro and iPhone 16 Pro Max are still months away from launching, there are already over a dozen rumors about the devices. Below, we have recapped new features and changes expected for the devices so far. These are some of the key changes rumored for the iPhone 16 Pro models as of April 2024:Larger displays: The iPhone 16 Pro and iPhone 16 Pro Max will be equipped with large…
Apple agreed to pay up to $14.4 million (CAD) to settle a class action lawsuit in Canada that alleged the company secretly throttled the performance of some iPhone models (“batterygate”), and eligible customers can now submit a claim for payment. Apple’s settlement received court approval on March 4, and the claims period began today, according to law firm Rochon Genova LLP. To submit a…
Apple’s CEO Tim Cook this week sold 196,410 shares of the company’s stock, which had a total value of approximately $33.2 million based on the average sale price of the transactions, according to a U.S. Securities and Exchange Commission filing. After taxes, Cook netted nearly $16.4 million from the sales. Cook received all of the shares that he sold this week as a performance-based stock…
It has been nearly 18 months since Apple last updated its iPad lineup, and customers are anxiously waiting for new models to be announced. For months, there have been rumors about new iPad Pro and iPad Air models, but the estimated timeframe for their release has been repeatedly pushed back from March to April to May. In defense of these rumors, it does sound like Apple has experienced…
Apple is exploring various “personal robotics” projects in an effort to create its “next big thing,” according to Bloomberg’s Mark Gurman. Amazon’s Astro robot One of these projects is described as a “mobile robot” that would “follow users around their homes,” while another is said to be an “advanced table-top home device that uses robotics to move a display around”:Engineers at Apple have…
Apple this week made the first betas of iOS 17.5 and iPadOS 17.5 available to developers for testing. The upcoming software updates include only a few new user-facing features so far, but hidden code changes reveal some additional possibilities. Below, we have recapped everything new in the first iOS 17.5 and iPadOS 17.5 betas so far. Web Distribution Starting with iOS 17.5, iPhone…
The total solar eclipse is coming, and of course you’ll want to capture this once-in-a-lifetime moment with your best camera. Whether that’s your DSLR, mirrorless, or smartphone, we’re here to give you the best tips possible. But let’s be honest, taking photos of the sun is hard on a normal day, and the total eclipse won’t make things easier.
Let’s set expectations. Even if you have a great camera or one of the best smartphones, your camera and your equipment may not be up to the task, and you probably won’t get an amazing shot worth hanging on your wall or selling in a gallery, not unless you are a dedicated solar photographer.
(Image credit: Shutterstock)
That’s why we have tips for taking the best shots of the eclipse that capture the moment and the special day, not just the sun and moon in the sky. We’ll teach you how to set up properly, stay safe during the eclipse, and have a great time taking your best shots.
Most of all, don’t forget to look up – with the proper eyewear in place, of course. Don’t spend the entire eclipse managing your gear or you’ll miss a truly stellar event that likely won’t come your way again in your lifetime.
What is a total solar eclipse?
A total solar eclipse is when the Moon passes in front of the Sun, completely covering the face. This incredible event happens roughly every 18 months, which sounds frequent, but usually only a small part of the Earth has a good view of any total eclipse. This time around, the eclipse will reach a massive cross-section of North America, including many large cities in the United States, Canada, and Mexico. The next total eclipse in the US won’t come until 2044.
According to NASA, the eclipse happens because the Sun is 400 times larger than the Moon, and it is also 400 times farther away from the Earth than the Moon. This serendipity means that the Sun and the Moon appear to be the same size in the sky. When the two objects line up, the Moon covers the Sun almost perfectly.
We say ‘almost’ because the type of eclipse depends on how far the Moon is from the Earth in its orbit. When the Moon is farthest from the earth and closer to the Sun, the Moon cannot block the entire face of the Sun, so the eclipse is not total.
Get the hottest deals available in your inbox plus news, reviews, opinion, analysis and more from the TechRadar team.
During an annular eclipse, the moon does not totally block the sun (Image credit: Shutterstock ID 690404740)
This gives us an ‘annular’ eclipse, which produces the ring of fire effect around the Sun because some of the Sun’s face is still visible. During an annular eclipse, it is very dangerous to view the eclipse without proper eyewear.
This year’s total eclipse takes place when the Moon is closer to the Earth. During the total eclipse, the Moon will block all of the face of the sun, including the bright corona. When the Sun is totally blocked, it is technically safe to remove your eclipse eyewear, but only if you are in the path of totality, and only while the sun is totally blocked. NASA and the American Optometric Association still suggest leaving your glasses on, just to be safe.
(Image credit: Shutterstock)
The ultimate treat is when the moon covers the entire face of the sun. This leaves the outer atmosphere of the Sun, the Corona, visible around the Moon. Photographers love to capture every stage of the event, but that Corona shot is something truly special because the Corona is usually invisible to the eye, but visible when the Moon is blocking the Sun’s light.
The total solar eclipse is often a once-in-a lifetime event. The eclipse itself seems to change everything. Darkness looms, birds start behaving strangely, and it gets noticeably colder. All of this adds up to a moment where you realize how incredible our solar system truly is.
When and where can I photograph the total solar eclipse?
(Image credit: Shutterstock)
The total solar eclipse on April 8, 2024, will cast its shadow of totality on land starting around Mazatlán, Sinaloa in Mexico at 11:07 AM local time. It will take around one hour forty minutes to cross the continent. During that time, some portion of the Sun may appear obscured by the moon, no matter where in the country you live.
The total solar eclipse will reach totality, when the moon completely covers the face of the Sun, at the times listed below for major cities in each time zone. If you want a more detailed look, check out NASA’s excellent Where and When website.
Swipe to scroll horizontally
Location
Totality begins
Totality ends
Mazatlán, Sinaloa
11:07 AM MST
11:11 AM MST
Dallas, Texas
1:40 PM CDT
1:44 PM CDT
Little Rock, Arkansas
1:51 PM CDT
1:54 PM CDT
Evansville, Indiana
2:02 PM CDT
2:05 PM CDT
Cleveland, Ohio
3:13 PM EDT
3:17 PM EDT
Erie, Pennsylvania
3:16 PM EDT
3:20 PM EDT
Buffalo, New York
3:18 PM EDT
3:22 PM EDT
Burlington, Vermont
3:26 PM EDT
3:29 PM EDT
Montreal, Quebec
3:26 PM EDT
3:27 PM EDT
Caribou Maine
3:32 PM EDT
3:34 PM EDT
Gander, Newfoundland
5:12 PM NT
5:14 PM NT
If you haven’t already picked your spot to see the eclipse, you may want to plan ahead to get the best shot possible. Unless you are carrying a serious zoom lens on a professional camera, your best shot of the eclipse is probably not going to be a close-up of the sun. You’ll want to have some scenery as well.
To pick the best location, including the surroundings and any other background you’d like to include, check out the app PhotoPills. Though PhotoPills is a bit complicated to use, it does an amazing job helping you plan the best photos when the Sun and/or Moon are involved.
With PhotoPills, you enter the date and time, then choose the location where you’ll be sitting, and the app will show you where the sun sits in the sky. If you want to shoot the total solar eclipse with the Statue of Liberty or your favorite local monument, PhotoPills is a must-have. We have more from PhotoPills below.
What to know about shooting an eclipse with your camera
If you’re in the path of totality within the United States, Canada, or Mexico and want to capture the event, then there are a number of things to do to make sure you’re properly prepared. First, you’ll need to make sure you pack the right kit.
Other than your DSLR, picking the right lens is one of the most important considerations, especially if you have an idea of the type of shot that you want to capture. At the very least, you’ll want a 200mm telephoto lens or, even better, 300mm or longer. This will result in the sun taking up around a fifth of the height of the shot.
(Image credit: Shutterstock ID 700335634)
On the other end, if you want the total solar eclipse to take up your whole shot, then you’ll need to get a lens with 1,200mm range. This can also be achieved by pairing a telephoto lens with a teleconverter, which is a secondary lens that magnifies the center of your image. So, 1,200mm is possible with a 600mm lens and a 2x teleconverter. Teleconverters add more glass, though, so the shot may not be as bright or sharp as it would be with a dedicated lens.
Getting the closest possible crop might seem like the best course of action, but there are other things to consider. The first is that the sun’s corona extends beyond the edge of the Sun and the total eclipse, and therefore a tight crop risks cutting off details. The second is that the closer the crop, the more regularly you’ll have to reframe.
To avoid both of these pitfalls, we recommend a lens focal length of between 400-800mm perfect for capturing all the beauty of a total solar eclipse.
Shooting the total solar eclipse – what you’ll need
(Image credit: Shutterstock / Lesterman)
– Camera or phone – A telephoto lens (at least 300mm – up to 1200mm) – Safety solar filter – Safety solar glasses – Tripod – Shutter release
For most photography, you’re all set with a DSLR and a lens, but that’s not the case when capturing the total solar eclipse. In the same way that you’ll need solar glasses for your eyes, you’ll also need a solar filter for your lens. This will help you avoid damaging components and ruining sensitive electronic parts.
Solar filters are fitted like any other filter, with a screw-in thread at the end of your lens. They block out enough UV and IR light to not only protect your equipment but also to protect your eyes when looking through the viewfinder.
The first step to finding the perfect filter is to find the diameter of your lens. This number, in mm, will be displayed either on the side or front of the lens and may even be preceded by the Ø symbol.
(Image credit: Shutterstock)
With all your gear purchased and ready to go, it’s time to make sure everything is clean and free from dust. The last thing you’ll want is a speck of dust ruining that once-in-a lifetime photo. Use a camera cleaning kit, or if you want it done professionally, then it might be worth paying for the service for this special occasion.
Pack your gear into your favorite camera bag, or look at our best camera bags for some ideas. Get to your pre-determined site well ahead of time, set everything up, and wait for the magic to happen.
Step-by-step instructions for shooting an eclipse with your camera
(Image credit: Future)
1. Choose your location By far the easiest way to make sure you’re in the right location is to purchase the Photopills app ($10.99 / £10.99 / AU$14.99). The app includes an incredible augmented reality function that superimposes the moon onto your camera feed. Being able to frame your shot in advance will save you the stress of having to work on the fly. Preparation is key to avoiding missing that special shot, and if you can visit the location ahead of time, then all the better. Position your tripod and lens in your desired location, and make sure your lens is pointing in the correct direction.
2. Set your lens to manual focusing You may be able to get away with autofocus, but to have maximum control, you are far better off switching to manual focus. By doing this, you’ll avoid the hassle of having to wait for the camera to find focus every time you want to take a snap.
3. Turn off VR/IS There is no need for your camera to apply vibration reduction or image stabilization when you’re using a tripod. Turning these settings off will result in a better image.
4. Shoot in RAW If you want to edit your image in post, then give yourself the most dynamic range by shooting in RAW format. This will enable you to adjust highlights, shadows, and the overall exposure in case you don’t capture it perfectly in camera.
(Image credit: Shutterstock)
5. Choose spot metering The only bright part of your shot is going to be the sun so make sure you meter on the sun specifically. Any of the other metering modes will struggle to accurately process the frame due to the amount of dark versus light parts.
6. Use aperture priority mode Switch on your camera and make sure it is set to aperture priority mode. In this mode, all you have to do is set the aperture and the ISO. Your camera will work out the ideal shutter speed for a well-exposed shot. An aperture between f/5.6 and f/8 is ideal. Finally, adjust your ISO so that you get a shutter speed of somewhere between 1/100s and 1/500s. Keep in mind that the higher the ISO, the more noise that will be introduced.
7. Capture the solar eclipse You are now ready to take some photographs. Use your camera’s self-timer or a remote shutter release to make sure you’re not touching your camera when the shutter is open. Any movement to the camera or tripod when the shutter is open could result in a blurry image.
What to know about shooting an eclipse with your phone
The most important thing to consider when you’re planning to shoot the total solar eclipse with your smartphone is just what sort of image you plan to capture. Even if you have one of the best smartphones with a real optical zoom lens, you won’t come close to making a photograph with an eclipse that dominates the image.
As we mention above in our camera section, to photograph the eclipse in full view, you’d need a lens with around 1,200mm focal range. The iPhone 15 Pro Max has a 24mm equivalent main lens, and that 5X zoom lens only reaches to around 120mm. Even the 10X zoom lens on the older Samsung Galaxy S23 Ultra is equivalent to around 240mm zoom. That’s very impressive for a smartphone, but not adequate for astrophotography.
People watching the solar eclipse may be more interesting than the eclipse (Image credit: Shutterstock)
Instead of trying to capture a close-up of the Sun’s corona, why not use your smartphone for what it does best? Take photos of the entire scene. Take photos of the landscape as the Sun disappears.
Even better, smartphone cameras are great for taking photos of people. Take photos of all the people around you, staring up at the eclipse with glasses on, wide-eyed with wonder. In 20 years, when the next eclipse rolls around, those are the photos that will be the most interesting: the photos that show what it was like to be there, not the photos that show just the moon and the sun.
Step-by-step instructions for shooting an eclipse with your phone
1. Use a tripod (even if it’s not really a tripod) You don’t need a tripod to stabilize your phone, but making sure your camera is steady is the best thing you can do for a sharp shot. On Amazon you can find plenty of options for phone tripods, or if you have a photo tripod you can just get an adapter to hold your phone. If you don’t have a tripod, find an object you can lean your phone against to hold it steady.
2. Use the camera’s timer When you tap the shutter button on screen, you can shake the phone, which causes blur. Better to set the timer. Look for the timer on the left side of the camera screen, when you hold your phone sideways (landscape). On iPhone and Galaxy phones, you’ll find a small clock icon that you can tap to set a timer.
The iPhone timer option is shown here (Image credit: Philip Berne / Future)
3. Attach a solar filter Normally, your phone can balance a scene with the sun just fine. During an eclipse, when the Moon partially blocks the Sun, your camera will adjust for the dark scene but the Sun will still radiate intense light. The difference can damage your camera sensor, just like it can damage your eyes. When the Moon is not totally blocking the Sun, you need to use a solar filter.
Samsung agrees. Company reps tell me “we encourage the use of a filter to protect your device for extended shots taken before, during, and after the eclipse when using a tripod.” The good news is that you don’t need to buy a special filter for your phone. If you have standard ISO 12312-2 eclipse glasses, you can just tape one of the lenses to the back of your phone. As long as it is covering your phone lens during the eclipse, your phone will be safe.
4. Turn down your exposure Even during the darkness of the eclipse, the bright light of the Sun’s corona may be overexposed in your shot. You can dial down the exposure on an iPhone. When you focus, a yellow box appears with a small sun icon. Hold the sun icon and drag it down to lower the exposure value (EV).
On Galaxy and other Android phones, you may need to use your camera’s Pro mode. Don’t worry, you won’t have to mess with too many settings. Just look for EV (exposure value) and lower this to a negative number. Lower your exposure until you can see texture on the sun, not just a bright blob of light.
The Night mode icons on the iPhone are shown in yellow (Image credit: Philip Berne / Future)
5. Shoot in Night mode during totality When the sky is dark, Night Mode will help you balance the difference between the eclipse and your surroundings. On the iPhone, Night Mode should activate automatically when your scene gets dark. A special Night Mode icon will appear, and if you tap on the icon you can set the controls for longer or shorter shots.
On Galaxy phones there is a Night Mode you can manually select. On Pixel phones, this is called Night Sight mode. Experiment during the totality of the eclipse to take a variety of photos for the best possible results.
6. Shoot video and photos at the same time Did you know your phone can shoot video and take photos at the same time? If you start taking a video of the eclipse, you’ll see a white circle appear on the screen. Tap that circle and your iPhone or Android phone will also take a photo, separate from the video. Just remember to use a solar filter when you shoot video before and after totality occurs.
Should I buy a lens attachment for my phone?
Sadly, extra lenses won’t help your smartphone take better eclipse photos. While there are some interesting lens attachments for smartphones, especially the very cool lenses made by Moment, I wouldn’t recommend buying a lens attachment to photograph the solar eclipse. Lens attachments are made to work with the main camera, the 1X zoom lens, so they won’t help take better photos of the eclipse.
If you attach a lens to the 5X zoom on the iPhone 15 Pro Max or Galaxy S24 Ultra, the image will not be clear because attachment lenses are not made to work with those zoom cameras. The zoom camera leaves too much space between the sensor and the lens, making it hard for the camera to properly focus. Your shot will be blurry.
Also, adding 2X zoom won’t be enough for great solar photography. To fill your frame with the eclipse, you’d need at least 600mm focal range, and up to 1,200mm would be ideal. The iPhone 15 Pro Max and Galaxy S24 Ultra give you 120mm with 5X zoom, and doubling that would result in 240mm equivalent. That’s nice, but still not close enough for a great, detailed eclipse photo.
If you’re a discerning mobile photographer in the market for a new shooter, our best camera phone roundup should be your first port of call, but, if you’re interested in how the best of the best actually perform, read on. I decided to pit the latest iPhone 15 Pro Max, Google Pixel 8 Pro and Samsung Galaxy S24 Ultra against one another in an extensive shootout to see how these top-ranking photographic champs compare.
For those not so familiar with this trio of mobile titans, here are some of the highlights. The Pixel 8 Pro – Google’s latest and greatest – delivers the company’s best AI smarts yet, thanks to its in-house Tensor G3 chip. This helps with everything from screening calls to ensuring everyone’s smiling and looking at the camera in that photo from your auntie’s 60th birthday (a feature known as Best Take).
Where photography is concerned, the 8 Pro’s hardware falls to a 50MP main sensor – boasting superior low light compared to the Pixel 7 Pro’s primary camera, a 48MP ultra-wide with a tuned macro mode and a 48MP telephoto that offers 5x optical zoom and helps facilitate the phone’s max 30x Super Res Zoom.
Apple, by comparison, hasn’t yet gone hard on branding every feature under the sun with AI, but that doesn’t make the iPhone 15 Pro Max any less of a cutting-edge powerhouse. It has one of the most capable mobile chips on the market in the company’s own A17 Pro SoC, alongside the first periscopic telephoto camera ever on an iPhone, with a unique tetraprism 5x optical zoom.
Sapphire crystal lens cover, Adaptive True Tone flash, Photonic Engine, Deep Fusion, Smart HDR 5, LiDAR scanner, Apple ProRAW, Dolby Vision HDR recording at up to 4K 60fps, LOG video recording, Academy Color Encoding System, Cinematic video recording
Pro controls, Ultra HDR, Magic Editor, Best Take, Photo Unblur, Motion Mode, Real Tone, Night Sight, Astrophotography, Top Shot, Live HDR+, Video Boost
ProVisual Engine, Reflection removal, Generative fill, Astrophotography, Pro Mode, Dual Recording, Nightography, Instant Slow-mo, Photo Assist, Super HDR, Super Steady video
Then we have the Galaxy S24 Ultra. It looks like its predecessors but boasts the best performance of any Android phone currently on the market, thanks to a custom-tuned Snapdragon 8 Gen 3 chip, a truly stunning 6.8-inch 120Hz display, a killer quad rear camera and, for a unique touch, Samsung’s iconic S Pen stylus.
Galaxy AI features can be found all over the Ultra experience, translating phone calls in real-time and letting you reframe photos with generative fill. However, like the last Ultra, camera versatility remains one of its biggest strengths.
In line with its rivals, there’s now a 5x optical zoom to work with but through some clever sensor cropping, the Ultra actually affords you six lossless focal lengths, from 0.6 to 10x zoom, as well as still capture at up to 200MP, thanks to its main sensor (not to mention up to 8K 30fps video capture too).
So with the specs and features detailed, let’s get on with testing those cameras in the real world.
Note: the camera being used is noted in the bottom left corner of each camera sample.
Main sensor
Starting with standard photos, shot using each phone’s main snapper. These are the results from simply opening the camera app and hitting the shutter button – no settings tweaks and no lenses or modes changed first.
Tower Bridge & Millennium Bridge
Image 1 of 3
(Image credit: Future | Alex Walker-Todd)
(Image credit: Future | Alex Walker-Todd)
(Image credit: Future | Alex Walker-Todd)
We shot on a characteristically bright and cloudy day in London Town; starting with these shots of Vic against Tower Bridge (above) and later Millennium Bridge (below).
The Pixel adopted perhaps the most striking results in this well-lit scene, with strong contrast and colors. It also served up the most true-to-life colors for Vic’s skin and hair. However, the rest of the scene adopted a slight magenta tinge that looked unnatural in comparison to the other two phones.
Image 1 of 3
(Image credit: Future | Alex Walker-Todd)
(Image credit: Future | Alex Walker-Todd)
(Image credit: Future | Alex Walker-Todd)
The iPhone captured a nicer, brighter image – with softer contrast and a cooler overall look – and the most balanced dynamic range processing, bringing up the darkest parts of the image without making the entire scene appear flat.
The S24 Ultra – like the Pixel – miscolored the overall scene, with a slight green tint this time, but otherwise applied good color and contrast to Vic herself. The phone’s large sensor and lens resulted in a slightly wider shot with shallower depth, applying a pleasing, natural softness to the background. The end result does, however, looked a little washed out.
So while all three have specific strengths, I’d give this one to the iPhone.
Shoes
Image 1 of 3
(Image credit: Future | Alex Walker-Todd)
(Image credit: Future | Alex Walker-Todd)
(Image credit: Future | Alex Walker-Todd)
Next up, Vic’s blue suede shoes, captured outside with a strip of bright, cloudy sky directly above between buildings that rose high on either side.
Here, the Pixel clinches it for blending the high contrast and great detail capture – also seen on the iPhone, but with more accurate colors.
Uplighting
Image 1 of 3
(Image credit: Future | Alex Walker-Todd)
(Image credit: Future | Alex Walker-Todd)
(Image credit: Future | Alex Walker-Todd)
Removing natural light from the scene and relying on what was predominantly this strong uplighting, like the Tower Bridge shot, the Pixel spit out the most striking and high-contrast image, with a lot of shadow detail on the brickwork.
With Samsung’s move away from its former heavily-processed approach to photography, I think it managed the most true-to-life and visually pleasing result of the three phones here. That said, I wish it had applied the iPhone’s processing when it came to dynamic range. Apple’s phone was the only one of the three to avoid blowing out the skin on Vic’s hand, even if the shot was comparatively too cool overall.
High contrast
Image 1 of 3
(Image credit: Future | Alex Walker-Todd)
(Image credit: Future | Alex Walker-Todd)
(Image credit: Future | Alex Walker-Todd)
One of the first sample shots taken on the day was this high-contrast scene, as I thought it would be a great way to assess how these phones handle metering and dynamic range processing. Sure enough, the results presented a lot of variation.
The Pixel’s preference for contrast is exacerbated here, with its attempts to stop down the scene in order to capture anything beyond the arch. This left the shot underexposed, overall, while the light sources still appeared blown out. It made for the most dramatic final image but the weakest of the three.
The iPhone took second place, serving up great colors and contrast, and managing to rescue some of the brightest parts of the shot in the back of the scene. Not quite as well as the S24 Ultra, though, which produced a similar result but did an amazing job more correctly exposing the entire scene. It kept all the detail beyond the arch, as well as all the lit brickwork in the foreground.
Zoom
Now let’s talk zoom. While all three of these phones have large main sensors and periscopic 5x telephoto cameras, they all handle zoom a little differently.
Samsung (above), unsurprisingly, served up the greatest versatility. Its combination of a secondary dedicated 3x telephoto sensor and sensor cropping gives you lossless shots at 0.6x, 1x, 2x, 3x, 5x and 10x magnification. In addition, that insane 100x Space Zoom feature, which might seem useless on first impressions, means you’ve got more headroom at distances between that 10x and 100x that the other phones struggle to match.
As for consistency and overall quality, I think the iPhone (above) deserves a pat on the back, as it doesn’t overextend like the Samsung. Even at its maximum zoom range, 25x lossy shots still held an impressive amount of detail and information that’s wholly usable.
The Pixel (above) didn’t disappoint in this test but it just received a participation award here. It served up consistent and usable shots but they don’t turn heads like the other two.
Image 1 of 3
(Image credit: Future | Alex Walker-Todd)
(Image credit: Future | Alex Walker-Todd)
(Image credit: Future | Alex Walker-Todd)
Also, don’t fall for Apple’s 24mm, 28mm, 35mm lens marketing (above), it’s just cropping on the main sensor, which I’d advise you do in post instead, for greater control.
Low light
While all three phones can deliver in conventional low light shooting scenarios, like nights out and at dusk, I wanted to see what work the image processing and sensors have to do when the lights get low. As such, we shot in a windowless room with the door almost completely shut – to the point where I could only just make out the plants on the wall with the naked eye.
First, here’s the scene with the lights on, to serve as a baseline for what each phone’s low light and Night modes are striving for.
The scene before the lights were turned off (Image credit: Future | Alex Walker-Todd)
Night mode off
Image 1 of 3
(Image credit: Future | Alex Walker-Todd)
(Image credit: Future | Alex Walker-Todd)
(Image credit: Future | Alex Walker-Todd)
Low light capture without Night mode proved (unsurprisingly) challenging for all three phones. The iPhone cranked the ISO up to retain the most sharpness and detail, at the expense of exhibiting the most sensor noise.
With Google’s well-established prowess with Night Sight, the Pixel didn’t even try here; creating a sort of pink sludgy shot with such underwhelming detail and color information that it looked like it was shot using infrared.
The S24 Ultra made the best of a bad situation, offering sharper detail than the Pixel and less noise than the iPhone in exchange for its characteristic green tint across the scene.
Night mode on
Image 1 of 3
(Image credit: Future | Alex Walker-Todd)
(Image credit: Future | Alex Walker-Todd)
(Image credit: Future | Alex Walker-Todd)
Flipping to Night mode, the Samsung showed the least improvement; struggling to recover much color detail or improve exposure much over the standard low light sample.
The iPhone boasted the fastest Night mode capture time and produced a usable shot with good detail but poor dynamic range. Not to mention it added a yellow hue to the scene.
The Pixel, meanwhile, moved from the back to the front of the pack, by being able to render a shot that looked like it was taken in a lit room. It’s still dim, sure, but there’s clear definition in the subject, tangible detail in the shadows and you can tell that the leaves on the plants are, in fact, green.
Portrait mode
Portrait mode using the main cameras on each phone yielded some interesting results. Both Android phones struggled to segment Vic from the background cleanly, while the iPhone over-softened her slightly in both scenarios.
Image 1 of 3
(Image credit: Future | Alex Walker-Todd)
(Image credit: Future | Alex Walker-Todd)
(Image credit: Future | Alex Walker-Todd)
In all three phones’ images, the level of bokeh looked too extreme as standard, with the iPhone offering the most effective adjustment over this attribute after capture. The Pixel won the award for subject detail, while the S24 Ultra managed the most accurate colors.
Image 1 of 3
(Image credit: Future | Alex Walker-Todd)
(Image credit: Future | Alex Walker-Todd)
(Image credit: Future | Alex Walker-Todd)
While all three phones crop in by default, the Pixel locks you into a 1.5x zoom as standard. You can punch much further out with the Galaxy and iPhone.
Selfies
All these shots are taken using each phone’s front camera, with a mix of Portrait mode enabled or disabled, depending on the sample.
Image 1 of 12
(Image credit: Future | Alex Walker-Todd)
(Image credit: Future | Alex Walker-Todd)
(Image credit: Future | Alex Walker-Todd)
(Image credit: Future | Alex Walker-Todd)
(Image credit: Future | Alex Walker-Todd)
(Image credit: Future | Alex Walker-Todd)
(Image credit: Future | Alex Walker-Todd)
(Image credit: Future | Alex Walker-Todd)
(Image credit: Future | Alex Walker-Todd)
(Image credit: Future | Alex Walker-Todd)
(Image credit: Future | Alex Walker-Todd)
(Image credit: Future | Alex Walker-Todd)
The Pixel’s tendency to increase contrast and under-expose in bright conditions carried across to its front 10.5MP camera. The iPhone and Galaxy’s 12MP selfie snappers were brighter and retained more face detail in direct comparison.
The S24 captured the narrowest field of view and had that characteristic green tint but offered the best overall composition – covering color, contrast and detail capture. The iPhone once again won for edge detection around challenging elements like hair and offering the most natural-looking bokeh, even if shots erred on the cooler side once more.
Video
Finishing with video capture, our 4K 60fps test footage revealed that, while close, the iPhone’s stabilization and autofocus tracking ruled supreme, but that color and contrast take a nosedive compared to the still shots the phone can produce.
The S24 Ultra over-exposed and over-sharpened footage but did the best job at filtering out wind noise. The Pixel came out on top, even without leaning on its AI-enhanced Video Boost feature.
Not only did footage more closely match still photo quality and fidelity, but provided you’re happy with the degree to which it punches in, you get a warmer and more filmic image overall, with attractive depth of field from that main 50MP sensor.
It’s worth noting that if you’re looking for a new phone to slot into a content capture workflow, the iPhone arguably has the best codecs and toolset, with Samsung’s flagship offering has the highest degree of control at capture.
Conclusion
So with these titans thoroughly tested, we can’t say there’s a clear-cut champ but rather the winner depends on which photographic qualities matter most to you. Are you a fan of the Pixel’s Night mode photography, or more a lover of the iPhone’s bokeh? Perhaps the sheer breadth of features and versatility offered by the S24 Ultra gets your vote.
Whichever device made the most convincing argument, just know that you’re getting one of the industry’s best right now.
In a recent Reddit AMA, Google revealed it’s working on multiple projects for its smart home platform. Chief among these is the introduction of an offline mode. The way Google Home currently works, as explained by Android Authority, is commands sent to a device are transmitted through company servers first before affecting your network. If your internet ever goes out, commands cannot be sent at all which can be frustrating for homeowners. Offline mode will directly address this by enabling local control.
It may, however, be a while until we see the feature rollout. One of the Google devs told a commenter that the team is focusing more on routing device interaction locally through the Matter standard. They’re doing this first because they want to establish a stable software foundation with low latency before moving forward. “Once…. a significant portion of your traffic [is] running locally,” the company will look into establishing an offline mode for Google Home.
Bringing in the old
Much of the AMA saw people airing out their grievances with Google Home. They point out the many issues affecting the platform using some, shall we say, colorful language. Once you get past all the vitriol, you begin to see what’s coming down the pipeline, including adding support for first-generation Nest cameras.
The old models don’t work with the current iteration of Google Home, leading to an ecosystem filled with hardware that should function as a cohesive unit, but sadly doesn’t. Support is sporadic at the moment According to another developer, updating the firmware for those old gadgets has been a tough challenge. Some of them are ancient by tech standards having launched back in 2015. A few, like the original Nest Cam Indoor, do work with Google Home.
Expanding support
Another area the team is working on is improving integration with third-party brands like Wyze and Eufy. Several commenters asked why the tech giant is so focused on Nest devices instead of expanding support to non-Google hardware. They cite “security and quality controls as reasons for delays”. Efforts like these require closely working with partners to ensure everything runs well.
Considering that Wyze recently suffered (yet another) security breach and service outage in February, perhaps it’s a good idea for the team to take its time filling in the gaps.
And that may be all the projects the Google Home dev team is working on right now. We scoured through the nearly one thousand comments but didn’t see anything else particularly noteworthy apart from promises from the team.
Get the hottest deals available in your inbox plus news, reviews, opinion, analysis and more from the TechRadar team.
Unfortunately, a launch date for any of these features or a roadmap wasn’t given so we don’t know when these updates will arrive. But if and when they do come out, they’ll first be made available through Google Home’s Public Preview. Instructions on how to join the program can be found on the Nest Help website.
One UI 6.1 brings Instagram Camera lockscreen shortcut
Devices running One UI 6.1 now have a new option for the lockscreen shortcut: Instagram Camera. As you can see in the screenshots below, the feature is present on our Galaxy S23 Ultra and Galaxy S24+. Both devices are running One UI 6.1 and have the latest beta version of Instagram. Once you set Instagram Camera as your phone’s lockscreen shortcut, you can jump directly to Instagram’s camera view, making it easier to create stories or post images and videos on your social media profile.
You can set Instagram Camera as your phone’s lockscreen shortcut by long-pressing on your phone’s lockscreen, entering your lockscreen password, selecting any of the lockscreen shortcuts (left or right), and then choosing the Instagram Camera option from the grid.
We couldn’t find the option to set Snapchat Camera as the lockscreen shortcut. Maybe the feature is still under development and could be released later. However, we can’t say for sure if Snapchat Camera will also appear as a lockscreen shortcut on Samsung phones.
I’ve been a long-time fan of Pixel phones, but Google made a major change to the camera experience on the latest Pixel 8 Pro that effectively broke one of its most convenient features; and while I’ve patiently waited for a fix, it looks like Google has committed to leaving users in the lurch, rather than undoing its mistake.
I’ve reviewed at least one entry of every generation of the best Pixel phones since Google debuted the series back in 2016, and the camera is what keeps me coming back; so much so that I’ve mainlined one of Google’s smartphones since the Pixel 4 XL. My experience with the Pixel 8 Pro, however, is soured every time a simple camera UI tweak that Google has made stops me from getting the shot I want.
The Pixel 7 Pro has proven to be one of the company’s most capable phones yet, and while the jump to the Pixel 8 Pro brought better performance, an aesthetic refinement, more AI functionality and more impressive imaging hardware, I wasn’t enamored with the camera experience compared to that of its predecessor right out the gate.
If it ain’t broke… break it?
This is partly down to the revised image processing pipeline, which produces distinctly different images compared to the Pixel 7 Pro. This may be a result of the Pixel imaging team having to adjust to the 8 Pro’s new sensor hardware – but that doesn’t absolve them of the newest model’s added ‘Pro Controls’, which consolidate management over ISO, shutter speed, focus, white balance, shadows, and brightness.
The Pixel 7 Pro’s manual control layout (left) and the Pixel 8 Pro’s Pro Controls (right) (Image credit: Future | Alex Walker-Todd)
While bringing this functionality under a single menu might seem like a refinement between generations, the move actually results in more steps being required when it comes to the critical moment of capture. With the Pixel 7 Pro, a tap on your subject while framing up was all it took to bring up sliders for white balance, shadows, and brightness; you could then adjust each value on the fly from within the viewfinder, instantly.
By incorporating these adjustments into the Pro Controls along the bottom of the Pixel 8 Pro’s camera UI, the new layout requires more taps and swipes, not to mention the need to switch in and out of each slider individually. If all you’re trying to shoot is a static landscape this change doesn’t really matter all that much, but for those occasions when you have only a few fleeting moments to grab your shot – most likely of a moving subject – forget it.
Google bills the Pixel 8 Pro’s Pro Controls as a premium upgrade, but those who were familiar with the Pixel 7 Pro’s interface will likely consider the change anything but that. To add to the sting, in the pursuit of consistency across generations the subsequent Android 14 update to the Pixel 7 Pro’s camera app has hidden those white balance, shadows, and brightness sliders under a similar UI change (ISO, focus and shutter speed controls aren’t available on the 7 Pro), meaning that now nobody can enjoy what was one of the best features of the recent Pixel camera experience.
More unhappy customers
While it might seem like I’m blowing this seemingly small change out of proportion, a quick scout around online brings up numerous testimonies that echo my sentiment; change for change’s sake is the wrong way to implement an upgrade, especially if it’s at the user’s expense.
Android Authority‘s Rita El Khoury appears to have similar feelings, while numerous users on the r/GooglePixel subreddit have also noted Google’s bad call here. Original poster andrewhahalee said, “now you need 4 taps to turn on manual mode, scroll the bottom, tap the option and then adjust,” while user 465468 said, “Major step in the wrong direction…I think it’s a damn shame and really can’t understand how they would come up with that change.”
As such, while both the Pixel 7 Pro and Pixel 8 Pro remain among some of the best camera phones available right now, it would appear that it’s not competitors Pixel photography fans need to be aware of – it’s Google.
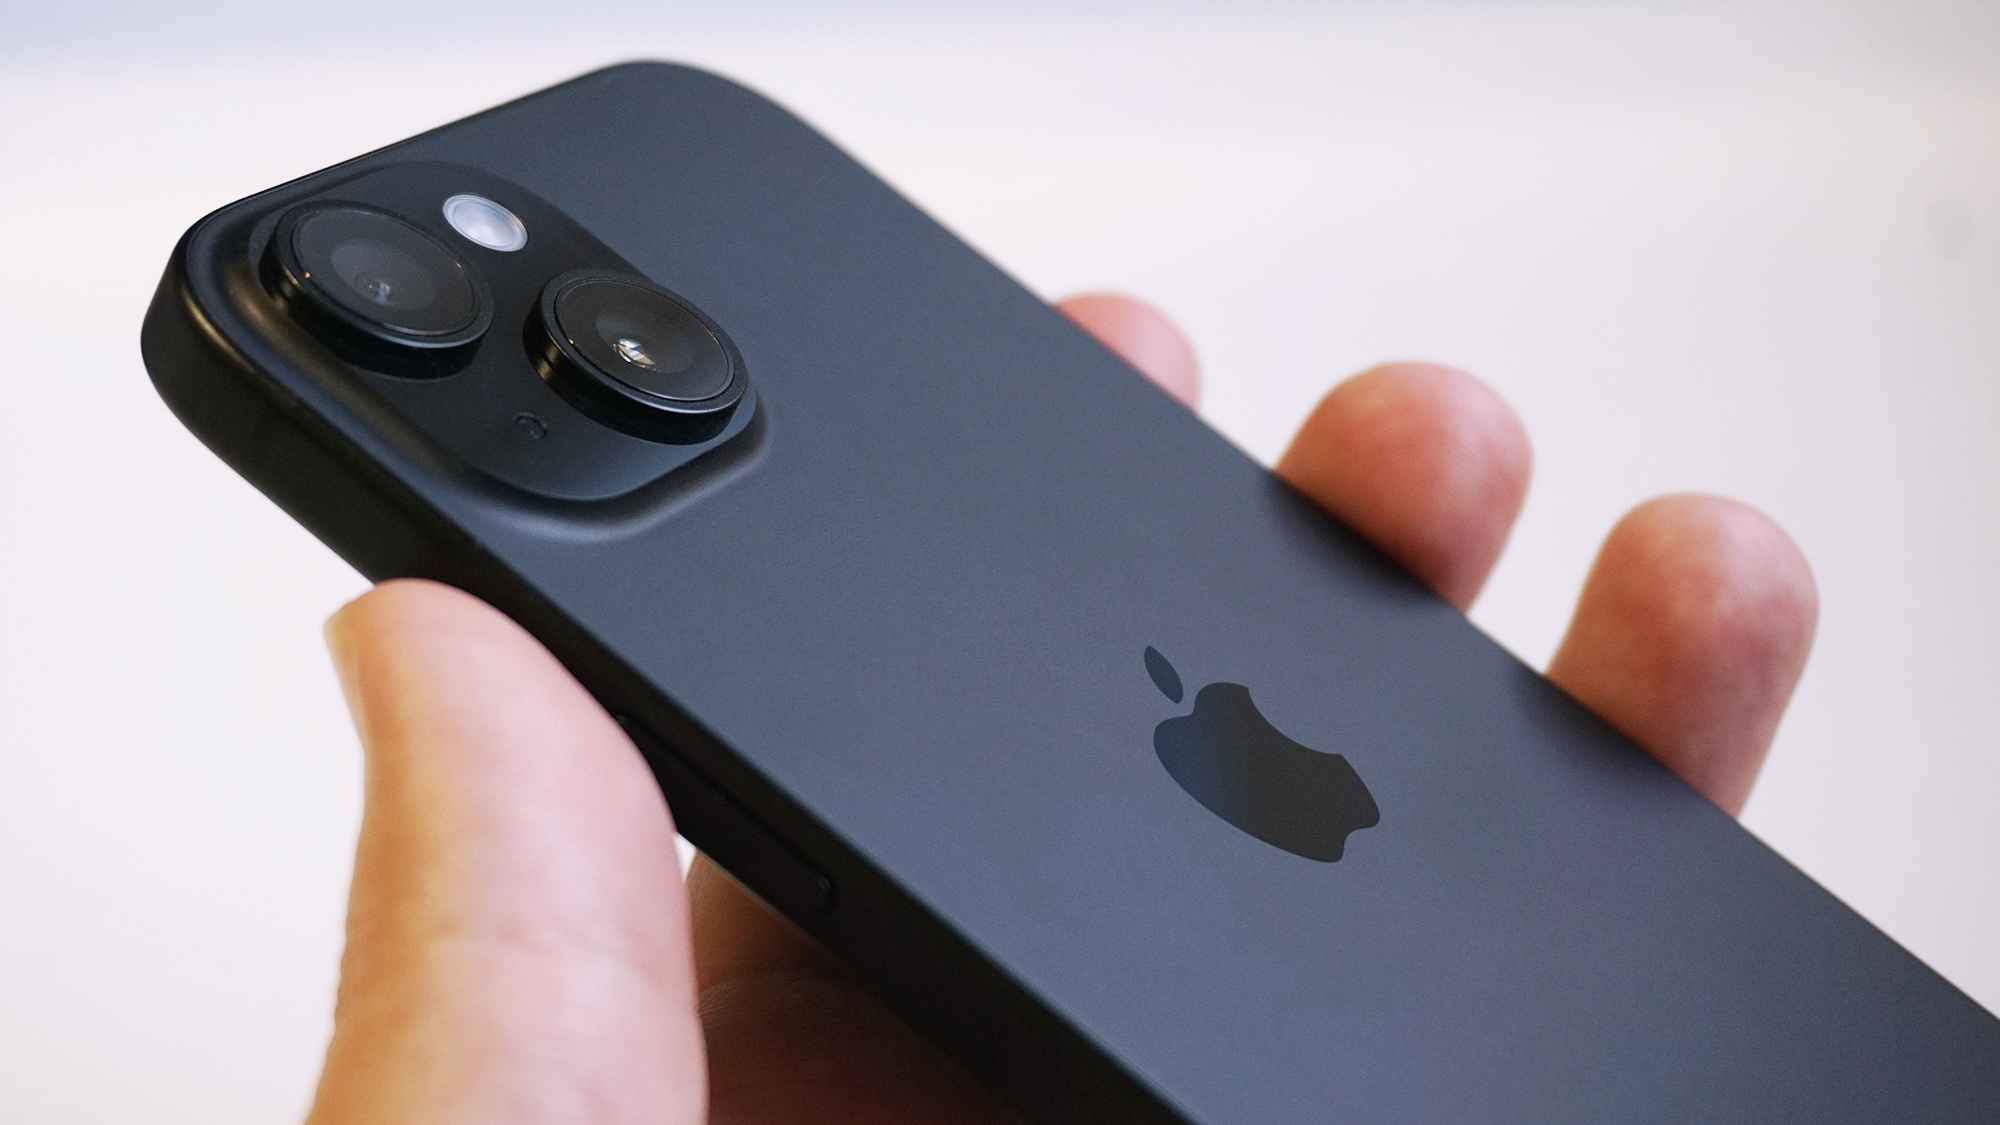
We’re seeing a steady stream of iPhone 16 leaks now, and the latest one comes from a tried and trusted source of advance information: case designs. A newly leaked case molding looks to have once again revealed the rear camera redesign heading to the iPhone 16 and iPhone 16 Plus.
This particular leak comes from serial tipster @SonnyDickson (via MacRumors), and shows the vertical pill-shaped look Apple is apparently going for this year when it comes to the two lenses on the back of the cheaper iPhone models.
It’s a rumor that we’ve come across before, but the more leaks we see along the same lines, the more inclined we are to believe they’re accurate – though nothing is certain until Apple gets around to an official launch (likely in September).
As well as renders showing the new design, we’ve also seen leaked schematics, and case molds, and dummy units revealing the new camera alignment, so that’s a lot of leaks that need to be wrong if this isn’t the design approach Apple is taking this year.
More spatial video?
First Cases for iPhone 16 pic.twitter.com/xCUOldA8I2March 29, 2024
See more
Recent iPhones have put the two rear cameras diagonally on a square bump. The vertical alignment we’re seeing in these new leaks has been used by Apple before, but you need to go back to the iPhone 12 in 2020 to find it.
As for why the switch back could be made, it seems spatial video might be the reason: while the iPhone 15 Pro and Pro Max can record this special 3D-enhanced video format (viewable on the Apple Vision Pro), the two cheaper 2023 models can’t.
Having the dual cameras aligned vertically might enable the recording of spatial video, bringing it to more handsets and more people. Maybe Apple engineers just like the look of the new alignment too, and feel it’s time for a change.
Get the hottest deals available in your inbox plus news, reviews, opinion, analysis and more from the TechRadar team.
The three cameras we’re expecting around the back of the iPhone 16 Pro and the iPhone 16 Pro Max don’t appear to be shifting their position, and will most likely arrive in the standard triangle formation that’s used on the current models.