Categories
News

Beginners guide to video editing with Microsoft Clipchamp

Beginners guide to video editing with Microsoft Clipchamp

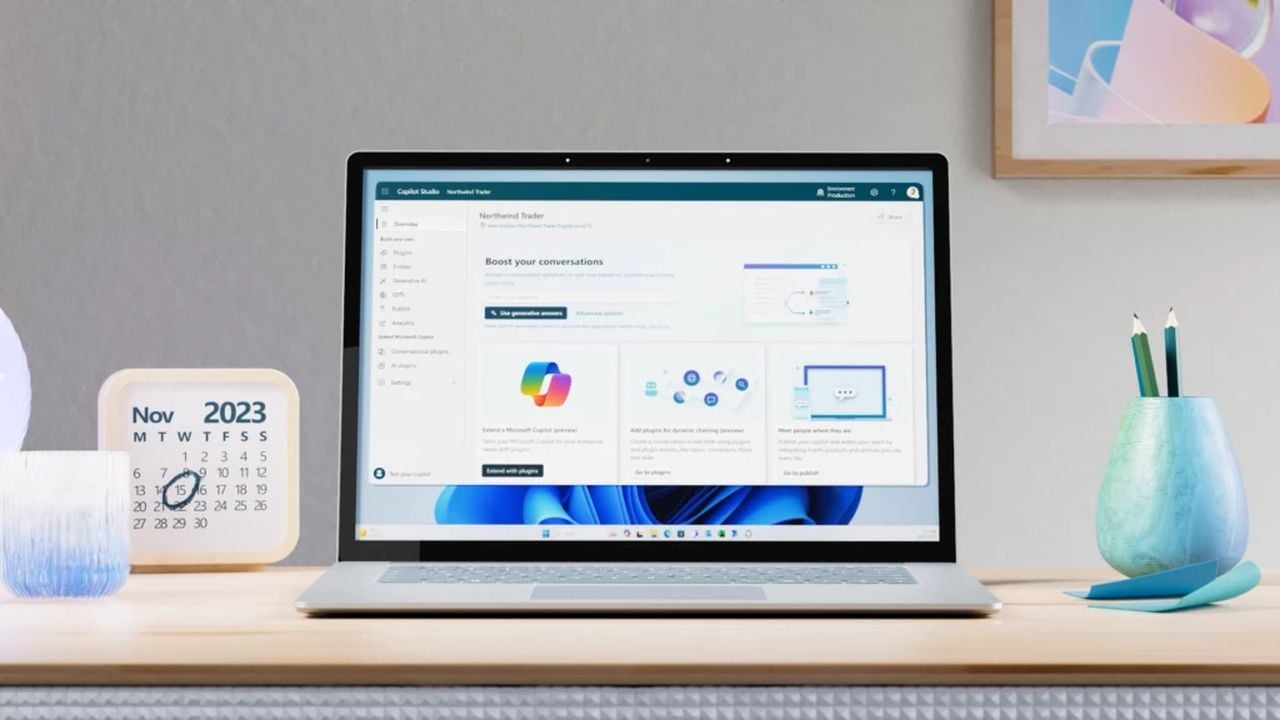
Microsoft Clipchamp is a user-friendly video creation and editing tool designed for workplace use, accessible through Microsoft 365. It offers a range of features to facilitate video production without requiring prior experience. If you’re looking to create professional videos for your office but don’t have much experience in videography, Microsoft Clipchamp could be the solution you need.

The Clipchamp video creation and editing platform is now part of the Microsoft 365 suite, and it’s designed to make video production accessible for users at any skill level. Starting a video project with Clipchamp is straightforward. Once you sign in with your Microsoft 365 credentials, you can choose to start with a blank slate or use one of the many templates available.

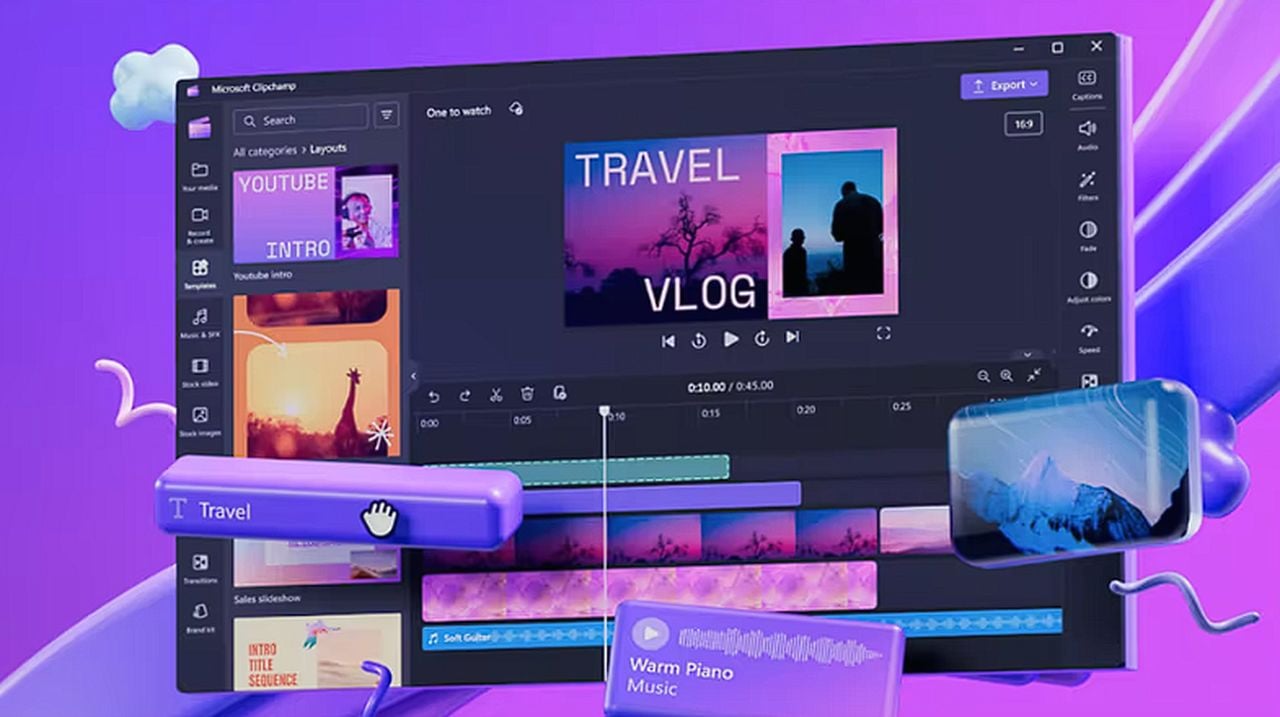
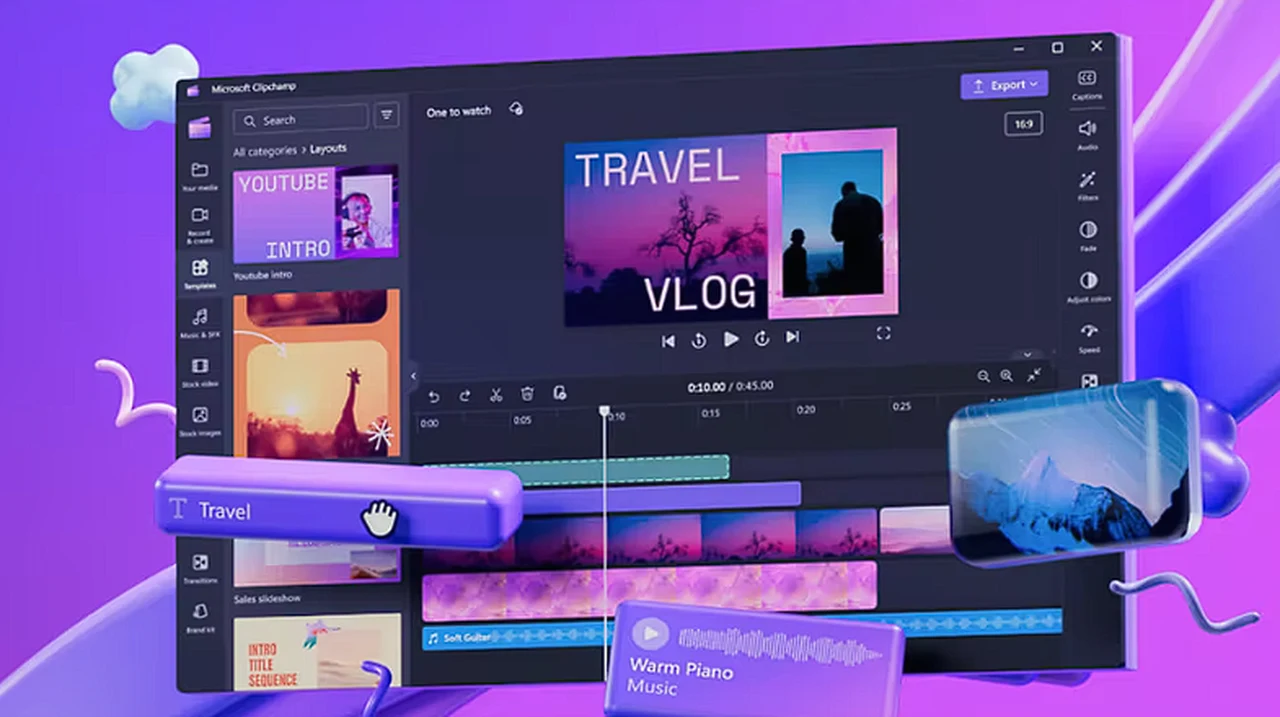
Easy video editing with MS Clipchamp

The platform’s integration with Microsoft OneDrive makes it easy to add your own media, such as images, videos, and audio clips, to your project.

Clipchamp’s interface is user-friendly, allowing you to record videos with blurred or virtual backgrounds that look professional. If you’re presenting or doing voiceovers, the teleprompter feature is incredibly helpful, as it scrolls your script on the screen while you record. The screen recording feature is also great for making tutorials or demonstrations.

When it comes to editing, Clipchamp’s multitrack timeline editor is intuitive and allows you to refine your footage by splitting clips, trimming sections, and removing gaps. The application offers preset aspect ratios for easy video sizing, and the Fill button helps ensure your content fits the frame perfectly.

Benefits of using Clipchamp

  • Starting a new video project with a Microsoft 365 account via Clipchamp for the web or through Microsoft OneDrive.
  • Importing media from local files or OneDrive, with options to record with a blurred or virtual background.
  • Utilizing a teleprompter feature by pasting a script for reading during recording, and the ability to record the screen.
  • Editing videos using a multitrack timeline editor to split clips, trim footage, and remove gaps.
  • Adjusting video size with preset aspect ratios and using the Fill button to resize videos automatically.
  • Customizing videos with titles, transitions, filters, and adjusting audio volume in the right panel.
  • Exporting videos for saving and sharing through SharePoint and OneDrive.
  • Sharing exported videos with colleagues, customers, or clients, and integrating them into PowerPoints, emails, or Microsoft Stream.

Clipchamp provides a variety of customization tools to enhance the visual appeal of your video. You can add titles, transitions, and filters with just a few clicks. Adjusting audio is also simple, with tools to control volume levels, ensuring your video’s message is heard loud and clear.

After finishing your video, exporting it is a breeze. You can download it to your device or share it directly through SharePoint and OneDrive. Clipchamp’s compatibility with PowerPoint, emails, and Microsoft Stream makes it easy to integrate your videos into different communication channels, helping you reach your audience effectively.

Microsoft Clipchamp is a fantastic easy-to-use video editing app to improve your video production workflow in the workplace or for personal projects. Its user-friendly features assist you from the initial recording with a teleprompter to adding visual effects and sharing your finished work. Clipchamp is more than a simple tool; it’s an app that supports you in bringing your video projects to life, whether for internal communications or external marketing campaigns.

Filed Under: Gadgets News


Latest timeswonderful Deals

Disclosure: Some of our articles include affiliate links. If you buy something through one of these links, timeswonderful may earn an affiliate commission. Learn about our Disclosure Policy.

Categories
News

Beginners guide to using Microsoft Copilot Studio

using Microsoft Copilot Studio to create GPT

In today’s fast-paced digital world, businesses and individuals are constantly on the lookout for tools that can help them manage their online content more effectively. Microsoft has introduced a new solution that is capturing the attention of many AI enthusiasts and developers in the form of Microsoft Copilot Studio. This platform allows users to create a personalized digital assistant, in a similar way to how OpenAI made available custom GPTs. You can create, manage, and publish GPTs from Copilot Studio to Copilot for Microsoft 365, although the services currently in a public preview development stage.

Studio acts as a Copilot to navigate the complexities of digital content management enabling you to create complex AI models extremely easily. What makes this tool particularly appealing is its availability to those who do not have a full Microsoft 365 Copilot license, offering advanced support at a more accessible price point. This beginners guide will help you get started in just a few minutes creating your own custom Copilot AI models. Microsoft has made bot building even simpler with AI-powered capabilities in Microsoft Copilot Studio. Whether you’re new to conversational AI or a seasoned developer.

Creating  custom GPTs  using Copilot Studio

To get started once you our at the Microsoft Copilot Studio webpage in the navigation menu, select Copilots to open the Copilots page and view all the bots you have access to in this environment. On the page, you can see metadata about these copilots, including the owner, when it was last published, and when it was last modified.

Here are some other articles you may find of interest on the subject of Copilot Studio in creating GPT style custom AI models :

The process of setting up your own digital Copilot is straightforward. You begin by giving it a unique name, which it will use to interact with users. Next, you select the language that your Copilot will operate in, ensuring it communicates effectively with your target audience. The setup is completed by linking your Copilot to various content sources, such as internal documents and external websites. This step is crucial as it arms your assistant with a vast array of knowledge to draw upon when assisting users.

Once your Copilot is connected to these information sources, you can test its capabilities within the Copilot Studio to fine-tune its responses. This ensures that your digital assistant is not only functional but also provides high-quality support to your users. As your business evolves, Copilot Studio offers the flexibility to add new content sources and modify moderation settings, keeping your Copilot up-to-date with your company’s changing needs.

When you’re ready to launch, your Copilot can be integrated into various platforms, such as Microsoft Teams, your company’s website, or even mobile apps. It uses sophisticated language models to offer assistance that is both natural and contextually relevant, making interactions seamless for users.

Security is a top concern for any business, and Microsoft Copilot Studio does not take this lightly. Your data is securely stored in Dataverse, ensuring that your information is protected within your own tenant. This focus on security allows you to use the Copilot with confidence, knowing that your data is safe.

Microsoft Copilot Studio is more than just a tool; it’s a strategic asset that brings advanced artificial intelligence and workflow management to a wider audience. Its ease of setup, ability to scale, and secure framework enable businesses to enhance their digital interactions and efficiency. With Microsoft Copilot Studio, companies are well-equipped to face the future of digital content management.

Filed Under: Guides, Top News


Latest timeswonderful Deals

Disclosure: Some of our articles include affiliate links. If you buy something through one of these links, timeswonderful may earn an affiliate commission. Learn about our Disclosure Policy.

Categories
News

Knowledge Graphs in AI beginners guide

Knowledge Graphs in AI beginners guide

In the realm of Artificial Intelligence (AI), knowledge graphs stand as a crucial innovation, particularly influential in areas like machine learning and natural language processing (NLP). These structures serve as complex maps, illustrating the intricate relationships between different data elements, thereby equipping AI systems with a deeper understanding and more nuanced processing capabilities.

Understanding Knowledge Graphs

Knowledge graphs represent a leap in how AI systems comprehend and structure information. Imagine a vast web where each point, or ‘node,’ symbolizes an entity – be it a person, place, or concept. The lines connecting these nodes, known as ‘edges,’ depict the relationships and associations between them. This complex network mirrors the multifaceted nature of real-world data, enabling AI to navigate and interpret it effectively.

Historically, the evolution of knowledge graphs has been closely tied to the demands of AI’s growing sophistication. Early AI models relied on simpler data structures. However, as AI began tackling more intricate problems, the need for a robust system to manage and represent complex information led to the emergence of knowledge graphs.

What is an AI Knowledge Graph

A knowledge graph is a way to show information using a picture or diagram. In this diagram, different things (like people or places) and how they are connected to each other are shown using lines and points.

  • Structural Components:
    • Nodes: Represent entities such as people, places, objects, or concepts.
    • Edges: Denote the relationships or connections between these entities.
  • Data Representation:
    • Encodes complex information in a structured and interconnected format.
    • Facilitates the mapping of relationships and hierarchies within data.
  • Functionality in AI:
    • Enhances the understanding of context and relationships in AI applications.
    • Supports advanced data processing, from simple retrieval to complex reasoning.
  • Applications:
    • Used in machine learning for context-aware data analysis.
    • Integral to NLP for understanding language semantics and user intents.
  • Advantages:
    • Provides a more natural and intuitive way to represent real-world information.
    • Enables more efficient and accurate information retrieval and analysis in AI systems.

How do you make a Knowledge Graph

Constructing and creating a knowledge graph involves several steps and considerations, each critical to ensuring that the graph accurately represents and connects relevant information. Here’s a breakdown of the process:

  1. Identifying Data Sources:
    • Determine the sources from which to extract data. These can include databases, websites, documents, and other data repositories.
    • Ensure data diversity and reliability for a comprehensive and accurate knowledge graph.
  2. Data Extraction and Preprocessing:
    • Extract relevant data from identified sources. This might involve scraping web data, querying databases, or processing text documents.
    • Preprocess the data to clean, normalize, and prepare it for integration into the knowledge graph. This step often involves removing duplicates, correcting errors, and standardizing formats.
  3. Entity Recognition and Disambiguation:
    • Identify entities (people, places, things, concepts, etc.) within the data.
    • Disambiguate entities to ensure that each one is uniquely identified. This step is crucial to avoid confusion between entities with similar or identical names but different meanings or contexts.
  4. Defining Relationships and Properties:
    • Establish the relationships between entities. These relationships are the edges in the knowledge graph and can represent various types of associations, like ‘works at,’ ‘located in,’ or ‘is a type of.’
    • Define properties or attributes of entities, such as age, location, or specifications, which provide additional context and detail.
  5. Graph Construction:
    • Construct the graph using the identified entities and relationships. This involves placing entities as nodes and connecting them with edges that represent their relationships.
    • Utilize graph databases or specialized graph construction tools to facilitate this process.
  6. Integration of Ontologies:
    • Apply or create ontologies, which are formal representations of knowledge within a domain, including definitions of various entities and the relations between them.
    • Ontologies help standardize the knowledge representation and enhance the graph’s utility in AI applications.
  7. Continuous Updating and Maintenance:
    • Regularly update the knowledge graph to reflect new information, changes in existing data, and corrections.
    • Implement mechanisms for the ongoing maintenance and quality control of the graph.
  8. Validation and Refinement:
    • Validate the accuracy and completeness of the knowledge graph.
    • Continuously refine the graph based on feedback, new data, and evolving requirements.
  9. Integration with AI Systems:
    • Integrate the knowledge graph into AI systems for various applications like recommendation systems, search engines, or NLP tasks.
    • Ensure that the AI systems can effectively query and utilize the knowledge graph.

Knowledge Graphs in Machine Learning

In machine learning, the saying “data is king” holds true, and knowledge graphs reign by providing rich, interconnected data landscapes. These structures endow machine learning models with context, enhancing their ability to discern patterns and make predictions. For instance, in recommendation systems, knowledge graphs enable AI to not just see individual choices but understand the network of preferences, drawing smarter, more personalized recommendations.

Knowledge Graphs in Natural Language Processing

In NLP, knowledge graphs have revolutionized the way machines interpret human language. They offer a framework that captures the subtleties of language, such as context-dependent meanings of words. This capability is crucial in applications like voice assistants, where understanding the difference in meaning between ‘Apple the company’ and ‘apple the fruit’ depends on the conversational context provided by the knowledge graph.

The Future of Knowledge Graphs in AI

Looking ahead, the potential of knowledge graphs in AI is vast. As AI continues to advance, knowledge graphs are expected to evolve, offering even more sophisticated ways for machines to interpret and interact with data. Their influence is likely to extend across various sectors, reshaping how AI systems are developed and deployed.

Knowledge graphs are more than just a data structure; they are a fundamental tool that allows AI to mirror the complexity of the real world. Their ability to contextualize information elevates AI’s capabilities, making interactions and decisions more accurate and relevant. As AI progresses, knowledge graphs will undoubtedly play a central role in its evolution, driving innovations and enhancing the depth of AI’s understanding of the world.

Filed Under: Guides, Top News


Latest timeswonderful Deals

Disclosure: Some of our articles include affiliate links. If you buy something through one of these links, timeswonderful may earn an affiliate commission. Learn about our Disclosure Policy.

Categories
News

Creating viral videos using AI tools – Beginners guide

beginners guide to creating videos using artificial intelligence

The world of videography is currently experiencing a significant transformation, thanks to the rise of AI video tools. These tools are not just changing how videos are made; they’re also making it possible for more people to become creators. If you’re interested in the media industry, you might have noticed that AI-generated videos are bringing a new dimension to storytelling and content creation.

AI technologies in video production are becoming as important as the large language models that have reshaped text-based AI. These video AI technologies are trained on huge amounts of data, which allows them to understand and predict video sequences with amazing accuracy. For creators, this means being able to put together complex visual stories with much less effort.

Consider Runway’s Gen 2 model, which is leading the way in innovation. It can turn a single image into a full video sequence. Plus, its selective animation feature lets you animate just parts of an image, making still pictures come alive. This level of control is groundbreaking and opens up new possibilities for your creative projects.

How to make viral videos using artificial intelligence

AI video tools have also evolved to work offline, recognizing that not everyone has access to fast internet all the time. Stable Diffusion’s open-source video model is a great example of this, allowing you to work on video projects without needing to be online. With the option to change frame rates, your creative process becomes more flexible and accessible.

Here are some other articles you may find of interest on the subject of creating videos and animations using artificial intelligence:


The development of web interfaces and tools has made it easier to create AI video clips. These platforms help you produce and extend video clips with ease, making high-quality video content available to more people, not just industry professionals with expensive equipment.

However, improving video quality is still a challenge, similar to the law of diminishing returns in professional video production. Despite this, there’s a constant effort to push AI capabilities further to achieve higher resolution, frame rate, and more realistic videos.

The release of Pika Labs 1.0 model has been a milestone, much like ChatGPT’s impact in the text domain. This model allows for the creation of professional-looking AI-generated video content, enabling your videos to stand out without the need for costly resources.

Pika Labs offers a unique and powerful platform that transforms text into captivating videos. This comprehensive guide will walk you through the steps to harness the full potential of Pika, ensuring that your creative ideas are brought to life with ease and precision. Getting Started To begin, you’ll need a Discord account.

One of the most exciting things about AI video tools is how they’re making storytelling available to all. These tools give you the power to create complex visual narratives that used to be possible only for film studios. This change is making the media landscape more inclusive and diverse.

Additional factors to consider when trying to create viral videos :

However using AI is not the only consideration when making videos that you hope will go viral you also need to take into consideration other options such as :

  • Audience Understanding: Know your target audience. What are their interests, online behaviors, and preferences? Tailoring content to resonate with your intended viewers increases the chance of it being shared.
  • Content Originality and Relatability: Original content that viewers can relate to, either emotionally or through shared experiences, often has a higher chance of going viral. It should either entertain, inform, inspire, or evoke strong emotions.
  • Platform Specifics: Different platforms have different audiences and norms (e.g., YouTube, TikTok, Instagram). Understanding the nuances of each platform, like optimal video length and format, is crucial.
  • Trends and Timeliness: Capitalizing on current trends or events can boost the relevance of your video. However, ensure your content remains unique and adds a new perspective to the ongoing conversation.
  • High-Quality Production: While not every viral video is professionally made, ensuring clear audio and visual quality can help. The first few seconds are crucial to retain viewer interest.
  • Engaging and Compelling Storytelling: A clear, engaging narrative or a unique storytelling approach can make your video more memorable and shareable.
  • Strong Opening: Capture attention in the first few seconds. The initial part of your video should be compelling enough to hook viewers immediately.
  • Emotional Connection: Videos that evoke emotions, whether laughter, joy, surprise, or even outrage, are more likely to be shared.
  • Incorporate a Call to Action: Encourage viewers to share, like, comment, or follow. Sometimes a direct appeal can significantly increase engagement.
  • Optimization for Sharing: Make it easy to share your video across various platforms. Ensure the video format is compatible with different social media platforms.
  • Collaborations and Influencers: Collaborating with influencers or other creators can help your content reach a broader audience.
  • Consistency: If you’re building a channel or a brand, consistent posting can help build an audience over time, which in turn can help your videos go viral.
  • Analytics and Feedback: Use analytics to understand what works and what doesn’t. Viewer feedback, through comments and shares, can also provide valuable insights.
  • Promotion Strategy: Beyond the organic reach, consider promoting your video through ads or social media to boost its visibility.
  • Luck and Timing: Sometimes, virality is a matter of being in the right place at the right time with the right content.

For those working in videography, it’s crucial to adapt and learn how to use AI video tools. These tools are not just a passing trend; they’re becoming the foundation of future media creation. By adding AI to your skill set, you can stay competitive in an industry that’s evolving quickly.

The advancements in AI video tools in 2023 mark a key moment for the media industry. As you explore these tools, you’ll find new ways to express your creativity, tell stories, and connect with audiences. The future of videography is here, and AI is driving it forward.

Filed Under: Guides, Top News


Latest timeswonderful Deals

Disclosure: Some of our articles include affiliate links. If you buy something through one of these links, timeswonderful may earn an affiliate commission. Learn about our Disclosure Policy.

Categories
News

How to use ComfyUI for AI image creation – Beginners Guide

How to use ComfyUI for AI image creation

If you have been dabbling creating AI imagery with artificial intelligence models such as DallE 3, Midjourney, Stable Diffusion and others. You might be interested in learning more about ComfyUI a powerful and modular Stable Diffusion graphical user interface GUI that can be used to make image generation more creative and rewarding. The user interface has been specifically designed to enable you to design and execute advanced Stable Diffusion pipelines using a graph, notes and flowchart based interface.

ComfyUI’s new innovative workflow builder is reshaping how we interact with artificial intelligence. This innovative platform is more than just a technological advancement; it’s a gateway to unleashing your creativity and tapping into lucrative opportunities. With ComfyUI, you have the power to create, customize, and monetize AI workflows, all while joining a vibrant community of like-minded individuals.

ComfyUI opens doors for anyone to craft custom nodes and models, turning your imaginative ideas into reality. It doesn’t matter if you’re an experienced developer or just starting your journey; ComfyUI provides an accessible environment for exploration and innovation. You can experiment with different settings, refine your workflows, and produce unique outcomes that reflect your personal touch.

Using ComfyUI AI artwork generation user interface

Here are some other articles you may find of interest on the subject of Stability AI’s Stable Diffusion AI art model

But ComfyUI isn’t just about feeding your creative appetite; it also presents a world of economic potential. By designing and selling your workflows, you can tap into a growing market of businesses and individuals looking to leverage AI for their needs. This platform offers more than a chance to earn—it’s a way to position yourself at the forefront of a technological wave and capitalize on your expertise.

To kick things off, ComfyUI invites you to participate in a workflow competition with a generous prize pool of $133,000. This contest is your chance to showcase your skills to respected judges from the AI industry and vie for various categories and exclusive rewards. Winning is great, but the real prize is the recognition and respect you’ll gain within the AI community.

ComfyUI on GitHub

If you’re eager to dive in, getting started with ComfyUI is straightforward. Simply download and install the platform. The setup process is easy, and once you’re in, you can begin managing custom nodes and models with ease. For those who need a little guidance, there’s a comprehensive tutorial to walk you through the basics, ensuring a smooth and enjoyable experience.

As you become more adept at using ComfyUI, you’ll discover that it supports both your artistic and financial aspirations. The platform is thoughtfully crafted to foster your creative spirit while providing a genuine path to earning money. It’s a harmonious blend of passion and profit, all available to you.

You’re not alone on this journey. A welcoming Discord community is ready to receive you with open arms. Here, you can engage in discussions, seek advice, and exchange insights with fellow ComfyUI users. This community is a center for collaboration, learning, and shared progress.

ComfyUI also doubles as an educational tool, enhancing your understanding of AI. Through hands-on experimentation, you can delve into AI concepts and apply them in innovative, practical ways. It’s an educational adventure that’s as rewarding as it is enlightening.

ComfyUI is more than just an AI workflow builder; it’s a nurturing platform for creativity, a means for monetization, and a promoter of community interaction and learning. Whether you aim to channel your artistic skills, generate income, or broaden your AI knowledge, ComfyUI is your key to a world brimming with possibilities. Join the community, enter the contest, and start crafting your AI-driven future today.

Filed Under: Guides, Top News


Latest timeswonderful Deals

Disclosure: Some of our articles include affiliate links. If you buy something through one of these links, timeswonderful may earn an affiliate commission. Learn about our Disclosure Policy.

Categories
News

Learn how to use Procreate Dreams animation app – Beginners Guide

Learn how to use Procreate Dreams Beginners Guide

Procreate Dreams a newly released animation app that is incredibly user-friendly. Provides a wide range of powerful tools for creating hand-drawn animations, motion graphics, and adding enhancements such as photos, videos, and sound. With Procreate Dreams, you can effortlessly create breathtaking 2D animations, expressive videos, and captivating stories.

Are you an artist, ready to bring your characters to life with the magic of movement? You’ve heard about Procreate, a powerful tool that can help you animate your creations with ease. But where do you start? This practical guide is here to walk you through the ins and outs of Procreate’s animation features, ensuring that you can make the most of this incredible app.

How to use Procreate Dreams

First things first, you’ll need to set up a new canvas. This is a crucial step, as it lays the foundation for your entire animation project. You’ll want to choose the right dimensions and frame rate to make sure your animation runs smoothly. Think of it as setting the stage for your characters to perform.

Once your canvas is ready, it’s time to sketch out your first frame. Procreate offers a wide array of brushes and tools that give you the freedom to draw with precision and style. You’ll learn how to manage your layers effectively, which is essential for making changes and refining your artwork without a hassle.

Here are some other articles you may find of interest on the subject of AI art and animation :

Now, let’s talk about onion skinning. This technique is a game-changer for animators. It lets you see several frames at once, which is incredibly helpful for creating fluid motion. You’ll discover how to adjust the onion skin settings to fit the needs of your project, making it easier to craft smooth transitions between frames.

Understanding loops and frame dynamics is next on the agenda. Even something as simple as animating a blinking eye can teach you a lot about looping animations. You’ll figure out how to create loops that are seamless and how to adjust the timing of frames to convey the right tempo and movement for your characters.

When your animation is complete and ready to be shared with the world, exporting is your final step. Procreate offers a variety of export options, so you can save your work in the best format for your needs. This guide will help you choose the right export settings to maintain the quality of your animation.

Procreate Dreams Deep Dive

Bringing characters and scenes together is what truly brings your animation to life. You’ll learn how to make sure your characters interact with their environments in a believable way. This not only adds depth to your animation but also helps to tell your story more effectively.

For those working on more complex animations, Procreate’s performance mode is a lifesaver. It helps you manage your project more efficiently. You’ll also explore how to add cinematic effects, like simulated camera movements and dynamic backgrounds, to give your animation that extra touch of drama and excitement.

Procreate Dreams Beginners Guide

To really polish your work, you’ll want to use keyframes and effects. These advanced features can take your animation to a professional level. This guide will show you how to apply them, allowing you to create animations that are not only smooth but also visually stunning.

Procreate is committed to supporting your learning journey. The app comes with a range of resources, including a detailed guide PDF and sample files. These are designed to help you practice and improve your animation skills.

Procreate Dreams animation app

Procreate Dreams is a versatile platform that can turn your 2D animation dreams into reality available to purchase from the Apple App Store priced at $20. By following this guide and using the resources provided, you’re well-equipped to explore the full capabilities of the software. So dive in, experiment with different techniques, and watch as your animations come to life in this exciting digital world. To learn more about the newly launched animation application jump over to the official website.

Filed Under: Apple iPad, Guides, Top News


Latest timeswonderful Deals

Disclosure: Some of our articles include affiliate links. If you buy something through one of these links, timeswonderful may earn an affiliate commission. Learn about our Disclosure Policy.

Categories
News

How to make GPTs using ChatGPT in minutes – Beginners Guide

How to create personal GPTs using ChatGPT

OpenAI has just made available its new custom AI model creation tool in the form of GPTs. Enabling anyone with ChatGPT Plus or Enterprise subscriptions to create their very own custom AI workflows built on the OpenAI ChatGPT large language model. The system builds on the Custom Instructions which was ruled out a few months ago and allows you to save your workflows for easy access within your ChatGPT browser interface.

Don’t worry if your first GPT build is not  producing the exact results you expected, because you can easily go in and edit it at any time tweaking its workflow and continually improve its results.

GPTs allow you to create custom ChatGPT instances for specific purposes and allow anyone to create a tailored version of ChatGPT with no coding required. The process allows you to customize the ChatGPT AI model to be more helpful at specific tasks for personal and work situations. Analyzing documents and generating reports on-the-fly from Excel spreadsheets and more.

If you can’t wait to build your first GPT will be pleased to know that it only takes a couple of minutes and ChatGPT will guide you through the process even creating the profile picture for you using the DallE 3 AI image generator. Recently added to the ChatGPT service by OpenAI a few weeks ago. Below is an image of the first screen welcoming new to the GPT  creation process.

building your first GPT with ChatGPT

Once you start building your first GPT you can decide on three main areas that you can include in it for added functionality such as web browsing, file upload for data analysis and also Code Interpreter that lets your GPT run code. When enabled your GPT can analyze data work with files you’ve uploaded to mathematical calculations and more. Furthermore once you have set up your GPT you can then add “Actions” to make your workflows more complicated by retrieving information or taking actions outside of ChatGPT.

How to make GPTs

Quick Start Guide

  1. Make sure you have a subscription for either a ChatGPT Plus or ChatGPT Enterprise account
  2. Once subscribed go to the official https://chat.openai.com/gpts/editor (or click on “Explore” in the left menu and then “My GPTs”)
  3. Select “Create a GPT”
  4. In the Create tab, you can message the GPT Builder to help you build a new GPT. You can say something like, “Make a creative who helps generate visuals for new products” or “Make a software engineer who helps format my code.”
  5. To name and set the description of your GPT, head to the Configure tab. Here, you will also be able to select the actions you would like your GPT to take, like browsing the web or creating images.
  6. When you’re ready to publish your GPT, select “Publish” and share it with other people if you’d like.

Other articles you may find of interest on the subject of ChatGPT :

Getting Started with GPT Creation

To start making your very first GPT, navigate to the official GPTs editor or access it via “My GPTs” under the Explore tab. Here, you’re presented with the option to “Create a GPT.” This initial step leads you to the GPT Builder, a user-friendly interface that assists in the construction of your GPT. Imagine telling the Builder, “Make a creative assistant for designing new products,” or “Create a software engineer bot to format my code.” This flexibility is the cornerstone of GPTs, allowing for a wide array of functional applications.

Configuring Your GPT

The next critical phase is in the Configure tab. This is where you infuse your GPT with identity and purpose, assigning it a name and a description. It’s also where you select the actions your GPT will perform. These can range from web browsing to creating images, depending on your needs.

Publishing and Sharing Your GPT

Once your GPT is ready, the “Publish” option allows you to bring your creation to life. You can choose to keep it for personal use or share it with others, expanding its utility within your community or organization.

ChatGPT GPT advanced configuration screen

Advanced Customization Options

For those seeking a deeper level of customization, the GPT Editor offers advanced settings. These include:

  • Image Integration: You can request the GPT Builder to generate an image for your GPT or upload one of your choice.
  • Additional Instructions: This section is crucial for imparting detailed instructions or guidelines on the GPT’s behavior, functionalities, and constraints.
  • Prompt Starters: These serve as conversation initiators, guiding users on how to interact with your GPT.
  • Knowledge Base: Here, you can provide additional context and information for your GPT to reference, including content from uploaded files.
  • New Capabilities: Enabling advanced functionalities like Web Browsing, DALL·E Image Generation, and Advanced Data Analysis, broadens the horizon of what your GPT can achieve.
  • Custom Actions: By integrating third-party APIs and importing actions from an OpenAPI schema, you can further enhance the GPT’s capabilities.

screenshot of the ChatGPT GPT menu to add actions to your workflow

The creation of a GPT is not just about programming an AI; it’s about breathing life into a  personal digital assistant that can assist you with specific needs and objectives. Whether you’re a developer looking to streamline coding processes, a creative professional seeking a more streamlined way to create those monthly reports, or an educator aiming to enhance learning experiences, the power to create custom GPT AI models tailored to your exact needs is now at your fingertips.

Don’t forget OpenAI will be continually adding new features so you can expect the features and applications and what is capable using the GPTs  to expand on a monthly or even a weekly basis.  As always as soon as more features and tips and tricks are discovered we will keep you up to speed as always.

Filed Under: Guides, Top News


Latest timeswonderful Deals

Disclosure: Some of our articles include affiliate links. If you buy something through one of these links, timeswonderful may earn an affiliate commission. Learn about our Disclosure Policy.

Categories
News

How to use ChatGPT Vision – Beginners Guide

Using ChatGPT Vision a comprehensive Beginners Guide Nov 2023

If you have not yet tried out the new ChatGPT vision and audio updates on the official OpenAI ChatGPT iOS and Android applications or via the official ChatGPT website and chatbot. Or would simply like to know more about the features and functionality, to make sure you’ve not missed anything that could help improve your results or workflow. This quick beginner’s guide will take you through everything you need to know about the latest audio and visual updates rolled out to ChatGPT by OpenAI.

As most of us already know OpenAI’s ChatGPT large language model is a powerful AI tool that uses artificial intelligence (AI) to except, analyze and respond to user inputs. It’s was originally designed to understand and generate text that mirrors human communication, based on user prompts. The technology behind ChatGPT is a machine learning model called GPT (Generative Pretrained Transformer), which uses AI to understand context and generate relevant and meaningful responses.

Now thanks to the development team at OpenAI, a significant advancement in ChatGPT has been rolled out with the addition of the new ChatGPT Vision features. which gives the AI the ability to interpret and respond to photographs, diagrams or images uploaded by users, adding a new dimension to its capabilities. The speed at which the new image recognition ability has been rolled out to ChatGPT is a testament to the progress made in AI technology by OpenAI, allowing it to not just understand text, but also visual data now as well.

The Vision feature has numerous applications. For instance, users can upload images depicting issues they’re facing, and ChatGPT can offer potential solutions or explanations. This AI-driven problem diagnosis can be applied in various fields, from technical support to solving math’s problems or even finding locations around the world, by providing instant, accurate solutions dependent on the image uploaded.

How to use ChatGPT Vision online and in the app

The Vision feature is included in ChatGPT 4, the latest version of the AI. Users can access this feature by selecting the image icon in the prompt bar when the default ChatGPT 4 version is selected in the online version. The AI’s responses can be further customized using the Custom Instructions feature which we have covered previously, allowing users to tailor the AI’s responses to their specific needs. Other articles you may find of interest on the subject of customizing your Custom Instructions to improve your results.

Users can embrace the power of AI and Vision to even request styling advice, by uploading images of their rooms or web pages, and ChatGPT can offer suggestions for improvement. This AI styling advice can mimic the thought process of a professional interior designer or a web developer, offering personalized advice based on the uploaded image. It is also been demonstrated that you can upload sketches, flowcharts and diagrams and ask ChatGPT to start building a program to complete the process. Without you having to know any coding at all.

Another interesting use of the Vision feature is in character description. Users can upload images of people or characters, and ChatGPT can provide detailed descriptions and suggest potential roles for them. This feature can be very useful for writers and filmmakers who need help with character development.

Official OpenAI ChatGPT apps for iOS and Android

ChatGPT isn’t limited to desktops or laptops; it can also available on mobile devices via the official OpenAI ChatGPT applications which are available for both iOS and Android. It is worth mentioning that make sure you download the official app and not any third parties that may be set up to access your private data or worse. Once you’ve installed the ChatGPT app it can be used to take photographs of documents, images, diagrams, reports and more all of which can be uploaded directly from your camera or tablets camera roll, making it more convenient and accessible for many.

Using ChatGPT Vision apps on mobile

This is perfect if you’re travelling need to quickly translate a menu, document or road sign. Although Google translate is also very good at this and is properly faster in some circumstances. On a side note you can also use ChatGPT to help you plan your next travel adventure. Now ChatGPT has visual recognition you can upload images you may have found in magazines or online and ask where they may be in the world you to plan your itinerary.

As explained earlier ChatGPT also has applications in design, where it can provide users with feedback on designs such as website layout, illustrations, logos and more. Using OpenAI’s DallE 3 integration you can even start creating your very own logos within ChatGPT. all of which allows users to create more visually appealing and user-friendly products, designs, illustrations and websites.

A few uses of ChatGPT vision and AI image recognition both now and in the near future

  • Agriculture: Farmers can diagnose plant health by taking pictures of crops, with AI suggesting treatment for diseases or pests.
  • Translation: By pointing their phone camera at text, users can get instant translation in various languages, which is particularly useful for travelers.
  • Shopping: Users can take photos of products to search for them online, compare prices, or find similar items.
  • Education: Students can use AI vision to get information about plants, animals, historical landmarks, or even solve math problems by pointing their camera at them.
  • Healthcare: Skin scanning apps can help in early detection of skin conditions by analyzing photos of skin lesions.
  • Safety: Real-time facial recognition or object detection can enhance personal security by identifying known threats or dangerous items.
  • Nutrition: Users can track their food intake by taking pictures of their meals, and AI can analyze the nutritional content.
  • Fitness: AI vision can track exercises and form, providing feedback to improve workouts.
  • Home Improvement: By capturing images of a room, users can visualize furniture placement, wall colors, or other design elements before making changes.
  • Event Planning: AI can recognize faces in photos, helping users to organize and tag photos after events automatically.
  • Social Media: Filters and effects that respond to facial movements or add contextual information to a scene are powered by AI vision.
  • Navigation: Visual recognition can assist in understanding complex scenes and providing context-based navigation indoors where GPS is limited.
  • Document Scanning: Smartphones can be used as portable scanners to digitize documents, with AI helping to enhance the text and correct angles.

ChatGPT is a robust tool that uses the power of AI to offer a wide range of services. From image recognition to problem diagnosis, styling advice, and character description, ChatGPT is changing the way we interact with technology. With the ongoing advancements in AI technology, the potential applications for ChatGPT are vast. It demonstrates the transformative power of AI, and its ability to reshape our interaction with technology. Here are a few other articles you may find of interest on the subject of ChatGPT vision :

Filed Under: Guides, Top News


Latest timeswonderful Deals

Disclosure: Some of our articles include affiliate links. If you buy something through one of these links, timeswonderful may earn an affiliate commission. Learn about our Disclosure Policy.

Categories
News

DallE 3 beginners guide to creating amazing AI art

DallE 3 conversational prompt writing beginners guide 5

Prior to the release of OpenAI’s latest generation AI image creator DallE 3. If you had used other AI art generators such as Midjourney you would have needed to learn learn how to use it parameters to write prompts enabling you to create images that suit your brief. However OpenAI’s DallE 3 has change this and you can now enter a simple conversational prompt to start the drawing process, discussing what image you would like to create. The AI model allows you to write in plaintext what you would like it to draw and further questions or guidance will refine it for you as needed all through the use of simple conversational prompts.

Simply ask  DallE 3 what you would like it to draw. You can start generating images in DallE 3 within ChatGPT by simply asking it to draw. While simple prompts like “draw me a cat” work perfectly well, DallE 3 thrives on complexity. You could be as specific as asking for a “surreal painting of a cat juggling fire under a purple moon,” and the model will understand your request and start drawing for images. The more descriptive you can be in your conversations with DallE 3 the better your results will be. As the AI model will be able to understand your requirements in more detail.

There is no need to input parameters, set up a Discord channel or input any other strange commands to start creating. Simply go to ChatGPT and select the DallE 3 option under the ChatGPT-4 button situated at the top of the browser window or application. It is worth noting that you do need to be a paying subscriber of ChatGPT Plus or Enterprise to be able to use the latest DallE 3 image generator within ChatGPT.  Once you have entered a prompt DallE 3 will provide you with for very different images. You can then ask ChatGPT DallE 3 to select one of these images and alter its aspect ratio, refine what it’s picturing and more.

DallE 3 conversational prompt writing

Thanks to OpenAI’s DallE 3’s conversational prompt style understanding, which is elegantly integrated into the ChatGPT environment it is easy to access if you have already been using ChatGPT. Although there are still a few limitations and little quirks that creep into images the AI model understand not just the words you use but the context, emotions, and nuances behind them, helping you edge closer to your ultimate creative vision.

  • Aspect Ratio Customization: Ideal for diverse applications like video thumbnails, digital art, or social media posts. Different aspect ratios enable you to tailor the artwork to the medium in which it will be displayed.
  • Dynamic Zoom: Unlike static images, the zoom feature allows for an evolving piece of art. Each zoom action generates slight alterations, making each viewpoint a unique piece of art. This could be a game-changer for dynamic visual storytelling.

DallE 3 beginners guide

Other articles we have written that you may find of interest on the subject of  DallE 3 :

Other features you can use to expand your AI art creativity

  • Feature Remixing: Let’s say you’re satisfied with the shape and subject but want a different color scheme or mood lighting. DallE 3’s feature remixing allows you to tweak specific elements without affecting the overall composition, saving you time on iterations.
  • Visual Version Control: Accidentally ventured down an artistic alley that didn’t pan out? No worries. DallE 3 allows you to backtrack by simply referencing previous versions conversationally. It’s like having an undo button but for art creation.
  • Pattern Tiling: Whether you’re designing a website background, custom wrapping paper, or even textile designs, DallE 3’s tiling option can be a tremendous asset. By asking the AI to repeat patterns, you can create intricate designs effortlessly.
  • Online Image Integration: If you’ve found an image online that you’d like to incorporate into your piece, DallE 3 can do that. It helps you amalgamate various elements, making your art truly interdisciplinary.
  • Conversational Interface: Imagine having a dialogue with your paintbrush and canvas, where each listens, adapts, and responds. The real beauty of DallE 3 lies in its ability to interact with you, refining your ideas through a conversational flow, creating an evolving piece that’s more a collaboration than a one-off request.

Areas DallE 3 needs to improve :

  • The resolution cap means it might not be ideal for large format printing.
  • Even though the AI is incredibly advanced, it’s not infallible. Expect a few oddities or imperfections in generated images.
  • With a rate limit on prompts, you might find yourself curbed if you’re in the middle of a creative spree.
  • The inability to store images in DallE 3 collections can be restrictive for those looking to build a portfolio.

DallE 3’s conversational prompt writing brings a level of accessibility and refinement to AI art creation that we haven’t seen before. It’s sophisticated yet user-friendly, marrying high-level technology with the kind of interactive, intuitive interface that makes AI art creation more of a conversation than a coding exercise.

Filed Under: Guides, Top News


Latest timeswonderful Deals

Disclosure: Some of our articles include affiliate links. If you buy something through one of these links, timeswonderful may earn an affiliate commission. Learn about our Disclosure Policy.

Categories
News

8 Types of CNC Machining – A Beginner’s Guide to CNC Machning

As a beginner’s guide to CNC machining, it’s important to understand that CNC (Computer Numerical Control) machining encompasses several different types of machining processes, each suited for specific applications and materials. Here’s an overview of the main types of CNC machining:

  1. CNC Milling:
    • Process: In CNC milling, a rotating cutting tool, often with multiple cutting edges, removes material from a workpiece. The workpiece is secured to a moving table, and the tool is guided by computer-controlled movements to create the desired shape.
    • Applications: CNC milling is versatile and used for producing flat and contoured surfaces, slots, holes, and more. It’s common in industries such as aerospace, automotive, and manufacturing.
  2. CNC Turning:
    • Process: CNC turning is used for creating cylindrical parts. A workpiece is rotated on a spindle, and a stationary cutting tool shapes the material by removing material incrementally.
    • Applications: It’s widely used for producing shafts, pins, and other cylindrical components. The automotive and aerospace industries frequently utilize CNC turning.
  3. CNC Drilling:
    • Process: CNC drilling involves creating holes in a workpiece. It can be used for creating holes of various sizes and depths with precision.
    • Applications: CNC drilling is vital in industries like construction, aerospace, and electronics for creating precise holes in materials like metal, plastic, and wood.
  4. CNC Grinding:
    • Process: CNC grinding uses an abrasive wheel to remove material from a workpiece. It’s employed for achieving very fine surface finishes and tight tolerances.
    • Applications: CNC grinding is essential for producing high-precision components in industries like aerospace, medical, and tool manufacturing.
  5. CNC Electrical Discharge Machining (EDM):
    • Process: EDM utilizes electrical discharges to erode material from a workpiece. It’s especially useful for machining hard or difficult-to-cut materials.
    • Applications: EDM is used for creating intricate shapes in materials like hardened steel and titanium. It’s common in the mold and die industry.
  6. CNC Laser Cutting:
    • Process: CNC laser cutting employs a high-energy laser beam to melt, vaporize, or blow away material from the workpiece. It’s ideal for cutting intricate shapes with minimal material waste.
    • Applications: CNC laser cutting is widespread in industries such as metal fabrication, signage, and electronics for precise cutting of various materials, including metal, plastic, and wood.
  7. CNC Waterjet Cutting:
    • Process: CNC waterjet cutting utilizes a high-pressure stream of water mixed with abrasive particles to cut through materials. It’s versatile and doesn’t generate heat, making it suitable for a wide range of materials.
    • Applications: CNC waterjet cutting is used in industries like architecture, aerospace, and manufacturing for cutting materials like metal, stone, glass, and composites.
  8. CNC Plasma Cutting:
    • Process: CNC plasma cutting employs a plasma torch to cut through electrically conductive materials, primarily metals. It uses a high-velocity jet of ionized gas to melt and remove material.
    • Applications: CNC plasma cutting is prevalent in industries like metal fabrication and automotive for cutting thick metal plates and sheets.

These are the primary types of CNC machining processes, each with its own set of advantages and applications. As a beginner, it’s essential to familiarize yourself with these processes and their capabilities to determine which one is most suitable for your specific machining needs and projects.