Categories
News

How to Plan Your Dream Smart Home Setup With Google Bard

Dream Smart Home

This guide is designed to show you how you can use AI tools like Google Bard to plan your Smart Home setup. Welcome to the exciting world of smart homes, where technology seamlessly integrates with your living space to enhance comfort, convenience, and security. As a seasoned tech writer, I’ve witnessed the evolution of smart home technology firsthand, and I’m thrilled to share my knowledge to help you build your dream smart home with the help of Google Bard – your AI-powered planning assistant.

Step 1: Envision Your Smart Home Lifestyle

Before diving into gadgets and gizmos, take a moment to envision how you want your smart home to function. Consider your daily routines, pain points, and desired conveniences. Do you crave automated lighting that mimics natural sunrise and sunset? Perhaps you dream of a voice-controlled thermostat that adjusts the temperature based on your presence and preferences. Maybe enhanced security with smart locks and cameras is your top priority.

Bard’s Brainstorming Power:

  • Ask Bard: “What are the most popular smart home devices for busy families?” or “Suggest creative ways to use smart lighting to improve my sleep quality.
  • Mind Map: Use Bard’s mind mapping feature to visually organize your smart home ideas, categorizing them by room, function, or desired outcome.

Step 2: Choose Your Smart Home Ecosystem

With a plethora of smart home platforms and devices available, choosing the right ecosystem is crucial. Consider factors like compatibility, scalability, security, and ease of use. Popular options include Google Home, Amazon Alexa, Samsung SmartThings, and Apple HomeKit.

Bard’s Comparison Guru:

  • Compare Platforms: Ask Google Bard to compare the features, strengths, and weaknesses of different smart home ecosystems based on your needs and budget.
  • Compatibility Check: Use Bard to research device compatibility with your chosen platform to avoid compatibility headaches down the line.

Step 3: Prioritize Your Smart Home Starters

Start small and focus on devices that address your most pressing needs and offer the highest impact. Popular starter options include:

  • Smart Lighting: Philips Hue, LIFX, Nanoleaf
  • Smart Thermostats: Nest Learning Thermostat, Ecobee Smart Thermostat
  • Smart Speakers: Google Home, Amazon Echo, Sonos One
  • Smart Doorbells: Ring Video Doorbell, Nest Hello Doorbell
  • Smart Locks: August Smart Lock Pro, Schlage Encode Plus

Bard’s Shopping Buddy:

  • Product Research: Ask Google Bard for in-depth reviews and comparisons of specific smart home devices based on your budget and desired features.
  • Deal Finder: Utilize Bard’s knowledge of current deals and promotions to score the best prices on your smart home purchases.

Step 4: Embrace the Power of Routines and Automation

The true magic of smart homes lies in automation. Utilize your chosen platform’s built-in routines or create custom ones using Bard’s help. Imagine lights automatically adjusting as you enter a room, the thermostat warming up before you wake up, or music playing personalized playlists based on your mood.

Bard’s Automation Architect:

  • Routine Inspiration: Ask Bard for creative routine ideas based on your daily habits or specific scenarios like movie nights or romantic dinners.
  • Customization Coach: Get Bard’s assistance in setting up and fine-tuning custom routines to perfectly match your preferences and needs.

Step 5: Expand Your Smart Home Horizons

As you get comfortable with your core smart home setup, explore the vast array of additional devices and integrations available. Consider:

  • Smart Kitchen Appliances: Coffee makers, refrigerators, ovens that can be controlled remotely or even preheat based on your schedule.
  • Smart TVs and Entertainment Systems: Voice-controlled streaming, personalized recommendations, and seamless integration with smart lighting for an immersive viewing experience.
  • Smart Security Systems: Motion sensors, leak detectors, and security cameras that provide peace of mind and remote monitoring capabilities.
  • Smart Yard and Garden Tools: Automated sprinklers, robotic lawnmowers, and weather-based irrigation systems for effortless yard maintenance.

Bard’s Innovation Hub:

  • Stay Informed: Ask Google Bard about the latest smart home trends, innovative devices, and upcoming releases to keep your setup future-proof.
  • Problem Solver: Having technical difficulties or integration challenges? Bard is always available to provide help and advice to make your smart home journey smoother.

Remember, building a smart home is an ongoing journey, not a one-time destination. Embrace the process of experimentation, refinement, and discovery. With Google Bard as your AI-powered planning partner, you can create a smart home that perfectly reflects your unique lifestyle and brings you joy, comfort, and convenience every day.

Filed Under: Guides


Latest timeswonderful Deals

Disclosure: Some of our articles include affiliate links. If you buy something through one of these links, timeswonderful may earn an affiliate commission. Learn about our Disclosure Policy.

Categories
News

How to setup, join and use a Meshtastic network

How to setup, join and use a Meshtastic network

Imagine the convenience of being able to communicate in the most remote corners of the world, where traditional cellular or internet services are nonexistent. This is the vision behind the Meshtastic network, a low-power, long-range mesh network that operates independently of conventional communication infrastructure. By following this guide, you can set up your own Meshtastic network and maintain connectivity, no matter where your adventures take you.

Meshtastic is a project that enables you to use inexpensive LoRa radios as a long range off-grid communication platform in areas without existing or reliable communications infrastructure. This project is 100% community driven and open source!

In the world of communication, the ability to stay connected across vast distances without relying on traditional infrastructure is becoming increasingly important. Whether you’re an outdoor enthusiast, part of an emergency response team, or living in a community with limited access to standard communication networks, the combination of Meshtastic and LoRa technology offers a compelling solution. This open-source project is designed to facilitate long-range, off-the-grid messaging through a network that’s easy to set up and maintain.

At the heart of this system is LoRa technology, which stands for Long Range. It’s a wireless communication method that allows for messages to be sent over distances that can exceed 200 kilometers under the right conditions. The beauty of LoRa is its decentralized approach; you can connect directly with others in the network without the need for a central router, making it ideal for remote or rural areas.

How to join Meshtastic

When you combine LoRa with Meshtastic, you get a mesh network that’s capable of functioning independently of cellular phones and the internet. Meshtastic devices are designed to create a network that can relay messages from one device to another, effectively increasing the range and reliability of the network. These devices are not only capable of sending secure, encrypted messages but also have the added benefit of long battery life, which is crucial for prolonged use in the field. Additionally, they can support text messaging and may include GPS functionality to help with location tracking.

Setting up your Meshtastic network is a straightforward process. It begins with pairing your smartphone with Meshtastic radios. Once paired, you can communicate with specific devices within the network. The setup involves installing Meshtastic software on ESP32-based boards, and the instructions provided are clear and easy to follow.

To manage your network effectively, Meshtastic provides both a smartphone app and a web client. These management tools allow you to tweak settings, manage communication channels, and even connect to the internet through an MQTT server using your phone’s data connection. This level of control ensures that you can maintain a robust and efficient network.

How to set up a Meshtastic network

Here are some other articles you may find of interest on the subject of mesh networking for your home and business :

Before you start using your network, it’s important to select the appropriate communication channels. Meshtastic makes this process simple by using channels and profiles that can be shared easily through QR codes. You’ll need to ensure that you choose the right regional and frequency settings to comply with local regulations and to optimize the performance of your network.

To maximize the range of your network, it’s essential to establish line-of-sight connections between devices. You can further enhance the network’s reach by using routers or repeaters, which are best placed at elevated locations to cover more ground. The capabilities of your Meshtastic network can be expanded by connecting nodes to the internet via an MQTT server. This allows for a wider range of interactions, including the ability to join specific channels with other users. Additionally, you can equip nodes with various sensors to collect and transmit valuable data across the network.

One of the most exciting aspects of using Meshtastic is the potential for automation and data utilization. By integrating tools like Node-Red with your Meshtastic network, you can leverage sensor data for automation purposes. This is particularly useful for environmental monitoring or automating tasks based on sensor triggers.

Overall, setting up a Meshtastic and LoRa network is a smart choice for anyone in need of reliable communication in areas without conventional infrastructure. Its mesh networking capabilities, secure messaging, sensor integration, and automation potential make it a versatile and dependable platform for a wide range of applications. Whether you’re looking to stay connected during outdoor adventures, coordinate emergency response efforts, or simply provide a communication solution for a remote community, Meshtastic and LoRa technology offer a powerful and flexible solution. For more information jump over to the official webpage for more details.

Filed Under: Guides, Top News


Latest timeswonderful Deals

Disclosure: Some of our articles include affiliate links. If you buy something through one of these links, timeswonderful may earn an affiliate commission. Learn about our Disclosure Policy.

Categories
News

How to setup Google Gemini Pro API key and AI model

How to setup Google Gemini Pro API AI model connection - Beginners Guide

As previously announced earlier this month Google made available it’s new Gemini Pro artificial intelligence developers, businesses and individuals to use. If you are interested in creating AI powered applications, automations and services you’ll be pleased to know that the  Gemini Pro API is now available, providing  access to the latest generative models from Google.

The Gemini Pro API is designed to handle both text and image inputs, making it a versatile asset for a wide range of applications and a competitor to the likes of ChatGPT-4  with its multimodal vision, text and image creation models. Whether you’re looking to create interactive chatbots, enhance customer support, or streamline content creation, the Gemini Pro API is engineered to integrate seamlessly into your projects, providing you with the benefits of the latest in AI technology Google has created.

The multimodal capabilities of the Gemini API are what set it apart from any other AI models. Enabling it to analyze and process information in a way that understands the context of the data, whether it’s text or images. For instance, when it comes to content generation, the API can take a snippet of text and expand on it, creating new content that is not only coherent but also contextually relevant. This ensures that the output aligns perfectly with the intended message and resonates with the target audience.

Making Gemini Pro API connections

If you haven’t yet obtained a Google Gemini Pro API key you can do so here. When you use API keys in your Google Cloud Platform (GCP) applications, take care to keep them secure. Never embed API keys into your code, You can find out more about using API keys and best practices over on the Google support website.

Here are some other articles you may find of interest on the subject of Google Gemini  AI model :

Gemini Pro API  Image requirements for prompts

It’s also worth mentioning that prompts with a single image tend to yield better results so is Google. Prompts that use image data are subject to the following limitations and requirements:

  • Images must be in one of the following image data MIME types:
    • PNG – image/png
    • JPEG – image/jpeg
    • WEBP – image/webp
    • HEIC – image/heic
    • HEIF – image/heif
  • Maximum of 16 individual images
  • Maximum of 4MB for the entire prompt, including images and text
  • No specific limits to the number of pixels in an image; however, larger images are scaled down to fit a maximum resolution of 3072 x 3072 while preserving their original aspect ratio.

Depending on the needs of your project, you can choose from different variations of the Gemini model. The gemini-pro model is tailored for text-based tasks, such as completing text or summarizing information, enhancing these processes with the efficiency of AI. If your project involves both text and visual data, the gemini-pro-vision model is the ideal choice, as it excels at interpreting and combining textual and visual elements.

For projects focused solely on text, configuring the Gemini Pro API is straightforward. Using the gemini-pro model, you can perform tasks like text completion, where the API continues sentences or paragraphs in the same tone and style as the original text. It can also create concise summaries from longer texts, ensuring the essence of the content is preserved.

The Gemini API is not limited to content generation; it shines in creating interactive applications as well. Chatbots, educational tutors, and customer support assistants can all benefit from the API’s streamed response feature, which enables real-time interactions that are both engaging and natural.

Another standout feature of the Gemini API is its embedding service, which is particularly useful for specialized natural language processing (NLP) tasks. This service can enhance semantic search by understanding the deeper meanings of words and improve text classification by accurately categorizing text. Incorporating the embedding service can greatly improve the accuracy and efficiency of your NLP projects.

To start using the Gemini Pro API, you’ll need to follow a few steps. First, you must register for API access on Google’s developer platform. Then, select the model that best fits your project—gemini-pro for text-centric tasks or gemini-pro-vision for projects that involve both text and images. Next, integrate the API into your application by following the provided documentation and using the available SDKs. Customize the API settings to meet the specific requirements of your project, such as the response type and input format. Finally, test the API with sample inputs to ensure it performs as expected and delivers the desired results.

By following these steps, you’ll be able to harness the full potential of the Gemini Pro API. Its sophisticated processing of inputs and nuanced generation of outputs make it an invaluable tool for enhancing the way you interact with and analyze data. With the Gemini Pro API, you’re not just keeping up with the technological curve—you’re positioning yourself at the forefront of AI innovation.

Filed Under: Guides, Top News


Latest timeswonderful Deals

Disclosure: Some of our articles include affiliate links. If you buy something through one of these links, timeswonderful may earn an affiliate commission. Learn about our Disclosure Policy.
Categories
News

How to setup a Raspberry Pi SNMP monitor

building and installing a Raspberry Pi SNMP monitor
If you would like to monitor the traffic on your home network or are thinking of exploring deeper into the world of network management. You might be pleased to know that building a Raspberry Pi SNMP (Simple Network Management Protocol) monitor can be a rewarding project. As well as provide plenty of information on your network traffic allowing you to examine it in a little more detail and monitor devices throughout your home or small business

Building an SNMP is not only a great way to learn about networking, but it also provides you with a powerful tool for monitoring your home or small office network. In this guide, we will take you through the process of setting up your very own Raspberry Pi SNMP monitor.

Before we dive into the building process, it’s important to grasp some fundamental concepts. SNMP is a protocol used for managing devices on IP networks. Devices that support SNMP include routers, switches, and servers, among others. Raspberry Pi, a small and affordable computer, is perfect for such a project due to its versatility and low power consumption.

Table of contents :

A remarkable aspect of SNMP is its ability to provide valuable insights into the performance of these devices. It can monitor network health, check the status of various devices, and even alter configurations on them remotely. This functionality is critical for network administrators to promptly identify and rectify issues, thereby maintaining the network’s optimal performance and reliability.

Now, why choose a Raspberry Pi for this project? The Raspberry Pi, a compact and cost-effective computer, emerges as an ideal candidate for several reasons. First and foremost, its small size and low power consumption make it a practical choice for continuous running as a network monitor. Despite its diminutive stature, the Raspberry Pi packs enough computing power to handle the demands of SNMP monitoring effectively. Additionally, its versatility and open-source nature allow for extensive customization and adaptability, making it a favorite in various tech projects, including network monitoring.

What you will need to build a Raspberry Pi SNMP

To start, you will need:

  • A Raspberry Pi (any model will do, but newer models offer better performance)
  • A microSD card (8 GB or more)
  • An Ethernet cable or Wi-Fi connection
  • A power supply for your Raspberry Pi
  • An SSH client on your computer (like PuTTY for Windows or Terminal for macOS)

Setting up your Raspberry Pi

  1. Install the Operating System: Begin by installing Raspberry Pi OS on your microSD card. You can download it from the Raspberry Pi website and use software like Raspberry Pi Imager to flash it onto the card.
  2. Initial Configuration: Once the OS is installed, insert the microSD card into your Raspberry Pi, connect it to your network, and power it up. Use SSH to log into your Raspberry Pi from your computer.
  3. Update Your Raspberry Pi: It’s crucial to update your Raspberry Pi to the latest software. Simply enter sudo apt-get update and sudo apt-get upgrade in the terminal.

Installing SNMP

Now that your Raspberry Pi is up and running, it’s time to install SNMP:

  1. Install SNMP Packages: Run sudo apt-get install snmp snmpd snmp-mibs-downloader.
  2. Configure SNMP: Edit the SNMP configuration file by typing sudo nano /etc/snmp/snmpd.conf. Here, you can set community strings and allowed hosts.
  3. Restart SNMP Service: After configuration, restart the SNMP service with sudo systemctl restart snmpd.

Configuring SNMP monitoring

With SNMP installed, let’s set up monitoring:

  1. Choose SNMP Management Software: There are various SNMP management tools available, such as Nagios or Zabbix. Choose one that suits your needs and install it on your Raspberry Pi.
  2. Add Devices to Monitor: In your SNMP management software, add the devices in your network that you want to monitor. This typically involves specifying the IP address and SNMP community string of each device.

Using a SNMP monitor

  1. View and Analyze Data: You can now view data from your monitored devices. Look for trends, performance issues, or other insights that SNMP provides.
  2. Set Up Alerts: Most SNMP tools allow you to set up alerts for specific conditions, such as a device going offline or high bandwidth usage.

Benefits of monitoring your network

Quality of Service (QoS) Monitoring
QoS is vital for optimizing network performance, especially in bandwidth-limited environments. The key is to identify essential traffic types, like video conferencing or critical business applications. Advanced users might explore tools like tc and iptables for in-depth QoS management, while others might prefer simpler solutions like Wondershaper or OpenWrt.

DNS Monitoring with Pi-Hole
Transforming a Raspberry Pi into a Pi-hole serves multiple purposes: it provides DNS privacy, blocks ads, and offers detailed network information. The Pi-hole acts as your DNS server, translating domain names into IP addresses locally, leading to enhanced network speed and security.

Intrusion Detection and Prevention
Beyond basic traffic analysis, securing your network against threats is imperative. Open-source programs like Suricata and Zeek are invaluable for this. Suricata combines an Intrusion Detection System (IDS) and an Intrusion Prevention System (IPS), while Zeek monitors for suspicious activities, aiding in broader network configuration and performance measurement.

Firewall & Security Auditing
While most routers come with a default firewall, a Raspberry Pi allows for more granular control. Using iptables or UFW (Uncomplicated Firewall) enables you to set specific rules for traffic filtering and conduct thorough security audits.

SNMP Traps and Alerts
Setting up Simple Network Management Protocol (SNMP) traps on a Raspberry Pi lets you proactively monitor your network. Applications like Net-SNMP can alert you to specific network events, ensuring prompt responses to potential issues.

VPN Monitoring
A Raspberry Pi can also assist in monitoring and controlling your Virtual Private Network (VPN). Tools like OpenVPN allow you to ensure that your VPN is consistently operational, enhancing your network’s privacy and security.

Troubleshooting tips

  • Ensure your Raspberry Pi has a stable network connection.
  • Check that your SNMP community strings and IP addresses are correctly configured.
  • If you encounter issues, reviewing the logs of your SNMP tool can provide valuable insights.

Building an SNMP monitor with a Raspberry Pi is a great way to gain hands-on experience in network management. By following the steps outlined above, you’ll have a functional and efficient network monitoring tool at your disposal. Remember, the world of networking is vast, and there’s always more to learn and explore. Happy monitoring!

Filed Under: DIY Projects, Top News


Latest timeswonderful Deals

Disclosure: Some of our articles include affiliate links. If you buy something through one of these links, timeswonderful may earn an affiliate commission. Learn about our Disclosure Policy.
Categories
News

How to Create an Awesome iPhone Setup (Video)

ultimate iPhone setup

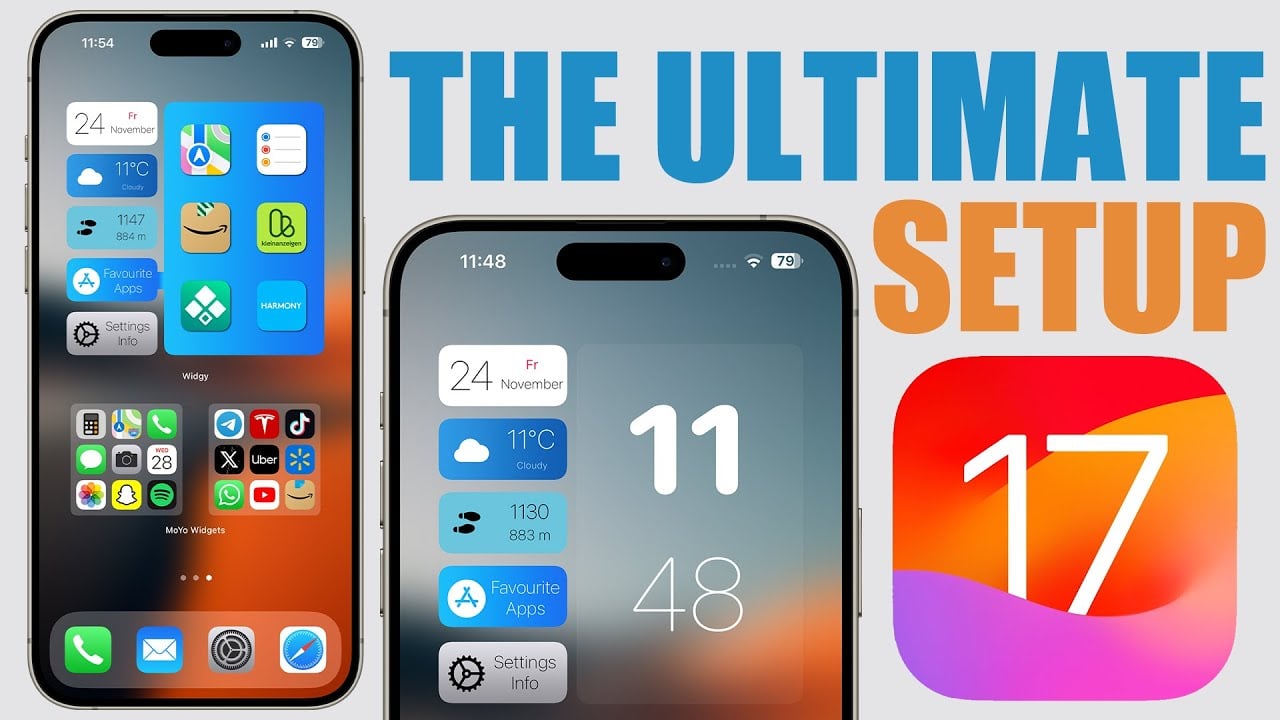
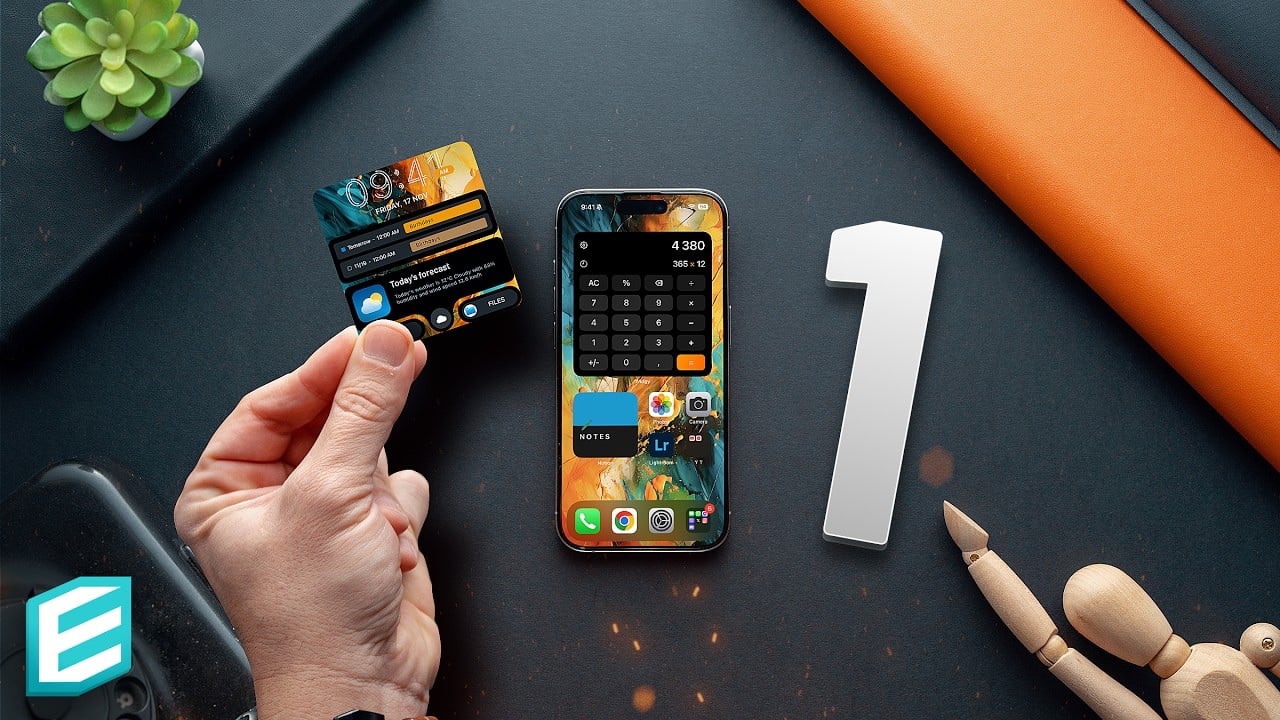
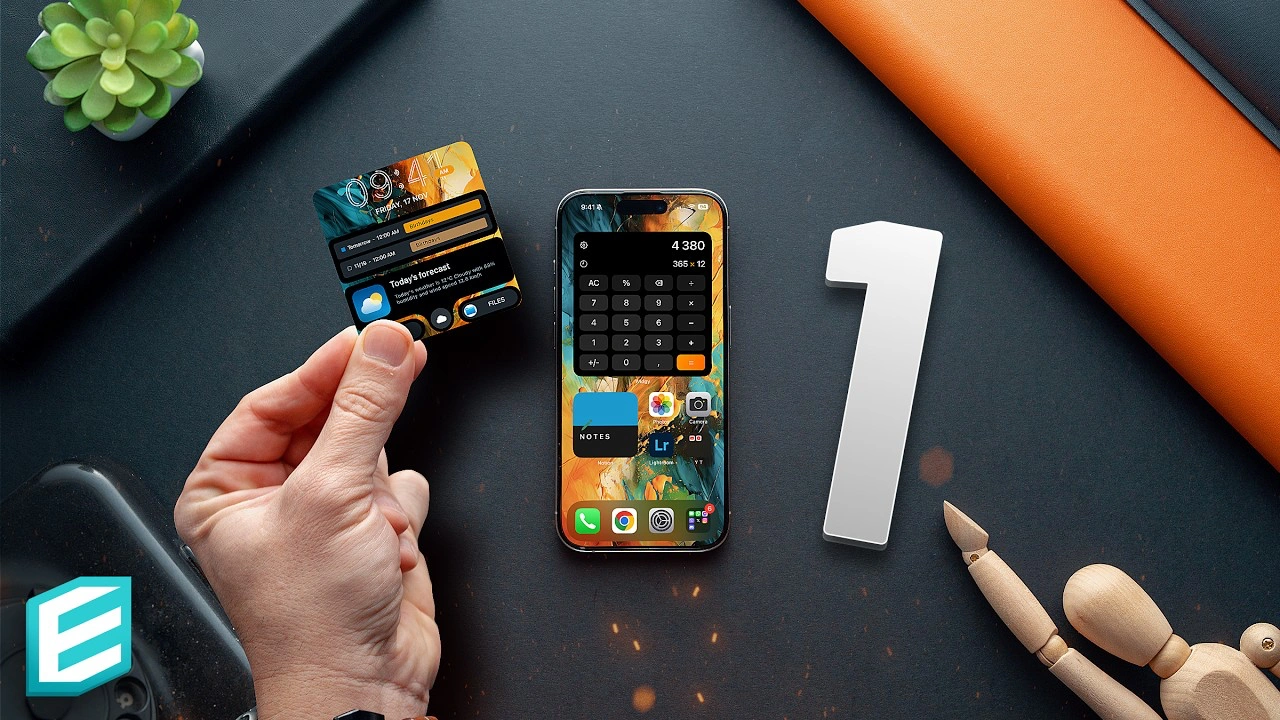
We previously showed you a video of the ultimate iPhone setup and now we have another video that is basically a guide on how you can create another awesome iPhone setup for your home screen with iOS 17.

In the fast-paced world of technology, your iPhone is more than just a device; it’s a crucial part of your daily life. Understanding how to maximize its utility, especially with the iPhone 15 Pro and iOS 17, can transform your user experience from ordinary to extraordinary. Let’s dive into how you can create an optimized home screen setup that not only saves time but also reduces stress and enhances your interaction with your favorite apps and tools. The video below from ThisisE is designed to show us how we can create an awesome iPhone setup with iOS 17.

A Gateway to Efficiency: The Ultimate Home Screen Setup

Imagine having all your essential tools and apps on one homepage. This is not just about decluttering your screen; it’s about enhancing functionality for both smaller and larger iPhone models. Whether you’re navigating your phone with one hand while on the move, or simply seeking faster access to your apps and notifications, this setup is your gateway to efficiency.

Tools for Transformation

At the heart of this setup are widgets and stacks of widgets. These aren’t just any widgets, but custom creations using apps like Widgetsmith and bespoke shortcuts via the Shortcuts app. The beauty of this setup? It’s compatible with most iPhones, especially those running the latest iOS 17.

1. Widget Page: Your Personal Dashboard

Your widget page is like your personal dashboard, featuring:

  • A stats stack displaying activities, battery life, and sleep data.
  • A calendar stack to keep your schedule at your fingertips.
  • Email and to-do widgets for staying on top of tasks.
  • A listening section to seamlessly switch between music and podcasts.

2. Home Page: Simplified and Streamlined

Transform your home page into a hub of productivity with:

  • A large Widgetsmith widget for quick information.
  • A handy calculator widget for those quick calculations.
  • A stack of Notion page widgets, perfect for organizing your notes and projects.
  • A folder containing your most-used apps, right where you need them.

3. Control Center: Tailored to Your Needs

Customize your control center to include:

  • Easy switching between light and dark modes.
  • Screen recording for capturing important moments.
  • Shazam for identifying music on the go.

Creating Shortcuts: A Click Away

Efficiency is key, and creating shortcuts for quick access to frequently used folders and documents is a game-changer. Integrate these shortcuts into your Widgetsmith widget for even faster access.

Customization at Its Best

Why settle for the default when you can personalize it? Customize your widgets to match your iPhone’s aesthetic, play with styles and colors, and make your screen truly yours.

Adapting to Different Models

Not all iPhones are created equal. For those without an action button, utilize the back tap feature in the accessibility settings to trigger shortcuts.

Enhance with Accessories

Briefly, it’s worth mentioning the use of NFC tags and accessories like a car charger and mount to further enhance your iPhone experience.

Guiding You Through

If you’re wondering how to put all these pieces together, don’t worry. You will be pleased to know that it’s simpler than it sounds. With a bit of customization and some tweaks to your settings, you can create an iPhone setup that works seamlessly for you.

Remember, your iPhone is a powerful tool, and with the right setup, you can unlock its full potential. So, start experimenting with these tips and tailor your iPhone to suit your lifestyle perfectly.

Source & Image Credit: ThisisE

Filed Under: Apple, Apple iPad, Guides


Latest timeswonderful Deals

Disclosure: Some of our articles include affiliate links. If you buy something through one of these links, timeswonderful may earn an affiliate commission. Learn about our Disclosure Policy.

Categories
News

How to create the ultimate iPhone setup

iPhone setup

We previously looked at how to create a minimalist iPhone setup. Are you looking to transform your iPhone into a sleek and functional masterpiece? You will be pleased to know that the latest video guide, “Create the Ultimate iPhone Setup,” offers invaluable insights into customizing your iPhone’s lock screen and home screen, blending aesthetics with practicality. The video below from ireviews shows us how to create the ultimate iPhone setup for your Home Screen and Lock Screen.

Lock Screen Customization

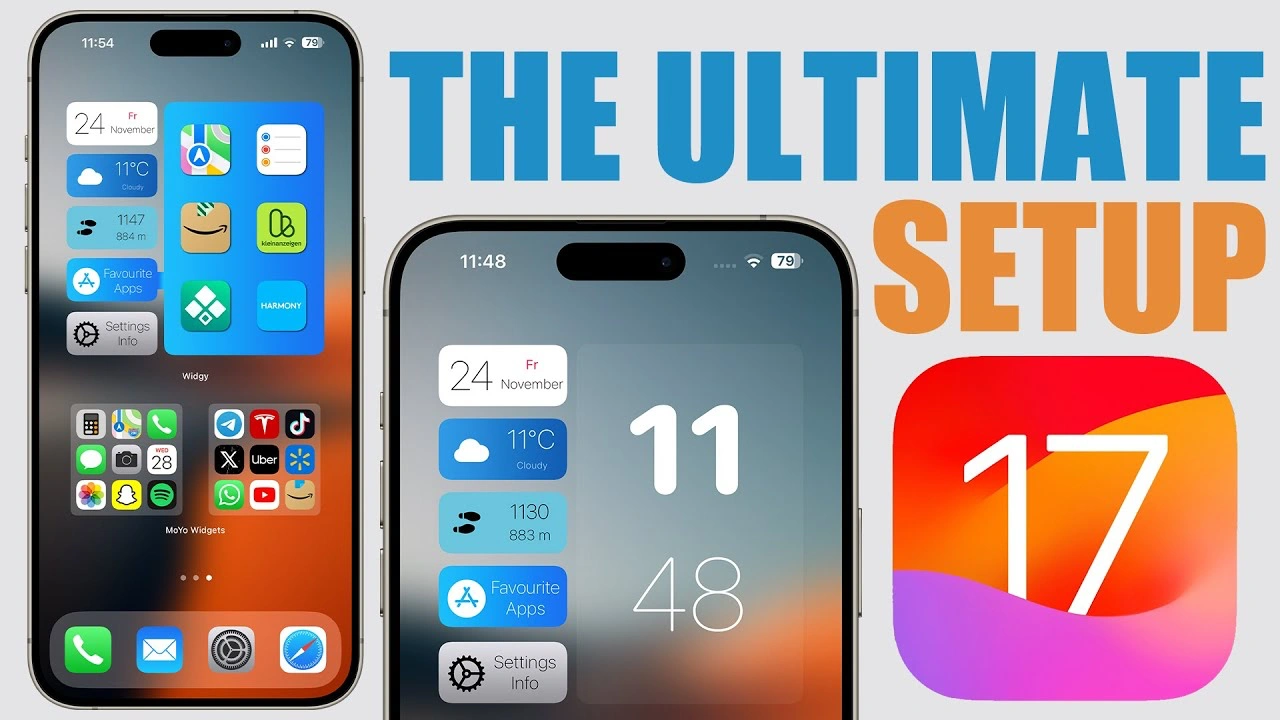
Firstly, let’s delve into the lock screen. The video shows two essential widgets. One displays the battery percentages for your various devices – a must-have for those juggling multiple Apple gadgets. The other widget is a hub of information, showing connectivity status, storage, RAM memory, and time. Imagine having all this vital information at a glance!

A pro tip to elevate your lock screen’s look is the smart use of colors. Match the clock and widgets color with your wallpaper for a visually pleasing effect. Achieving this is a breeze with the Color Picker tool found in the customization settings.

Home Screen Customization

Moving on to the home screen, simplicity meets functionality. A widget from ‘Widget’ encompasses everything you need: a calendar, weather forecast, step counter, links to your favorite apps, settings info, and time. With iOS 17, these widgets have become interactive, allowing you to tap them for more detailed information.

A striking feature is the widget’s transparent background, which seamlessly integrates with your chosen wallpaper. The guide provides straightforward instructions to achieve this look, utilizing a screenshot of an empty home screen page.

Additional Home Screen Features

The video doesn’t stop there. It introduces ‘Moo Widgets’, a clever app that allows you to add a hidden page of apps. This feature is not just about aesthetics; it’s about efficiency and accessibility. Swipe on the home screen, and voilà, your apps are there, out of sight but easily reachable.

In combination with ‘Moo Widgets’, ‘Blank Widgets’ plays a pivotal role. It creates a stack that conceals ‘Moo Widgets’, enabling a secret widget on your home screen. This setup maintains a clean look while ensuring your apps are just a swipe away.

Moreover, the guide suggests utilizing the left side of the home screen for practical widgets like shortcuts, a calendar, and a world clock. This is perfect for those who love having quick access to their daily essentials.

Overall Setup Aesthetic and Functionality

The overarching goal of this setup is to achieve a clean and simple look without compromising functionality. You’ll find that this custom setup is not only easy to create but also elevates your iPhone’s usability. The video concludes by reassuring viewers of the setup’s simplicity and provides all necessary links for wallpapers, widgets, and apps in the video description.

By following this information in the video, you can transform your iPhone into a more efficient, aesthetically pleasing device that caters to your personal and professional needs. So, if you are wondering how to give your iPhone a functional makeover without sacrificing style, this video is your go-to resource.

Source & Image Credit: iReviews

Filed Under: Apple, Apple iPhone, Guides


Latest timeswonderful Deals

Disclosure: Some of our articles include affiliate links. If you buy something through one of these links, timeswonderful may earn an affiliate commission. Learn about our Disclosure Policy.

Categories
News

How to Create a Minimalist iPhone Setup with iOS 17

iPhone iOS 17

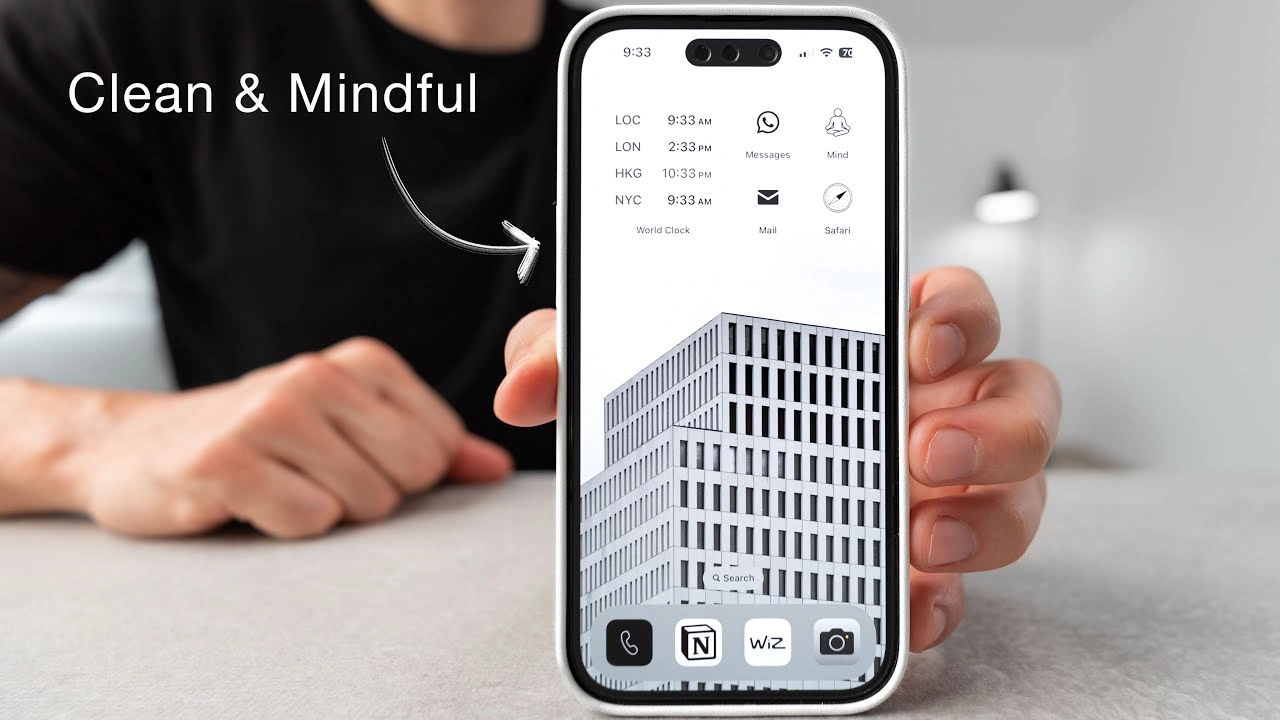
Are you looking to simplify your iPhone experience with the latest iOS 17? If so, you will be pleased to know that achieving a minimalist setup that balances functionality, aesthetics, and mindfulness is now more accessible than ever. This video below from Robert Creating will walk you through transforming your iPhone into a device that not only looks great but also encourages a healthier, less addictive relationship with technology.

Step 1: Ensure Your iPhone is Updated The journey begins by updating your iPhone to the latest iOS 17. This step is crucial as it unlocks all the new settings and features you’ll need for your minimalist transformation.

Step 2: Aesthetic Customization iOS 17 offers a plethora of aesthetic customizations. A popular choice is the grayscale theme, which provides a cleaner, less distracting look. You can personalize your iPhone with black and white wallpapers that automatically switch based on different modes during the day.

Step 3: Streamlined Lock Screen Setup Your lock screen can be a window to simplicity. Set a serene black-and-white photo, perhaps of a calming landscape or an architectural marvel, along with handy widgets like headphone battery levels and fitness app summaries.

Step 4: Home Screen Customization Echo your lock screen’s photo on the home screen for a cohesive look. iOS 17 allows you to limit your home screen to a single page, showcasing only essential apps. This step significantly reduces clutter and helps maintain focus.

Step 5: Utilize Focus Modes Focus modes are a standout feature in iOS 17. Set up different modes for work, sleep, and mindfulness, each with its own app layout and notification settings.

  • Work Mode: Activate this from Monday to Friday and include apps crucial for your professional tasks.
  • Mindfulness Mode: Include apps that promote a balanced and mindful use of your phone, such as meditation or fitness tracking apps.
  • Sleep Mode: Employ a darker theme with minimal distractions, perhaps just a moon icon, signaling it’s time to put the phone down for the night.

Step 6: Dock Customization Keep your dock limited to frequently used apps like your phone, a notes app, a smart home control app, and the camera. This approach ensures that your most important tools are always just a tap away.

Step 7: Innovative App Integration iOS 17 introduces exciting integrations like an AI assistant tool powered by GPT-4, which can enhance your content creation process and overall productivity.

Step 8: Setting Up New Focus Modes Dive into the settings to fine-tune your Focus modes. You can customize which contacts can reach you, tailor your lock screen for each mode, and even schedule them to activate automatically.

Step 9: Personalizing App Icons Use resources like Pinterest to find unique app icons, and employ the Shortcuts app to apply these custom icons for a truly personalized look.

Step 10: Standby Mode When charging, your phone can display useful information like the time, calendar, or rotating photos. Customize these widgets to suit your needs and preferences.

Step 11: App Blocking for Reduced Distraction Consider using apps like Unplug to block distracting apps during work hours or nighttime, helping you stay focused and maintain a healthy digital balance.

As you embark on this journey of minimalist transformation, remember that the beauty of iOS 17 lies in its flexibility to adapt to your unique lifestyle and preferences. Experiment with different settings and layouts until you find the perfect balance that reflects your personality and enhances your daily life.

Source Robert Creating

Filed Under: Apple, Apple iPhone, Guides


Latest timeswonderful Deals

Disclosure: Some of our articles include affiliate links. If you buy something through one of these links, timeswonderful may earn an affiliate commission. Learn about our Disclosure Policy.
Categories
News

How to setup a GPT Store and sell your custom GPTs

How to setup a GPT store and publish your custom GPTs

In preparation for the imminent launch of the new and highly anticipated OpenAI GPT Store, enabling you to sell your custom GPTs to other ChatGPT Plus and Enterprise users. This guide will take you through how to set up your GPT store in and prepare your first custom GPTs for sale. Wes Roth has also created a fantastic tutorial video takes you through the process and shows you exactly how to get ready for this huge milestone event that will take place very soon.

The rise of Generative Pretrained Transformers (GPTs) has sparked a significant shift in the field of artificial intelligence (AI). OpenAI, a leading entity in this sector, is preparing to launch the GPT Store, a innovative platform that allows you to sell custom GPT AI applications you have created using its advanced AI technology. The standout feature of this platform is its user-friendly interface that requires no coding skills, making it accessible to a wider audience, regardless of their technical background. The launch of the new GPT store is reminiscent of that of the launch of the official Apple App store back in 2008 when the first application started becoming available for its range of iOS devices.

Setup your GPT store and sell custom GPTs

The GPT Builder is more than just a platform for creating applications; it also offers a chance to monetize your applications and earn income. This is achieved through a revenue-sharing model, where the profits from the sale of applications are split between you, the creator, and the platform. This model encourages the development of high-quality applications and promotes a mutually beneficial relationship between the platform and its creators.

Other articles we have written that you may find of interest on the subject of GPT Builder and creating GPTs :

Verify your business

The platform is carefully designed to highlight the work of verified creators. This verification process is crucial in maintaining the platform’s credibility and ensuring that only top-quality applications are available for purchase. The verification process involves two steps: creating a creator profile and verifying your domain. The creator profile serves as your digital identity on the platform, while domain verification confirms your ownership of a website domain. If you like to learn more about ways to make money using the new GPT Builder check out our previous article.

The GPTs available on the platform are organized based on their functionality. This classification allows users to easily find the applications that meet their needs. As a creator, it’s important to build a reputation for producing high-quality applications. Focusing on a specific niche can help you stand out and attract a loyal user base.

GTP Store Creator Profile

The GPT Store is about more than just short-term gains. It’s about creating lasting value for the end user. This means developing applications that are not only useful but also regularly updated and improved to meet the changing needs of users. This long-term vision can contribute to a sustainable business model and ensure customer satisfaction.

Preparing for the store launch involves several steps. First, you need to create a creator profile. This profile serves as your digital identity on the platform and provides potential buyers with information about you and your applications. Next, you need to build your GPTs. This involves using the platform’s no-code technology to create your applications.

Marketing your custom GPTs

Once your applications are fully developed, you can start planning how to market them. This is where digital marketing tools like Google search, YouTube, and SEO become essential. These tools can increase the visibility of your applications online, attracting a larger pool of potential buyers. Additionally, an email list can be a powerful marketing tool. By collecting email addresses, you can send updates and promotions to a dedicated audience, establishing a direct communication channel with your potential customers.

The GPT Store by OpenAI provides a unique opportunity to create and sell applications using advanced AI technology, without the need for any coding skills. By focusing on a specific niche, building a reputation for quality, and adopting a long-term approach, you can succeed on this platform. With the right preparation and marketing strategies, you can take full advantage of this opportunity and establish a successful business in the rapidly growing world of AI applications.

Filed Under: Guides, Top News


Latest timeswonderful Deals

Disclosure: Some of our articles include affiliate links. If you buy something through one of these links, timeswonderful may earn an affiliate commission. Learn about our Disclosure Policy.
Categories
News

How to setup your Google Pixel 8 Pro

Google Pixel 8 Pro

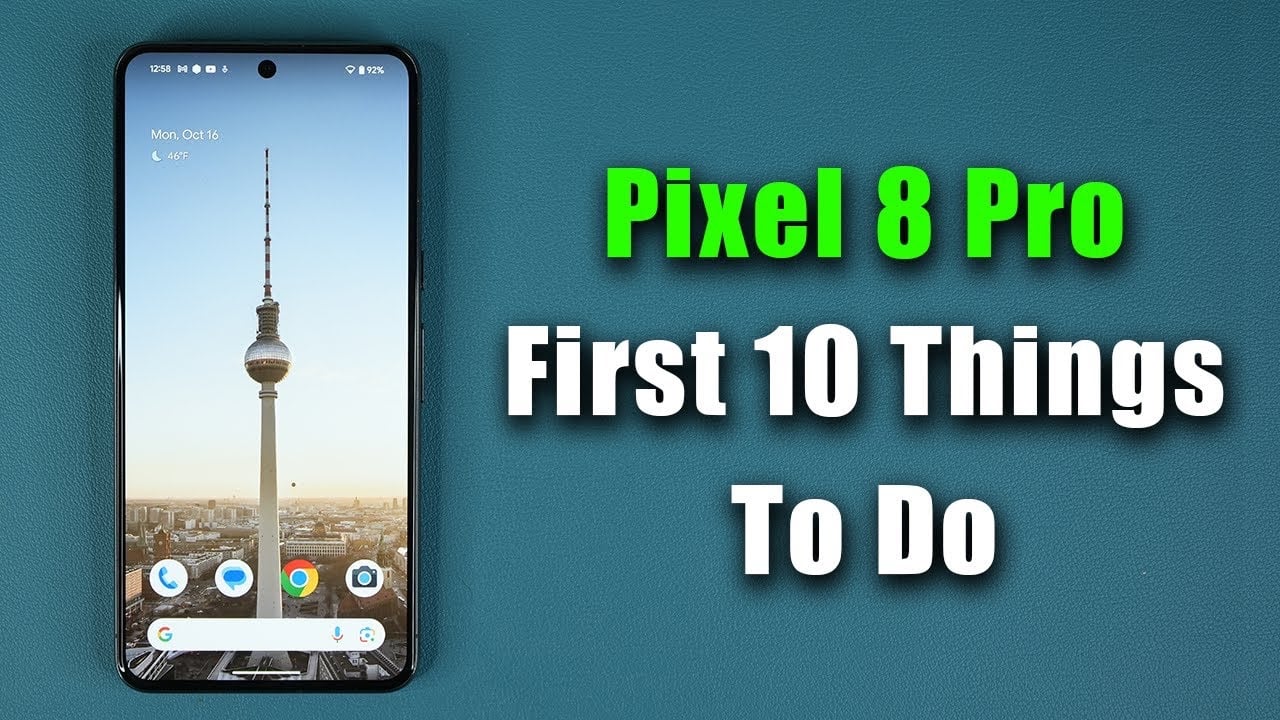
If you’ve just unboxed your brand-new Google Pixel 8 Pro, you’re probably eager to dive in and explore all its features. But before you get lost in the world of apps and widgets, there are some essential settings you should tweak to make the most of your device. Here’s a guide on the first 10 things to do with your Pixel 8 Pro to maximize its utility.

1. Assign a Unique Device Name

The first thing you should do is give your Pixel 8 Pro a unique name. Go to “Settings > About Phone > Device Name” and enter a name that resonates with you. This will not only personalize your device but also make it easier to identify when connecting to other gadgets like Bluetooth speakers or laptops.

2. Optimize Battery Settings

Battery life is a critical aspect of any smartphone experience. Navigate to “Settings > Battery” and enable the “Adaptive Charging” feature. This will help extend your battery’s lifespan, ensuring your phone remains functional for a longer period. You can also run battery diagnostics and choose to display the battery percentage on the status bar.

3. Get Creative with AI Wallpapers

The Pixel 8 Pro comes with a unique feature that allows you to customize AI-generated wallpapers. Head over to the wallpaper settings and tap on the AI wallpaper option. You can then tap on underlined words to change elements of the wallpaper, creating a design that’s uniquely yours.

4. Choose Your Navigation Mode

The Pixel 8 Pro offers two types of navigation modes: gesture navigation and three-button navigation. To select your preferred mode, go to “Settings > Display” and make your choice. Each mode also comes with additional customization options to suit your navigation style.

5. Master the Gestures

Your Pixel 8 Pro is equipped with a variety of gestures to make your user experience more fluid. To enable or disable these, go to “Settings > System > Gestures.” Here, you can activate features like one-handed mode or the flip-to-mute option, which can be incredibly handy in various situations.

6. Fine-Tune Camera Settings

The camera is one of the Pixel 8 Pro’s standout features. To make the most of it, explore the manual controls available for parameters like ISO, shutter speed, and focus. You can also switch between 12 or 50-megapixel resolution and enable grid lines for better photo composition.

7. Adjust Video Recording Options

If you’re into videography, the Pixel 8 Pro has got you covered. Within the camera app, you can switch between 1080p and 4K video recording. You can also adjust the frames per second to capture smooth or more detailed footage, depending on your needs.

8. Customize the At-a-Glance Feature

The At-a-Glance feature on the home screen provides quick information like the date and weather. If you find it distracting, you can easily disable it. Alternatively, you can customize it to show the information that’s most relevant to you.

Summary

The Google Pixel 8 Pro is a powerhouse of features, but to truly unlock its potential, you’ll need to spend some time in the settings menu. Whether you’re a new user or planning to keep this device for the long haul, these initial tweaks are crucial for an optimized experience. So go ahead, make these changes and elevate your Pixel 8 Pro experience to the next level.

Source & Image Credit: Sakitech

Filed Under: Android News, Mobile Phone News, Top News


Latest timeswonderful Deals

Disclosure: Some of our articles include affiliate links. If you buy something through one of these links, timeswonderful may earn an affiliate commission. Learn about our Disclosure Policy.