Categories
News

How to Take Night Sky Photos With The iPhone (Video)

Night Sky Photos With The iPhone

Have you ever gazed up at the night sky, wishing you could capture its awe-inspiring beauty with your iPhone? You’ll be pleased to know that with the advent of Night Mode, this is not only possible but also remarkably straightforward. This video below from Quick Tips for iPhone will walk you through the essential steps to take breathtaking night sky photos using your iPhone, leveraging its Night Mode feature for stunning results.

Night Mode: A Gateway to Stellar Photography

Night Mode is a powerful feature in newer iPhones that allows for long-exposure photography. This means your iPhone can take photos over a few seconds to as long as 30 seconds, allowing more light to hit the sensor and capturing the night sky in all its glory. The result? Detailed images of the night sky with stars that twinkle in high definition.

Activating Night Mode for Optimal Results

When lighting conditions are low, your iPhone’s Camera app will automatically suggest activating Night Mode, signaled by a moon icon turning yellow. For those crystal-clear shots of the cosmos, stability is key. Here’s a pro tip: to avoid any blur, keep your phone as still as possible, or better yet, use a tripod. This ensures your long-exposure shots are as sharp as the stars.

Fine-Tuning Exposure for the Perfect Shot

One of the most exciting aspects of Night Mode is the ability to manually adjust exposure time. By swiping up in the Camera app, you can access this setting and dial in the perfect exposure. Handheld shots are generally limited to shorter exposures, around 3 seconds, but with a tripod, you can extend this up to 30 seconds. This longer exposure is the secret sauce for capturing more light and detail, making stars and celestial bodies stand out against the night sky with an almost daylight-like quality.

Focusing Techniques for Stellar Clarity

To ensure your night sky photos are not just bright but also sharp, focus is critical. A simple tap on the screen where the sky appears allows you to set the focus manually. This, combined with a longer exposure, will result in a photograph where every star seems to leap out of the frame, with details and lighting that truly bring the night to life.

Crafting the Perfect Night Sky Photograph

Taking night sky photos with your iPhone is a blend of art and science. By understanding and utilizing Night Mode’s capabilities, you can transform the way you capture the night. Remember, the key elements are stability, exposure, and focus. Adjust these settings to suit the scene in front of you, and don’t be afraid to experiment. With each shot, you’ll get closer to mastering the art of night sky photography.

Your iPhone is more than just a phone; it’s a window to the cosmos. Whether you’re an amateur astronomer, a photography enthusiast, or simply someone who appreciates the beauty of the night sky, these tips will help you capture its splendor. So, the next time you’re under a starlit sky, remember that with just your iPhone, you have everything you need to take spectacular night sky photographs.

Source & Image Credit: Quick Tips for iPhone

Filed Under: Apple, Apple iPhone, Guides


Latest timeswonderful Deals

Disclosure: Some of our articles include affiliate links. If you buy something through one of these links, timeswonderful may earn an affiliate commission. Learn about our Disclosure Policy.

Categories
News

Easily add your face to AI generated photos and art

Easily add your face to AI generated artwork

Imagine being able to travel through time and space with just a photograph. Photomaker, an innovative AI-generated art tool, makes this possible. With a simple upload, you can see yourself or others in a variety of scenes, from historical moments to futuristic landscapes. This article will guide you through using Photomaker in conjunction with Pinokio, a platform that allows you to run AI tools on your own Windows computer. We’ll discuss what you need to get started, how to install the software, and tips for getting the most realistic results from the AI.

Photomaker is at the forefront of AI-generated art technology. Its user-friendly design lets you create personalized scenes with ease. You can be part of a famous painting, experience a moment in history, or venture into a science fiction world. The advanced algorithms of Photomaker ensure that your image is seamlessly integrated into any setting, with appropriate style and lighting.

How to face swap on AI artwork

Before you can start using Photomaker, you’ll need to set up Pinokio on your computer. This platform is designed to make it easy to use AI tools like Photomaker on your own device, offering faster processing times and more privacy. Pinokio acts as a bridge between your computer’s hardware and the AI software, ensuring everything runs smoothly.

Here are some other articles you may find of interest on the subject of using your own face and face swapping on AI generated artwork and photographs and character consistency using Midjourney, DallE 3 and more:

Getting Photomaker up and running is straightforward. You’ll want to make sure your Windows operating system is up to date first. Next, download and install Pinokio from its official website, following the instructions in the video embedded below. Once Pinokio is installed, you can use it to install Photomaker. The installation process is guided by on-screen prompts, so you’ll be ready to create AI art in no time.

To ensure Photomaker operates without a hitch, your computer should meet certain system requirements. A dedicated graphics processing unit (GPU), like the RTX 480 GPU, is recommended. This type of GPU has its own memory, which is important for handling the tasks associated with AI-generated art.

Before you begin, it’s a good idea to check that your GPU has enough memory for the job. You can do this in Windows by going to the Display settings and then to Advanced display settings. There, you’ll find information about your GPU and the available memory.

For the best results, you may need to adjust some settings, such as the quality of the image and the intensity of the style. These tweaks help the AI better understand your photo and create more accurate scenes. You’ll find the perfect settings for your projects through a bit of trial and error.

How to install Pinokio

With Photomaker, you can explore a vast array of creative scenarios. Whether you want to see yourself in a serene natural landscape, an intense action scene, or a calm urban environment, the AI can create a unique image that fits your chosen setting.

There’s also exciting news for those looking to enhance their AI art creation capabilities. An upcoming giveaway will offer the chance to win an RTX 480 GPU. This powerful GPU will provide the speed and memory necessary to handle even the most complex scenarios.

Photomaker and Pinocchio open the door to the world of AI-generated art. By following the steps outlined in this guide and ensuring your system is ready, you can easily transport yourself or others into any imaginable situation with impressive realism. Stay tuned for the giveaway, and let your creativity soar with the endless scenarios you can create.

Filed Under: Guides, Top News


Latest timeswonderful Deals

Disclosure: Some of our articles include affiliate links. If you buy something through one of these links, timeswonderful may earn an affiliate commission. Learn about our Disclosure Policy.

Categories
News

How to store photos on a Synology NAS

How to store photos on a Synology NAS

Most of us already have a vast collection of cherished photographs, each one capturing a unique moment in time. As this collection grows, organizing and safeguarding these memories becomes increasingly important. Especially if you would like to keep them locally rather than rely on cloud storage provided by third-party providers such as Apple, Google, Microsoft and others.

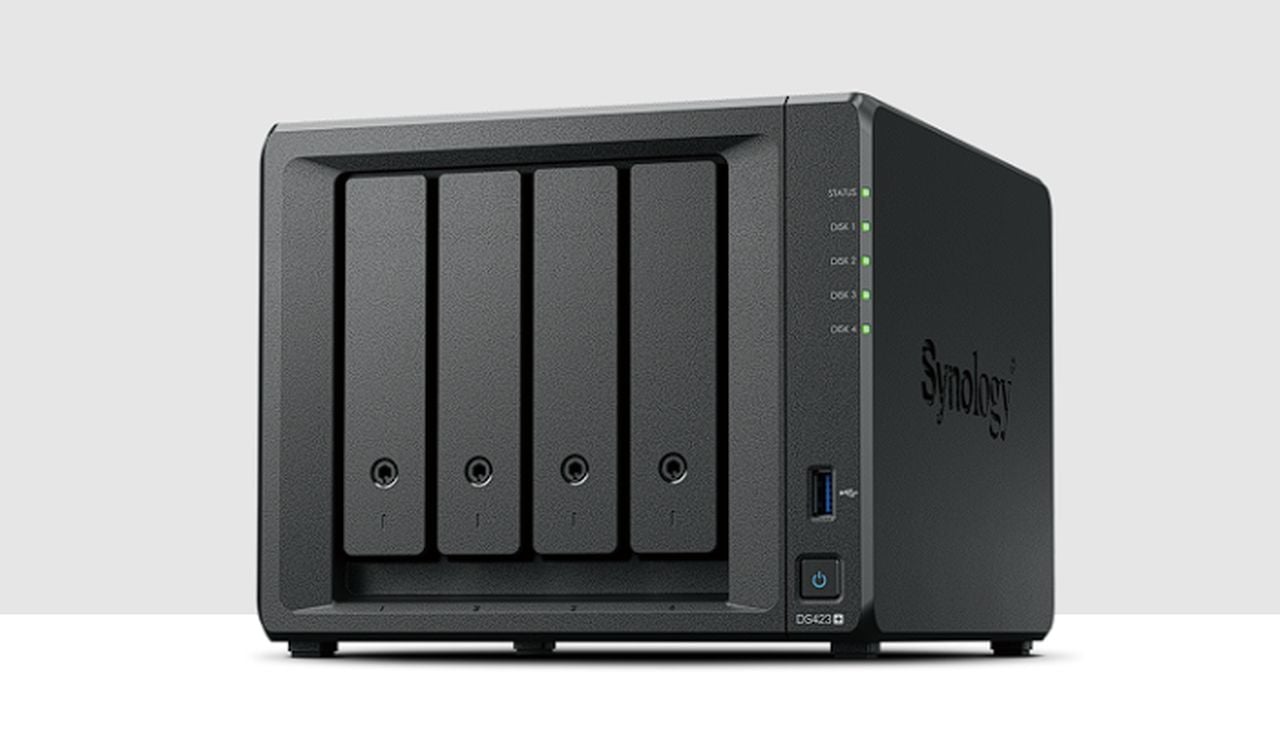
A Synology NAS, paired with Synology Photos, offers a sophisticated yet accessible way to manage your digital photo library. This combination not only keeps your photos organized but also ensures they are protected and easy to share. This quick guide will provide more insight onto how to store photos on a Synology NAS and the best way to tech them from the worst

For those who are new to Synology Photos, it’s essential to start by ensuring your Synology NAS is updated to DSM 7 or higher. Once updated, installing Synology Photos is your first step toward creating a centralized hub for all your photographic needs. The software’s design is intuitive, making it simple to navigate and manage your photos directly within the NAS file system.

Storing photos on a Synology NAS

One of the key benefits of Synology Photos is its ability to optimize storage space. It provides separate personal and shared spaces, which can be customized to suit your organizational style. Whether you want to keep your photos private or share them with others, Synology Photos has the flexibility to meet your needs.

Here are some other articles you may find of interest on the subject of network attached storage :

Privacy and security

When it comes to privacy and security, controlling who has access to your photos is crucial. Synology Photos allows you to create user groups and set specific permissions, ensuring that only people you trust can view or edit your images. This level of control is vital for maintaining the privacy of your personal memories.

Sharing photos

Sharing your photos should be effortless, whether you’re sending them to family and friends or making them available to a wider audience. Synology Photos provides secure and easy-to-use sharing options, giving you the freedom to share your memories as you see fit.

Easily connect your photos from different sources

Collecting photos from various sources can often be a cumbersome task, especially when dealing with events or collaborative projects. Synology Photos simplifies this process with its photo request feature, which streamlines the collection of images from multiple contributors.

The file structure within Synology Photos is designed to be organized and integrated with your NAS, ensuring that your photos are systematically stored and easily retrievable. This organization is a significant advantage for those who need to find specific images quickly.

EXIF photo format

For photography enthusiasts who pay close attention to detail, Synology Photos supports EXIF data. This feature allows you to filter and sort your photos based on the embedded information, providing valuable insights and aiding in the organization of your collection.

One of the most critical aspects of photo management is ensuring that your memories are backed up and safe. Synology Photos offers reliable mobile backup features, including support for iCloud smart previews and sleep time backup. These features protect your photos automatically, without the need for manual intervention.

Advanced technologies

Facial recognition technology is another advanced feature of Synology Photos that enhances the organization of large photo libraries. By sorting images by person, it saves you time and effort in managing your collection.

Benefits of storing photos on a Synology NAS

  • Centralized Photo Hub: Creates a single, accessible location for all your photographs, simplifying management and access.
  • Optimized Storage Space: Offers personal and shared spaces, allowing for efficient and customized photo organization.
  • Privacy and Security: Enables the creation of user groups and specific permissions, ensuring control over who can view or edit your photos.
  • Easy and Secure Sharing: Provides straightforward options for sharing photos, maintaining both ease of use and security.
  • Photo Request Feature: Streamlines the collection of images from multiple contributors, ideal for events or collaborative projects.
  • Organized File Structure: Ensures systematic storage and easy retrieval of photos within the NAS system.
  • EXIF Data Support: Allows filtering and sorting of photos based on embedded information, aiding in detailed organization.
  • Reliable Mobile Backup: Includes features like iCloud smart previews and sleep time backup for automatic photo protection.
  • Facial Recognition Technology: Enhances organization by sorting images by person, saving time in managing large libraries.
  • User-Friendly Interface: Designed to be intuitive, making it simple for users to navigate and manage their photo collections.
  • Comprehensive Photo Management Solution: Combines advanced features with ease of use, suitable for both casual and serious photographers.
  • Educational Resources: Synology offers tutorials and guides to help users maximize their experience with the system.
  • Digital Legacy Preservation: Ensures that digital memories are safe, organized, and accessible, recognizing the importance of photographs as more than just images.
  • Scalability: As your photo collection grows, Synology NAS can scale to meet increasing storage demands.
  • Remote Access: Access your photos from anywhere, providing flexibility and convenience for viewing and managing your collection.
  • Integration with Other Services: Synology NAS can integrate with various cloud services for additional backup or synchronization options.
  • Energy Efficiency: NAS systems are generally more energy-efficient for continuous running compared to traditional servers or PCs.
  • Cost-Effective: Over time, using a NAS for photo storage can be more cost-effective than relying on subscription-based cloud services.

Synology NAS and Synology Photos together provide a comprehensive solution for photo storage and management. The advanced features, combined with a user-friendly interface, make it an excellent choice for anyone looking to secure and organize their digital memories efficiently. For those seeking additional guidance, Synology offers resources and tutorials to help you maximize your experience with their system.

This powerful duo of Synology NAS and Synology Photos stands as a testament to the importance of preserving our digital legacies. In an age where photographs are more than just images—they are stories, memories, and legacies—it’s essential to have a system that can keep them safe, organized, and accessible. With Synology’s solution, you can rest assured that your digital memories are well-managed, leaving you free to create more moments worth capturing.

Filed Under: Guides, Top News


Latest timeswonderful Deals

Disclosure: Some of our articles include affiliate links. If you buy something through one of these links, timeswonderful may earn an affiliate commission. Learn about our Disclosure Policy.

Categories
News

How to transfer photos and videos from your iPhone to PC or Mac

transfer photos iPhone

This guide is designed to show you how you can easily transfer photos from your iPhone or iPad to your PC or Mac. Transferring photos and videos from an iPhone or iPad to a Mac or PC is a common task that many users need to perform. This process allows for better organization, editing, and backup of your media files. There are several methods to achieve this transfer, each with its own set of steps and considerations.

Method 1: Using iCloud

Background: iCloud is Apple’s cloud storage service, which syncs data across all your Apple devices.

Assumptions: You have an iCloud account and are signed in on your iPhone/iPad and Mac/PC.

Steps:

  1. Enable iCloud Photos on your iPhone/iPad: Go to Settings > [your name] > iCloud > Photos, then turn on iCloud Photos. This will upload all your photos and videos to iCloud.
  2. Access on Mac: On a Mac, open the Photos app and sign in with your Apple ID to view the iCloud Photos.
  3. Access on PC: Install iCloud for Windows and sign in with your Apple ID. Enable Photos. You can then access your photos through the iCloud for Windows application or directly from a folder in File Explorer.

Considerations:

  • iCloud storage is limited to 5GB for free accounts. Additional storage requires a subscription.
  • This method requires a good internet connection for initial upload and subsequent syncing.

Method 2: Using a USB Cable

Background: Direct transfer via a USB cable is a straightforward method that involves physically connecting your device to your computer.

Assumptions: You have a compatible USB cable and the latest version of iTunes installed on your PC (not required for Mac).

Steps:

  1. Connect your iPhone/iPad to your computer using the USB cable.
  2. Trust the Computer: If prompted, tap ‘Trust’ on your iPhone/iPad to allow the computer access to your device.
  3. For Mac users: The Photos app will open automatically. You can then import your photos and videos.
  4. For PC users: Open iTunes, select your device, and choose ‘Photos’. You can then choose to sync all photos and albums or select specific items.

Considerations:

  • This method provides a quick and direct transfer without needing internet access.
  • Syncing via iTunes on PC may sometimes lead to data overwriting or duplication.

Method 3: Using AirDrop (Mac Only)

Background: AirDrop is a feature that allows wireless transfer of files between Apple devices.

Assumptions: Both devices have AirDrop enabled and are within Bluetooth and Wi-Fi range.

Steps:

  1. Enable AirDrop on your Mac: Go to Finder > AirDrop and turn on Bluetooth and Wi-Fi.
  2. Choose Photos/Videos on your iPhone/iPad: Open the Photos app, select the items you want to transfer, tap the share icon, and choose AirDrop.
  3. Accept the Transfer on Mac: When your Mac appears, tap it. The photos/videos will be transferred to the Downloads folder on your Mac.

Considerations:

  • AirDrop requires both devices to be relatively close.
  • Large transfers may take some time.

Method 4: Using Third-Party Cloud Services

Background: Services like Google Photos, Dropbox, and OneDrive offer cross-platform cloud storage.

Assumptions: You have an account with these services and have their apps installed on your devices.

Steps:

  1. Upload from iPhone/iPad: Open the respective app and upload your photos and videos to the cloud.
  2. Access on Mac/PC: Log into the same account on your computer and download the uploaded files.

Considerations:

  • These services usually offer limited free storage, with paid plans for more space.
  • Transfer speed is dependent on your internet connection.

Summary

Each method has its pros and cons, and the best method depends on your specific needs, such as the volume of data to be transferred, the devices you are using, and whether you prefer a wired or wireless solution. Regularly transferring and backing up your photos and videos ensures that your memories are safe and accessible across all your devices. You can find out more information about transferring your videos and photos from your iPhone or iPad to your PC or Mac over at Apple’s website.

Here are some more helpful iPhone articles:

Image Credit: Tomasz Zagórski

Filed Under: Apple, Apple iPad, Apple iPhone, Guides


Latest timeswonderful Deals

Disclosure: Some of our articles include affiliate links. If you buy something through one of these links, timeswonderful may earn an affiliate commission. Learn about our Disclosure Policy.

Categories
News

How To Recover Deleted Photos on Android

Recover Deleted Photos on Android

This guide is designed to show you how to recover deleted photos on your Android device. In today’s digital world, where smartphones have become an integral part of our lives, the loss of precious photos can be a cause for great distress. Whether accidentally deleted or lost due to device malfunction, recovering these cherished memories is crucial. While the process may seem daunting, there are several effective methods to get your photos back.

Method 1: Restore from Trash

Most Android devices have built-in trash or recycle bin features for photos. These folders temporarily store deleted images for a specified period, typically 30-60 days, before permanently erasing them. To recover photos from trash:

  1. Open the Google Photos app on your Android device.
  2. Tap the Library tab at the bottom.
  3. Select Trash or Bin from the options.
  4. Identify the photos you want to restore.
  5. Long-press on the desired photos and tap Restore from the options that appear.
  6. The restored photos will be moved back to your main photo library.

Method 2: Use Cloud Backup

If you have linked your Android device to a cloud storage service like Google Photos, OneDrive, or Dropbox, you may be able to restore deleted photos from your cloud backups. These services automatically upload your photos to the cloud, ensuring you have a backup in case of loss.

  1. Open the cloud storage app on your Android device.
  2. Access your photo library or search for the deleted photos you want to recover.
  3. Select the photos and tap the Restore or Download option.
  4. The restored photos will be downloaded to your device’s internal storage.

Method 3: Use Photo Recovery Apps

In cases where your photos have been permanently deleted or cloud backups are unavailable, specialized photo recovery apps can be a lifesaver. These apps utilize advanced scanning techniques to search for and recover deleted images from your device’s internal memory or external SD card.

  1. Install a reputable photo recovery app on your Android device from the Google Play Store.
  2. Grant the app necessary permissions to access your device’s storage.
  3. Initiate the scanning process. The app will thoroughly scan your device’s memory for deleted photos.
  4. Locate and select the photos you want to recover.
  5. Initiate the recovery process. The recovered photos will be saved to a designated folder on your device’s storage.

Method 4: Utilize Data Recovery Software

If the previous methods fail to yield the desired results, you can resort to data recovery software specifically designed for Android devices. These tools employ advanced data recovery algorithms to scan and retrieve even deeply embedded deleted files.

  1. Download and install data recovery software compatible with Android devices.
  2. Connect your Android device to your computer via a USB cable.
  3. Launch the data recovery software and follow the on-screen instructions to connect your device.
  4. Select the appropriate scanning mode, such as “Deleted Files” or “Lost Partition.”
  5. Initiate the scanning process. The software will scan your device’s storage for deleted files.
  6. Identify and select the photos you want to recover.
  7. Initiate the recovery process. The recovered photos will be saved to a designated folder on your computer.

Tips for Preventing Future Photo Loss

To minimize the risk of losing important photos, consider implementing these precautionary measures:

  1. Regularly back up your photos to cloud storage services like Google Photos, OneDrive, or Dropbox.
  2. Enable automatic backup options if available.
  3. Use a memory card for storing photos, as internal storage can be more prone to data loss.
  4. Avoid deleting photos directly from your device. Instead, use cloud storage options or transfer them to a computer.
  5. Be cautious of malware or viruses that can corrupt or delete data.
  6. Keep your Android device updated with the latest security patches.

Losing precious photos can be a devastating experience, but with the right approach, you can often retrieve these cherished memories. The methods outlined in this guide provide viable solutions for recovering deleted photos from your Android device. By utilizing built-in features, cloud backups, photo recovery apps, or data recovery software, you can salvage your lost photos and preserve your digital memories. Remember, prevention is always better than cure. By implementing proactive measures like regular backups and mindful device usage, you can greatly reduce the risk of data loss and ensure the safety of your valued photos. We hope that you find this guide on how to recover deleted photos on your Android phone helpful and informative.

Here are some more useful Android articles:

Filed Under: Android News, Guides, Mobile Phone News


Latest timeswonderful Deals

Disclosure: Some of our articles include affiliate links. If you buy something through one of these links, timeswonderful may earn an affiliate commission. Learn about our Disclosure Policy.

Categories
News

How to Take Better Photos with Your iPhone: Expert Tips and Tricks

better photos iPhone

This guide is designed to show you how to take better photos with your iPhone, we cover a wide range of tips that will help you improve your iPhone photography. Are you eager to explore and maximize the full potential of your iPhone’s camera? The camera in your iPhone is not merely a component of your smartphone; it’s a sophisticated and versatile device packed with advanced features and creative capabilities, transforming it into an exceptional tool for capturing breathtaking images. Whether you identify as an aspiring photographer or simply someone keen on refining your photographic skills, your journey to mastering iPhone photography begins here.

With a comprehensive blend of tips, techniques, and hidden features, we delve into the art of utilizing your iPhone’s camera to its utmost capacity. From snapping casual shots to creating professional-level imagery, this guide caters to all levels of interest and expertise in photography. So, get ready to embark on a photographic adventure that will elevate the way you see and capture the world through your iPhone’s lens.

Mastering Panoramic Shots

Discover the art of panoramic photography with your iPhone. Did you know you can change the direction of your panoramic shots? Try vertical panoramas for a unique perspective that adds height and drama to your photos.

Stability with Timers

Shaky hands? No problem. Use the timer feature on your iPhone camera to capture stable and sharp images. With 3 or 10-second options, you can set up your shot and step back without the need to press the shutter button.

Long Exposure Magic

Create mesmerizing visual effects with the Long Exposure feature. By converting a Live Photo to Long Exposure, you can blur motion for artistic and ethereal images, perfect for capturing flowing water or city lights.

High-Resolution Photography on the Latest iPhones

Owners of the iPhone 14 and 15 Pro models can enjoy shooting in an impressive 48-megapixel resolution. This feature offers unprecedented detail and allows for extensive cropping without losing image quality.

Consistent Quality with Preserve Settings

For those who prefer custom settings, the Preserve Settings feature is a game-changer. It remembers your last-used camera settings, ensuring consistency and saving you time.

Perfect Composition with Grid and Level Tools

Achieve balanced and level compositions by enabling the Grid and Level features. These tools are invaluable for aligning horizons and structuring your photos with precision.

Mastering Night Mode Photography

In low light conditions, opt for Night mode instead of flash. This feature captures clearer and more natural photos by adjusting the exposure to the ambient light.

Creative Lens Positioning

Leverage the small and lightweight design of your iPhone’s lens for creative shots. Experiment with low-ground perspectives or high-angle shots for a fresh take on your subjects.

Capturing Action with Burst Photography

Never miss a moment with Burst mode. This feature is ideal for fast-moving subjects, allowing you to capture a series of photos quickly and select the best one later.

Manual Exposure Adjustments

Gain better control over your photo’s lighting by manually adjusting the exposure. With the Preserve Settings feature enabled, your adjustments remain consistent across shots.

Exploring Different Lenses

Utilize the various built-in lenses (wide, zoom, ultra-wide) of your iPhone to experiment with different photographic effects. Each lens offers a unique perspective and creative opportunities.

Advanced Portrait Mode

Portrait Mode isn’t just for portraits. Use it to create beautiful bokeh effects, adjust the F-stop, and experiment with different lighting modes. Plus, you can even change the focal point after capturing the image.

Summary

Your iPhone is a versatile and powerful photographic tool. By exploring these tips and tricks, you can significantly enhance the quality and creativity of your photos. Remember, the best way to improve is by experimenting and practicing with your iPhone’s camera. We hope that you find this guide on how to take better photos with your iPhone helpful,  if you have any tips or questions, please leave a comment below and let us know.

Image Credit: Hendrik Morkel

Filed Under: Apple, Apple iPhone, Guides


Latest timeswonderful Deals

Disclosure: Some of our articles include affiliate links. If you buy something through one of these links, timeswonderful may earn an affiliate commission. Learn about our Disclosure Policy.

Categories
News

How to Recover Deleted Photos on Your Mac

recover deleted photos Mac

This guide will show you how to recover deleted photos on your Mac. Losing cherished photographs can be an immensely heart-wrenching experience. It might happen in various unforeseen ways: perhaps you’ve unintentionally deleted them, hastily emptied the Trash without a second thought, or encountered the misfortune of a hard drive malfunction. Each scenario carries with it the heavy weight of potentially losing memories that are irreplaceable, moments captured in time that hold significant sentimental value. The very idea of these precious snapshots disappearing into the ether can be profoundly unsettling. Fortunately, there’s a glimmer of hope. For those facing this dilemma, there are multiple strategies you can employ to attempt the recovery of your deleted photos on your Mac, offering a chance to reclaim those lost pieces of your personal history.

Check the Recently Deleted Album

The most straightforward way to recover deleted photos is to check the Recently Deleted album in the Photos app. Photos that have been deleted within the past 30 days are stored in this album, allowing you to easily restore them.

To access the Recently Deleted album, open the Photos app and click on “Albums” in the sidebar. The Recently Deleted album should be listed at the bottom of the sidebar. If it’s locked, you’ll need to enter your Mac’s password to unlock it.

Once you’ve opened the Recently Deleted album, select the photos you want to recover and click on the “Recover” button. The photos will be restored to your Photos library.

Use Third-Party Photo Recovery Software

If the photos you want to recover are no longer in the Recently Deleted album, you can try using third-party photo recovery software. There are numerous photo recovery programs available, both free and paid. Some popular options include Disk Drill, PhotoRec, and EaseUS Data Recovery Wizard.

To use photo recovery software, you’ll need to download and install the program on your Mac. Then, you’ll need to select the drive or folder where the photos were originally stored. The software will scan the drive or folder and attempt to recover any deleted photos.

Restore from iCloud Photo Library

If you have iCloud Photos turned on, your photos are automatically backed up to iCloud. This means that you may be able to recover deleted photos from iCloud even if they’ve been permanently deleted from your Mac.

To recover photos from iCloud, you can either use the Photos app on your Mac or access iCloud.com from a web browser.

In the Photos app, open the Recently Deleted album and click on the “Recover Items” button in the toolbar. Select the photos you want to recover and click on the “Recover” button again.

On iCloud.com, click on the “Photos” icon and then click on the “Recently Deleted” album. Select the photos you want to recover and click on the “Recover” button.

Restore from Time Machine Backup

If you use Time Machine to back up your Mac, you can restore your Photos library to a previous point in time, thereby recovering any deleted photos.

To restore your Photos library from Time Machine, open Time Machine and select a date before you deleted the photos. Then, navigate to your Photos library and click on the “Restore” button.

Tips for Preventing Photo Loss

To prevent future photo loss, here are some tips:

  • Back up your photos regularly. Use Time Machine or an external hard drive to back up your Photos library on a regular basis.
  • Enable iCloud Photos. This will automatically back up your photos to iCloud, making them accessible from any device.
  • Be careful when deleting photos. Make sure you’re deleting the right photos and that you’re not emptying the Trash accidentally.
  • Use photo recovery software as a last resort. Photo recovery software can be effective, but it’s not always guaranteed to work. It’s best to prevent photo loss in the first place by backing up your photos regularly.

Summary

Losing photos can be a distressing experience, but there are steps you can take to recover them. By checking the Recently Deleted album, using third-party photo recovery software, restoring from iCloud Photo Library, or restoring from a Time Machine backup, you can increase your chances of retrieving your lost photos. To prevent future photo loss, make sure to back up your photos regularly and be careful when deleting them.

Image Credit: Arvind Menon

Here are some more helpful Mac articles:

Filed Under: Apple, Guides


Latest timeswonderful Deals

Disclosure: Some of our articles include affiliate links. If you buy something through one of these links, timeswonderful may earn an affiliate commission. Learn about our Disclosure Policy.

Categories
News

Add extra creativity to your photos with this portable fog machine

Add extra creativity to your photos with this portable fog machine

In the world of photography, creativity is the key to capturing images that resonate and leave a lasting impression. One of the most innovative ways to infuse creativity into your photographs is by using a portable handheld fog machine. This nifty gadget, equipped with fast USB-C charging and the ability to fill a 20m³ studio space in just a minute, can dramatically enhance the atmosphere and mood of your shots.

Firstly, let’s delve into the practicality of this device. Its compact size and fast charging capability make it an ideal companion for photographers on the go. Whether you’re shooting in a studio or in the wilderness, this fog machine is a game-changer. Its ability to quickly fill a space with fog means you can work efficiently, maintaining the flow of your creative process without lengthy interruptions.

Early bird bonuses are now available for the ground-breaking project from roughly $98 or £80 (depending on current exchange rates), offering a considerable discount of approximately 23% off the retail market price, while the Indiegogo crowd funding is under way.

how to create film style mist and smoke effects using a fog machine

Now, let’s explore the creative possibilities. The fog produced by this machine can add a layer of mystique and drama to your photographs. It scatters light in a way that creates a soft, dreamlike quality, perfect for ethereal portraits or moody landscapes. The fog can also highlight beams of light, creating a visually stunning effect that can’t be replicated in post-production. Imagine the sun’s rays piercing through a misty forest, captured in your photo with a surreal quality.

Control your smoke effects

Moreover, the fog machine’s portability allows for spontaneity in your shoots. You can experiment with different angles and compositions, seeing how the fog interacts with various light sources and environments. This can lead to unexpectedly beautiful shots, where the interplay of light, shadow, and fog produces a truly unique image.

how to take portraits with a fog machine and smoke effects

Using the fog machine in outdoor settings opens up a world of possibilities. It can transform an ordinary landscape into an otherworldly scene or add an element of mystery to urban photography. In portrait photography, the fog can be used to create a sense of intimacy, enveloping the subject in a soft, flattering light.

If the Smoke S campaign successfully raises its required pledge goal and production progresses smoothly, worldwide shipping is expected to take place sometime around November 23. To learn more about the Smoke S portable fog machine project appraise the promotional video below.

Compact portable fog machine

For those who enjoy thematic photography, this tool is invaluable. You can create specific atmospheres that align with your theme. A dense, eerie fog can set the stage for a horror-themed shoot, while a lighter mist can evoke a romantic, fairy-tale-like setting.

how to create a dry ice look with a fog machine

Safety and control are also crucial. The handheld nature of this fog machine allows for precise control over the density and placement of the fog, ensuring that it enhances rather than overwhelms the subject of your photograph. Additionally, being mindful of your surroundings and the environmental impact is important when using the machine outdoors.

fog machine control system instructions

In conclusion, a portable handheld fog machine is a powerful tool for photographers looking to elevate their creative expression. Its fast charging, efficiency, and portability make it an excellent investment for both amateur and professional photographers. By mastering the use of this device, you can unlock a new dimension in your photography, creating images that are not only visually stunning but also emotionally captivating. Remember, creativity in photography is about exploring new tools and techniques, and this fog machine is your ticket to a world of imaginative and breathtaking photography.

For a complete list of all available pledges, stretch goals, extra media and build specifications for the portable fog machine, jump over to the official Smoke S crowd funding campaign page by navigating to the link below.

Source : Indiegogo

Disclaimer: Participating in Kickstarter campaigns involves inherent risks. While many projects successfully meet their goals, others may fail to deliver due to numerous challenges. Always conduct thorough research and exercise caution when pledging your hard-earned money.

Filed Under: Gadgets News, Top News


Latest timeswonderful Deals

Disclosure: Some of our articles include affiliate links. If you buy something through one of these links, timeswonderful may earn an affiliate commission. Learn about our Disclosure Policy.

Categories
News

How to take better photos and videos with Android 14

Android 14 Camera

Android 14 introduces a number of new features and improvements that can help you take better photos and videos with your phone. Here are some tips on how to make the most of these new features:

Use Ultra HDR

Ultra HDR is a new feature in Android 14 that captures more detail and color in your photos, especially in high-contrast scenes. To enable Ultra HDR, open your camera app and go to Settings. Then, tap on “HDR” and select “Ultra HDR.”

Ultra HDR is still under development, so it may not be available on all Android 14 devices yet. But if you have a device that supports it, be sure to give it a try. You’ll be amazed at the difference it can make in your photos.

Experiment with new camera modes

Android 14 also includes a number of new camera modes, such as Night Sight, Portrait Mode, and Macro Mode. These modes can help you take better photos in specific situations.

For example, Night Sight can help you take brighter and clearer photos in low-light conditions. Portrait Mode can help you blur the background of your photos to make your subject stand out. And Macro Mode can help you take close-up photos of small objects.

To experiment with the new camera modes, open your camera app and tap on the “More” button. Then, select the mode you want to try.

Use manual controls

If you want to have more control over your photos, you can use the manual controls in the camera app. To do this, open your camera app and tap on the “Pro” button.

The manual controls allow you to adjust settings such as ISO, shutter speed, and white balance. This can be helpful if you’re shooting in challenging conditions, such as in low light or bright sunlight.

Take advantage of AI features

Android 14 includes a number of AI features that can help you take better photos and videos. For example, AI Scene Detection can automatically identify the scene you’re shooting and adjust the camera settings accordingly.

AI Face Detection can also automatically focus on faces in your photos and videos. And AI Noise Reduction can help to reduce noise in your photos, especially in low light conditions.

To use the AI features, simply open your camera app and tap on the “AI” button.

Edit your photos and videos

Once you’ve taken your photos and videos, you can edit them to make them look even better. Android 14 includes a number of built-in editing tools, such as crop, rotate, and adjust brightness and contrast.

You can also use third-party editing apps to do more advanced editing, such as adding filters and effects.

Here are some additional tips for taking better photos and videos with Android 14:

  • Use natural light whenever possible. Natural light is the best light for taking photos and videos. It’s soft and flattering, and it can help to create beautiful colors and shadows.
  • Pay attention to your composition. When you’re taking a photo, think about how you want to arrange the elements in the frame. Try to use the rule of thirds to create a more balanced and interesting composition.
  • Experiment with different angles. Don’t be afraid to get creative with your angles. Try shooting from above, below, or to the side. You might be surprised at how different your photos look.
  • Use a tripod to keep your phone steady. This is especially important when you’re shooting in low light or when you’re using a slow shutter speed.
  • Edit your photos and videos to make them look even better. Once you’ve taken your photos and videos, you can use the built-in editing tools or third-party editing apps to make them look even better.

Android 14 includes a number of new features and improvements that can help you take better photos and videos. By using Ultra HDR, experimenting with the new camera controls, and using the new video editing tools, you can capture stunning images and videos that you’ll be proud to share. Youc an find out more details about Android 14 over at Google’s website.

Filed Under: Android News, Guides


Latest timeswonderful Deals

Disclosure: Some of our articles include affiliate links. If you buy something through one of these links, timeswonderful may earn an affiliate commission. Learn about our Disclosure Policy.

Categories
News

Pooja Hegde’s Wiki, Net Worth, Spouse, Family Background, Hot Photos, Measurement, And More.

Pooja Hegde is an actress who primarily appears in Telugu films and a few Hindi and Tamil films. She started as a model in the industry and placed second at the Miss Universe India competition in 2010. In 2012, Hegde made her acting debut in the Tamil film Mugamoodi, and in 2014, she had her first Telugu release with Oka Laila Kosam. She has cemented herself as one of the leading actresses in Telugu cinema. Keep reading to learn more about Pooja Hegde.

Pooja Hegde’s Net Worth

How rich is Pooja Hegde? Pooja Hegde is a famous Indian actress who primarily works in Telugu films and a few Hindi and Tamil films. The actress has achieved commercial success in her acting career. She has a net worth of $8 million (0.8 crore), acting as her primary source of income.

Besides her wealth, Hegde has secured several accolades in her career. Hegde won the SIIMA Award for Best Actress – Telugu for her performances in “Ala Vaikunthapurramuloo” (2020) and “Most Eligible Bachelor” (2021). Heged was also nominated for the Filmfare Award for Best Actress – Telugu for “Oka Laila Kosam,” “Ala Vaikunthapurramuloo,” and “Aravinda Sametha Veera Raghava” (2018).

Net Worth $8 million (0.8 crore)
Salary Under review
Profession Actress

Early Life

Pooja Hegde was born to Manjunath Hegde and Latha Hegde on October 13, 1990, in Mumbai, India. She has an older brother, Rishabh Hegde, who is a doctor. According to her birthday, she was born under the Libra astrological sign. Hegde holds Indian nationality and is of white descent.

Pooja completed her schooling at Maneckji Cooper Education Trust School, Mumbai. She attended the Shrimati Mithibai Motiram Kundnani College of Commerce and Economics (M.M.K. College) in Mumbai, where she graduated with a master’s in commerce.

Quick Wiki/Bio

Full Name Pooja Hegde
Gender Female
Age 33 years old
Date of Birth October 13, 1990
Place of Birth Mumbai, India
Nationality Indian
Zodiac Sign Libra
Ethnicity White
High School Maneckji Cooper Education Trust School
University Shrimati Mithibai Motiram Kundnani College of Commerce and Economics (M.M.K. College)
Credentials Master Degree

Career

She started her career as a model in her sophomore year. She competed in Miss India 2009 but was eliminated in an early round. Hegde received the Miss India Talented 2009 honor. The following year, she reapplied and became the second runner-up in the Miss Universe India 2010 contest.

In the meantime, she was crowned Miss India South Glamorous Hair 2010. Her acting career began with the Tamil movie Mugamoodi (2012), and she later appeared in her first Telugu film, Oka Laila Kosam (2014). She has established herself as one of the leading actresses in Telugu cinema.

Hegde clinched the SIIMA Award for Best Actress in Telugu for her remarkable performances in Ala Vaikunthapurramuloo (2020) and Most Eligible Bachelor (2021). She was a nominee for the Filmfare Award for Best Actress – Telugu for her exceptional roles in Oka Laila Kosam, Ala Vaikunthapurramuloo, and Aravinda Sametha Veera Raghava (2018).

Duvvada Jagannadham (2017), Gaddalakonda Ganesh (2019), Maharshi (2019), and Housefull 4 (2019) are among her critically acclaimed films. However, her career took a nosedive as her 2022 films Beast, Radhe Shyam, Acharya, and Cirkus and the 2023 film Kisi Ka Bhai Kisi Ki Jaan failed to impress the audience.

Personal Life

Who is Pooja Hegde dating? Pooja Hegde is currently single and not in a relationship. According to sources, she has been in relationships with Rohan Mehra (2020) and Hrithik Roshan (2016). Regarding body measurements, Hegde stands 5 feet 9 inches (175 cm) tall and weighs 117 lbs. (53 kg). Find out more in the table below.

Marital Status Single
Spouse Unknown
Children None
Height 5 ft. 9 inches (175 cm)
Weight 117 lbs (53 kg)
Body Measurement
Hair Color Dark Brown
Eye Color Dark Brown
Instagram @hegdepooja
Twitter @hegdepooja
Tik Tok @poojahegde70

FAQs

Where is Pooja Hegde’s birthplace?

Pooja was born in Mumbai, India.

How old is Pooja Hegde?

As of 2023, Pooja Hegde is 33 years old.

What is Pooja Hegde’s net worth?

Pooja has a net worth of $6 million.

Is Pooja Hegde single or married?

Pooja Hegde is single.