Categories
News

How to use the new Journal App on Your iPhone

journal app iPhone

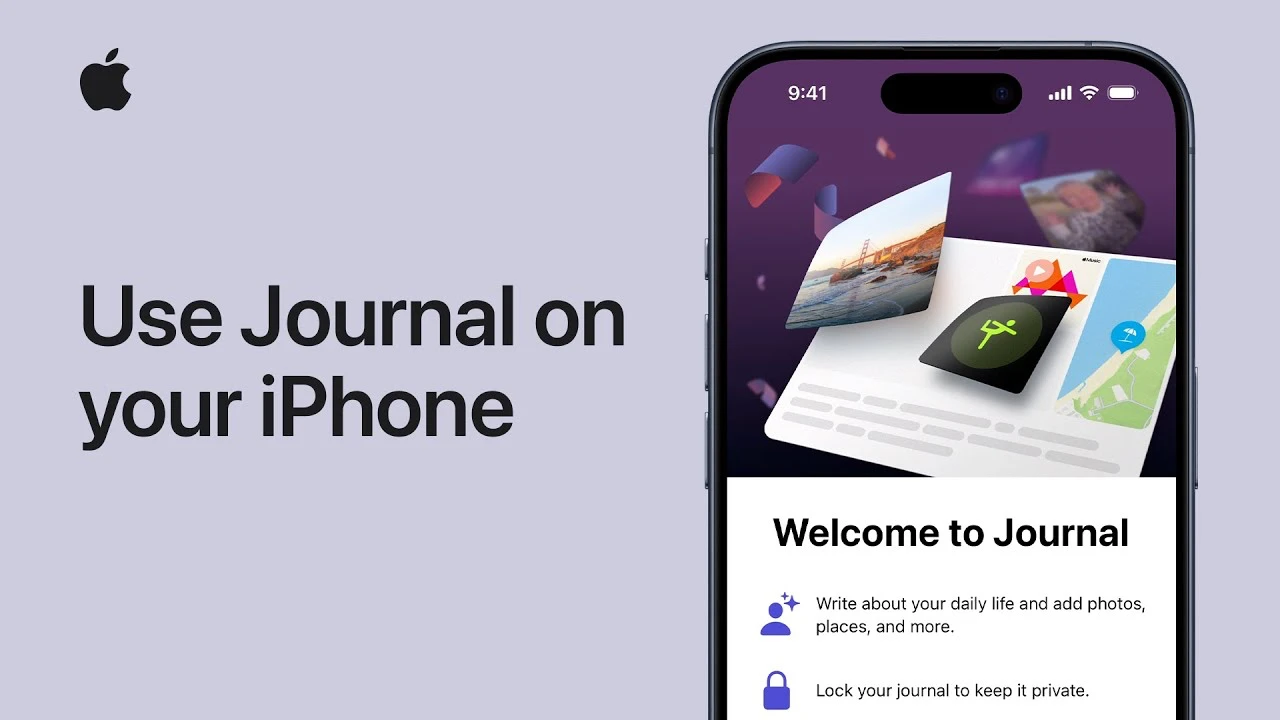
This guide is designed to show you how to use the new Journal App on your iPhone, the video below from Apple covers everything you need to know about the app. Are you ready to transform your journaling experience on your iPhone? With the latest iOS 17.2 update comes the innovative Journal app, a platform where personal reflection meets technology. This guide dives into how you can leverage the app to capture life’s moments, both mundane and monumental.

 Setting Up Your Journal

First things first, ensure your iPhone is running on iOS 17.2 or a later version. Once you’ve updated, dive into the Journal app. You’ll be greeted with a welcome screen, guiding you through the initial setup. It’s a straightforward process, tailored to get you started on your journaling journey with ease.

Dive into Personalized Journaling

What sets the Journal app apart is its ability to offer personalized suggestions. It intelligently draws from your interactions with photos, music, podcasts, and places you’ve visited. These suggestions are for your eyes only unless you decide to include them in your journal. It’s a unique way to reflect on your daily interactions and memories.

Tailoring Your Experience

Your Journal app isn’t just smart; it’s adaptable. Customize the types of recommendations you receive and familiarize yourself with its robust privacy features. Over time, these suggestions evolve, becoming more attuned to your preferences and patterns.

Creating Meaningful Entries

Whether you start with a blank slate or use prompts from the News, Podcasts, or Photos apps, creating entries is a breeze. The app’s suggestions can also spark your creativity, offering a starting point for your entries.

Customizing Entries

Here’s where you can truly make each entry your own. Add photos, record thoughts, include locations, and much more. Bookmark favorite entries for quick access, and don’t worry about mistakes; you can always edit the entry date or delete entries as needed.

Ensuring Your Privacy

After your first entry, the app prompts you to secure your journal. Choose from Face ID, Touch ID, or a passcode. This feature is pivotal in maintaining the privacy and security of your personal reflections.

Organize and Filter with Ease

Entries in the Journal app are displayed chronologically, but you can filter them by photos, places, bookmarks, and more. This organizational feature is especially handy for quick access to specific entries.

Reflection Prompts for Inspiration

Sometimes, finding the right words can be challenging. The app offers reflection prompts, a tool to inspire your writing. You can refresh these prompts for a variety of inspiration, aiding your journaling process.

A Personalized Journaling Experience

As you continue to use the Journal app, it learns and adapts to your preferences and usage patterns, offering a more personalized experience. This adaptation makes each interaction with the app more intuitive and tailored to your journaling style.

Guiding You Through

As you explore the Journal app, remember that it’s designed to be an intimate space for your thoughts and memories. If you’re wondering how to make the most of its features, rest assured that the app’s intuitive design and customizable options cater to a range of preferences and styles.

So go ahead, and start your journaling journey with the Journal app on your iPhone. Whether you’re reflecting on the day, capturing a special moment, or simply exploring your thoughts, this app is your companion in personal storytelling.

Source & Image Credit: Apple

Filed Under: Apple, Apple iPhone, Guides


Latest timeswonderful Deals

Disclosure: Some of our articles include affiliate links. If you buy something through one of these links, timeswonderful may earn an affiliate commission. Learn about our Disclosure Policy.

Categories
News

How to Transfer Data to A New iPhone

Transfer Data iPhone

Transferring data to a new iPhone can often seem like a daunting task, but worry not! Whether you’re upgrading to the latest model or simply switching to an iPhone for the first time, there are several methods available to ensure a smooth transition. The key is to choose the method that best suits your current situation. Here’s a breakdown of three primary methods to help you seamlessly transfer your data.

1. Transfer Using iCloud with Your Previous iPhone

For those who still have their previous iPhone, using iCloud is the quickest path to setting up your new device. This process involves two main steps: firstly, backing up your old iPhone to iCloud and then, restoring this backup to your new iPhone. The beauty of this method lies in its simplicity and convenience. Once you initiate the transfer, you can immediately start using your new iPhone as apps and data continue to download in the background. Here’s how you can do it:

  • Ensure that your old iPhone is connected to Wi-Fi and backed up to iCloud.
  • While setting up the new iPhone, choose to restore from an iCloud backup and log in with your Apple ID.
  • Voila! Your new iPhone will begin downloading your data.

2. Direct Transfer from Your Previous iPhone

This method is ideal for those who have both their old and new iPhones at hand. It allows for a direct data transfer between the two devices using a Wi-Fi connection. This method is comprehensive as it does not require an iCloud backup, but it’s important to note that it will temporarily render both devices unusable during the transfer. Here’s what you need to do:

  • Keep both devices near each other, connected to Wi-Fi, with Bluetooth on.
  • Plug in both devices to ensure they remain charged throughout the transfer.
  • Follow the on-screen instructions on your new iPhone to start the direct transfer.

3. Using iCloud Backup without Your Previous iPhone

If you no longer have your previous iPhone, fret not. You can still restore your data using an iCloud backup. This method requires your Apple ID, password, and a Wi-Fi connection. The process includes setting up your new device and then restoring data from your iCloud backup. Here’s a quick guide:

  • During the setup of your new iPhone, select to restore from an iCloud backup.
  • Enter your Apple ID and password.
  • Your new iPhone will then download all the data from your iCloud backup.

Regardless of the method you choose, there are a few universal tips to keep in mind:

  • Always ensure that your devices (where applicable) are charged.
  • A stable Wi-Fi connection is crucial for a smooth transfer.
  • Regularly updating your backups can save you a lot of hassle.

Remember, transferring data to your new iPhone doesn’t have to be a complex task. By following these steps, you can ensure that your transition to a new device is as seamless as possible. Whether you’re a seasoned iPhone user or a newcomer to the iOS ecosystem, these methods offer a straightforward way to get your new device up and running with all your important data intact.

Source & Image Credit: Apple

Filed Under: Apple, Apple iPhone, Guides


Latest timeswonderful Deals

Disclosure: Some of our articles include affiliate links. If you buy something through one of these links, timeswonderful may earn an affiliate commission. Learn about our Disclosure Policy.

Categories
News

How to Backup Your New iPhone

backup iPhone

This this guide is designed to show you how to backup your new iPhone. If you managed to get yourself a new iPhone for Christmas, one of the first things you will want to do is make sure your data is backed up. Whether you’re upgrading from an older model or diving into the Apple ecosystem for the first time, setting up your new device can be exciting. But before you get lost in the endless customization options, take a moment to prioritize something crucial: backups.

A proper backup safeguards your precious data – photos, contacts, messages, app settings – from unforeseen mishaps like accidental deletion, software glitches, or even hardware failure. It’s like having a safety net for your digital life, ensuring you can restore everything if disaster strikes.

So, how do you back up your new iPhone like a pro? Fear not, intrepid tech adventurer! This guide will equip you with the knowledge and steps to create a secure haven for your data, giving you peace of mind and the freedom to explore your new iPhone with confidence.

The Backup Battleground: iCloud vs. iTunes/Finder

Apple offers two main backup methods: iCloud and iTunes/Finder. Each has its advantages and quirks, so let’s break them down:

1. iCloud:

  • Convenience is king: Backups happen automatically over Wi-Fi when your iPhone is locked, charged, and connected. No cables or manual intervention is needed!
  • Accessibility across devices: Restore your backup to any compatible Apple device with your iCloud account.
  • Free storage, with limits: Apple gives you 5GB of free iCloud storage, which might be enough for basic needs. However, for extensive data like photos and videos, you’ll likely need to upgrade for more space.

2. iTunes/Finder:

  • Detailed control: Choose what gets backed up and browse previous backups for selective restoration.
  • Local storage: Backups are stored on your computer, offering more control and potentially faster restore speeds compared to iCloud.
  • Requires a cable: You’ll need to connect your iPhone to your computer using a cable to initiate and manage backups.

Choosing Your Champion: The Right Backup Method for You

If you value convenience and automatic backups, iCloud is a fantastic choice. It’s perfect for most users who don’t need granular control or have massive amounts of data. Plus, with iCloud Photos, your memories are always accessible from any device.

For those who prefer the security and control of local backups, iTunes/Finder is the way to go. It’s ideal for power users who want to manage their data meticulously and have the storage space to accommodate backups.

Ultimately, the best method depends on your individual needs and preferences. Consider your data usage, desired level of control, and available storage space before making your choice.

How to Backup Your New iPhone

Now that you’ve chosen your backup method, let’s get down to business! Here’s how to back up your new iPhone:

iCloud Backup:

  1. Go to Settings > [Your Name] > iCloud.
  2. Tap iCloud Backup.
  3. Ensure Back Up This [Device] is turned on.
  4. Tap Back Up Now.

That’s it! Your iPhone will automatically back up to iCloud whenever the conditions are met. You can also check the last backup date and time under Back Up Now.

iTunes/Finder Backup:

  • Connect your iPhone to your computer using a cable.
  • Open iTunes (Windows) or Finder (Mac).
  • Click the iPhone icon in the top left corner.
  • Select the Summary tab.
  • Click Back Up Now.
  • (Optional) To encrypt your backup for extra security, check the box next to Encrypt local backup and set a password.

Remember, iTunes/Finder backups require a manual approach. Schedule regular backups to ensure your data is always protected.

Bonus Tip: Double Down on Defense with Encrypted Backups

Both iCloud and iTunes/Finder offer encryption for your backups, adding an extra layer of security. This is especially important if your backup contains sensitive information. Remember to choose strong passwords for encrypted backups to keep your data safe from prying eyes.

With Your Data Safeguarded, Explore with Confidence!

By taking the time to back up your new iPhone, you’ve secured your precious memories and laid the foundation for a worry-free Apple experience. Now go forth, customize your device, download exciting apps, and capture new adventures – knowing that your data is always protected. Remember, a backed-up iPhone is a happy iPhone!

P.S. Don’t forget to check your iCloud storage usage regularly and upgrade if needed. A full iCloud can prevent backups from happening, leaving your data vulnerable. I hope this guide has been helpful! If you have any questions or need further assistance, feel free to ask. You can find out more details about how to backup your new iPhone over at Apple’s support website.

Filed Under: Apple, Apple iPhone, Guides


Latest timeswonderful Deals

Disclosure: Some of our articles include affiliate links. If you buy something through one of these links, timeswonderful may earn an affiliate commission. Learn about our Disclosure Policy.

Categories
News

How to Set Up You New iPhone

set up iphone

If you have received a new iPhone for Christmas, then you may want to know how to set the device up, this guide is designed to cover everything you need on how to set it up. s you begin your adventure with your new iPhone, allow us to be your companion in a smooth and straightforward setup process. We understand the importance of security and personalization for your device, and our goal is to ensure that every step of your journey is both secure and suited to your individual needs.

This extensive guide is designed to provide you with detailed insights and effective techniques that will help you unlock the full potential of your iPhone. We aim to turn this sophisticated piece of technology into an invaluable part of your daily life, ensuring it becomes a tool that not only meets but exceeds your expectations. From customizing settings to optimizing features, we’ll cover all the essentials and more, making sure your iPhone experience is as unique and rewarding as possible.

Step 1: Unveiling Your iPhone’s Potential

  • Unboxing and Preparation: Remove the protective stickers guarding your iPhone’s screen and back, ensuring they adhere to the included Lightning cable for safekeeping.
  • Powering Up and Initial Greetings: Connect your iPhone to a power source using the provided cable. Once the Apple logo appears, embark on the setup journey by following the on-screen prompts.

Step 2: Language and Connection Essentials

  • Language Selection: Choose the language that resonates with your comfort level, ensuring menus, apps, and other interfaces seamlessly align with your preferences.
  • Wi-Fi Integration: Connect to your preferred Wi-Fi network by entering the network password. This establishes internet access, enabling seamless communication and data exchange.

Step 3: Security and Passcode Protection

  • Face ID or Touch ID: Embrace Apple’s advanced biometric authentication technology, Face ID for facial recognition or Touch ID for fingerprint scanning. Follow the on-screen instructions to set up whichever suits your preference.
  • Passcode Creation: Enhance security by crafting a robust passcode, preferably a six-digit combination. This safeguard protects your iPhone from unauthorized access.

Step 4: Data Management with iCloud

  • iCloud: Your Digital Concierge: Experience the convenience of iCloud, Apple’s cloud storage service. Sign in with your existing iCloud account or create a new one to ensure your photos, contacts, and other vital data remain safely synchronized across your devices.
  • Data Migration (Optional): If you have an existing iPhone, seamlessly transfer your data, including photos, contacts, and app data, to your new device. This process ensures continuity and minimizes data loss.

Step 5: Siri, Your Voice-Activated Assistant

  • Siri: A Voice-Activated Companion: Discover the power of Siri, Apple’s intuitive voice assistant. Set up Siri and personalize its voice to control your iPhone hands-free, whether setting alarms, dictating messages, or seeking information.

Step 6: Personalization and Customization

  • Wallpaper Transformation: Customize the look and feel of your iPhone by selecting an eye-catching wallpaper from the vast collection or creating your own masterpiece.
  • Home Screen Rearrangement: Customize your home screen to suit your workflow and preferences. Arrange apps into folders, create convenient shortcuts, and eliminate clutter to optimize your iPhone’s usability.

Step 7: App Adventures and Endless Possibilities

  • Explore the App Store: Embark on a journey through the App Store, a treasure trove of applications tailored to your interests and needs. Download your favorite apps, discover new ones, and expand your iPhone’s capabilities.
  • Settings: Personalize Your Experience: delve into the Settings app to personalize your iPhone experience further. Adjust notifications, manage privacy settings, set up Do Not Disturb mode, and customize various aspects of your device’s operation.

Step 8: Data Backup and Safety

Regular Backups: Prioritize data security by regularly backing up your iPhone to iCloud or a computer using iTunes. This ensures your precious information remains protected in case of device loss or malfunction.

Summary

Congratulations on successfully setting up your new iPhone! With your iPhone now tailored to your liking, you’re ready to embrace the possibilities that await. From enhancing productivity and creativity to staying connected with loved ones, your iPhone is your gateway to an enriched digital experience. Embrace the limitless possibilities that await and unleash your iPhone’s true potential.

Here are some more helpful iPhone articles:

Filed Under: Guides


Latest timeswonderful Deals

Disclosure: Some of our articles include affiliate links. If you buy something through one of these links, timeswonderful may earn an affiliate commission. Learn about our Disclosure Policy.

Categories
News

How to Transfer Your Data to a New iPhone

transfer iPhone

Upgrading to a new iPhone is an exciting moment, but it often comes with the challenge of transferring your data. Whether you’re an experienced iPhone user or new to the ecosystem, this guide will walk you through the process seamlessly. If you’re wondering how to shift your cherished memories, contacts, and apps to your new device, you’ll be pleased to know that Apple has made it quite straightforward.

1. Transferring Data Using iCloud with Your Previous iPhone

If you still have your old iPhone, the iCloud transfer method is a handy option. Before you start, make sure your previous iPhone is backed up to iCloud. Both your old and new iPhones should be connected to Wi-Fi, have Bluetooth enabled, and be plugged in for charging. Here’s how to proceed:

  • Activate the Quick Start feature by simply placing your new iPhone near the old one. A series of on-screen prompts will guide you through the setup.
  • Choose “Download from iCloud” to begin transferring your data.
  • You’ll need to log in with your Apple ID and agree to Apple’s terms and conditions.
  • Patience is key here, as your data and apps will download in the background, which might take some time depending on your internet speed.

2. Direct Transfer from Your Previous iPhone

For those who prefer a more direct approach, the iPhone-to-iPhone transfer is ideal. Keep both your old and new iPhones close throughout this process. Just like the iCloud method, both devices need Wi-Fi and Bluetooth enabled and should be charging. Here’s what to do:

  • Use the Quick Start feature as before and follow the steps, similar to the iCloud method.
  • Select “Transfer from iPhone” to initiate a direct data transfer.
  • This method transfers all your data in one go. Note that it requires both phones to be inactive during the transfer.
  • The duration of this transfer is contingent on the amount of data you have.

3. Transferring Data Using iCloud Backup without the Previous iPhone

Don’t have your old iPhone anymore? No worries! As long as you have a recent iCloud backup, you’re all set. Here’s how to restore your data to the new iPhone:

  • Make sure you have your Apple ID and password at hand.
  • Connect your new iPhone to Wi-Fi and plug it in to charge.
  • During the setup, select “Set Up Without Another Device,” then “From iCloud Backup.”
  • Enter your Apple ID and password, accept the terms, and select the most recent backup.
  • The restoration might take some time, with your apps and data downloading in the background.

Remember, regardless of the method you choose, the key to a smooth transition is an up-to-date backup and a bit of patience. The time taken for the transfer can vary, so it’s best to start the process when you don’t need immediate access to either device.

By following these steps, you can ensure a hassle-free setup of your new iPhone. Keeping your data secure and making the transition as smooth as possible are top priorities for Apple, and these methods reflect that commitment. For more detailed instructions and tips on using your Apple devices, subscribing to the Apple Support YouTube channel can be a valuable resource.

Transferring data to a new iPhone doesn’t have to be a daunting task. With these clear, easy-to-follow steps, you’ll have your new iPhone up and running with all your important data in no time. Happy transferring!

Source Apple

Filed Under: Apple, Apple iPhone, Guides


Latest timeswonderful Deals

Disclosure: Some of our articles include affiliate links. If you buy something through one of these links, timeswonderful may earn an affiliate commission. Learn about our Disclosure Policy.

Categories
News

How to easily AirDrop anything on iPhone or iPad

How to easily AirDrop anything on your iPhone or iPad

If you would like to easily transfer photos, documents, videos and more from one iPhone to another or perhaps from your iPhone to someone else’s Mac computer. You will be pleased to know there is a very easy way to do this on iOS 17 using all Apple devices whether it be your iPhone, iPad or MacBook laptop.

AirDrop, a feature available on your iPhone and iPad, simplifies the task of sharing content like photos, videos, and other files with nearby Apple devices. This technology, utilizing Bluetooth and Wi-Fi, offers a straightforward way to transfer data without the need for cables or complex procedures. Here’s a step-by-step guide to make the most out of AirDrop’s capabilities.

First, ensure that both the sending and receiving devices are within range of each other and have Bluetooth and Wi-Fi enabled. This setup is crucial for establishing a connection. Also, remember to turn off the Personal Hotspot feature to avoid any connectivity issues.

AirDrop anything on your iPhone or iPad

Next, it’s time to configure your AirDrop reception settings. You have two options: ‘Contacts Only’ or ‘Everyone.’ The ‘Contacts Only’ setting works well if the person you’re sharing with is in your contact list. If not, you may need to switch to the ‘Everyone’ setting for broader accessibility. You can easily find and adjust these settings in the Settings app under General or via the Control Center for quick access.

When you’re ready to share a file, simply locate the item you wish to send, tap on the Share button, and a list of nearby devices eligible for AirDrop will appear. Select the desired recipient’s device from this list. The receiver will get a prompt to either ‘Accept’ or ‘Decline’ the incoming file. Upon acceptance, the file automatically opens in the corresponding app on their device.

For those using the latest iPhone models with iOS 17, AirDrop has an enhanced feature. In some apps, just bringing two iOS devices close to each other can trigger AirDrop, streamlining the sharing process even further.

Apple Airpdrop quick reference

  • AirDrop allows sharing and receiving content like photos and documents between nearby Apple devices.
  • Ensure both sender and receiver are within Bluetooth and Wi-Fi range, with both services enabled and Personal Hotspot turned off.
  • Adjust AirDrop receiving settings to ‘Contacts Only‘ or ‘Everyone‘ depending on the sender’s contact status.
  • To share via AirDrop, open the content, tap Share, then select the recipient from the AirDrop list.
  • Accepting an AirDrop request involves tapping ‘Accept‘ on the alert that appears on the receiver’s device.
  • Shared content automatically opens in the corresponding app on the receiver’s device.
  • AirDrop settings can be adjusted in the Settings app under General or via the Control Center.
  • Specific steps are provided for different iPhone models and operating systems.
  • If AirDrop is not functioning, ensure it is enabled in the Screen Time settings.
  • The ‘Everyone’ option can be temporarily enabled for 10 minutes for convenience.
  • Devices using iOS 17 can share content by simply bringing them close together in certain apps.

Troubleshooting AirDrop is straightforward. If you’re facing issues, check the Screen Time settings to ensure AirDrop isn’t restricted. Additionally, the ‘Everyone’ option can be temporarily enabled for 10 minutes, allowing for a quick file transfer without permanently changing your settings.

AirDrop proves to be an invaluable tool for iPhone and iPad users, enhancing the way we share and receive content. By following these guidelines and ensuring your device settings are correctly configured, you can leverage this technology for efficient, wireless sharing. Whether it’s transferring a collection of photos or important documents, AirDrop simplifies connectivity and boosts productivity among Apple device users.

If you need further assistance using your iPhone, iPad or MacBook jump over to the official Apple support website for more information, troubleshooting ideas and suggestions. Or book an appointment with an Apple Genius Bar representative who can look into your issue in more detail.

Image Credit: Apple

Filed Under: Apple, Top News


Latest timeswonderful Deals

Disclosure: Some of our articles include affiliate links. If you buy something through one of these links, timeswonderful may earn an affiliate commission. Learn about our Disclosure Policy.

Categories
News

How to Factory Reset Your iPhone, iPad, or iPod touch

factory reset iPhone

This guide is designed to show you how to factory reset your iPhone, iPad or iPod Touch. Embarking on a new beginning can often be the most effective approach. This is particularly true in the realm of technology and personal devices. When you find yourself at a crossroads — contemplating the sale of your gadget, passing it on to a new owner, or grappling with continuous glitches and slowdowns that hinder its functionality — opting for a factory reset can be akin to a technological rebirth.

By reverting your iPhone, iPad, or iPod touch to its original factory settings, you strip away the clutter and complications that have accumulated over time, allowing the device to emerge as fresh and unblemished as it was the day it left the production line. However, it’s critical to approach this reset with knowledge and caution. Understanding the full scope of the reset process and the consequences it entails is essential to ensure that you do not inadvertently lose valuable data or encounter unexpected issues post-reset.

Before You Begin:

  • Backup: This is crucial! A factory reset erases all your data and settings. Back up your device to iCloud or a computer using iTunes or Finder.
  • Find My iPhone/iPad: Turn off “Find My” before resetting. Otherwise, you’ll be prompted for the previous Apple ID used on the device.
  • Know Your Passcode: You’ll need it to erase the device using the Settings app.
  • Have internet access: This is needed to activate the device after the reset.

Two Ways to Reset:

1. Using the Settings App (Recommended if your device functions normally):

  • Open Settings.
  • Tap General.
  • Scroll down and tap Transfer or Reset [Device].
  • Tap Erase All Content and Settings.
  • If prompted, enter your passcode and Apple ID password.
  • Tap Erase Now.
  • The device will restart and go through the initial setup process.

2. Using a Computer (For unresponsive devices or forgotten passcodes):

On a Mac:
  • Open Finder (macOS Catalina or later) or iTunes (macOS Mojave or earlier).
  • Connect your device to your computer.
  • If prompted, enter your device passcode or trust the computer.
  • Select your device in Finder or iTunes.
  • Click Restore [Device].
  • Confirm you want to erase and restore the device.
  • Follow the on-screen instructions to set up your device.
On a PC:
  • Open iTunes.
  • Connect your device to your computer.
  • If prompted, enter your device passcode or trust the computer.
  • Select your device in iTunes.
  • Click Restore [Device].
  • Confirm you want to erase and restore the device.
  • Follow the on-screen instructions to set up your device.

Post-Reset Tips:

  • Restore your data: After setting up your device, you can restore your backed-up data from iCloud or your computer.
  • Update the software: Download and install the latest iOS/iPadOS/iPodOS version for optimal performance and security.
  • Personalize your device: Reinstall your favorite apps, set up your accounts, and customize your settings to make the device your own again.

Additional Considerations:

  • Warranty: A factory reset won’t void your device’s warranty unless you tamper with the hardware or software.
  • SIM card: If you’re selling your device, remove the SIM card before resetting it.
  • Activation lock: If you’re giving your device to someone else, ensure you remove your iCloud account to prevent it from being locked out.

By following these steps and understanding the implications, you can confidently factory reset your iPhone, iPad, or iPod touch and start afresh with a clean slate. Remember, a backup is your best friend, so always prepare before hitting that erase button!

For detailed instructions specific to your device model and iOS/iPadOS/iPodOS version, refer to the official Apple Support website. I hope this comprehensive guide helps you navigate the factory reset process with ease. Feel free to ask if you have any further questions!

Image Credit Amanz

Filed Under: Apple, Apple iPad, Apple iPhone, Guides


Latest timeswonderful Deals

Disclosure: Some of our articles include affiliate links. If you buy something through one of these links, timeswonderful may earn an affiliate commission. Learn about our Disclosure Policy.

Categories
News

What to do if your iPhone battery needs replaced or repaired

IPhone battery

This guide is designed to show you what you can do if your iPhone battery needs replaced or repaired. Ah, the dreaded iPhone battery drain. It starts subtly: a few extra charges throughout the day, then a mad dash for the charger before that important meeting. Eventually, even the most patient iPhone owner reaches a breaking point. But fear not, fellow iOS devotee! This guide will equip you with the knowledge to tackle your battery woes head-on.

Step 1: Diagnose the Problem

Before diving into replacements, let’s confirm the culprit is indeed your battery. Here are some telltale signs:

  • Rapid battery drain: Your phone nosedives from 100% to 20% in what feels like minutes.
  • Unexpected shutdowns: The phone mysteriously dies even with sufficient battery life remaining.
  • Slow performance: Sluggishness, lag, and app crashes can also be battery-related.
  • Battery health below 80%: Check Settings > Battery > Battery Health. A value below 80% suggests reduced capacity.

Step 2: Consider Your Options

Once you’ve diagnosed the issue, you have two main paths: Apple-authorized repair and third-party repair.

Apple-authorized repair:

  • Pros: Uses genuine Apple parts, comes with a warranty, and ensures proper battery calibration.
  • Cons: Generally more expensive, may require an appointment, and longer turnaround times.

Third-party repair:

  • Pros: Often cheaper and faster, readily available repair shops.
  • Cons: May use non-genuine parts, void your warranty if not done by an Apple-authorized service provider, and potential quality/safety concerns.

Step 3: Apple-authorized Repair

If you opt for the official route, here’s what to expect:

  • Book an appointment: Visit Apple’s website or use the Support app to book a Genius Bar appointment at your nearest Apple Store.
  • Diagnostics: Apple technicians will run tests to confirm the battery issue.
  • Cost: The cost varies depending on your iPhone model and whether you have AppleCare+. Generally, expect to pay between $49 and $99 for an out-of-warranty battery replacement.
  • Warranty: Apple provides a 90-day warranty on battery replacements.

Step 4: Third-party Repair

If you choose the third-party route, do your research! Here are some tips:

  • Read reviews: Check online reviews and ratings of repair shops in your area.
  • Ask about parts: Ensure they use high-quality, reputable replacement batteries.
  • Warranty: Inquire about their warranty policy on repairs.
  • Price comparison: Get quotes from several shops before making a decision.

Step 5: DIY Repair (Advanced Users Only!)

For adventurous souls, replacing your iPhone battery yourself is a possibility. However, this is a delicate procedure and not recommended for everyone.

Requires technical skills: You’ll need specialized tools and a good understanding of phone repair.
Risk of damage: Improper repair can permanently damage your phone.
Voiding warranty: DIY repair may void your iPhone’s warranty unless you use Apple’s self service repair program.

Bonus Tip: Extend Your Battery Life

Here are some ways to maximize your iPhone’s battery life before resorting to replacement:

  • Update your iOS: Bug fixes and performance improvements in newer versions can improve battery life.Adjust brightness: Lower screen brightness is a significant battery saver.
  • Enable battery-saving mode: This reduces background activity and extends battery life.
  • Turn off location services and Bluetooth when not in use.
  • Close unused apps: Background app refresh can drain the battery.

Summary

While a dwindling iPhone battery can feel like a digital apocalypse, it doesn’t have to be the end of the world. Armed with the knowledge in this guide, you can confidently diagnose the problem, explore your repair options, and even extend your battery life before replacement becomes necessary. Remember, prioritizing healthy charging habits and keeping your software updated can go a long way in prolonging your battery’s lifespan. So, take a deep breath, put down that dying phone, and embrace the power of informed action. Your iPhone’s battery life, and your sanity, will thank you! You can find out more details about Apple’s official repairs over at their website.

Image Credit: Dennis Brendel

Filed Under: Apple, Apple iPhone, Guides


Latest timeswonderful Deals

Disclosure: Some of our articles include affiliate links. If you buy something through one of these links, timeswonderful may earn an affiliate commission. Learn about our Disclosure Policy.

Categories
News

Blocking Unwanted Calls, Messages, and Emails on Your iPhone

Block Unwanted Calls

This guide will show you how to block unwanted calls, emails and messages on your iPhone or iPad. In today’s digital age, it’s more important than ever to be able to control who can contact you. With the rise of spam and harassment, it’s important to have the ability to block unwanted messages and calls. Luckily, both iPhone and iPad offer built-in features that allow you to block phone numbers, contacts, and emails.

Blocking phone numbers is the most straightforward way to prevent unwanted calls and messages. You can block individual numbers, or you can block all calls and messages from unknown callers.

Blocking Individual Phone Numbers

To block an individual phone number, follow these steps:

  1. Open the Phone app on your iPhone or iPad.
  2. Tap the Recents tab.
  3. Tap the phone number that you want to block.
  4. Tap Block this Caller.
  5. A confirmation dialog will appear. Tap Block again to confirm.

Blocking All Unknown Callers

If you want to block all calls and messages from unknown callers, follow these steps:

  1. Go to Settings > Phone > Silence Unknown Callers.
  2. A confirmation dialog will appear. Tap Turn On to enable the feature.

By blocking phone numbers, you can take control of your privacy and reduce the amount of spam that you receive. If you receive a call from a blocked number, you will not see it in your Recents list, and you will not be notified of the call.

Blocking Contacts

You can also block contacts from contacting you. This can be useful if you have a contact that is sending you unwanted messages or calls.

To block a contact, follow these steps:

  1. Open the Contacts app on your iPhone or iPad.
  2. Find the contact that you want to block and tap on it.
  3. Tap the Edit button in the top right corner of the screen.
  4. Tap the Block Contact button in the bottom left corner of the screen.
  5. A confirmation dialog will appear. Tap Block again to confirm.

By blocking contacts, you can keep unwanted callers and senders from reaching you.

Blocking Email Addresses

Blocking email addresses is a great way to stop spam from filling up your inbox. To block an email address, follow these steps:

  1. Open the Mail app on your iPhone or iPad.
  2. Open the email from the sender that you want to block.
  3. Tap the Details button in the bottom right corner of the screen.
  4. Scroll down to the More section and tap the Block Contact button.
  5. A confirmation dialog will appear. Tap Block again to confirm.

By blocking email addresses, you can keep unwanted senders from reaching you.

Filtering iMessages from Unknown Senders

In addition to blocking phone numbers and email addresses, you can also filter iMessages from unknown senders. This will help to reduce the amount of spam that you receive.

To filter iMessages from unknown senders, follow these steps:

  1. Go to Settings > Messages > Filter Unknown Senders.
  2. Toggle the Filter Unknown Senders switch to On.

With this feature enabled, iMessages from unknown senders will be sent to your Junk Mail folder. You can still view and reply to these messages if you want, but they won’t be mixed in with your regular messages.

Reporting iMessages

If you receive an iMessage that you believe is spam or junk mail, you can report it to Apple. This will help to improve Apple’s spam filter and prevent other users from receiving the same message.

To report an iMessage, follow these steps:

  1. Open the iMessage that you want to report.
  2. Tap the i icon in the top right corner of the screen.
  3. Tap Report Spam or Junk.
  4. Tap Report Spam again to confirm.

By reporting iMessages, you can help to keep your inbox clean and prevent other users from receiving spam.

Summary

By blocking phone numbers, contacts, and emails, you can take control of your privacy and reduce the amount of spam that you receive. By filtering iMessages from unknown senders and reporting iMessages that you believe are spam or junk mail, you can help to create a more secure and enjoyable online experience for yourself and others. You can find out more details about how to block unwanted calls, messages and emails over at Apple’s website.

Image Credit: René Ranisch

Filed Under: Apple, Apple iPhone, Guides


Latest timeswonderful Deals

Disclosure: Some of our articles include affiliate links. If you buy something through one of these links, timeswonderful may earn an affiliate commission. Learn about our Disclosure Policy.

Categories
News

How to Find Your Lost iPhone or iPad with Find My

find my iPhone

This guide will show you how to use Apple’s Find My app top locate your iPhone, iPad and other Apple devices. Apple’s Find My app offers an extensive suite of features designed to assist users in tracking and securing their Apple devices, such as iPhones, iPads, and other compatible products. This application is especially valuable in situations where your device is misplaced, lost, or unfortunately stolen. One of the primary functions of the Find My app is its ability to display the geographical location of your device on a detailed map. This feature is particularly useful for pinpointing the device’s current position, which can be vital for recovery efforts.

In addition to location tracking, the Find My app includes a feature that allows users to play a sound on the device. This can be incredibly helpful in situations where the device is nearby but not immediately visible, such as being hidden under cushions or in a bag. The sound emitted is distinct and designed to draw attention, thereby aiding in the quick location of the device.

For scenarios where the device is believed to be lost or in unauthorized hands, the Find My app provides an option to mark the device as lost. This action triggers several security measures to protect your information. One such measure is the activation of a passcode lock, which prevents unauthorized access to the device. This ensures that personal data and sensitive information remain secure, even when the device is out of your possession.

Furthermore, in extreme cases where the device is deemed irrecoverable, the Find My app offers a remote data erasure feature. This allows users to completely wipe the device’s data from afar, ensuring that personal information, photos, documents, and other sensitive data do not fall into the wrong hands. This feature acts as a last resort to safeguard user privacy and security, providing peace of mind that your data is protected even in adverse situations.

Prerequisites

Before you start using Find My to locate your lost device, make sure you have the following:

  1. Your iPhone or iPad is turned on and has cellular or Wi-Fi connectivity.
  2. Your iPhone or iPad is signed in to your Apple ID and Find My is turned on.
  3. You have access to another Apple device or a web browser.

Locating Your Device with Find My

Once you’ve met the prerequisites, you can use Find My to locate your lost device:

  1. Open the Find My app on another Apple device or sign in to iCloud.com/find on a web browser.
  2. Sign in using your Apple ID and password.
  3. Under “Devices,” select the device you want to locate.
  4. If your device is turned on and connected to the internet, you will see its location on a map.

Playing a Sound

If your device is nearby but you can’t find it, you can play a sound to help you locate it:

  1. In the Find My app or on iCloud.com/find, select the device you want to locate.
  2. If your device is turned on, you will see an option to “Play Sound.”
  3. Tap “Play Sound” and your device will start playing a loud sound.

Marking Your Device as Lost

If you think your device is lost or stolen, you can mark it as lost to secure it with a passcode and display a message on the screen.

  1. In the Find My app or on iCloud.com/find, select the device you want to mark as lost.
  2. If your device is turned on, you will see an option to “Mark As Lost.”
  3. Tap “Mark As Lost” and follow the on-screen instructions to create a passcode and a message for the screen.

Remotely Erasing Your Device

If you’re sure you won’t be able to recover your lost device, you can erase its data remotely to protect your personal information:

  1. In the Find My app or on iCloud.com/find, select the device you want to erase.
  2. If your device is turned on, you will see an option to “Erase Device.”
  3. Tap “Erase Device” and confirm your choice to erase all data on the device.

Additional Tips

Here are some additional tips for finding your lost iPhone or iPad:

  1. Check Find My Friends: Make sure you’ve enabled Find My Friends on your device and that you’re sharing your location with your friends or family. They may be able to help you locate your device if they’re nearby.
  2. Contact your wireless carrier: If you think your device has been stolen, contact your wireless carrier to report the loss and disable your account.
  3. File a police report: If your device is stolen, file a police report. This will help you get insurance reimbursement if your device is not recovered.

Summary

With Find My, you have powerful tools at your disposal to locate your lost iPhone or iPad. By following the steps outlined in this guide, you can increase your chances of finding your device and keeping your personal information safe. We hope that you find out guide on how to use Find My to find your lost iPhone or iPad useful, if you have any tips, comments, or questions, please let us know in the comments section below.

Image Credit: Georgiy Lyamin

Filed Under: Apple, Apple iPhone


Latest timeswonderful Deals

Disclosure: Some of our articles include affiliate links. If you buy something through one of these links, timeswonderful may earn an affiliate commission. Learn about our Disclosure Policy.