Categories
News

How to Set Up Your New iPad

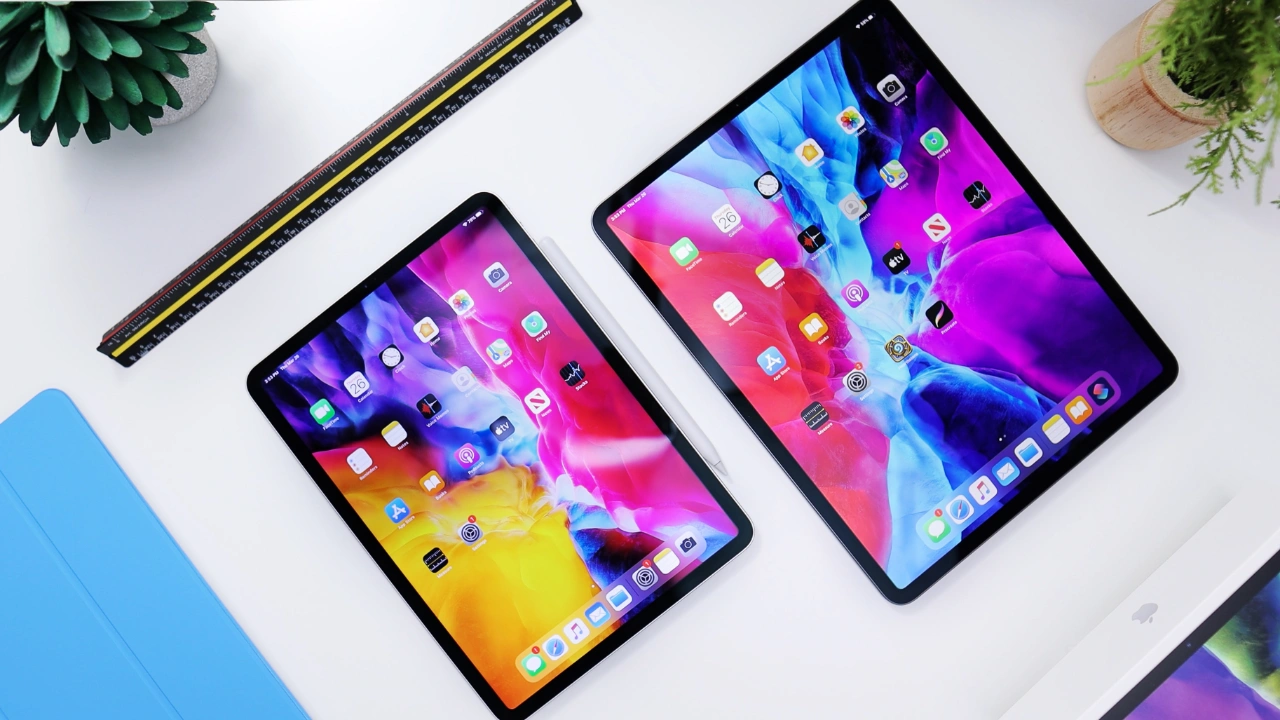
The arrival of a new iPad is an exciting moment, marking the beginning of a journey into a world of enhanced productivity, entertainment, and creativity. However, setting up a new device can often be a daunting task, filled with unfamiliar options and technical jargon. Fear not, for this comprehensive guide will transform the setup process into a seamless and enjoyable experience.

Preparation: Gathering Essentials and Ensuring Compatibility

Before diving into the setup process, it’s essential to gather the necessary items to ensure a smooth experience:

  • Power Source: The iPad’s charging cable is crucial for powering up the device and ensuring it remains energized throughout the setup process.
  • Wi-Fi Connection: A reliable Wi-Fi connection is required to download updates, install apps, and sync data with iCloud.
  • Apple ID: If you don’t already have an Apple ID, you’ll need to create one to access the App Store, iCloud, and other Apple services.
  • Existing iPad or iPhone: If you have another compatible device, you can use Quick Start to transfer data and settings to your new iPad seamlessly.

Step 1: Turning On Your New iPad

  • Press and hold the Sleep/Wake button on the top edge of the iPad until the Apple logo appears.
  • Follow the on-screen instructions to complete the initial setup, which includes language selection, region, and Siri voice options.
  • Connect to Wi-Fi: Tap on the “Wi-Fi” field and select your preferred network. Enter the network password and tap “Join.”

Step 2: Using Quick Start for a Seamless Transfer

  • If you have another compatible iPad or iPhone with an active internet connection, you can use Quick Start to quickly transfer data and settings to your new iPad.
  • Place your new iPad near the existing device.
  • On the new iPad, tap “Set Up Manually” and then choose “Quick Start.”
  • On the existing device, follow the on-screen instructions to scan the QR code displayed on the new iPad.
  • Authenticate the transfer by entering your passcode on the existing device.

Step 3: Setting Up Your Apple ID and iCloud

  • Your Apple ID serves as your digital passport to the Apple ecosystem, allowing you to access apps, purchase content, and sync data across your devices.
  • If you already have an Apple ID, enter your email address and password.
  • If you don’t have an Apple ID, create one by providing a valid email address and creating a strong password.
  • Review and accept the Apple Terms and Conditions.
  • Turn on iCloud Drive to automatically sync your documents, photos, and other data across your Apple devices.

Step 4: Personalizing Your iPad Experience

  • Choose a passcode to secure your iPad and prevent unauthorized access.
  • Set up Face ID or Touch ID for convenient device unlocking and app authorization.
  • Customize your wallpaper to personalize the look and feel of your iPad.
  • Adjust display settings such as text size, brightness, and color temperature to suit your preference.
  • Enable or disable notifications from apps and services based on your preferences.
  • Install essential apps from the App Store, including productivity apps, entertainment providers, and social media platforms.

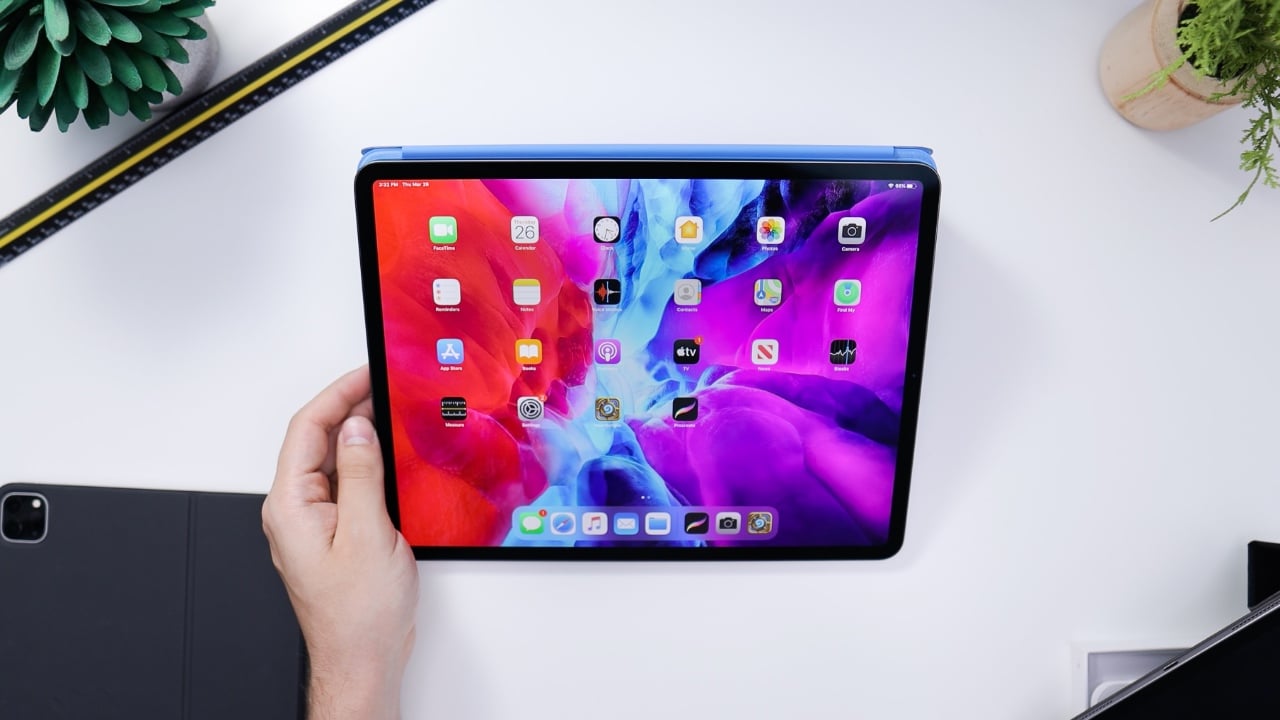
Step 5: Enjoying Your New iPad

Once the setup process is complete, you’re ready to explore the vast world of possibilities offered by the iPad. From browsing the web to creating stunning artwork, the iPad empowers you to work, play, and learn in ways never before experienced. Embrace the freedom and versatility that your new iPad has to offer, and embark on a journey of endless possibilities.

With your new iPad now fully set up and customized to your liking, you’re ready to embark on a journey of enhanced productivity, limitless creativity, and unparalleled entertainment. Whether you’re a student seeking to enhance your learning experience, a professional striving for greater efficiency, or a creative individual seeking to express your artistic vision, the iPad offers an unparalleled platform to achieve your goals.

As you explore the vast array of apps, features, and services available on the iPad, remember to embrace the flexibility and adaptability that this remarkable device provides. The iPad is a tool that can evolve alongside your needs and aspirations, transforming seamlessly from a powerful productivity powerhouse to a source of inspiration and entertainment.
So, grab your new iPad, connect to the world of endless possibilities, and prepare to unlock your full potential. With the iPad by your side, the journey of innovation, creativity, and achievement awaits.

Here are some other iPad articles you may find helpful:

Image Credit: Daniel Romero

Categories
News

How to easily AirDrop anything on iPhone or iPad

How to easily AirDrop anything on your iPhone or iPad

If you would like to easily transfer photos, documents, videos and more from one iPhone to another or perhaps from your iPhone to someone else’s Mac computer. You will be pleased to know there is a very easy way to do this on iOS 17 using all Apple devices whether it be your iPhone, iPad or MacBook laptop.

AirDrop, a feature available on your iPhone and iPad, simplifies the task of sharing content like photos, videos, and other files with nearby Apple devices. This technology, utilizing Bluetooth and Wi-Fi, offers a straightforward way to transfer data without the need for cables or complex procedures. Here’s a step-by-step guide to make the most out of AirDrop’s capabilities.

First, ensure that both the sending and receiving devices are within range of each other and have Bluetooth and Wi-Fi enabled. This setup is crucial for establishing a connection. Also, remember to turn off the Personal Hotspot feature to avoid any connectivity issues.

AirDrop anything on your iPhone or iPad

Next, it’s time to configure your AirDrop reception settings. You have two options: ‘Contacts Only’ or ‘Everyone.’ The ‘Contacts Only’ setting works well if the person you’re sharing with is in your contact list. If not, you may need to switch to the ‘Everyone’ setting for broader accessibility. You can easily find and adjust these settings in the Settings app under General or via the Control Center for quick access.

When you’re ready to share a file, simply locate the item you wish to send, tap on the Share button, and a list of nearby devices eligible for AirDrop will appear. Select the desired recipient’s device from this list. The receiver will get a prompt to either ‘Accept’ or ‘Decline’ the incoming file. Upon acceptance, the file automatically opens in the corresponding app on their device.

For those using the latest iPhone models with iOS 17, AirDrop has an enhanced feature. In some apps, just bringing two iOS devices close to each other can trigger AirDrop, streamlining the sharing process even further.

Apple Airpdrop quick reference

  • AirDrop allows sharing and receiving content like photos and documents between nearby Apple devices.
  • Ensure both sender and receiver are within Bluetooth and Wi-Fi range, with both services enabled and Personal Hotspot turned off.
  • Adjust AirDrop receiving settings to ‘Contacts Only‘ or ‘Everyone‘ depending on the sender’s contact status.
  • To share via AirDrop, open the content, tap Share, then select the recipient from the AirDrop list.
  • Accepting an AirDrop request involves tapping ‘Accept‘ on the alert that appears on the receiver’s device.
  • Shared content automatically opens in the corresponding app on the receiver’s device.
  • AirDrop settings can be adjusted in the Settings app under General or via the Control Center.
  • Specific steps are provided for different iPhone models and operating systems.
  • If AirDrop is not functioning, ensure it is enabled in the Screen Time settings.
  • The ‘Everyone’ option can be temporarily enabled for 10 minutes for convenience.
  • Devices using iOS 17 can share content by simply bringing them close together in certain apps.

Troubleshooting AirDrop is straightforward. If you’re facing issues, check the Screen Time settings to ensure AirDrop isn’t restricted. Additionally, the ‘Everyone’ option can be temporarily enabled for 10 minutes, allowing for a quick file transfer without permanently changing your settings.

AirDrop proves to be an invaluable tool for iPhone and iPad users, enhancing the way we share and receive content. By following these guidelines and ensuring your device settings are correctly configured, you can leverage this technology for efficient, wireless sharing. Whether it’s transferring a collection of photos or important documents, AirDrop simplifies connectivity and boosts productivity among Apple device users.

If you need further assistance using your iPhone, iPad or MacBook jump over to the official Apple support website for more information, troubleshooting ideas and suggestions. Or book an appointment with an Apple Genius Bar representative who can look into your issue in more detail.

Image Credit: Apple

Filed Under: Apple, Top News


Latest timeswonderful Deals

Disclosure: Some of our articles include affiliate links. If you buy something through one of these links, timeswonderful may earn an affiliate commission. Learn about our Disclosure Policy.

Categories
News

How to Factory Reset Your iPhone, iPad, or iPod touch

factory reset iPhone

This guide is designed to show you how to factory reset your iPhone, iPad or iPod Touch. Embarking on a new beginning can often be the most effective approach. This is particularly true in the realm of technology and personal devices. When you find yourself at a crossroads — contemplating the sale of your gadget, passing it on to a new owner, or grappling with continuous glitches and slowdowns that hinder its functionality — opting for a factory reset can be akin to a technological rebirth.

By reverting your iPhone, iPad, or iPod touch to its original factory settings, you strip away the clutter and complications that have accumulated over time, allowing the device to emerge as fresh and unblemished as it was the day it left the production line. However, it’s critical to approach this reset with knowledge and caution. Understanding the full scope of the reset process and the consequences it entails is essential to ensure that you do not inadvertently lose valuable data or encounter unexpected issues post-reset.

Before You Begin:

  • Backup: This is crucial! A factory reset erases all your data and settings. Back up your device to iCloud or a computer using iTunes or Finder.
  • Find My iPhone/iPad: Turn off “Find My” before resetting. Otherwise, you’ll be prompted for the previous Apple ID used on the device.
  • Know Your Passcode: You’ll need it to erase the device using the Settings app.
  • Have internet access: This is needed to activate the device after the reset.

Two Ways to Reset:

1. Using the Settings App (Recommended if your device functions normally):

  • Open Settings.
  • Tap General.
  • Scroll down and tap Transfer or Reset [Device].
  • Tap Erase All Content and Settings.
  • If prompted, enter your passcode and Apple ID password.
  • Tap Erase Now.
  • The device will restart and go through the initial setup process.

2. Using a Computer (For unresponsive devices or forgotten passcodes):

On a Mac:
  • Open Finder (macOS Catalina or later) or iTunes (macOS Mojave or earlier).
  • Connect your device to your computer.
  • If prompted, enter your device passcode or trust the computer.
  • Select your device in Finder or iTunes.
  • Click Restore [Device].
  • Confirm you want to erase and restore the device.
  • Follow the on-screen instructions to set up your device.
On a PC:
  • Open iTunes.
  • Connect your device to your computer.
  • If prompted, enter your device passcode or trust the computer.
  • Select your device in iTunes.
  • Click Restore [Device].
  • Confirm you want to erase and restore the device.
  • Follow the on-screen instructions to set up your device.

Post-Reset Tips:

  • Restore your data: After setting up your device, you can restore your backed-up data from iCloud or your computer.
  • Update the software: Download and install the latest iOS/iPadOS/iPodOS version for optimal performance and security.
  • Personalize your device: Reinstall your favorite apps, set up your accounts, and customize your settings to make the device your own again.

Additional Considerations:

  • Warranty: A factory reset won’t void your device’s warranty unless you tamper with the hardware or software.
  • SIM card: If you’re selling your device, remove the SIM card before resetting it.
  • Activation lock: If you’re giving your device to someone else, ensure you remove your iCloud account to prevent it from being locked out.

By following these steps and understanding the implications, you can confidently factory reset your iPhone, iPad, or iPod touch and start afresh with a clean slate. Remember, a backup is your best friend, so always prepare before hitting that erase button!

For detailed instructions specific to your device model and iOS/iPadOS/iPodOS version, refer to the official Apple Support website. I hope this comprehensive guide helps you navigate the factory reset process with ease. Feel free to ask if you have any further questions!

Image Credit Amanz

Filed Under: Apple, Apple iPad, Apple iPhone, Guides


Latest timeswonderful Deals

Disclosure: Some of our articles include affiliate links. If you buy something through one of these links, timeswonderful may earn an affiliate commission. Learn about our Disclosure Policy.

Categories
News

How to fix the “iPad Unavailable” message on your tablet

iPad Unavailable

The dreaded “iPad Unavailable” message can strike fear into the hearts of even the most tech-savvy iPad users. This jarring message appears when you’ve entered an incorrect passcode too many times, rendering your iPad temporarily unusable. While it may seem like a daunting issue, there are several methods you can employ to regain access to your device.

Understanding the iPad Unavailable Mechanism

The iPad Unavailable message is a security feature implemented by Apple to protect your device from unauthorized access. When you repeatedly enter an incorrect passcode, the iPad temporarily locks you out, displaying the message “iPad Unavailable. Try again later.” This lock-out period gradually increases after each failed attempt, discouraging brute-force password-cracking attempts.

Restoring Access with the Correct Passcode

The simplest way to resolve the iPad Unavailable issue is to wait for the lock-out timer to expire. The timer typically starts at one minute and increases with each failed attempt. Once the timer runs out, you can try entering your passcode again. If you enter the correct passcode, your iPad will unlock normally.

Using the Erase iPad Option

If you’re unable to wait for the lock-out timer or have forgotten your passcode entirely, you can use the “Erase iPad” option to unlock your device. This method will erase all data and settings from your iPad, restoring it to factory defaults.

How to Erase iPad Using the Security Lockout Screen

  1. Repeatedly enter the wrong passcode until the “iPad Unavailable” screen appears.
  2. Tap the “Erase iPad” option.
  3. A confirmation prompt will appear. Tap “Start Erase” to proceed.
  4. Enter your Apple ID password to sign out of iCloud.
  5. Your iPad will begin the erase process. This may take several minutes, depending on the device’s storage capacity.
  6. Once the erase is complete, your iPad will reboot and prompt you to set it up as new.

Using iTunes or Finder to Erase iPad

  1. If your iPad is unresponsive or you cannot access the Security Lockout screen, you can use iTunes or Finder on your computer to erase it. This method requires you to have an up-to-date computer and a valid USB cable for your iPad.
  2. How to Erase iPad Using iTunes or Finder
  3. Connect your iPad to your computer using a USB cable.
  4. Open iTunes (for Windows) or Finder (for macOS).
  5. Locate your iPad in the device list.
  6. Click the “Restore” button.
  7. Follow the on-screen instructions to confirm the erase and restore your iPad.

Preserving Data with iCloud Backup

Before attempting to erase your iPad, ensure that you have a recent iCloud backup of your device’s data. This backup will allow you to restore your data after the erase process, minimizing data loss. To create an iCloud backup, go to Settings > [Your Name] > iCloud > iCloud Backup, and tap “Back Up Now.”

Using Third-Party Passcode Removal Tools

In some cases, you may require third-party passcode removal tools to bypass the iPad Unavailable screen and unlock your device. These tools typically require you to put your iPad into recovery mode or DFU mode, which can be risky if not done correctly. It’s advisable to use these tools as a last resort and to exercise caution when selecting and using one.

Seeking Professional Assistance

If you’ve tried all the above methods and are still unable to unlock your iPad, you may need to seek professional assistance from an authorized Apple service provider. They have specialized tools and expertise to handle complex device issues.

Preventing Future iPad Lockouts

To avoid encountering the iPad Unavailable message in the future, consider using a strong and memorable passcode, avoiding repetitive patterns or easily guessable combinations. Additionally, enable two-factor authentication for your Apple ID to further secure your account.

Remember, the iPad Unavailable message is a security feature designed to protect your device. By following the recommended methods and practicing responsible password management, you can minimize the risk of encountering this issue and keep your data secure.

Image Credit: Francois Hoang

Filed Under: Apple, Apple iPad, Guides


Latest timeswonderful Deals

Disclosure: Some of our articles include affiliate links. If you buy something through one of these links, timeswonderful may earn an affiliate commission. Learn about our Disclosure Policy.

Categories
News

How to Find Your Lost iPhone or iPad with Find My

find my iPhone

This guide will show you how to use Apple’s Find My app top locate your iPhone, iPad and other Apple devices. Apple’s Find My app offers an extensive suite of features designed to assist users in tracking and securing their Apple devices, such as iPhones, iPads, and other compatible products. This application is especially valuable in situations where your device is misplaced, lost, or unfortunately stolen. One of the primary functions of the Find My app is its ability to display the geographical location of your device on a detailed map. This feature is particularly useful for pinpointing the device’s current position, which can be vital for recovery efforts.

In addition to location tracking, the Find My app includes a feature that allows users to play a sound on the device. This can be incredibly helpful in situations where the device is nearby but not immediately visible, such as being hidden under cushions or in a bag. The sound emitted is distinct and designed to draw attention, thereby aiding in the quick location of the device.

For scenarios where the device is believed to be lost or in unauthorized hands, the Find My app provides an option to mark the device as lost. This action triggers several security measures to protect your information. One such measure is the activation of a passcode lock, which prevents unauthorized access to the device. This ensures that personal data and sensitive information remain secure, even when the device is out of your possession.

Furthermore, in extreme cases where the device is deemed irrecoverable, the Find My app offers a remote data erasure feature. This allows users to completely wipe the device’s data from afar, ensuring that personal information, photos, documents, and other sensitive data do not fall into the wrong hands. This feature acts as a last resort to safeguard user privacy and security, providing peace of mind that your data is protected even in adverse situations.

Prerequisites

Before you start using Find My to locate your lost device, make sure you have the following:

  1. Your iPhone or iPad is turned on and has cellular or Wi-Fi connectivity.
  2. Your iPhone or iPad is signed in to your Apple ID and Find My is turned on.
  3. You have access to another Apple device or a web browser.

Locating Your Device with Find My

Once you’ve met the prerequisites, you can use Find My to locate your lost device:

  1. Open the Find My app on another Apple device or sign in to iCloud.com/find on a web browser.
  2. Sign in using your Apple ID and password.
  3. Under “Devices,” select the device you want to locate.
  4. If your device is turned on and connected to the internet, you will see its location on a map.

Playing a Sound

If your device is nearby but you can’t find it, you can play a sound to help you locate it:

  1. In the Find My app or on iCloud.com/find, select the device you want to locate.
  2. If your device is turned on, you will see an option to “Play Sound.”
  3. Tap “Play Sound” and your device will start playing a loud sound.

Marking Your Device as Lost

If you think your device is lost or stolen, you can mark it as lost to secure it with a passcode and display a message on the screen.

  1. In the Find My app or on iCloud.com/find, select the device you want to mark as lost.
  2. If your device is turned on, you will see an option to “Mark As Lost.”
  3. Tap “Mark As Lost” and follow the on-screen instructions to create a passcode and a message for the screen.

Remotely Erasing Your Device

If you’re sure you won’t be able to recover your lost device, you can erase its data remotely to protect your personal information:

  1. In the Find My app or on iCloud.com/find, select the device you want to erase.
  2. If your device is turned on, you will see an option to “Erase Device.”
  3. Tap “Erase Device” and confirm your choice to erase all data on the device.

Additional Tips

Here are some additional tips for finding your lost iPhone or iPad:

  1. Check Find My Friends: Make sure you’ve enabled Find My Friends on your device and that you’re sharing your location with your friends or family. They may be able to help you locate your device if they’re nearby.
  2. Contact your wireless carrier: If you think your device has been stolen, contact your wireless carrier to report the loss and disable your account.
  3. File a police report: If your device is stolen, file a police report. This will help you get insurance reimbursement if your device is not recovered.

Summary

With Find My, you have powerful tools at your disposal to locate your lost iPhone or iPad. By following the steps outlined in this guide, you can increase your chances of finding your device and keeping your personal information safe. We hope that you find out guide on how to use Find My to find your lost iPhone or iPad useful, if you have any tips, comments, or questions, please let us know in the comments section below.

Image Credit: Georgiy Lyamin

Filed Under: Apple, Apple iPhone


Latest timeswonderful Deals

Disclosure: Some of our articles include affiliate links. If you buy something through one of these links, timeswonderful may earn an affiliate commission. Learn about our Disclosure Policy.

Categories
News

How to Create a New Apple ID for Your iPhone or iPad

create apple ID

Creating an Apple ID is an essential step for new users of Apple devices, including iPhones and iPads. This ID serves as a unique identifier, seamlessly linking all your Apple devices and services. It’s not just about gaining access to basic features like the App Store, iCloud, iMessage, and FaceTime; an Apple ID also unlocks a world of possibilities within the Apple ecosystem. With this ID, you can download and install apps from the App Store, expanding the functionality of your device.

Additionally, it enables you to rent movies from iTunes, offering a wide range of entertainment options at your fingertips. Importantly, an Apple ID is crucial for utilizing iCloud services, which provide secure and convenient storage for your data, photos, and backups, ensuring that your important information is accessible and protected across all your devices. Thus, setting up an Apple ID is a fundamental step in integrating into the Apple ecosystem and making the most out of your new device.

Prerequisites

Before you begin creating your Apple ID, ensure you have the following items ready:

  • An internet connection: You’ll need an internet connection to create your Apple ID and access Apple services. Make sure you’re connected to a stable Wi-Fi network or have a strong mobile data connection.
  • A valid email address: You’ll need a valid email address to create your Apple ID. Choose an email address that you’ll use regularly and can access easily.
  • A strong password: A strong password is essential for protecting your Apple ID and the data associated with it. Choose a password that is at least 8 characters long and includes a mix of uppercase and lowercase letters, numbers, and special symbols.
  • Payment information (optional): If you plan to purchase apps or content from the App Store, you’ll need to enter your payment information. This can include your credit card number, debit card number, or PayPal account information.

Creating an Apple ID Using Your iPhone or iPad

There are two primary methods to create an Apple ID using your iPhone or iPad: through the App Store or through the Settings app.

Option 1: Through the App Store

  • Launch the App Store on your iPhone or iPad.
  • Tap on your profile icon in the top right corner of the screen.
  • Scroll down and tap on the “Create New Apple ID” option.
  • Follow the on-screen instructions to enter your personal information, including your email address, password, name, and payment details (if applicable).
  • Verify your email address by clicking on the link sent to your inbox.
  • Complete the rest of the setup process, including accepting the terms and conditions.

Option 2: Through the Settings App

  • Open the Settings app on your iPhone or iPad.
  • Tap on your name or profile picture.
  • Scroll down and tap on the “iCloud” tab.
  • Tap on the “Create New Apple ID” option.
  • Follow the on-screen instructions to enter your personal information, including your email address, password, name, and payment details (if applicable).
  • Verify your email address by clicking on the link sent to your inbox.
  • Complete the rest of the setup process, including accepting the terms and conditions.

Important Considerations

When creating your Apple ID, it’s important to follow these key guidelines to ensure your account’s security and protect your personal information:

  • Choose a strong password: Avoid using easily guessable passwords or those associated with your personal information. A strong password should be at least 8 characters long and include a combination of uppercase and lowercase letters, numbers, and symbols.
  • Secure your email address: Use a secure and private email address for your Apple ID. Avoid using personal or work email addresses that may be compromised.
  • Protect your Apple ID credentials: Keep your Apple ID password confidential and don’t share it with anyone. Enable two-factor authentication to add an extra layer of security to your account.
  • Beware of scams: Be cautious of phishing emails or websites that attempt to collect your Apple ID credentials. Never provide your password or personal information to unsolicited requests.

Additional Tips

To further safeguard your Apple ID and the data associated with it, consider these additional tips:

  • Manage your Apple ID: Regularly check your Apple ID settings and ensure that payment information, security options, and family sharing settings are accurate and up-to-date.
  • Enable Find My iPhone or iPad: This feature allows you to locate and remotely erase your device if it’s lost or stolen.
  • Keep your device software up to date: Apple regularly releases software updates to address security vulnerabilities and enhance device performance.

Summary

An Apple ID serves as the gateway to a world of possibilities on your iPhone or iPad. It’s the single identifier that connects you to Apple’s vast ecosystem of services and features, allowing you to browse and download apps from the App Store, store your photos, music, and documents in iCloud, and enjoy seamless connectivity with other Apple devices.

By following the steps outlined in this guide, you can effortlessly create and manage your Apple ID, ensuring that you fully embrace the benefits of this versatile digital tool. Remember, security is paramount when it comes to your Apple ID, so always prioritize safeguarding your information to maintain the integrity of your account. You can find out more details about creating your Apple ID for a new iPhone or iPad over at Apple’s website.

Image Credit: David Švihovec

Filed Under: Apple, Apple iPad, Apple iPhone, Guides


Latest timeswonderful Deals

Disclosure: Some of our articles include affiliate links. If you buy something through one of these links, timeswonderful may earn an affiliate commission. Learn about our Disclosure Policy.

Categories
News

How to use Apple’s Find My on the iPad or iPhone

Find My iPhone

This guide will show you how to use Apple’s Find My feature on the iPhone or iPad, it can be used to find other devices like Apple’s AirTags and more. Keeping track of our personal devices and items has become more crucial than ever. Apple’s Find My feature, available on both the iPad and iPhone, offers a seamless solution for this.

Whether you’re trying to locate a misplaced device, share your location with loved ones, or ensure the safety of your personal items, Find My is an indispensable tool. This article delves into the various functionalities of Find My, providing a step-by-step guide to mastering this feature on your Apple devices.

Setting Up Find My

The journey to using Find My begins with its setup. For new Apple device users, Find My is automatically activated upon signing into iCloud. To ensure it’s enabled, navigate to Settings, tap on your name, and select Find My > Find My iPhone. This feature isn’t just limited to your iPhone or iPad; it extends to paired devices like your Apple Watch, AirPods, and Beats headphones, automatically syncing them if Find My is activated on your iPhone.

Locating and Sharing Items

One of the standout features of Find My iPhone is its ability to locate and share supported items, such as AirTags. Through the Find My app, you can view these items on a map, play a sound to locate them, or use the Find Nearby feature for proximity-based searching. Sharing an item’s location is just as straightforward. Simply add a person via the app, ensuring all parties involved are using the latest iOS version for seamless sharing.

Notifications and Lost Mode

For times when an item’s location is unavailable, Find My offers a notification feature. You can set alerts for when the item is found or left behind. In the unfortunate event of losing an item, activating Lost Mode is a vital step. This mode locks the item to your Apple ID and allows you to leave contact information for anyone who might find it.

Finding Apple Devices

Find My iPhone isn’t limited to just items; it’s also a powerful tool for locating your Apple devices. Whether using another device signed in with your Apple ID or accessing iCloud.com/find, you can see your devices on a map. Features like playing a sound, getting directions, or activating Lost Mode (which locks the device and displays your contact info) are invaluable in locating a lost device.

Remote Actions

In scenarios where you believe your device is irretrievably lost, Find My allows you to remotely erase it. This feature ensures your personal data remains secure. Interestingly, even after erasing, you can continue to track the device and restore it from a backup if it’s found.

Sharing Your Location

Beyond tracking devices and items, Find My also facilitates location sharing with friends and family. You can easily manage who sees your location and choose to share it for a specific duration or indefinitely. This feature not only enhances connectivity but also adds a layer of safety, allowing loved ones to know your whereabouts.

Conclusion

Apple’s Find My feature on the iPad and iPhone is more than just a tool; it’s a comprehensive solution for enhancing your digital life’s convenience and security. From setting up and sharing locations to employing Lost Mode and remote actions, Find My ensures that your devices and personal items are always within reach. Embrace the full potential of your Apple devices by integrating Find My iPhone into your daily routine.

Source & Image Credit: Apple

Filed Under: Apple, Apple iPad, Apple iPhone, Guides


Latest timeswonderful Deals

Disclosure: Some of our articles include affiliate links. If you buy something through one of these links, timeswonderful may earn an affiliate commission. Learn about our Disclosure Policy.

Categories
News

How to Speed Up an Older iPad

Older iPad

As technology advances, so do our expectations for the performance of our devices. Unfortunately, older iPads may not be able to keep up with the latest apps and games, making them feel slow and sluggish. However, there are a few things you can do to speed up your older iPad and improve its performance. In this article, we will discuss some of the best tips and tricks for speeding up an older iPad.

Update to the Latest Software

One of the most important things you can do to speed up your older iPad is to make sure it is running the latest version of iOS. Apple releases software updates regularly to fix bugs, improve performance, and add new features. To check for an update, go to Settings > General > Software Update. If an update is available, you will be able to download and install it.

Limit Background App Refresh

Background App Refresh allows apps to continue to update their content even when they are not in use. This can be useful for apps that you want to be up-to-date, such as news apps or social media apps. However, Background App Refresh can also consume a lot of battery power and can slow down your iPad. To limit Background App Refresh, go to Settings > General > Background App Refresh. You can then turn off Background App Refresh for all apps or for individual apps.

Reduce Motion and Transparency

iOS has a number of effects that make the interface look more visually appealing. However, these effects can also consume a lot of resources and can slow down your iPad. To reduce motion and transparency, go to Settings > General > Accessibility > Reduce Motion. You can then turn on Reduce Motion and Reduce Transparency.

Clear Storage Space

If your iPad is running out of storage space, it can start to slow down. To clear storage space, go to Settings > General > Storage. You can then see how much storage space is being used by each app and delete apps that you no longer use. You can also delete photos, videos, and other files to free up space.

Limit Widgets and Animations

Widgets are small apps that can be added to your Home screen. They can be useful for getting quick information at a glance, but they can also slow down your iPad. To limit widgets, go to Settings > Home Screen & Dock. You can then turn off widgets for all apps or for individual apps.

Turn Off Background App Refresh

Background App Refresh allows apps to continue to update their content even when they are not in use. This can be useful for apps that you want to be up-to-date, such as news apps or social media apps. However, Background App Refresh can also consume a lot of battery power and can slow down your iPad. To turn off Background App Refresh, go to Settings > General > Background App Refresh. You can then turn off Background App Refresh for all apps or for individual apps.

Reset All Settings

If you have tried all of the other tips and your iPad is still slow, you can try resetting all of your settings. This will not delete any of your data, but it will reset all of your settings to their defaults. To reset all of your settings, go to Settings > General > Reset > Reset All Settings.

Consider a Factory Reset

If you have tried all of the other tips and your iPad is still slow, you can try doing a factory reset. This will erase all of your data and settings, so you will need to back up your iPad before you do this. To do a factory reset, go to Settings > General > Reset > Erase All Content and Settings.

Additional Tips

In addition to the tips above, there are a few other things you can do to improve the performance of your older iPad:

  • Close apps that you are not using.
  • Delete unused apps.
  • Restart your iPad regularly.
  • Avoid using too many widgets.
  • Turn off Siri if you do not use it.
  • Keep your iPad updated with the latest software.

By following these tips, you can improve the performance of your older iPad and make it feel like new again. There are a few things you can do to speed up an older iPad. By updating to the latest software, limiting background app refresh, reducing motion and transparency, clearing storage space, limiting widgets and animations, turning off background app refresh, resetting all settings, and considering a factory reset, you can improve the performance of your older iPad and make it feel like new again.

Image Credit: Marek Levák

Filed Under: Apple, Apple iPad, Guides


Latest timeswonderful Deals

Disclosure: Some of our articles include affiliate links. If you buy something through one of these links, timeswonderful may earn an affiliate commission. Learn about our Disclosure Policy.

Categories
News

How to block websites on your iPhone or iPad

block websites iPhone ipad

This guide will show you how to block websites on your iPhone or iPad, you will be able to block specific websites and also specific types of websites, this can be done with Apple’s Screen Time feature and also with third-party apps and more. This is as good idea if your kids use your iPhone or iPad from time to time, if they have their own device then you can set up parental controls on their device.

In the modern era of constant online connectivity, it’s increasingly necessary to exercise control over the digital content accessible to us and our families. This is particularly crucial when considering the exposure of children to the vast array of content on the internet, some of which might be inappropriate or harmful. Apple’s iOS, the operating system used by iPhones and iPads, is equipped with various features and supports a range of third-party applications that enable users to block specific websites, thereby offering a more controlled internet experience.

Understanding the Importance of Blocking Websites

  1. Child Safety: One of the primary reasons to block websites on your device is to protect children from accessing inappropriate content.
  2. Productivity: Limiting access to certain websites can help in reducing distractions, thereby enhancing productivity, especially for students or professionals.
  3. Internet Addiction Management: Controlling website access can be a step towards managing internet usage and addiction.

Using Built-in iOS Features

Apple’s iOS provides built-in functionalities to help manage and restrict access to certain types of content, including websites.

Screen Time: A Comprehensive Tool

Screen Time, a feature integrated into iOS, is particularly useful for managing screen time and imposing content restrictions. Here’s how you can use it:

  • Navigate to the Settings app and select Screen Time.
  • If it’s your first time using Screen Time, you will need to activate it by following the on-screen prompts.
  • Within Screen Time, go to Content & Privacy Restrictions and enter your Screen Time passcode if you’ve set one up.
  • Enable Content & Privacy Restrictions by toggling the switch to the On position.
  • Choose Content Restrictions followed by Web Content.

Blocking Adult Websites:

  • In the Web Content menu, select ‘Limit Adult Websites’.
  • Under ‘Never Allow’, add the URL of any website you wish to block.

Blocking Specific Websites:

  • Alternatively, choose ‘Allowed Websites Only’ and manually enter the URLs of websites you want to permit.
  • For restricting explicit language, navigate back to Web Content and select ‘Explicit Language’, then opt for ‘Don’t Allow’.

Securing Your Settings with a Passcode:

  • To prevent unauthorized changes to these settings, use a Screen Time Passcode, which can be set up in the Screen Time menu.

Leveraging Third-Party Applications

In addition to iOS’s built-in features, several third-party apps offer enhanced capabilities for website blocking:

  • Freedom: Known for its comprehensive content filtering, Freedom allows users to block various online distractions.
  • BlockSite: This app is useful for blocking websites, apps, and even games.
  • Kidslox: Kidslox offers a broader range of parental control features, including website blocking.

Additional Factors to Consider

  • Workarounds to Website Blocking: It’s crucial to be aware that tech-savvy individuals, particularly teenagers, might find ways to bypass these restrictions. Therefore, it’s important to couple these technical solutions with open discussions about responsible internet use.
  • Regular Software Updates: Keep your devices updated with the latest iOS version to ensure you have the most current security features and bug fixes.
  • Transparent Communication: Discuss the implementation of website blocking with your family, especially children, to maintain transparency and understand their viewpoints.

By effectively utilizing tools like Screen Time, third-party applications, and fostering an environment of open communication, you can create a safe and focused online environment for yourself and your family on your iPhone or iPad. We hope that you find this guide helpful and informative, if you have any questions, tips or comments, please leave a comment below and let us know.

Image Credit: Daniel Romero

Categories
News

How to speed up your iPad or iPhone

speed up iPad

This guide will show you how to speed up your iPhone or iPad. As you enjoy the seamless experience of your iPad or iPhone, it’s not uncommon for the device to begin to lag as time progresses. This gradual decrease in performance may stem from a myriad of causes that can dampen the sleek efficiency Apple users cherish. Let’s delve into the potential culprits and explore comprehensive strategies to speed up your iPad or iPhone.

Storage Woes: The Silent Speed Thieves

The scarcity of storage space is a prime suspect in the case of a sluggish iPad or iPhone. A nearly full storage not only hampers the swift loading of apps but also escalates the chances of unexpected crashes. Poring over your device’s storage via Settings > General > [Device] Storage offers a revealing glance at what might be hogging space. Cleaning out the digital cobwebs by removing redundant apps and files can breathe new life into your device’s performance.

The Hidden Cost of Background App Refresh

An often-overlooked feature that could be siphoning your device’s speed is the Background App Refresh setting. While useful, it can drain your battery life and impede overall responsiveness. To gain back control and conserve power, navigate to Settings > General > Background App Refresh to disable the function either entirely or for select apps.

Accessibility Features: A Double-Edged Sword

Accessibility services, such as VoiceOver and Zoom, are instrumental for users who need them, but they may inadvertently affect your device’s speed. Tweaking these settings can strike a balance between utility and performance.

The Pitfalls of Outdated Software

Neglecting software updates is akin to driving a car without a tune-up. Outdated versions of iOS or iPadOS can lead to a slew of performance issues, hence staying up-to-date is crucial. You can update your device via Settings > General > Software Update, ensuring access to the latest features and performance optimizations.

Revving Up Your Device: Pro Tips to Restore Speed

  1. The Power of a Fresh Start: Regular Restarts A simple yet effective trick is the age-old practice of restarting your device. This action clears out the temporary clutter and can significantly improve speed. For iPads, hold the Sleep/Wake button along with the Home button until the Apple logo graces the screen. For iPhones, the process involves holding the Sleep/Wake button, sliding to power off, and then restarting with the same button.
  2. Pruning the Digital Garden: Delete Unused Apps and Files Evaluate your app garden and pluck out the weeds—those unused apps and files. This not only tidies up your device but also liberates storage, allowing your device to breathe and operate more freely.
  3. Disabling Background App Refresh Take charge of which apps refresh in the background by disabling this feature wholly or for individual apps. This not only saves on battery life but can also help in maintaining a brisk device performance.
  4. Streamlining Visuals: Reducing Transparency and Motion Excessive visual effects can sometimes detract from performance. You can optimize this by turning off certain features like Reduce Transparency and Reduce Motion in the Accessibility settings.
  5. Location Services: Only When Necessary Location services can be a drain on resources. Scrutinize which apps truly require real-time location data and disable it for those that don’t through Settings > Privacy > Location Services.
  6. Dealing with Unresponsive Apps A frozen app can be a speed bump in your device’s performance. Double-press the Home button and swipe up on any app that isn’t responding to close it.
  7. Embracing the New: Updating Your Device Stay current with the latest iOS or iPadOS version to ensure your device is fortified with the latest bug fixes and performance enhancements.
  8. A Clean Slate: Resetting All Settings As a more comprehensive step, resetting all settings may resolve persistent sluggishness without affecting your data.
  9. Factory Reset: The Last Resort Should all else fail, restoring your device to factory settings is the ultimate step. Remember to back up your data before this nuclear option.
  10. Professional Help: Visiting an Apple Store In instances where your efforts prove futile, seeking the expertise of Apple Store technicians can unearth the root cause and provide a tailored solution.

For those looking to maintain an iPad or iPhone that operates at peak performance, adopting these strategies will go a long way. Enhanced user experience and prolonged device longevity are just a few steps away, ensuring that your Apple device remains a steadfast companion in your daily digital adventures. We hope taht you find outr guide on how to speed up the iPhone or iPad helpful. If you have any suggestions or questions, please let us know in the comments below. You can find out more information over at Apple’s website.

Filed Under: Apple, Apple iPad, Apple iPhone, Guides


Latest timeswonderful Deals

Disclosure: Some of our articles include affiliate links. If you buy something through one of these links, timeswonderful may earn an affiliate commission. Learn about our Disclosure Policy.