Categories
News

How to use the Relume AI website builder to build amazing interactive sites

How to use the Relume AI website builder

Website designers looking for a more effective way to create wireframes and final finishes websites might be interested in a new AI tool in the form of the Relume AI website builder. Whether you are experienced web designer or someone simply looking to build their first website or perhaps enhance the website you already have the Relume AI website design tool is deathly with more investigation.

Launched earlier this year AI tool allows you to quickly build a site map and wireframe in just minutes with the help of artificial intelligence and then export this to other online services such as Figma and Webflow. Enabling you to create client websites extremely quickly, saving you time on the mundane tasks, allowing you to concentrate on more of the finer details and bells and whistles of the website.

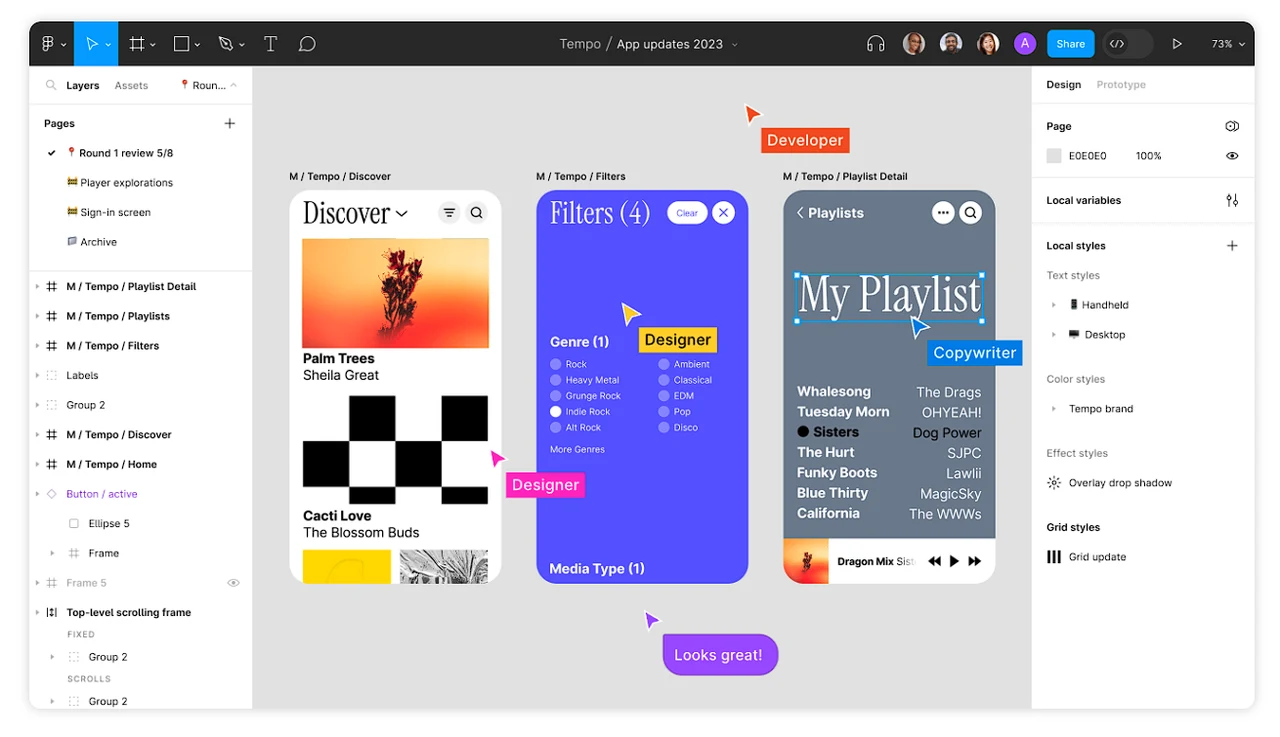
Figma website design tool workspace

Figma website design tool

If you’re not a website designer creating a website can be a complex task, but with the right tools and guidance, it can become a straightforward and enjoyable process, even without an advanced skill set. The Relume AI website builder is looking to transform the website building process using the Relum Library Site Builder. This overview guide provides more insight on how to use this AI-assisted website builder, from creating a new project to publishing your website online.

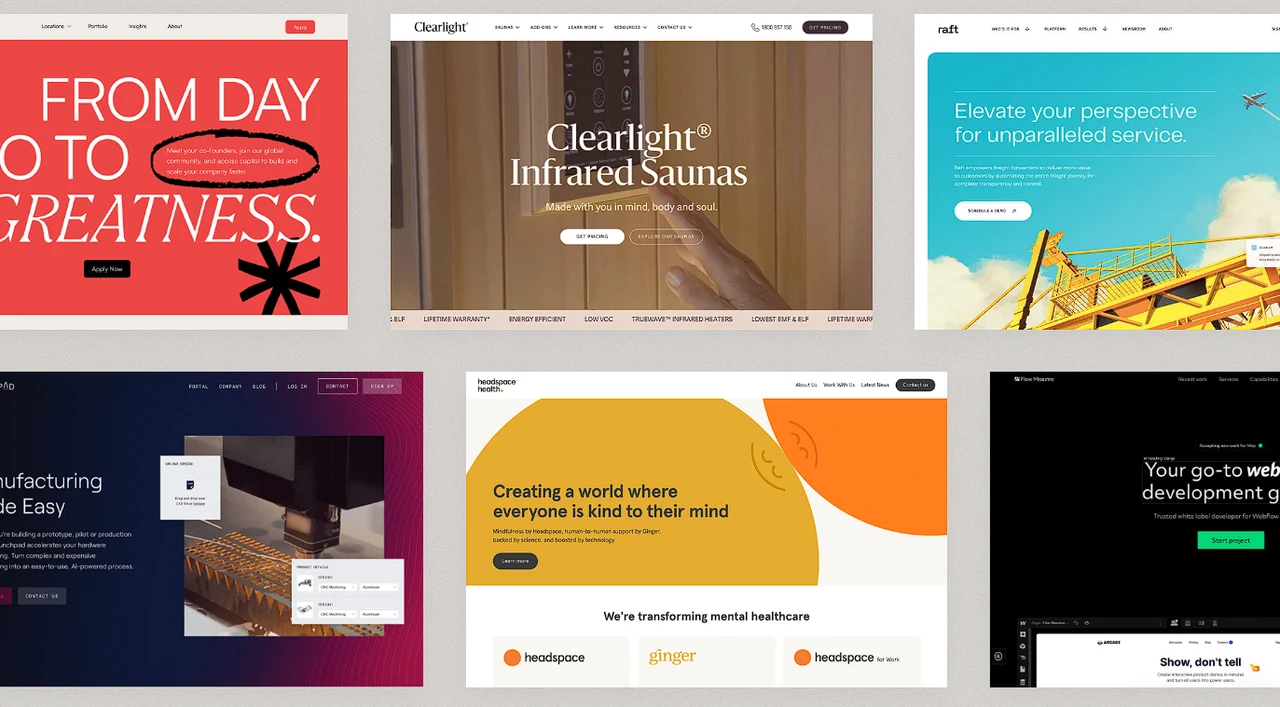
Creating a professional website with Relume AI website builder

The journey to a stunning website begins with constructing a well-thought-out sitemap. The Relume Library Site Builder excels in this aspect by providing an intuitive interface for editing the sitemap. Users can effortlessly move sections between pages, duplicate pages, and generate new versions, crafting a sitemap that perfectly aligns with their vision and requirements. This flexibility allows for a tailor-made structure, laying a solid foundation for the website.

Other articles we have written that you may find of interest on the subject of AI design tools :

Transitioning to Wireframe

Once the sitemap is set, the next step is to bring it to life through wireframing. The wireframe view in the Relume Library Site Builder presents a list of each page in the sitemap along with a generated wireframe for each, using components from the Relume library. This feature is particularly beneficial as it provides a visual blueprint of the website, helping in better planning and layout design.

AI-Generated Content

A standout feature of the Relume AI website builder is its AI-driven content generation. For each section, the AI crafts copy based on the titles and descriptions provided. This function is a time-saver, especially for those who may struggle with content creation. Moreover, the layout of each section can be modified by swapping components, offering a range of choices to match the desired aesthetic and functional needs.

Flexibility and Customization

Customization is at the heart of the Relume Library Site Builder. Sections can be rearranged using keyboard arrows or by simple drag-and-drop actions. Adding new sections is a breeze with over 1,000 Relume components at your disposal, opening a world of possibilities to create a unique and user-engaging website. This level of customization ensures that the final product stands out and resonates with the intended audience.

Further articles on AI design tools to help improve your productivity and speed up your workflow.

Collaboration and Exporting Options

Collaboration is key in website design, and the Relume AI website builder facilitates this through its shareable, view-only link for the wireframe. Additionally, for further editing and design enhancements, the wireframe can be exported into Figma using the Relume Library Figma plugin. This seamless integration allows for easy style updates and the use of components from the Figma kit, enhancing the design process.

Publishing your final website

The final step involves exporting the website to Webflow, which is made simple by the Relume Library. The exported wireframe is not only mobile responsive but also allows for global control of styling in Webflow. This ensures that the website is not only visually appealing but also functional and accessible across various devices. Once published, the website can be viewed in a browser, marking the culmination of a streamlined and efficient website building process.

The Relume Library Site Builder is a revolutionary tool that harnesses the power of AI to make website building more efficient and accessible. Its intuitive design, coupled with powerful AI capabilities, makes it an ideal choice for both seasoned designers and beginners. By following these steps, you can use the Relume AI website builder to create a professional, engaging, and responsive website that effectively meets your needs and goals.

Image Credit: Relume

Filed Under: Guides, Top News


Latest timeswonderful Deals

Disclosure: Some of our articles include affiliate links. If you buy something through one of these links, timeswonderful may earn an affiliate commission. Learn about our Disclosure Policy.

Categories
News

How to use the Duet AI coding assistant to build your next app

Using Duet AI to build apps on Google Cloud

If you would like a little helping hand when coding your very first app or next generation phone or web application. You might be interested to know that Google’s Duet AI can help you. By providing coding assistance during the creation process and can be integrated into your favorite IDE. Duet AI, an advanced AI-powered coding assistant, is specifically designed to enhance your productivity on Google Cloud.

This state-of-the-art coding assistant is built on Google’s robust foundation models, providing personalized and context-aware assistance while prioritizing data privacy and security. As a fully managed service, Duet AI utilizes the latest AI technology from Google and is constructed on the Vertex AI platform. It strictly follows Google’s AI principles and has earned numerous certifications for information security and privacy, demonstrating its dedication to protecting user data.

Google Duet AI

Duet AI offers a unique blend of AI-powered assistance, designed to expedite the building of applications on Google Cloud. It provides insightful suggestions to address application code challenges, offers guidance in Integrated Development Environments (IDEs), and references sources in Cloud Code. This AI-powered assistance supports a wide range of programming languages, including Go, Java, Javascript, Python, and SQL, catering to a diverse group of developers.

Duet AI is designed to simplify and expedite the application development process. It integrates seamlessly with various IDEs, including industry leaders like Visual Studio Code and JetBrains IntelliJ, to provide real-time code assistance. Combined with Cloud Code extensions, this feature allows you to write, debug, and deploy applications directly from your IDE, significantly reducing development time and boosting productivity.

Beyond code assistance, Duet AI also offers conversational assistance through a user-friendly natural language chat interface. This feature allows you to interact with Duet AI conversationally, making complex coding concepts and solutions easier to understand. The natural language chat interface is powered by advanced Natural Language Processing (NLP) algorithms, enabling Duet AI to understand and respond to your queries effectively and efficiently.

AI Coding Assistance across Multiple IDEs

Other articles you may find of interest on the subject of Google Duet AI :

Duet AI extends its AI-powered code assistance to multiple IDEs. It uses machine learning models to understand your unique coding style and provide personalized code suggestions. This feature is available in various IDEs, including Visual Studio Code, JetBrains IntelliJ, and other cloud-based development tools like Colab for Enterprise, Cloud Workstations, Cloud Shell Editor, Cloud Spanner, and BigQuery.

Duet AI respects and upholds intellectual property rights, ensuring that user data and inputs are not used for product and model learning. It follows a strict data governance policy, ensuring that your code and data remain private and secure, thereby fostering trust and confidence among its users. As a fully managed service, Duet AI removes the need for you to manage the underlying AI infrastructure. It uses the latest AI technology from Google, including large foundation models and the Vertex AI platform. This allows you to focus on building applications while Duet AI handles the rest, ensuring a smooth and hassle-free development process.

Security and Privacy

Duet AI strictly follows Google’s AI principles, which include being socially beneficial, avoiding creating or reinforcing unfair bias, being built and tested for safety, being accountable to people, incorporating privacy design principles, upholding high standards of scientific excellence, and being made available for uses that accord with these principles.

In addition to adhering to these principles, Duet AI has earned multiple certifications for information security and privacy, including ISO/IEC 27001, 27017, 27018, and 27701. These certifications highlight Duet AI’s commitment to maintaining the highest standards of data security and privacy, further enhancing its credibility.

Duet AI is a powerful tool that can significantly enhance your productivity on Google Cloud. Its AI-powered assistance, conversational assistance in natural language, and AI-powered code assistance in multiple IDEs make it an invaluable resource for any developer. Furthermore, its respect for intellectual property rights, fully managed service, and strict adherence to Google’s AI principles and certifications for security and privacy make it a reliable and trustworthy tool for building applications on Google Cloud. To learn more about how you can use Duet AI to develop an application jump over to the official Google Cloud website.

Filed Under: Guides, Top News


Latest timeswonderful Deals

Disclosure: Some of our articles include affiliate links. If you buy something through one of these links, timeswonderful may earn an affiliate commission. Learn about our Disclosure Policy.

Categories
News

How to build an AI chess engine from scratch

How to build a chess engine from scratch

If you are interested in chess or perhaps coding and programming your very own chess engine. You are sure to enjoy this quick guide and overview provided by Bartek Spitza. Programming a chess engine or chess computer is a complex task that necessitates a profound understanding of both chess and computer science. This process involves a series of meticulously planned steps, each contributing significantly to the overall functionality, efficiency, and effectiveness of the chess program.

The initial step in this intricate process is the representation of the chessboard and its pieces. This is achieved using a method known as the Bitboard technique. This technique uses a 64-bit integer to represent the chessboard, with each bit in the integer corresponding to a square on the chessboard. This provides a compact and efficient representation of the game state, offering a clear and concise snapshot of the current state of play.

How to build an AI chess engine from scratch

Other articles we have previously written you may find of interest on the subject of chess :

The Evaluation Function and Piece Value Assignment

After accurately representing the chessboard and its pieces, the next step involves evaluating the game’s state. This is done using an evaluation function, a vital component of the program that assesses a position’s strength. The function assigns numerical values to each chess piece, considering their worth in the game. For example, a queen, due to its superior mobility and power, might be assigned a higher value than a pawn.

Position Adjustment and Strength

The evaluation function also considers the pieces’ position on the board, a factor known as position adjustment. A piece’s value can change depending on its location on the board. For instance, a knight positioned on the board’s edge is less valuable than a knight situated in the center because it has fewer potential moves, thus limiting its potential game impact.

Identifying the Optimal Chess Move

Minimax Algorithm and Game Tree Search

The program uses the minimax algorithm to identify the best possible move. This algorithm works by searching down the game tree, considering all possible moves and their potential outcomes. It operates under the assumption that the opponent will always make the move that minimizes the player’s maximum advantage, thereby ensuring the most strategic move is chosen.

Alpha-Beta Pruning: Enhancing the Search Process

To further enhance the search process, the program employs the alpha-beta pruning technique. This algorithm prunes, or eliminates, branches of the game tree that do not need to be searched because they cannot possibly influence the final decision. This significantly reduces the number of nodes that the program needs to evaluate, thereby increasing its efficiency and speed.

Predicting the Strategy

Recursion and Opponent’s Potential Moves

The program also uses recursion, a programming technique where a function calls itself, to explore the opponent’s potential moves. This allows the program to predict the opponent’s strategy and make the best possible move in response, providing a strategic advantage.

Optimizing and Refining the Chess Engine

While the program is already efficient due to the use of the minimax algorithm and alpha-beta pruning, there is always scope for further optimization. This could involve refining the evaluation function or implementing more advanced search techniques, thereby enhancing the program’s ability to compete effectively.

Programming a chess computer is a challenging task that requires a deep understanding of both chess and computer science. However, with the right techniques and algorithms, it is possible to create a program that can compete with human players at a high level. For further insights into the alpha-beta algorithm, consider watching a video by Sebastian Lague, a renowned programmer and chess enthusiast. Additionally, the Wikipedia page on chess programming provides a wealth of information on this fascinating subject, offering a comprehensive overview of the process and the techniques involved.

Filed Under: DIY Projects, Top News


Latest timeswonderful Deals

Disclosure: Some of our articles include affiliate links. If you buy something through one of these links, timeswonderful may earn an affiliate commission. Learn about our Disclosure Policy.

Categories
News

How to build a NAS storage system using a mini PC

How to build a network attached storage system (NAS) using a mini PC

If your main computer is running out of storage and you are considering adding external storage. Or perhaps your home network of devices could do with a secure main central backup solution. You may be interested in building your very own network attached storage solution or NAS using one of the many different mini PC systems available.

Setting up a Network Attached Storage (NAS) system might seem daunting, especially if you’re not deeply familiar with computer hardware and software. But don’t worry, with the right tools and guidance, you can successfully create your own NAS using a mini PC and Open Media Vault. This guide will take you through the entire process, from selecting the right hardware to installing the necessary software and configuring your system to suit your needs.

To act as the foundation for your NAS,  Christopher Barnatt suggest using the Bmax B1 Plus mini PC. Although you can use any other single board computer that might take your fancy, such as the new Raspberry Pi 5. Or an older version that might be collecting dust in your drawer.

The Bmax B1 Plus is small but mighty device powered by a dual-core Celeron N3350 processor and comes with 6 GB of RAM. The Celeron N3350 is a reliable processor that provides sufficient power for a small-scale NAS setup. The 6 GB of RAM ensures smooth operation, even when multiple users are accessing the system simultaneously, guaranteeing a seamless user experience.

Openmediavault software

Open Media Vault (OMV) is a free, open-source software that allows you to convert a PC into a NAS. It’s built on the sturdy Debian Linux platform and offers a user-friendly web-based interface for easy NAS management. OMV requires at least two drives: a system drive of at least 4 GB and one or more data drives for network storage. The system drive houses OMV and its operating system, while the data drive stores your files, keeping system and user data separate.

“OMV is the next generation network attached storage (NAS) solution based on Debian Linux. It contains services like SSH, (S)FTP, SMB/CIFS, RSync and many more ready to use. Thanks to the modular design of the framework it can be enhanced via plugins. openmediavault is primarily designed to be used in small offices or home offices, but is not limited to those scenarios. It is a simple and easy to use out-of-the-box solution that will allow everyone to install and administrate a Network Attached Storage without deeper knowledge.”

How to build a NAS using a mini PC

Watch the excellent tutorial below, kindly created by Christopher Barnatt and the Explaining Computers channel on how you can use a mini PC to create a fully functional NAS  storage solution.

Other articles you may find of interest on the subject of network attached storage solutions:

Installing OMV on the Bmax B1 Plus involves downloading the OMV ISO file, writing it to a USB drive, and then booting the mini PC from this drive. Once the installation is complete, you can access the OMV interface from a web browser using the mini PC’s IP address, allowing for easy remote NAS management.

The next step in setting up your NAS is creating and mounting a file system. This involves formatting the data drive and assigning it a mount point. OMV supports various file systems, including the X4 file system, which is highly recommended for its stability and performance, ensuring your data is stored securely and can be accessed quickly.

Shared folders are the heart of any NAS. These are the directories that will be accessible over the network. In OMV, you can create shared folders on your data drive and assign them permissions based on user or group, allowing for precise control over who can access what data. You can also enable SMB/CIFS, a protocol that allows shared folders to be accessed from Windows, macOS, and Linux systems, ensuring cross-platform compatibility.

To access the shared folders from different operating systems, connect to the NAS using the mini PC’s IP address and the credentials set up in OMV. On a Windows system, this can be done through the Network Discovery feature. For Linux systems, like Linux Mint or Chrome OS Flex, you can use the built-in file manager, providing a familiar interface for accessing your files.

The benefits of network attached storage NAS

  • Centralized Storage: NAS devices provide a central location where data can be stored and retrieved by multiple users and client devices. This centralization simplifies data management and can help prevent data duplication across individual devices.
  • Easy File Sharing: With NAS, users on a network can easily share files among different devices, such as computers, smartphones, and tablets. This is particularly useful in a collaborative environment where team members need to access and work on the same files.
  • Scalability: NAS systems can often be easily scaled by adding more hard drives or connecting additional NAS units, which allows for flexible expansion to meet growing data storage needs without significant disruption or need for major infrastructure changes.
  • Cost-Effective: Deploying a NAS is generally more cost-effective compared to setting up a dedicated file server. The simplicity of a NAS means that you don’t need an extensive IT setup or specialized personnel to maintain it, which can reduce costs.
  • Data Redundancy: Many NAS systems include built-in redundancy features, such as RAID (Redundant Array of Independent Disks), which can provide data protection by replicating data across multiple drives. This helps ensure data integrity in the case of a hardware failure.
  • Convenience and Efficiency: NAS systems are designed to be easy to use with minimal setup, often offering intuitive user interfaces and simple installation processes. This allows non-technical users to effectively manage and access data.
  • Remote Access: Some NAS systems offer remote access features, allowing users to access files over the internet securely. This can be particularly useful for remote work scenarios or when accessing data from multiple locations.

So if you are thinking of creating your very own network attached storage, setting up a NAS using a mini PC and Open Media Vault is a manageable process that requires some patience and technical knowledge. The result is a cost-effective, flexible, and powerful network storage solution that can be accessed from various operating systems, offering a versatile solution for your storage needs.

Filed Under: DIY Projects, Top News


Latest timeswonderful Deals

Disclosure: Some of our articles include affiliate links. If you buy something through one of these links, timeswonderful may earn an affiliate commission. Learn about our Disclosure Policy.

Categories
News

Build your own robot dog with the CM4 XGO-Lite kit

Build your own robot dog

If you would like to build your very own robot dog companion complete with moving limbs, sensors and more. You might be interested in the CM4 XGO Robot Dog Kit V2 for Raspberry Pi is a noteworthy addition to the market. This robotic dog companion kit offers an engaging and educational experience for tech enthusiasts, providing them with the opportunity to build their own robotic companion using advanced technology and open-source software.

The CM4 XGO robotic companion is powered by a Raspberry Pi Compute Module 4 (CM4), a robust microcomputer with a Quad-Core Cortex-A72 CPU running at 1.5GHz. This processor ensures a smooth and efficient operation, allowing the robot dog to execute complex tasks effortlessly. The CM4 also offers wireless connectivity with dual-band 2.4GHz/5GHz Wi-Fi and Bluetooth 5.0 BLE, ensuring seamless communication between the robot and its controller. The robot is equipped with 2GB/4GB of RAM for efficient multitasking and a 32GB Micro SD card for storing the operating system and other necessary data.

Unlike many robot kits on the market, the CM4 XGO Robot Dog boasts a sturdy metal construction, giving it a satisfyingly robust and weighty feel. This construction not only enhances the robot’s durability but also adds to its aesthetic appeal. The kit comes pre-assembled, saving users from the often complicated process of assembly and wiring.

At the heart of this robot dog is the Compute Module 4, which serves as the control center. Users can program the robot with custom code via a web browser, or they can opt for traditional programming methods by connecting it to a monitor. The kit comes with several examples of code that demonstrate the robot’s capabilities, including facial recognition using the inbuilt camera, remote control, and more. The robot’s functionality can be further expanded with the use of Python commands, as detailed in the provided documentation. For those who are not yet proficient in Python, a block code editor is also available.

Other articles you may find of interest on the subject of robots :

CM4 XGO Robot dog

The CM4 XGO was recently showcased at OSSUMMIT EU 2023, a leading open-source event by the Linux Foundation, held in Bilbao, Spain. This event, themed “Innovation Happens Here”, gathered global open-source developers, vendors, technologists, users, universities, and research institutes to discuss open-source innovation and the future. ELECFREAKS, a partner of the OpenAtom OpenHarmony ecosystem, demonstrated the capabilities of its open-source XGO at the event.

The XGO Robot Dog operates on the OpenHarmony lightweight system, an open-source operating system that allows the robot to perform functions like visual line inspection, self-balancing control, and motion detection. The robotic companion, made of aluminum alloy material, can perform actions like walking up and down steps, demonstrating its advanced mobility.

In addition to the XGO, ELECFREAKS also highlighted the Open Source Big Brother project at the OSSUMMIT. This project is an open-source technology education ecosystem for youth, aiming to help young people gain access to open-source hardware and develop skills in creativity education, programming education, and artificial intelligence education. ELECFREAKS has created a series of creative works using open-source hardware products suitable for teaching and display on campus, and these have been demonstrated in various schools, sparking interest among students.

The CM4 XGO Robot Dog Kit V2 for Raspberry Pi offers an exciting and educational opportunity for tech enthusiasts to build their own robot dog. With its advanced technology, open-source software, and robust construction, this robot dog kit is a valuable addition to the realm of robotics.

Filed Under: Hardware, Top News


Latest timeswonderful Deals

Disclosure: Some of our articles include affiliate links. If you buy something through one of these links, timeswonderful may earn an affiliate commission. Learn about our Disclosure Policy.

Categories
News

How to build developer portals using Backstage

using Backstage to build developer portals

Developers are the lifeblood of the technology industry, creating the software and platforms that power our digital world. However, they often face significant challenges and frustrations in their work, from managing a sprawling list of bookmarks to navigating the “ticket purgatory” of requesting new resources. The Backstage.io project, an open platform for building developer portals, aims to address these issues and improve the developer experience.

Backstage was originally created by Spotify and open-sourced in March 2020. Since then, it has become a Sandbox project at the Cloud Native Computing Foundation, the organization that also hosts Kubernetes and Envoy. The platform serves as a centralized software catalog, bringing order to microservices and infrastructure, and enabling product teams to deliver high-quality code quickly without compromising autonomy.

What is Backstage?

A Backstage developer portal can serve multiple functions. For developers, it can be the fastest way to create a new software component. For platform teams, it can encourage best practices. For an entire engineering organization, it can serve as the central nervous system for all software, tooling, and documentation.

Backstage unifies all infrastructure tooling, services, and documentation, creating a streamlined development environment from end to end. It enables one team to manage multiple services and makes it possible for a company to manage thousands of them. Every team can see all the services they own and related resources, from deployments to pull request status. All this information can be shared with plugins inside Backstage to enable other management features, like resource monitoring and testing.

How to build developer portals using Backstage

One of the common developer frustrations that Backstage addresses is the “bookmark of death”, where developers have a long list of bookmarks with no central place to find all their websites and applications. Backstage solves this issue with its catalog, which leverages existing repositories, such as those storing Kubernetes projects, automation playbooks, or virtual machine applications. The catalog can be enhanced with plugins to bring in technologies used in the repositories, such as Jira tickets, pull requests, and more.

Another issue that Backstage addresses is “ticket purgatory”, where developers need a new repository, service, or namespace and have to file a ticket and wait for a response. Backstage uses “software templates” to automate the creation of new resources, eliminating the need for tickets.

The “documentation graveyard” is another problem Backstage tackles. This is where documentation is created and then lost or forgotten. Backstage simplifies documentation by connecting it to the catalog and using markdown files in the repository.

How to build developer portals using Backstage

Other articles you may find of interest on the subject of coding :

Backstage also includes a search function that indexes the catalog, documentation, software templates, and plugins, making it easy to find anything. This feature helps prevent developers from feeling “lost at sea” when trying to find specific resources or information.

The Backstage Software Catalog is a centralized system that keeps track of ownership and metadata for all the software in your ecosystem. The catalog is built around the concept of metadata YAML files stored together with the code, which are then harvested and visualized in Backstage. This feature enhances discoverability and accountability, ensuring no software is left orphaned in the dark corners of your tech stack.

The platform is extensible and customizable, with a plug-in architecture built on modern technologies and common frameworks. It scales with the company, enabling teams to build quickly and safely together, reducing infrastructure complexity and increasing developer happiness.

For those looking to deploy Backstage, more information can be found at backstage.io. For those looking for a fully supported, enterprise-capable, secure, and compliant version of Backstage, the Red Hat Developer Hub offers a hardened instance of the platform. More information about Red Hat’s version of Backstage can be found at developers.redhat.com/rhdh.

Backstage is a powerful tool for improving the developer experience, addressing common frustrations and creating a streamlined, centralized platform for managing software and documentation. By bringing all the necessary resources and tools under one roof, it helps developers focus on what they do best: creating innovative software solutions.

Filed Under: Guides, Top News


Latest timeswonderful Deals

Disclosure: Some of our articles include affiliate links. If you buy something through one of these links, timeswonderful may earn an affiliate commission. Learn about our Disclosure Policy.

Categories
News

Using JavaScript to build your AI SaaS business

Using JavaScript to build your AI SaaS business

In today’s tech world, JavaScript is everywhere and is mainly used to make websites more interactive. Meanwhile, Artificial Intelligence (AI) has moved beyond just being a topic in science fiction. It’s now a big deal in many different fields. You’ll be pleased to know that combining JavaScript and AI can be a great way to create a successful online subscription-based service, also known as a SaaS business.

Why JavaScript?

JavaScript, initially a client-side language, has evolved considerably. With the advent of Node.js, it’s now omnipresent, running on the client as well as the server side. This means you can use a single language throughout your stack, enhancing consistency and streamlining development.

The JavaScript ecosystem is brimming with libraries, frameworks, and tools that can expedite the development process. For instance, TensorFlow.js allows you to bring machine learning capabilities right into the browser. JavaScript developers are abundant, which often leads to competitive pricing when hiring. Moreover, the open-source nature of many JavaScript tools can significantly reduce initial costs.

AI SaaS business

AI algorithms can process vast datasets to make real-time decisions. In a SaaS context, this capability can be employed for customer segmentation, predictive analytics, and automated customer service. Machine learning models can tailor user experiences based on historical data and behavior patterns. A more personalized service often translates to higher user retention rates. AI can adapt to growing or fluctuating workloads, adjusting algorithms and resource allocation as needed. This dynamic nature is crucial for a SaaS model where scalability can make or break the business.

In addition to JavaScript, CSS and HTML are integral for front-end development. While these languages are easier to learn and primarily used for designing the user interface, their role should not be underestimated. A well-designed and user-friendly interface can significantly enhance the user experience, making the SaaS product more appealing to potential customers.

Data handling is another critical aspect of coding for SaaS applications. Efficient data handling can improve the performance of the application and enhance the user experience. JavaScript excels in this area, allowing for efficient data manipulation and exchange with other software, including payloads and exos calls.

Other articles you may find of interest on the subject of coding with AI and building SaaS businesses.

Combining both AI and JavaScript

To enhance your experience, it’s essential to select the appropriate frameworks and libraries that align with your goals. For example, if you’re aiming to integrate chatbot functionality into your SaaS platform, you might want to look into libraries like Botpress or Rasa that specialize in conversational AI. The right tools can not only make your development process smoother but also provide a more polished end result, elevating user satisfaction and engagement. So, don’t just pick the first library or framework that comes up in a Google search; take the time to evaluate your options and choose those that best align with what you’re trying to achieve.

Before diving into AI algorithms, you need a robust data pipeline. JavaScript libraries like Pandas-js can be used for data manipulation and preparation. Once your data is ready, you can train your AI models. Tools like TensorFlow.js can be used not just for model training but also for inference right within the browser. This allows for a more interactive and responsive user experience. After the model is trained, the next step is to integrate it into your SaaS platform. Make sure to conduct thorough testing to ensure the model’s accuracy and reliability. JavaScript’s rich testing frameworks like Mocha or Jest can be beneficial here.

Server-side

On the server-side, Node.js, a JavaScript runtime built on Chrome’s V8 JavaScript engine, is a popular choice for back-end development. It allows developers to write server-side scripts in JavaScript, enabling the development of dynamic web pages before they are sent to the user’s web browser. This makes Node.js particularly useful for creating complex, data-intensive, real-time applications that run across distributed devices, a common requirement for AI integrated SaaS products.

Key Considerations

  • Security: AI models can be vulnerable to various attacks. Therefore, always adhere to best practices when it comes to securing your JavaScript code as well as your AI model.
  • Performance: Machine learning models can be resource-intensive. Optimize your JavaScript code to ensure that the user experience is not compromised.
  • Compliance: Be sure to adhere to regulations like GDPR when collecting and processing data.
  • Scalability: As your user base grows, both your JavaScript code and your AI models should be designed to scale efficiently.

Getting started

  1. Define the Problem: Clearly identify what you aim to solve with AI.
  2. Select Tools and Libraries: Choose appropriate JavaScript libraries and AI frameworks.
  3. Data Preparation: Collect and prepare the data for training.
  4. Train the Model: Use the chosen framework for training.
  5. Deploy and Iterate: Once deployed, continuously update the model based on performance and feedback.

JavaScript’s versatility, widespread use, and compatibility with AI platforms make it a fantastic tool for building a web-based AI integrated SaaS product. Coupled with its role in front-end and back-end development, data handling, and integration with other platforms, it is clear that mastering JavaScript is a crucial step towards successfully building and launching an AI integrated SaaS product. Whether you’re a seasoned developer or just starting your coding journey, investing time and effort into learning JavaScript will undoubtedly pay off in the long run.

Filed Under: Guides, Top News


Latest timeswonderful Deals

Disclosure: Some of our articles include affiliate links. If you buy something through one of these links, timeswonderful may earn an affiliate commission. Learn about our Disclosure Policy.

Categories
News

How to build AI powered apps with no-code using Dify AI tool

How to build artificial intelligence AI powered apps with no-code

If you have an idea for an artificial intelligent (AI) powered application but don’t have any coding skills. You might be pleased to know that you can use a variety of different online services that allow you to integrate the power of AI into your app without the need to write a single line of code. One such service is Dify. This guide will provide a quick overview of how you can build AI powered applications with no code.

Dify offers a quick and efficient way to build a Web App, with the generated frontend code capable of being hosted on Dify itself. For developers looking to further expand on their Web App, templates can be obtained from GitHub and deployed anywhere, including Vercel or their own server. Alternatively, developers can build their own Web frontend, mobile App, and more, based on the WebAPI. This process saves the backend development work, allowing developers to focus on other aspects of their application.

Build AI apps with no-code

At its core, Dify is all about creating, configuring, and improving your application in a visual interface. This is part of a process known as LLMOps, which involves logic design, context enhancement, data preparation, and other tasks that can be challenging without the right tools. The platform allows for the continuous improvement lifecycle of application development based on large language models, which can be trained to provide correct answers based on your content, improve AI’s accuracy and narrative style, and even download a subtitle from YouTube as context.

Other articles we have written that you may find of interest on the subject of AI coding :

One of the standout features of Dify is its ability to use both open-source and closed-source models for AI app creation. This was not always the case, as users were previously restricted to using ChatGPT models. However, Dify now supports a variety of models, including Llama and Anthropic. In addition, the platform also offers support for Hugging Face embedded models, dataset services, and prompt engineering integration. These features and plugins open up a world of possibilities for AI app development.

Dify is designed with ease of use and efficiency in mind. The platform allows for the creation of AI-powered applications within minutes, which can be quickly deployed. This speed and efficiency are complemented by a range of features such as Storyteller Bots, an SQL generator, a code converter, and a text generator. These features save backend coding effort and increase productivity, making Dify an invaluable tool for developers.

Beyond these features, Dify also allows for the creation of websites supporting form mode and chat conversation modes with a single API. This further simplifies the development process, allowing developers to focus on creating engaging and interactive applications. The platform also offers a tutorial on how to create an app using Dify, including setting up the model provider and configuring plugins.

Dify can be accessed through the cloud or installed using Docker, providing flexibility for its users. The platform supports different large language models, including L chain, Hugging Face, and Replicate. Registered Dify Cloud users are even provided with free resources, including 200 free OpenAI queries, visual registration, text embeddings, and API-based services.

Build AI apps with no-code

Another unique feature of Dify is the ability to create and train apps based on personal data sets. This allows developers to customize their applications to their specific needs and preferences. Users can also configure and select the models they want to use, including GPT-4 and GPT 3.5 Turbo. The platform also supports the integration of different plugins, APIs, and languages, further expanding its versatility.

Dify is a powerful and versatile AI tool that simplifies the process of building and managing AI native apps. With its range of features and support for a variety of large language models, Dify is poised to become an essential tool in the arsenal of any developer looking to leverage the power of AI in their applications. For more advanced features and capabilities, users are recommended to check out the AI tool’s documentation.

Filed Under: Guides, Top News


Latest timeswonderful Deals

Disclosure: Some of our articles include affiliate links. If you buy something through one of these links, timeswonderful may earn an affiliate commission. Learn about our Disclosure Policy.

Categories
News

How to become an AI engineer and 4 beginner projects to build

How to become an AI engineer and 4 projects you can build now

Interested in becoming an AI engineer? This guide will provide you with more information on how you can start harnessing the power of artificial intelligence and becoming an AI engineer. Including four AI-based projects which you can build as a beginner to start your journey as an AI engineer. Understanding the technology stack is crucial for an AI engineer as it provides the foundational tools to build, deploy, and maintain AI solutions.

The stack generally includes programming languages, data manipulation libraries, machine learning frameworks, and cloud services. Mastering these technologies enables engineers to build robust, scalable, and efficient systems. Moreover, being proficient in the tech stack allows for seamless collaboration with data scientists, DevOps engineers, and other stakeholders in a project.

What is an AI engineer?

An AI engineer is a specialized role within the software engineering discipline, focused on developing and maintaining AI and machine learning systems. They typically work alongside data scientists to bring AI models from the research stage to production, ensuring that the models are scalable, maintainable, and aligned with business objectives. Their responsibilities range from data gathering and preprocessing to model deployment and monitoring.

Learning from doing

A practical approach to AI engineering often involves a problem-first methodology, where the focus is on understanding the business or scientific problem at hand before diving into data and algorithms. This requires a strong collaboration with domain experts and stakeholders. The engineering process typically follows stages of data collection, data preprocessing, model building, validation, and deployment, all while adhering to best practices for software development and data governance.

The skills of an AI engineer

Key skills include proficiency in programming languages like Python or Java, familiarity with machine learning frameworks such as TensorFlow or PyTorch, and understanding of cloud computing platforms like AWS or Azure. Other important skills include data engineering, feature engineering, and understanding DevOps practices such as continuous integration and deployment (CI/CD).

4 AI engineer beginner friendly projects

The OpenAI API allows engineers to access pre-trained models like GPT-3 for various natural language processing tasks. Python is often the language of choice for interacting with this API, due to its extensive libraries and ease of use. Integrating the OpenAI API into projects can drastically reduce the development time required for building language models from scratch.

Other articles we have written that you may find of interest on the subject of coding :

1. Building a simple AI chatbot

Creating a simple chatbot can be achieved through various methods, but one common approach is to use pre-trained language models accessed via APIs like OpenAI’s GPT-3. Basic chatbots can be built with just a few lines of Python code to send prompts to the API and receive generated text as responses, which can then be parsed and presented to the user.

2. Chaining AI prompts together for more complicated processes

Chaining prompts refers to the practice of sending a series of questions or commands to a language model API to perform multi-step tasks. For instance, you can first ask the model to draft an email and then follow up with a command to summarize the drafted content. This allows for a more interactive and dynamic use of language models in automating tasks.

3. Transcribing audio using the OpenAI Whisper API

OpenAI’s Whisper is an automatic speech recognition (ASR) API that can convert spoken language into written text. It can be particularly useful in applications like transcription services, voice assistants, and more. With the API, AI engineers can add a layer of voice interaction to their applications.

4. Using OpenAI  DallE API to create AI images

DALL-E is another API by OpenAI that generates creative and coherent images from text descriptions. This technology opens up a range of possibilities in fields like design, advertising, and content creation. By integrating the DALL-E API, an AI engineer can enable an application to generate custom images based on user input or other data.

The road to becoming in AI engineer

AI engineering is a specialized field within software development that focuses on creating and maintaining AI and machine learning systems. Mastering the technology stack is essential for success, as it includes the tools needed to build, deploy, and monitor AI solutions. A practical approach in this role often starts with understanding the problem at hand, followed by data collection, model building, and deployment.

AI engineers need a diverse skill set that includes programming, data engineering, and a familiarity with machine learning frameworks and cloud services. Several APIs from OpenAI, such as GPT-3, Whisper, and DALL-E, offer powerful capabilities for tasks ranging from natural language processing to speech recognition and image generation. These APIs can be integrated into projects to expedite development and introduce advanced functionalities like chatbots, automated task sequences, and more.

The role of an AI engineer is pivotal in bridging the gap between data science research and real-world applications. By understanding both the technical and practical aspects, AI engineers can contribute to building robust, scalable, and impactful AI systems.

Filed Under: Guides, Top News


Latest timeswonderful Deals

Disclosure: Some of our articles include affiliate links. If you buy something through one of these links, timeswonderful may earn an affiliate commission. Learn about our Disclosure Policy.

Categories
News

How to build AI SaaS businesses using ChatGPT and no-code

How to build AI SaaS platforms using ChatGPT

Do you have an idea for an amazing software or online service but don’t have the technical skills or team to help you build it. Harnessing the power of artificial intelligence both as an adviser and integrated via an API as a backend is a great start. Building a software platform with artificial intelligence (AI) is an exciting venture that’s full of possibilities! Imagine creating a service that could change the way people interact with technology or solve problems they face every day. On the tech side, you have a chance to build something scalable and super-responsive—something that can grow as your brilliant idea catches fire.

Building an AI Software-as-a-Service (SaaS) platform with ChatGPT integration is a multifaceted endeavor that requires careful planning and consideration across several domains. From technical challenges like scalability and latency to ethical concerns such as transparency and data privacy, every aspect plays a critical role in the project’s success.

Build a SaaS platform with ChatGPT

AI plays a pivotal role in SaaS development, particularly in the creation of intelligent systems capable of learning from and adapting to user interactions. OpenAI and its language model, ChatGPT, have emerged as key players in this space. OpenAI’s API serves as the actual AI used in the SaaS, while ChatGPT functions as a teacher or expert, providing insights and understanding of complex documentation and programming concepts. This unique partnership allows developers to leverage the strengths of both tools to create more intelligent and user-friendly SaaS platforms.

The development of an AI-integrated SaaS platform is not limited to the integration of AI alone. The choice of back-end and front-end software is equally critical. The back-end is where user data is stored and cloud functions are executed, while the front-end is what the user visually interacts with. For the back-end, Firebase and AWS are commonly recommended, especially for those with little to no coding experience. Firebase, in particular, is lauded for its user-friendly interface and comprehensive set of features. For the front-end, React is often the go-to choice due to its flexibility and efficiency.

The objective is to create a service that is not just robust and reliable on the technical front, but also ethical and compliant with regulations. This involves a harmonious blend of software architecture, data handling protocols, ethical norms, legal stipulations, and a deep understanding of your target market.

Building automated SaaS businesses

In addition to choosing the right software, the use of tools like Zapier can expedite processes and make the SaaS platform more effective for scaling and handling data. Zapier, a popular automation tool, can connect your apps and automate workflows, thus reducing manual tasks and enhancing productivity.

With the right strategy, your AI SaaS platform can not only provide valuable services but also set a high standard for responsible AI usage in the industry. This guide will provide you with more insight into areas you should consider as well as a few informative videos on how you can get started utilising ChatGPT as both an assistant and a backend to build your SaaS business.

Other articles we have written that you may find of interest on the subject of workflow automation :

Low and No-code framework’s

No-Code Platforms:

  • OutSystems: Aimed at enterprise-level applications, it allows for fast development with a range of in-built templates and features.
  • Webflow: Primarily focused on website and landing page creation, it does offer some functionality for building web apps as well.
  • Adalo: Provides drag-and-drop components to build apps and includes features for databases, user authentication, and more.
  • Bubble: Known for its versatile drag-and-drop interface that enables users to build both simple websites and complex web applications. With its capabilities for database management, user authentication, and API integrations
  • Appgyver: Known for its versatility in creating both mobile and web apps, with capabilities for data integration and UI customization.
  • Zapier: Although not a full development platform, it can automate workflows between different web apps, adding a layer of functionality to your SaaS.
  • Dorik: Aimed at building websites and single-page apps with an easy-to-use interface, good for small projects or MVPs.
  • Thunkable: Designed for people without any coding experience, it’s great for mobile app development and includes drag-and-drop components.

Low-Code Platforms:

  • Mendix: Offers both no-code and low-code environments and aims to accelerate enterprise-level application development.
  • Salesforce Lightning: Known for its CRM services, it also offers a low-code platform for app development, making it easier for businesses to build customized solutions.
  • Microsoft Power Apps: Part of Microsoft’s Power Platform offering a range of tools for app development, data manipulation, and automation.
  • Quick Base: Focused on business applications with a strong emphasis on database management and workflow automation.
  • Betty Blocks: Aimed at enterprise solutions, it provides a range of pre-built blocks to speed up the development process.

Choosing the right AI

Choosing the right model in OpenAI is also a key decision. Both the 3.5 and 4 models have their strengths and can be leveraged depending on the specific needs of the SaaS platform being developed. Understanding these models and their capabilities can greatly enhance the effectiveness of the AI integration in the SaaS platform. For example here are the OpenAI models currently available :

  • GPT-4 A set of models that improve on GPT-3.5 and can understand as well as generate natural language or code
  • GPT-3.5 A set of models that improve on GPT-3 and can understand as well as generate natural language or code
  • GPT base A set of models without instruction following that can understand as well as generate natural language or code
  • DALL·E A model that can generate and edit images given a natural language prompt
  • Whisper A model that can convert audio into text
  • Embeddings A set of models that can convert text into a numerical form
  • Moderation A fine-tuned model that can detect whether text may be sensitive or unsafe

Technical Considerations:

  • Scalability: Ensure your architecture is scalable to handle increased load as your user base grows. Microservices could be a good approach for this.
  • Integration: Determine how ChatGPT will be integrated into your SaaS platform. Options could range from a simple API call to a more complex, custom-tailored model.
  • Latency: The response time from ChatGPT can be crucial, especially if the application is time-sensitive. Optimize network latency and consider edge computing if necessary.
  • Data Pipeline: Consider how data will be ingested, processed, and sent to ChatGPT, as well as how the responses will be handled and presented to the user.
  • Monitoring & Maintenance: Implement logging, tracking, and alert systems to keep an eye on the system’s health and the model’s performance metrics.

Ethical Considerations:

  • Transparency: Ensure that users know they’re interacting with a machine and not a human. This is crucial for setting user expectations right.
  • Data Privacy: Be GDPR, CCPA, or other locally compliant. Explain how the data will be used, stored, and protected.
  • Content Moderation: Implement safeguards against generating harmful or misleading content. Consider an additional layer of filtering or moderation.

Legal Considerations:

  • Licensing: Ensure you understand and adhere to the terms of service for using ChatGPT or any other third-party services.
  • Liability: Clearly define the scope of reliability and liability around the AI service you’re providing, ideally in a Terms of Service (ToS) agreement.
  • Intellectual Property: If your service generates content, specify who owns this content – the user, your platform, or a combination of both.

Business Considerations:

  • Monetization: Consider how you will monetize the service. This could be through a subscription model, freemium model, or any other revenue streams.
  • Market Research: Understand your target audience, what they need, and how your AI service will provide value to them.
  • Customer Support: Plan for a support system to assist users who run into issues or have questions about the service.

Building an AI SaaS platform using ChatGPT and the OpenAI API for the backend involves a careful selection of software for both the back-end and front-end. But always remember to include passion in your projects as this will carry you through the hard times when perhaps everything isn’t going quite to plan.

Filed Under: Guides, Top News


Latest timeswonderful Deals

Disclosure: Some of our articles include affiliate links. If you buy something through one of these links, timeswonderful may earn an affiliate commission. Learn about our Disclosure Policy.