Categories
News

Easily add your face to AI generated photos and art

Easily add your face to AI generated artwork

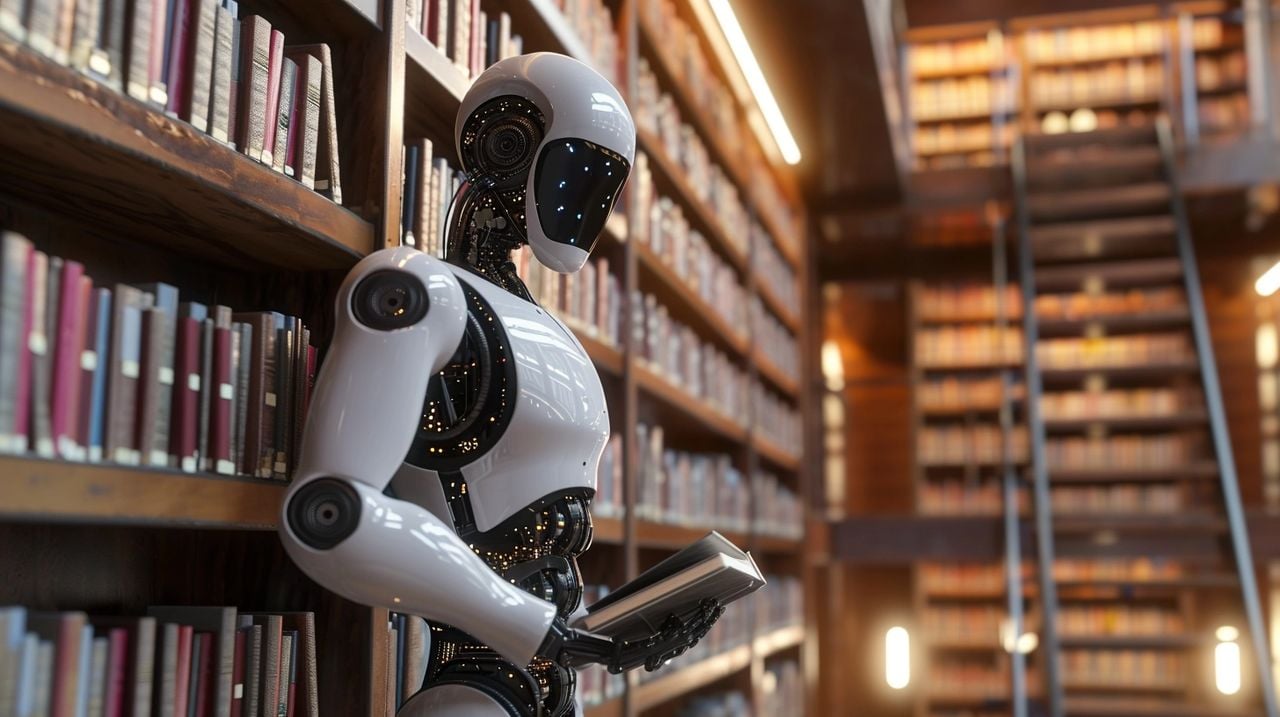
Imagine being able to travel through time and space with just a photograph. Photomaker, an innovative AI-generated art tool, makes this possible. With a simple upload, you can see yourself or others in a variety of scenes, from historical moments to futuristic landscapes. This article will guide you through using Photomaker in conjunction with Pinokio, a platform that allows you to run AI tools on your own Windows computer. We’ll discuss what you need to get started, how to install the software, and tips for getting the most realistic results from the AI.

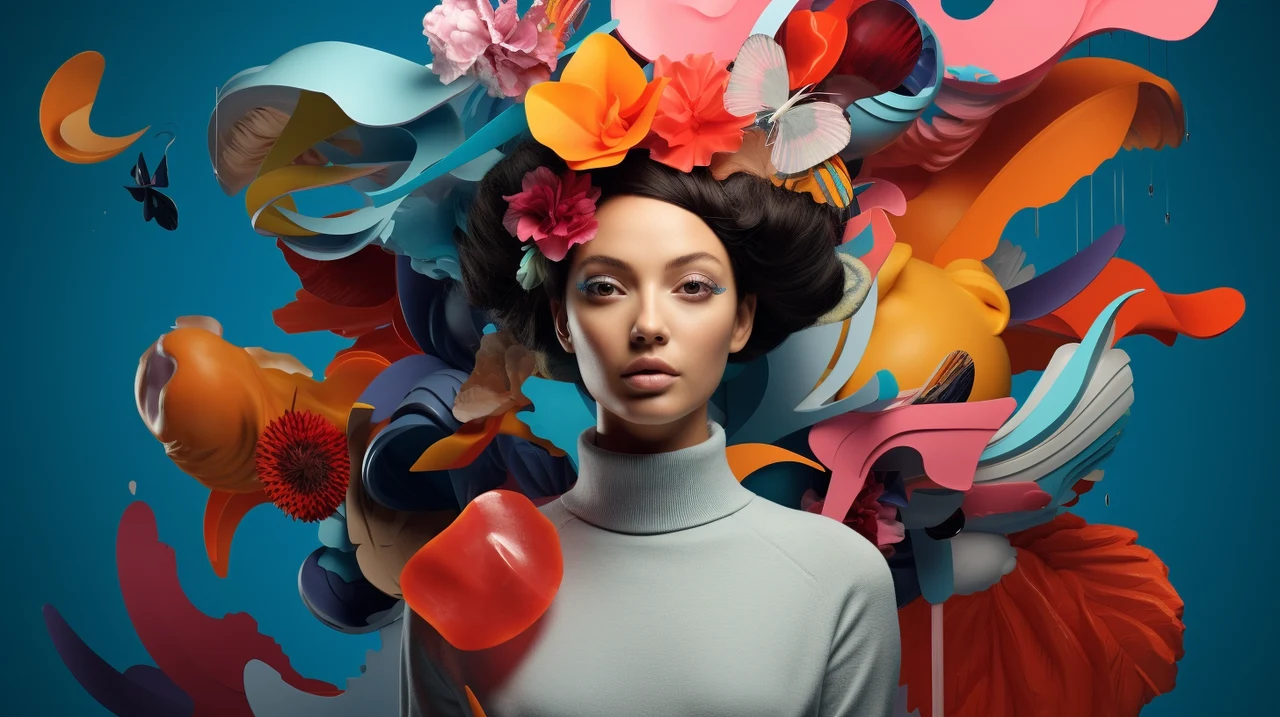
Photomaker is at the forefront of AI-generated art technology. Its user-friendly design lets you create personalized scenes with ease. You can be part of a famous painting, experience a moment in history, or venture into a science fiction world. The advanced algorithms of Photomaker ensure that your image is seamlessly integrated into any setting, with appropriate style and lighting.

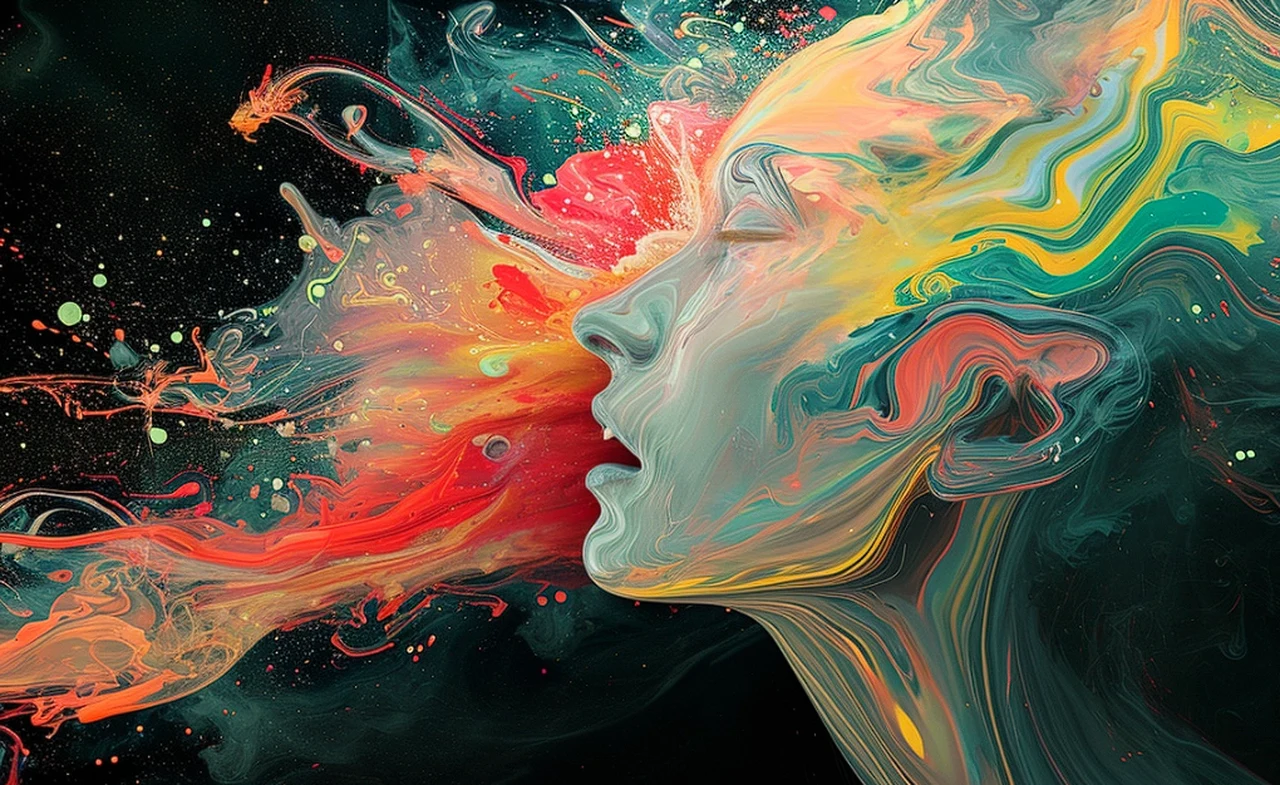
How to face swap on AI artwork

Before you can start using Photomaker, you’ll need to set up Pinokio on your computer. This platform is designed to make it easy to use AI tools like Photomaker on your own device, offering faster processing times and more privacy. Pinokio acts as a bridge between your computer’s hardware and the AI software, ensuring everything runs smoothly.

Here are some other articles you may find of interest on the subject of using your own face and face swapping on AI generated artwork and photographs and character consistency using Midjourney, DallE 3 and more:

Getting Photomaker up and running is straightforward. You’ll want to make sure your Windows operating system is up to date first. Next, download and install Pinokio from its official website, following the instructions in the video embedded below. Once Pinokio is installed, you can use it to install Photomaker. The installation process is guided by on-screen prompts, so you’ll be ready to create AI art in no time.

To ensure Photomaker operates without a hitch, your computer should meet certain system requirements. A dedicated graphics processing unit (GPU), like the RTX 480 GPU, is recommended. This type of GPU has its own memory, which is important for handling the tasks associated with AI-generated art.

Before you begin, it’s a good idea to check that your GPU has enough memory for the job. You can do this in Windows by going to the Display settings and then to Advanced display settings. There, you’ll find information about your GPU and the available memory.

For the best results, you may need to adjust some settings, such as the quality of the image and the intensity of the style. These tweaks help the AI better understand your photo and create more accurate scenes. You’ll find the perfect settings for your projects through a bit of trial and error.

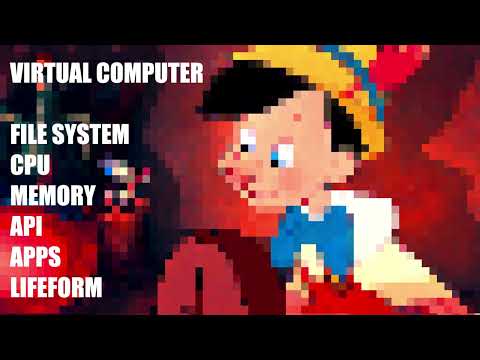
How to install Pinokio

With Photomaker, you can explore a vast array of creative scenarios. Whether you want to see yourself in a serene natural landscape, an intense action scene, or a calm urban environment, the AI can create a unique image that fits your chosen setting.

There’s also exciting news for those looking to enhance their AI art creation capabilities. An upcoming giveaway will offer the chance to win an RTX 480 GPU. This powerful GPU will provide the speed and memory necessary to handle even the most complex scenarios.

Photomaker and Pinocchio open the door to the world of AI-generated art. By following the steps outlined in this guide and ensuring your system is ready, you can easily transport yourself or others into any imaginable situation with impressive realism. Stay tuned for the giveaway, and let your creativity soar with the endless scenarios you can create.

Filed Under: Guides, Top News


Latest timeswonderful Deals

Disclosure: Some of our articles include affiliate links. If you buy something through one of these links, timeswonderful may earn an affiliate commission. Learn about our Disclosure Policy.

Categories
News

How to add knowledge to your custom GPT from any website

How to add knowledge to your custom GPT from any website

In the rapidly evolving world of artificial intelligence, staying ahead of the curve is crucial for those who rely on AI to power their operations. One of the most effective ways to do this is by enhancing the capabilities of your AI models, such as Generative Pre-trained Transformers (GPTs). These advanced AI systems are designed to generate text that mimics human writing, but they often require a boost to reach their full potential. This is where the integration of custom knowledge becomes a key strategy, and the Apify Website Content Crawler emerges as a powerful ally in this endeavor.

The Apify Website Content Crawler is a sophisticated tool that can significantly improve the performance of your GPTs. It does so by providing them with access to a wealth of targeted information, transforming their output from generic responses to ones that are finely tuned to your specific needs. But how does this work, and what benefits can you expect from employing such a tool?

At the heart of the challenge with GPTs is their inherent limitation when it comes to sourcing information from the web. While these AI models are complex and intelligent, they sometimes fall short in retrieving accurate data from the internet. This is where custom knowledge bases come into play. By supplying your GPTs with handpicked data, you can bypass the pitfalls of web browsing and furnish your AI with a reliable source of information.

Adding custom knowledge to your ChatGPT GPT

The Apify Website Content Crawler excels at meticulously collecting data from the web. It’s particularly adept at handling intricate websites and extracting the crucial content that you want your GPTs to learn from. This is especially beneficial when dealing with technical documentation, which often contains the kind of detailed information that you want your AI to understand and convey.

Once the data is collected, the next step is to integrate it into your GPTs. This involves creating a knowledge base that the GPTs can draw from during their interactions. To ensure the data is useful, it must be clean and well-structured. This means that the HTML must be processed carefully, and any irrelevant data must be removed. The Apify crawler is highly skilled at these tasks, ensuring that the information you feed into your GPTs is of the highest quality.

Here are some other articles you may find of interest on the subject of fine tuning AI models to customize their knowledge.

There are numerous advantages to using the Apify Website Content Crawler. It streamlines the process of data collection and integration, and it also enhances the reliability of your GPTs’ responses. By building a custom knowledge base, your AI becomes a more precise tool, tailored to meet your specific needs.

To get started with the Website Content Crawler, you need to determine the data you want to extract and set up the crawler to capture it. Once the data is collected, it’s processed to remove any unnecessary HTML and extraneous information, resulting in clean, usable data. This polished data is then incorporated into your GPTs, expanding their knowledge base and improving their overall performance.

Enhancing your GPTs with specialized knowledge through the use of Apify’s Website Content Crawler can significantly upgrade their functionality. By creating a custom knowledge base, you ensure that your GPTs provide reliable, accurate responses that are tailored to your unique requirements. The process is straightforward, and the results can be substantial, making it an essential strategy for those looking to leverage the full power of AI in their daily operations. For more information jump over to the official Apify website.

Filed Under: Guides, Top News


Latest timeswonderful Deals

Disclosure: Some of our articles include affiliate links. If you buy something through one of these links, timeswonderful may earn an affiliate commission. Learn about our Disclosure Policy.

Categories
News

How to add your face in AI images

How to use your face in AI images for photorealism, illustrations and more

Imagine having the power to create an endless series of high-quality images that feature your face or any subject you choose. With the latest advancements in artificial intelligence, this is not just a possibility but a reality that’s within your reach. The Stable Diffusion XL (SDXL) model, when combined with Local LORA fine-tuning, offers a sophisticated way to generate personalized AI images. This guide will walk you through the process, from setting up your system to refining the final product, providing you with the knowledge to produce custom visuals with remarkable accuracy.

Before you dive into the world of AI-generated imagery, it’s crucial to ensure that your system is up to the task. A powerful GPU is a non-negotiable requirement due to the heavy computational demands of the process. If you have a gaming rig or something you use for video editing you should be okay to get started. You’ll also need to install a specific software stack that includes Koyha_SS, Python, Git, and Visual Studio. These tools lay the groundwork for you to effectively manipulate the SDXL model with Local LORA.

The quality of the images you generate is heavily dependent on the source material you feed into the model. To achieve the best results, you should gather a diverse collection of high-resolution images. This variety is key to preventing the model from becoming overly specialized and ensures that it can produce a wide range of visuals. Aim for a balanced dataset that reflects the diversity of the images you want to create.

Adding your face to AI images

Once you have your dataset ready, you can begin the training phase. This is where you’ll guide the model’s learning by using specific prompts and regularization images to avoid overfitting. Fine-tuning the learning process is a delicate balance that involves adjusting various parameters, such as batch size, epochs, learning rates, and network depth. To give the model a deeper understanding of context, which is crucial for generating more nuanced images, you can incorporate BLIP captioning. Watch the fantastic tutorial kindly created by All Your Tech AI to learn  how easy it is to add your face to AI images, photos and illustrations.

Here are some other articles you may find of interest on the subject of AI art generators :

As you progress through the training, your focus will shift to refining precision settings and ensuring that your GPU performance is optimized for seamless image generation. When your model is fully trained, you’ll be able to start creating personalized images. It’s important to assess the quality of your output and experiment with different LORA files to achieve the best results.

The applications for this technology are vast, ranging from personal projects to professional uses and artistic exploration. If you find yourself needing more guidance or resources, joining a community like Patreon can provide you with the support you need as you explore the exciting possibilities of AI image generation.

This guide is designed to empower you to take advantage of the SDXL model with Local LORA, enabling you to create personalized, high-quality AI images. Whether you’re a developer, artist, or AI enthusiast, the insights provided here will help you set up your system, curate the right images, and adjust training parameters to craft the bespoke visuals you envision.

Filed Under: Guides, Top News


Latest timeswonderful Deals

Disclosure: Some of our articles include affiliate links. If you buy something through one of these links, timeswonderful may earn an affiliate commission. Learn about our Disclosure Policy.

Categories
News

How to add DallE 3 with the Bubble no-code platform

How to integrate DallE 3 with the Bubble no-code platform for full automation

By combining the capabilities of the DALLE-3 API with the user-friendly Bubble no-code platform, developers and designers can now transform simple user inputs into stunning, unique images. This tutorial will guide you through the process of integrating these two powerful tools, providing a straightforward method to enhance your Bubble application with the magic of AI.

To begin, you’ll need to incorporate the API Connector plugin into your Bubble application. This plugin is crucial as it establishes a bridge for communication between your app and the DALLE-3 API. Once you’ve installed the plugin, the next step is to obtain the necessary authorization and API keys from OpenAI. These keys are the gateway for your application to interact with the API services, ensuring that your requests are recognized and processed.

After establishing the connection, the focus shifts to creating an API call within Bubble. This call is the trigger that prompts the DALLE-3 API to generate images based on the user’s input. It’s important to pay close attention to the OpenAI API documentation to set up the image endpoint correctly. The API call will utilize a POST method, which involves configuring headers and body parameters. These parameters are the core of the data exchange between your app and the API. You’ll start by initializing the call with default parameters, but you’ll soon modify them to accept dynamic inputs from users, allowing for a personalized image generation experience.

Add DallE 3 image generation to Bubble

Here are some other articles you may find of interest on the subject of OpenAI’s DallE 3 AI image generator :

Once you’ve configured the API call, the next step is to weave it into your Bubble workflows. Workflows are the backbone of your application’s response to user actions. You’ll design a web page where users can enter their prompts, and then you’ll showcase the AI-generated images. This integration effectively turns user concepts into visual reality, bridging the gap between imagination and digital creation.

For those eager to delve deeper into the world of no-code AI applications, there are additional learning opportunities available. No Code MBA, for instance, offers a detailed course on building an image generation app using various AI models. This educational resource can significantly enhance your understanding of how to create interactive and advanced applications without the need for extensive coding knowledge.

Integrating the DALLE-3 API with Bubble’s no-code platform opens up a realm of possibilities for digital creativity. By following the steps outlined in this guide, you’re well on your way to developing an application that harnesses the power of AI to produce captivating visuals from textual prompts. This integration is not only beneficial for developers and designers but also for entrepreneurs who are keen to explore the latest trends in digital innovation.

Filed Under: Guides, Top News


Latest timeswonderful Deals

Disclosure: Some of our articles include affiliate links. If you buy something through one of these links, timeswonderful may earn an affiliate commission. Learn about our Disclosure Policy.

Categories
News

How to add ChatGPT custom GPTs to your website in minutes

How to add ChatGPT custom GPTs to your website in minutes

If you are interested in adding a powerful AI ChatGPT assistant to your website to help answer visitors and customers questions about your products and services. You will be pleased to know that the process has been made very easy and only takes a few steps with very little coding.

By harnessing the power of AI, companies can offer immediate assistance to customers, addressing their needs efficiently and effectively. This can be easily accomplished using OpenAI’s developer portal to create a GPT (Generative Pre-trained Transformer) with custom instructions and knowledge from a PDF manual. The chatbot is then added your website using Botpress, a no-code chatbot platform.

The process begins with selecting the most suitable AI model for your needs. OpenAI offers a range of models, including the advanced GPT-4 Turbo and the slightly older GPT-3.5 Turbo. These models are capable of generating responses that closely mimic human conversation, which is essential for a customer service chatbot. The choice of model should be based on the desired level of interaction and the financial resources available for the project.

Once the AI model is chosen, the next step is to customize the chatbot to meet the specific demands of user needs users. This involves programming the chatbot to understand and use the information from the heat pump’s PDF manual. By doing so, the chatbot can provide accurate and specialized advice to customers. Moreover, the chatbot can be designed to suggest additional services or products, such as maintenance appointments or accessory sales, enhancing the potential for increased revenue.

How to add ChatGPT to your website

Watch the tutorial below to learn how you can easily add ChatGPT and custom GPTs to any website in just a few minutes.

Benefits of adding custom GPTs to your web site

There are many benefits to adding ChatGPT or custom GPTs trained on your products and services to your website, here are just a few to consider :

  • Enhanced Customer Support: These models can provide immediate, 24/7 customer support, answering queries about products and services. This improves the customer experience, reduces wait times, and can handle a large volume of queries simultaneously.
  • Personalized Recommendations: By understanding your products and services deeply, the model can make personalized recommendations to customers based on their interests and previous interactions. This can increase customer satisfaction and potentially drive sales.
  • Cost Efficiency: Automating customer service with a GPT model can reduce the manpower and resources needed for customer support. This can be particularly beneficial for handling routine queries, allowing human customer service representatives to focus on more complex issues.
  • Data Collection and Analysis: Interaction with customers through the model provides valuable data about customer preferences and behaviors. This data can be analyzed to improve products, services, and customer engagement strategies.
  • Brand Interaction and Engagement: The model can engage users in a conversational manner, making the user experience more interactive and engaging. This can strengthen brand loyalty and improve the overall user experience on the website.
  • Consistency in Responses: The model can ensure that the information provided to customers is consistent and up-to-date, reducing the risk of miscommunication and errors that might occur with human agents.
  • Scalability: The model can easily scale to handle increasing customer interactions without the need for additional human resources, making it a flexible solution for growing businesses.
  • Language and Localization: Custom GPT models can be trained to interact in multiple languages and dialects, making your website more accessible to a diverse audience.
  • Feedback Loop for Improvement: Customer interactions with the model can be used as feedback to continuously improve the AI’s performance and the information it provides.

The deployment of the chatbot is streamlined through platforms that support easy integration, like Botpress. These platforms enable businesses to add the chatbot to their websites without the need for extensive coding knowledge. As a result, customers can begin interacting with the chatbot as soon as they require assistance, leading to a more seamless support experience.

Monitoring and refining your custom GPT

After the chatbot is live, it is crucial to monitor and refine its performance. This involves analyzing the interactions between the chatbot and customers to identify any areas where the chatbot may not be providing the best possible service. Adjustments can then be made to improve the chatbot’s responses and ensure that it is meeting the needs of users.

Looking ahead, the potential for further personalization is significant. By tailoring the chatbot to recognize and provide individualized support to authenticated users, businesses can offer an even more personalized experience. This could involve remembering past interactions or suggesting products based on the user’s specific heat pump model.

The implementation of a custom AI chatbot for customer service in the heat pump industry represents a significant enhancement to the support offered. By following the steps outlined, businesses can provide expert advice, boost sales, and elevate the overall customer experience. As AI technology continues to evolve, the opportunities for improving customer service in this way will only grow, making it an exciting time for businesses looking to innovate in the realm of customer support.

Here are some other articles you may find of interest on the subject of creating custom OpenAI GPT AI models that can use for a wide variety of different applications.

Filed Under: Guides, Top News


Latest timeswonderful Deals

Disclosure: Some of our articles include affiliate links. If you buy something through one of these links, timeswonderful may earn an affiliate commission. Learn about our Disclosure Policy.

Categories
News

How to add custom ChatGPTs to Instagram DM for full automation

How to add custom ChatGPTs to Instagram Direct Messages for full automation

Imagine your Instagram DMs are very active, your customers are getting quick, personal replies, and finding new customers is very easy. This isn’t just a dream. It’s something you can really do by using AI chatbots and adding custom GPTs to your Instagram DMs. Social media is great for talking to customers, and AI chatbots are becoming very important for quick and good communication. OpenAI has made building a custom GPT very easy with their integration with ChatGPT. Now, anyone can create a GPT that suits their needs in just a few minutes by following the instructions provided by ChatGPT.

Putting AI chatbots in Instagram DMs changes the way businesses talk to their customers. These custom GPT chatbots can communicate with people on Instagram 24-hours a day seven days a week, giving fast and helpful answers. This is important on Instagram, where responding quickly matters a lot and can easily help increase your followers, customers and sales.

To begin, create a chatbot that can engage in human-like conversations. You need special API keys to connect the chatbot to Instagram. These keys let the chatbot talk to Instagram’s system. Then, you make the chatbot understand your business and the common questions your customers have. It’s essential to provide the right answers.

Adding custom GPTs into Instagram

Other articles we have written that you may find of interest on the subject of OpenAI custom GPTs :

Benefits of adding custom GPTs to your Instagram account

  • 24/7 Availability: Custom GPT chatbots can interact with users on Instagram around the clock, providing immediate responses to inquiries and messages.
  • Quick and Personalized Responses: These chatbots offer quick replies that are personalized based on user data and past interactions, enhancing user experience.
  • Improved Customer Engagement: By remembering past conversations, chatbots can provide updated information and relevant suggestions, keeping customers engaged.
  • Efficient Customer Service: Chatbots can handle a wide range of customer inquiries, from simple questions to complex requests, streamlining customer service.
  • Increased Lead Generation: By providing tailored responses, chatbots can effectively address potential customers’ specific interests, increasing the chances of conversion.
  • Enhanced User Experience: Regular updates and refinements to the chatbot’s settings ensure a smooth and efficient user experience.
  • Building Trust and Credibility: Accurate and helpful responses from a well-informed chatbot build customer trust and reinforce the business’s reputation for quality service.
  • Automated Interactions with Personal Touch: The system set up for chatbots allows for automated yet personalized interactions with users, balancing efficiency with user satisfaction.
  • Scalability: AI chatbots can handle a large volume of messages simultaneously, making them scalable solutions for growing businesses.
  • Cost-Effective: Reduces the need for extensive customer service teams, saving on labor costs.
  • Data Collection and Insights: Chatbots can gather valuable customer data and insights, which can be used for targeted marketing and improving products/services.
  • Multilingual Support: Custom chatbots can be configured to support multiple languages, reaching a broader audience.
  • Integration with Business Tools: Chatbots can be integrated with CRM systems, payment gateways, and other business tools for seamless operations.
  • Handling Routine Tasks: They can automate routine tasks like providing store hours, policies, or processing simple transactions, freeing up human resources for more complex issues.
  • Continuous Learning and Improvement: AI chatbots learn from interactions, continuously improving their responses and effectiveness over time.

Some services, like Manychat, let you set up automatic actions for your chatbot. It can do things like welcome new followers or answer tough questions. The chatbot uses advanced technology, like OpenAI’s GPT, to make sure it talks clearly and helps get new customers.

One of the major benefits of AI chatbots is their ability to personalize conversations. These chatbots are designed to analyze and learn from user data and past interactions. By doing so, they gain insights into each user’s specific interests, preferences, and previous queries.

Improving your chatbots answers

This enables the custom GPT chatbot to tailor its responses to each individual, creating a more engaging and relevant dialogue. If a user asked about a product before, the chatbot can remember and give updated information or suggest related products later. This level of personalization not only enhances the user experience but also plays a crucial role in attracting new customers. If potential customers get responses that match their interests and questions, they’re more likely to engage and convert.

To improve a chatbot’s performance, focus on enhancing its conversation handling, message comprehension, and response accuracy. This can be done by adjusting the chatbot’s settings to meet the business’s needs. For example, program the chatbot to recognize and respond appropriately to various customer inquiries. This includes simple questions about store hours and more complex requests such as product recommendations or troubleshooting. Regularly updating and refining these settings is crucial to maintain a smooth and efficient user experience.

Custom GPT knowledge base

The core of a custom GPT chatbot’s effectiveness lies in its knowledge base, particularly concerning products or services. Ensuring that this knowledge base is rich with detailed and up-to-date information is essential. It covers everything, including product specs, prices, FAQs, and troubleshooting guides.

A chatbot that is well-informed can handle a wide range of inquiries accurately. This is important for maintaining the credibility and reliability of the customer service. When customers receive helpful and accurate responses, it builds trust and satisfaction. This helps to reinforce the reputation of the business by providing high-quality service.

An important step is to get an API key from Instagram’s developer platform. We need this key to connect the chatbot safely to Instagram and manage DMs. The last step is to use your custom GPT chatbot for real. This is a big step and involves testing it to make sure it works well in different situations. Once it’s live, it becomes a key part of your Instagram DM strategy, ready to chat with users and build relationships anytime.

Using AI chatbots for Instagram DMs is a smart move. It can make your customer support and finding new customers much better. By following these steps, you can set up a system that not only talks to customers automatically but also that feels personal. In a world where quick communication is vital, AI chatbots for Instagram DMs help businesses thrive.

Filed Under: Guides, Top News


Latest timeswonderful Deals

Disclosure: Some of our articles include affiliate links. If you buy something through one of these links, timeswonderful may earn an affiliate commission. Learn about our Disclosure Policy.

Categories
News

How to add custom ringtones to your iPhone

custom ringtones iPhone

The iconic ringtone of an iPhone has become instantly recognizable, a subtle yet distinct signature sound that sets these devices apart. While the default ringtones are undoubtedly pleasing, nothing quite matches the thrill of hearing your favorite song or a personalized sound as your iPhone rings. Fortunately, adding custom ringtones to your iphone is a relatively straightforward process, allowing you to express your individuality and preferences every time your phone chimes.

Step 1: Gathering the Necessary Tools

Before embarking on your custom ringtone journey, ensure you have the following prerequisites:

  • An iPhone: Any iPhone model running iOS 13 or later will suffice.
  • A computer: You’ll need a Mac or Windows PC to transfer the ringtone files to your iPhone.
  • iTunes or Apple Music: These applications serve as the interface for managing ringtones on your computer.
  • Ringtone files: The audio files you wish to use as ringtones. These can be in MP3, AAC, or M4R format.

Step 2: Converting Audio Files to M4R Format

If your ringtone files are not already in M4R format, you’ll need to convert them using a media conversion tool. Several free online converters are available, such as Zamzar or Media.io. Simply upload the desired audio file, select M4R as the output format, and download the converted file.

Step 3: Transferring Ringtone Files to iPhone

  • Connect your iPhone to your computer: Use a Lightning cable to establish a connection between your iPhone and your computer.
  • Launch iTunes or Apple Music: Open either of these applications on your computer.
  • Select your iPhone: In iTunes or Apple Music, identify your iPhone listed as a connected device.
  • Access the Tones section: In iTunes, click the “Tones” tab. In Apple Music, click the “Devices” icon, then select your iPhone. Under “Settings for [iPhone Name],” click “Tones.”
  • Drag and drop ringtone files: Drag and drop the converted M4R ringtone files from your computer to the “Tones” section in iTunes or Apple Music.
  • Sync your iPhone: In iTunes, click the “Sync” button to transfer the ringtone files to your iPhone. If using Apple Music, the sync process should occur automatically.

Step 4: Setting Custom Ringtones

  • Open Settings on your iPhone: Tap the “Settings” app on your iPhone’s home screen.
  • Navigate to Sounds & Haptics: Scroll down and tap “Sounds & Haptics.”
  • Select Ringtone: Under “Ringtone Sounds,” tap “Ringtone.”
  • Choose your custom ringtone: Locate and tap the custom ringtone you added earlier.

Enjoy your personalized ringtone: Your iPhone will now ring with your chosen custom ringtone.

Additional Tips and Considerations

  • Ringtone length limitations: Custom ringtones are limited to 40 seconds in length. You may need to trim longer audio files before converting them to M4R format.
  • Editing ringtone names: You can edit the names of your custom ringtones in iTunes or Apple Music. Double-click the ringtone file, enter the desired name, and press Enter or Return.
  • Using custom ringtones for specific contacts: You can assign different custom ringtones to individual contacts. In the Contacts app, select the desired contact, tap “Edit,” then tap “Ringtone” and choose your custom ringtone.

Embrace the freedom of personalization and transform your iPhone’s ringtone into a reflection of your unique style. With these simple steps, you can effortlessly add custom ringtones, making every incoming call a delightful symphony of your choice.

Image Credit: Amanz

Filed Under: Apple, Apple iPhone, Guides


Latest timeswonderful Deals

Disclosure: Some of our articles include affiliate links. If you buy something through one of these links, timeswonderful may earn an affiliate commission. Learn about our Disclosure Policy.

Categories
News

How to add an AI Assistant to your website using Voiceflow

How to add an AI Assistant to your website using Voiceflow

If you are looking for ways to integrate the new OpenAI GPT custom AI models into your existing website you might be interested to know that there are a number of ways you can do this. One is using the Voiceflow AI agent creation platform, which has been specifically designed to help conversational AI teams design, test, and manage AI agents for any use case or channel – at scale.

With huge anticipation about the launch of the new OpenAI GPT Store, the new GPT Builder and the OpenAI Assistant API. A powerful tool for creating and managing AI assistants enabling developers to build projects that can utilize a range of AI assistants, each with their own unique skills and specializations. Now is never been a better time to start integrating AI into your existing websites to increase sales, provide customer support and more.

The Assistant API provides an interface for software interaction, giving developers the means to create, execute, and retrieve threads and messages in a streamlined and efficient manner. When combined with Voiceflow, which has been specifically designed for developing voice assistants you can easily integrate AI assistance into your website. Or create more dynamic and interactive AI assistants. Check out the video below for a a detailed guide on how to combine these technologies. Learning the process of building a project using the OpenAI Assistants API, from creating a thread to retrieving a message.

How to add an AI Assistant to your website

Other articles we have written that you may find of interest on the subject of OpenAI GPTs :

Why add and AI assistant to your website?

Integrating an AI model into an existing website can be beneficial for several reasons here are just a few :

  • Improved User Experience: AI enhances the user experience in various ways. For instance, machine learning algorithms can analyze past user interactions to tailor future content, product suggestions, and services to individual users. This personalization leads to a more relevant and engaging user experience. Users are more likely to find what they’re looking for quickly and discover new products or content that aligns with their interests.
  • Efficient Customer Service: AI-powered chatbots and virtual assistants can handle a wide range of customer service tasks, from answering frequently asked questions to guiding users through transactions or troubleshooting. These tools are available 24/7, providing instant support that improves customer satisfaction. They can handle multiple interactions simultaneously, ensuring efficient service even during peak times.
  • Enhanced Analytics and Insights: AI tools can collect and analyze data from various sources, including user behavior on the website, social media interactions, and market trends. This data can reveal insights into customer preferences, behavior patterns, and potential areas for improvement. Businesses can use these insights to optimize their website design, tailor their marketing strategies, and create more effective content.
  • Increased Sales and Conversion Rates: Personalization and improved user experience directly impact sales and conversion rates. AI-driven product recommendations, personalized email marketing, and targeted content can significantly increase the likelihood of conversions. By presenting users with options that are more aligned with their interests and needs, AI can effectively guide them through the sales funnel.
  • Cost Efficiency: Automating routine tasks with AI reduces the need for human intervention in repetitive and time-consuming tasks. This automation can lead to significant cost savings, as AI can handle large volumes of interactions without requiring additional staff. Moreover, AI systems can often operate more efficiently and make fewer errors than humans in these tasks.
  • Search Engine Optimization (SEO): AI can analyze search trends and optimize website content for better search engine rankings. This includes suggesting keywords, optimizing meta tags, and improving content relevance. Better SEO leads to higher visibility on search engines, attracting more organic traffic to the website.
  • Content Creation and Management: AI can assist in content creation by suggesting topics, generating drafts, and optimizing content for specific audiences. It can also help manage content by organizing and scheduling posts, and analyzing the performance of different content types. This ensures that the website remains up-to-date with relevant and engaging content.
  • Predictive Analysis: By analyzing past data and identifying patterns, AI can predict future trends and customer behaviors. This allows businesses to anticipate market changes, adjust their strategies proactively, and stay ahead of competitors. Predictive analysis can be used in inventory management, content creation, marketing strategies, and more.

Voiceflow AI model creation platform

Voiceflow is well-positioned to play a key role in this future vision. As a platform dedicated to voice assistant development, it provides the necessary tools and infrastructure to create and manage multiple AI assistants. It also offers a custom interface for designing user-specific software interactions, allowing developers to tailor the user experience to meet specific needs and preferences.

The use of third-party APIs is another important aspect of AI assistant creation and management. These external software interfaces can be used to add extra functionality and data sources to the AI assistants, enhancing their capabilities and usefulness. This can result in AI assistants that are more versatile and capable, able to handle a wider range of tasks and queries.

A knowledge base serves as a comprehensive information source for the AI assistants. This can include a wide range of data, from general knowledge and facts to specific information relevant to the assistant’s area of expertise. The AI model training and execution system can use this knowledge base to train the AI models, improving their performance and accuracy.

AI Assistants helping to build customer relationships

The interaction between the AI assistants and the users can take place on various digital platforms, such as websites and mobile apps. These platforms provide the interface for users to interact with the AI assistants, ask questions, and receive responses. This interaction is crucial to the user experience. The Large Language Model is a specific type of AI model designed to understand and generate human language. This model can be used in the creation of AI assistants, enabling them to understand user queries and generate appropriate responses.

The OpenAI Assistance API, when used with Voiceflow and other technologies, offers a powerful and flexible framework for creating and managing AI assistants. The future of AI systems looks bright, with the potential for creating multiple AI assistants, each an expert in their own field, leading to the development of a powerful general assistant. This vision of the future is both exciting and promising, and these technologies are paving the way towards it.

Filed Under: Guides, Top News


Latest timeswonderful Deals

Disclosure: Some of our articles include affiliate links. If you buy something through one of these links, timeswonderful may earn an affiliate commission. Learn about our Disclosure Policy.

Categories
News

How to add custom GPTs to any website

How to add custom GPTs to any website using Assistant API

If you have already been playing around creating your very own custom OpenAI GPTs to help streamline your daily tasks. You might be interested in moving onto the next stage and integrating your custom GPT’s into any website using the OpenAI Assistant API. This guide provides more insight into how you can create more complex GPT workflows and then add them to your existing websites or customer websites to add the power of artificial intelligence to your already existing workflows.

If you’re looking for an introduction in how to harness the power of OpenAI’s GPTs for your website you’re in the right place. As well as providing inspiration we will also provide more details on how you can use OpenAI’s recently launched Assistant API, combined with tools like Replit and Voiceflow to quickly generate AI will workflows and processes that you can add to your website for customers to use or internal employees.

Understanding the Value of Custom OpenAI GPTs At the forefront of AI advancements, OpenAI’s GPTs offer a transformative edge. These AI models are adept at understanding and generating human-like text, making them invaluable for enhancing user interactions on websites. Whether it’s for customer support, content generation, or interactive features, custom GPTs offer a versatile range of applications.

ChatGPT GPTs vs Assistant API

The Generative Pretrained Transformers (GPTs) available on the ChatGPT website are engineered with individual users in mind. These models are typically easier to interact with and require minimal technical knowledge. They are often used for personal applications like creative writing, simple question-answering, or basic task automation. The key characteristics of these GPTs include:

  • User-Friendly Interface: They often come with an intuitive, easy-to-navigate interface, making them accessible to a wide audience, regardless of their technical background.
  • Limited Customization: While these models offer some level of customization, they are generally not as flexible or adaptable as their business-oriented counterparts.
  • Ready-to-Use Solutions: Aimed at providing immediate assistance, these GPTs are designed to be used as-is, without the need for extensive setup or configuration.

GPTs for Business Applications (Assistant API): On the other hand, GPTs developed with OpenAI’s Assistant API are aimed squarely at business and enterprise applications. This approach is much more robust and allows for a greater degree of control and customization. Key aspects include:

  • Programmatic Control: Businesses can programmatically configure these GPTs, tailoring them to specific tasks or workflows. This level of control is essential for integrating the GPT into complex business processes.
  • Customization and Flexibility: The Assistant API provides a platform for businesses to fine-tune the AI’s responses, behaviors, and capabilities, aligning them with specific business needs and goals.
  • Integration Capabilities: These GPTs can be integrated into a variety of business applications, from customer service chatbots to more sophisticated data analysis tools. This integration is crucial for businesses looking to leverage AI to improve efficiency, customer engagement, and decision-making processes.
  • Scalability and Security: Business-oriented GPTs are built with scalability in mind, able to handle the higher demands of enterprise operations. Additionally, they often come with enhanced security features, a crucial aspect for businesses handling sensitive data.

How to add custom GPTs to any website

Liam Ottley has created a fantastic tutorial showing how you can add custom GPTs to any website in minutes with the new OpenAI GPT AI models. Providing examples of creating custom functions with function calling. Whether you are looking to add them to your existing website or would like to learn the skill to sell via your existing AI Automation Agency. as well as showing how to create an an AI example using the Assistant API using tjhe Voiceflow and Replit online tools.

Other articles we have written that you may find of interest on the  subject of learning to code using artificial intelligence:

Using Voiceflow to integrate GPTs to your website

Voiceflow offers in wealth of features that simplify the creation of conversational AI, allowing seamless integration with various applications, including Replit. Voiceflow’s intuitive design and drag-and-drop interface make it a go-to choice for building and customizing chatbots without delving deep into coding.

The final, yet crucial, phase is embedding your customized assistant into your website. Voiceflow’s publish feature facilitates this, enabling a smooth transition from development to deployment. By using Voiceflow, you can ensure that the integration is not only effective but also maintains the aesthetic and functional coherence of your website.

Quick reference comparison of ChatGPT GPTs vs Assistant API

ChatGPT custom GPTs

  • User-Friendly Interface: Designed for ease of use, suitable for non-technical users.
  • Limited Customization: Offers some customization but generally less flexible than business-oriented models.
  • Ready-to-Use Solutions: Aimed at providing immediate, general-purpose assistance.
  • Personal Applications: Ideal for creative writing, basic Q&A, and simple task automation.
  • Lower Technical Requirements: Requires minimal technical knowledge to operate.
  • Standard AI Capabilities: Equipped with general AI functionalities for everyday use.

Assistant API

  • Programmatic Control: Allows businesses to tailor AI behaviors and responses programmatically.
  • Advanced Customization: Highly flexible and adaptable to specific business needs and goals.
  • Integration Capabilities: Can be integrated into various business applications and workflows.
  • Scalability and Security: Designed to handle larger volumes and comes with enhanced security features.
  • Business-Oriented Features: Tailored for customer service, data analysis, and other enterprise functions.
  • Technical Expertise Utilization: More suitable for users with some technical background or resources.

The Future of Customs GPTs

Custom Generative Pretrained Transformers (GPTs) offer significant value addition to websites, enhancing both user interaction and operational dynamics. It’s crucial to comprehend the distinction between GPTs designed for individual users and those tailored for business applications.

Businesses looking to harness the power of AI can utilize the Assistant API to create a GPT-based assistant, customized with specific functionalities to suit their unique needs. Integration with platforms like Voiceflow simplifies the bot-building process, facilitating a seamless combination with tools such as Replit. Finally, the effective embedding of these AI assistants into websites is made effortless using Voiceflow’s features, ensuring that the integration is not only functional but also aligns well with the website’s overall design and user experience.

By following these steps, you can adeptly incorporate a custom GPT into your website, enhancing its interactivity and intelligence. Remember, the journey doesn’t end at deployment. Continuous monitoring and refinement based on user interactions are key to maintaining the effectiveness of your AI assistant.

Filed Under: Guides, Top News


Latest timeswonderful Deals

Disclosure: Some of our articles include affiliate links. If you buy something through one of these links, timeswonderful may earn an affiliate commission. Learn about our Disclosure Policy.

Categories
News

Add extra creativity to your photos with this portable fog machine

Add extra creativity to your photos with this portable fog machine

In the world of photography, creativity is the key to capturing images that resonate and leave a lasting impression. One of the most innovative ways to infuse creativity into your photographs is by using a portable handheld fog machine. This nifty gadget, equipped with fast USB-C charging and the ability to fill a 20m³ studio space in just a minute, can dramatically enhance the atmosphere and mood of your shots.

Firstly, let’s delve into the practicality of this device. Its compact size and fast charging capability make it an ideal companion for photographers on the go. Whether you’re shooting in a studio or in the wilderness, this fog machine is a game-changer. Its ability to quickly fill a space with fog means you can work efficiently, maintaining the flow of your creative process without lengthy interruptions.

Early bird bonuses are now available for the ground-breaking project from roughly $98 or £80 (depending on current exchange rates), offering a considerable discount of approximately 23% off the retail market price, while the Indiegogo crowd funding is under way.

how to create film style mist and smoke effects using a fog machine

Now, let’s explore the creative possibilities. The fog produced by this machine can add a layer of mystique and drama to your photographs. It scatters light in a way that creates a soft, dreamlike quality, perfect for ethereal portraits or moody landscapes. The fog can also highlight beams of light, creating a visually stunning effect that can’t be replicated in post-production. Imagine the sun’s rays piercing through a misty forest, captured in your photo with a surreal quality.

Control your smoke effects

Moreover, the fog machine’s portability allows for spontaneity in your shoots. You can experiment with different angles and compositions, seeing how the fog interacts with various light sources and environments. This can lead to unexpectedly beautiful shots, where the interplay of light, shadow, and fog produces a truly unique image.

how to take portraits with a fog machine and smoke effects

Using the fog machine in outdoor settings opens up a world of possibilities. It can transform an ordinary landscape into an otherworldly scene or add an element of mystery to urban photography. In portrait photography, the fog can be used to create a sense of intimacy, enveloping the subject in a soft, flattering light.

If the Smoke S campaign successfully raises its required pledge goal and production progresses smoothly, worldwide shipping is expected to take place sometime around November 23. To learn more about the Smoke S portable fog machine project appraise the promotional video below.

Compact portable fog machine

For those who enjoy thematic photography, this tool is invaluable. You can create specific atmospheres that align with your theme. A dense, eerie fog can set the stage for a horror-themed shoot, while a lighter mist can evoke a romantic, fairy-tale-like setting.

how to create a dry ice look with a fog machine

Safety and control are also crucial. The handheld nature of this fog machine allows for precise control over the density and placement of the fog, ensuring that it enhances rather than overwhelms the subject of your photograph. Additionally, being mindful of your surroundings and the environmental impact is important when using the machine outdoors.

fog machine control system instructions

In conclusion, a portable handheld fog machine is a powerful tool for photographers looking to elevate their creative expression. Its fast charging, efficiency, and portability make it an excellent investment for both amateur and professional photographers. By mastering the use of this device, you can unlock a new dimension in your photography, creating images that are not only visually stunning but also emotionally captivating. Remember, creativity in photography is about exploring new tools and techniques, and this fog machine is your ticket to a world of imaginative and breathtaking photography.

For a complete list of all available pledges, stretch goals, extra media and build specifications for the portable fog machine, jump over to the official Smoke S crowd funding campaign page by navigating to the link below.

Source : Indiegogo

Disclaimer: Participating in Kickstarter campaigns involves inherent risks. While many projects successfully meet their goals, others may fail to deliver due to numerous challenges. Always conduct thorough research and exercise caution when pledging your hard-earned money.

Filed Under: Gadgets News, Top News


Latest timeswonderful Deals

Disclosure: Some of our articles include affiliate links. If you buy something through one of these links, timeswonderful may earn an affiliate commission. Learn about our Disclosure Policy.