Categories
News

How to Set Up and Use Google Bard for the Best Results

Google Bard

This guide is designed to show you the best way to set up Google Bard and how to get the most out of Google’s AI tool. In today’s fast-paced digital era, streamlining your online activities is more important than ever. Enter Google Bard, the cutting-edge tool designed to boost your productivity and efficiency to new heights. This innovative platform is particularly adept at transforming how you manage emails, documents, and various data. Are you curious about the best ways to harness the full potential of Google Bard? You’re in luck!

This guide meticulously walks you through every step, from the initial setup to explore the more sophisticated features. Whether you’re a seasoned tech aficionado or new to digital optimization, you’ll find invaluable insights and tips to make Bard an integral part of your digital toolkit. So, dive in and discover how to make your digital life not just easier, but significantly more productive and efficient.

Initial Setup and Customization

Embarking on your Google Bard journey begins with the initial setup. Customizing settings like enabling the Dark theme and toggling on real-time responses will significantly enhance your user experience. It’s also crucial to enable extensions such as Google Workspace and YouTube for your personal Google account. This integration unlocks a more seamless workflow across Google’s platforms.

Mastering Email Management

Bard shines in its ability to manage emails efficiently. For example, searching for all emails related to ‘Spotify earnings’ and having them displayed in new tabs is a breeze. This feature not only saves time but also ensures you don’t miss any important communication threads.

Google Drive Document Retrieval

Retrieving documents from Google Drive is no longer a tedious task. Bard’s ability to quickly and accurately find specific documents, like those pertaining to SAT prep, is a testament to its efficiency and precision.

Analyzing Google Docs

Bard steps up in analyzing documents housed in Google Docs. Whether it’s summarizing key takeaways or providing detailed analysis, Bard makes handling Google Docs an effortless affair. Simply input the document name and your desired task, and watch Bard work its magic.

Image Analysis and Data Extraction

The capability of Bard to analyze images and extract data is nothing short of impressive. It can interpret complex charts, summarize key points, and even convert data from non-editable formats like PDFs into editable tables in Google Sheets. This feature is invaluable for anyone dealing with diverse data formats.

Delving into YouTube Video Analysis

For those interested in digital content creation, Bard’s YouTube video analysis is a goldmine. It provides insights into target audiences, performance metrics, and key takeaways, helping you understand the success factors behind popular videos.

Navigating PDF Analysis Workarounds

While Bard doesn’t support direct PDF uploads, there are effective workarounds. You can use online PDF links or upload PDFs to Google Drive and then utilize Bard for analysis. This flexibility ensures that even with format limitations, your productivity remains uninterrupted.

Embracing User-Friendly Features

Bard’s user-friendly nature is highlighted by its customizable response options, voice interaction capabilities, and the option to share prompts and responses publicly. The ability to pin high-quality outputs for future reference further adds to its user-centric design.

Exploring Practical Applications

The versatility of Bard is evident in its myriad of practical applications. From analyzing business data and managing emails to extracting information from various formats, Bard proves to be an indispensable tool in modern digital tasks.

Summary

Embarking on this journey with Google Bard by adhering to these outlined steps is akin to laying a strong foundation for a remarkably streamlined and efficient digital experience. It’s about setting the stage where your digital interactions aren’t just routine, but a symphony of productivity and effectiveness. Remember, the true essence of mastering any tool lies in a deep understanding of its capabilities and, more importantly, skillfully adapting them to meet your unique requirements and challenges. With Google Bard, this becomes not just a possibility, but a tangible reality. It arms you with the necessary tools and features to not only keep pace but thrive in the ever-evolving and fast-paced landscape of today’s digital world.

This guide ensures that you’re not merely operating Bard, but you’re leveraging it to its fullest potential, transforming the way you interact with digital content, manage tasks, and process information. In doing so, you elevate your productivity, efficiency, and digital prowess to levels that align with the demands and opportunities of our modern, digital age.

Here are some more useful Google Bard guides:

Source Jeff Su

Image Credit: Mojahid Mottakin

Filed Under: Guides


Latest timeswonderful Deals

Disclosure: Some of our articles include affiliate links. If you buy something through one of these links, timeswonderful may earn an affiliate commission. Learn about our Disclosure Policy.

Categories
News

How to Set Up Your New Mac For Optimal Performance

set up new mac

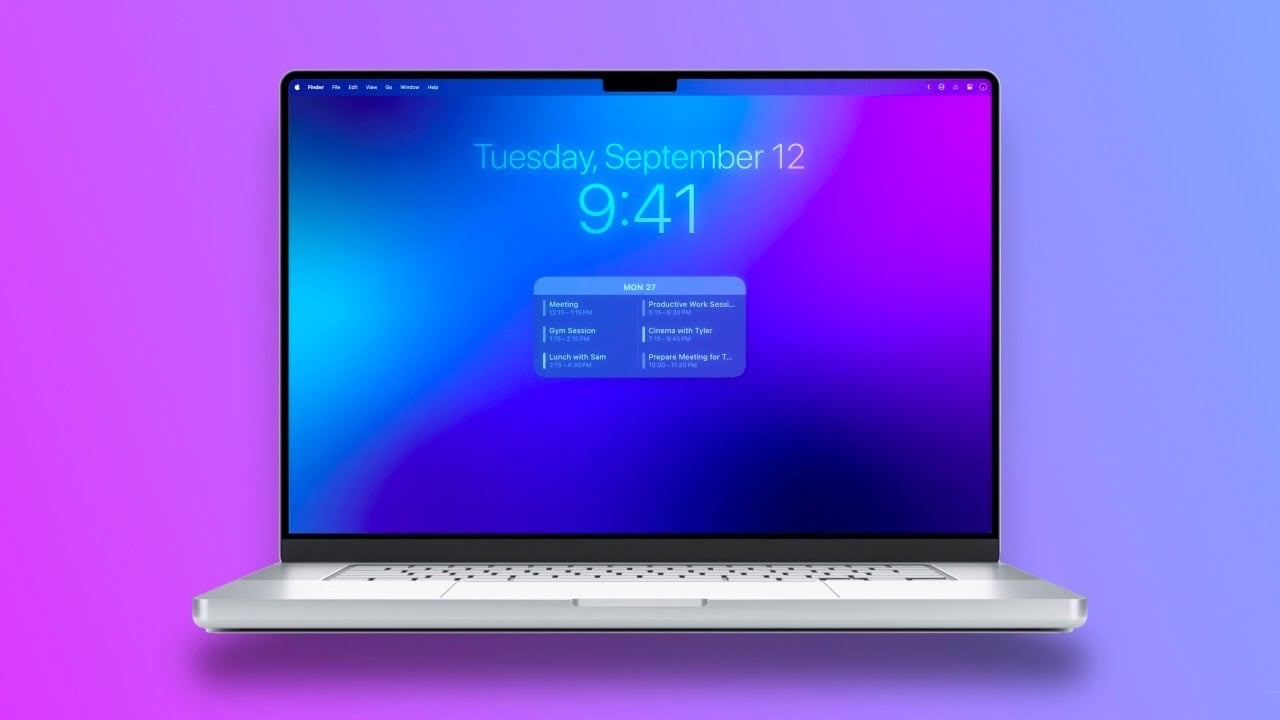
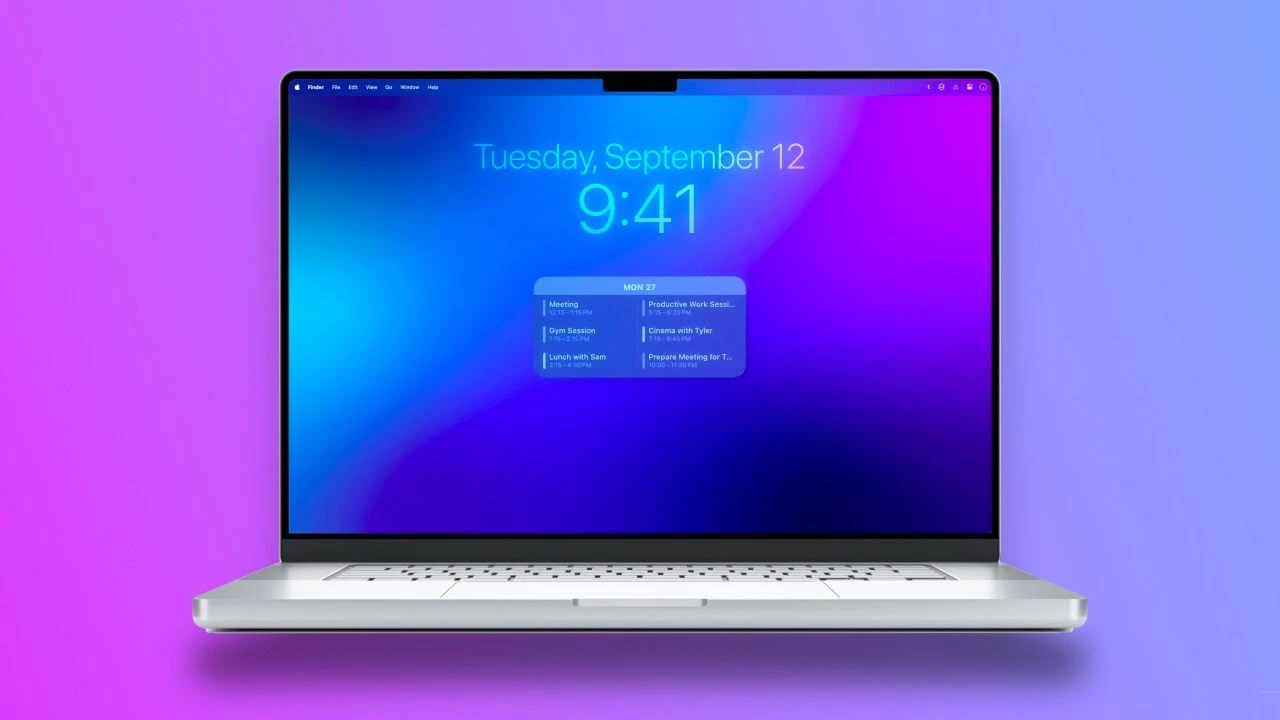
Embarking on the journey of setting up your new Mac can be a thrilling experience. You’re not just organizing a device; you’re crafting a digital workspace that’s both aesthetically pleasing and functionally efficient. The video below from MacVince will walk you through the steps to transform your Mac and Apple’s macOS into an optimal workspace that enhances your productivity and is set up with a clean and minimal interface, let’s find out some more details.

Wallpaper and Dock: The Foundation of Your Digital Space

Firstly, let’s talk about the visuals. The wallpaper on your Mac is more than just a backdrop; it’s the foundation of your digital space. Consider using a color gradient with a blur effect. This not only adds depth but also allows your windows and applications to stand out. As for the dock, it’s your command center. Keep it reserved for your most frequently used apps. By accessing less frequent applications through Launchpad or Spotlight search, you maintain a decluttered and efficient dock. To further streamline, disable ‘suggested’ and ‘recent’ apps in the dock settings.

Desktop and Finder: Clarity and Accessibility

Your desktop should be a reflection of clarity. Remove hard drive and external drive icons for a cleaner look. Utilize a feature that hides desktop items, allowing you to maintain a clean space without sacrificing file storage. In Finder, embrace the list view for better navigation and space management. Organize your sidebar with folders you use regularly, saving you time and maintaining order in your digital space.

App and System Tweaks: Enhancing Focus

Optimizing your Mac isn’t just about organization; it’s about focus. Use an app like HazeOver to dim background windows, keeping your attention on the active task. For the dock, try a terminal command to make hidden apps appear translucent, a subtle reminder of what’s running without cluttering your view. Tweak your display settings for more screen real estate. And don’t overlook Siri shortcuts – they’re a gateway to efficiency, especially for functions like accessing iCloud keychain passwords.

Browser and Focus Filters: Streamlined Browsing

When it comes to internet browsing, efficiency is key. Safari, known for its minimalism and speed, can be your ally here. Customize your start page and bookmarks bar for a cleaner and more personalized interface. Utilize focus filters to create a work-oriented environment in apps like Calendar and Mail during work hours, ensuring you’re only presented with what’s relevant to your tasks.

File Management and Templates: Organized and Efficient

Effective file management is crucial for a productive digital environment. Streamline your file organization by removing unused tags and adding frequently used folders to the Finder sidebar. Embrace the ‘stationary pad’ feature for document templates, safeguarding your original files from accidental edits.

Minimizing Additional Apps: Embracing Built-in Features

Your Mac comes packed with features that can eliminate the need for additional apps. Discover built-in functionalities for common tasks like flight tracking and image conversion. This not only saves space but also integrates your activities more seamlessly into the Mac ecosystem.

By following these steps, you will be pleased to know that your Mac will not only reflect a clean and organized digital space but also enhance your productivity and focus. Remember, setting up your Mac is more than a one-time event; it’s an ongoing process of refining and adjusting to suit your evolving needs and preferences.

If you are wondering how to keep your digital workspace as efficient and productive as possible, remember that it’s about finding the right balance between functionality and aesthetics. With these tips, your Mac will be more than just a tool; it will be a space that inspires and facilitates your best work.

Source & Image Credit: MacVince

Filed Under: Apple, Guides, Laptops


Latest timeswonderful Deals

Disclosure: Some of our articles include affiliate links. If you buy something through one of these links, timeswonderful may earn an affiliate commission. Learn about our Disclosure Policy.
Categories
News

How to set up a laptop as a home server

How to set up a laptop as a home server

If you are considering the possibility of using a laptop as a home server you’ll be pleased to know that Wolfgang has created a great tutorial and overview of how you has used the Ninker N16 Pro laptop to create a home server. When you think about setting up a home server, a laptop might not be the first thing that comes to mind. However,  laptops specifications are more than capable of taking on the role of a home server. But the question remains: can it truly handle the continuous operation and varied demands of server use?

Virtualization is a key feature for modern servers, and setting up Proxmox on the Ninker N16 Pro is a straightforward task. This platform allows the laptop to run multiple operating systems and virtual machines, effectively turning it into a powerhouse capable of handling diverse server tasks. Performance tests have shown that the Ninker N16 Pro can manage multiple tasks simultaneously without breaking a sweat, proving its mettle as a server.

Build a home server using a laptop

The Ninker N16 Pro offers a level of BIOS customization that is essential for a machine that’s expected to run around the clock. This flexibility allows users to optimize the laptop’s settings for peak server performance, a significant benefit for those who need a reliable and efficient system. The laptop’s durability is also a critical factor, as a home server needs to be robust enough to operate non-stop. The Ninker N16 Pro is built to withstand such demands, and its comprehensive I/O options, including multiple USB ports and Ethernet connectivity, are indispensable for linking various peripherals and network devices.

Here are some other articles you may find of interest on the subject of network attached storage.

For those who need a server that can handle media, the Ninker N16 Pro shines in its ability to transcode video quickly. This capability is crucial for anyone wanting to use their home server for entertainment purposes, as it ensures smooth streaming and playback of media files. The laptop’s prowess in this area makes it an attractive option for a home entertainment server.

Another important aspect of running a home server is energy efficiency. Servers that operate 24/7 can consume a lot of power, leading to high electricity bills. The Ninker N16 Pro is designed to be more energy-efficient than many desktop PCs, which could mean significant savings on energy costs over time.

Things to consider when building a home server from a laptop

However, there are certain factors to consider when using a laptop as a home server. It’s essential to have BIOS support for always-on operation, adequate connectivity for all necessary devices, and the ability to expand storage if needed. The Ninker N16 Pro checks these boxes and also operates with minimal fan noise, making it suitable for a quiet home environment.

  • Hardware Suitability
    • Ensure the CPU is powerful enough for server tasks (e.g., the Ninker N16 Pro’s 12-core CPU).
    • Verify sufficient RAM (e.g., 16GB) for multitasking and handling server applications.
    • Check storage capacity and speed (e.g., 1TB SSD) to support server data requirements.
    • Confirm the laptop’s durability for continuous operation.
  • BIOS Customization and Management
    • Utilize BIOS features for continuous operation.
    • Configure power management settings to optimize for long-term use.
    • Enable settings for automatic reboot and recovery in case of power failures.
  • Connectivity and Expansion
    • Assess the availability and variety of ports (USB, Ethernet) for peripherals and network connections.
    • Consider the need for external storage options and the capability to connect additional hard drives.
    • Evaluate wireless connectivity options for flexibility.
  • Virtualization Capability
    • Check compatibility with virtualization platforms like Proxmox.
    • Assess the laptop’s ability to run multiple operating systems and virtual machines efficiently.
  • Media Handling and Transcoding
    • Evaluate the laptop’s capability to handle media server tasks, including transcoding video for smooth streaming.
    • Ensure support for relevant media formats and codecs.
  • Energy Efficiency
    • Compare the laptop’s power consumption with traditional desktop servers.
    • Consider the impact on electricity costs for 24/7 operation.
  • Noise and Heat Management
    • Monitor noise levels, especially important in a home environment.
    • Assess cooling systems to prevent overheating during continuous use.
  • Software and Operating System
    • Choose an appropriate operating system for server use (e.g., Linux variants for stability and flexibility).
    • Install and configure server-specific software and tools.
  • Security Considerations
    • Implement robust security measures, including firewalls and antivirus software.
    • Regularly update software to protect against vulnerabilities.
  • Backup and Recovery Plans
    • Set up a reliable backup system for data protection.
    • Plan for disaster recovery and data restoration in case of hardware failure.
  • Maintenance and Monitoring
    • Schedule regular maintenance checks for hardware and software.
    • Use monitoring tools to keep track of server performance and health.
  • Network Setup and Management
    • Configure network settings for optimal performance and security.
    • Plan for scalability in case of increased server demand.
  • Physical Placement
    • Choose a location with adequate ventilation and minimal dust.
    • Ensure the server is accessible for maintenance but secure from unauthorized access.

The Ninker N16 Pro laptop emerges as a viable option for those looking to set up a laptop-based home server. Its combination of strong specifications, customization options, and efficient power usage, along with its ability to run Proxmox for virtualization, presents it as a compelling choice compared to traditional desktop servers. Whether you’re looking to manage data, run a media center, or host websites, the Ninker N16 Pro proves that a laptop can indeed fulfill the role of a home server.

Filed Under: DIY Projects, Laptops


Latest timeswonderful Deals

Disclosure: Some of our articles include affiliate links. If you buy something through one of these links, timeswonderful may earn an affiliate commission. Learn about our Disclosure Policy.
Categories
News

How to Set Up Your New Android Phone or Tablet

Android Phone or Tablet

This guide is designed to show you how to set up your new Android Phone or Android tablet. Unboxing your shiny new Android phone or tablet is an exciting moment, marking the beginning of a journey filled with endless possibilities. However, before immersing yourself in the vast world of Android apps and features, it’s crucial to complete the initial setup process. This guide will walk you through each step, ensuring a smooth transition into the Android ecosystem.

Getting Started: Powering On and Connecting to Wi-Fi

Power On: The first step is to turn on your new device. Simply press and hold the power button located on the side or top of the phone or tablet. Once the device powers on, you’ll be greeted with a welcome screen.

Connect to Wi-Fi: Connecting to a Wi-Fi network is essential for various aspects of Android setup, including downloading apps and accessing online services. Select the desired Wi-Fi network from the list and enter the password if prompted.

Personalizing Your Device: Setting Language and Themes

Choose Your Language: Select the language you prefer from the list of available options. This determines the language used for the user interface, menus, and other text-based elements.

Personalize Your Theme: Android offers a variety of themes to customize the look and feel of your device. Explore the available themes and choose one that aligns with your personal preference.

Google Account Sign-in: Unlocking the Power of Google Services

Google Account Sign-in: To fully utilize the capabilities of your Android phone or tablet, you’ll need to sign in with a Google account. This will allow you to access Google services like Gmail, Google Maps, and Google Play Store.

Data Transfer Options: If you’re switching from an iOS device or another Android device, you’ll be presented with options to transfer data, such as contacts, photos, and messages. Follow the on-screen instructions to seamlessly move your data to your new device.

Setting Up Biometric Authentication: Enhancing Security

Fingerprint Scanner: Many Android devices come equipped with fingerprint scanners for convenient and secure unlocking. Follow the on-screen instructions to register your fingerprint and enable it as a security option.

Face Unlock: Some Android devices also support face unlock, allowing you to unlock your phone by simply looking at it. If your device has this feature, follow the on-screen instructions to set it up.

Privacy and Security: Protecting Your Data

Location Access: Android devices can access your location to provide relevant information and services. However, you can control which apps can access your location and for what purposes. Go to Settings > Privacy > Location to manage location permissions.

App Permissions: Apps request various permissions to function properly. Carefully review app permissions before granting them, especially sensitive permissions like access to your contacts or microphone.

Additional Setup Steps: Fine-tuning Your Android Experience

Notifications: Android allows you to customize how notifications are displayed and managed. Go to Settings > Notifications to adjust notification settings for individual apps or change the overall notification behavior.

Gesture Controls: Android offers a variety of gesture controls to enhance navigation. Explore the available gestures and enable the ones you prefer in Settings > System > Gestures.

Summary:

Congratulations on successfully setting up your new Android phone or tablet! Now, it’s time to explore the vast world of Android apps, games, and services. Download your favorite apps, customize your home screen, and immerse yourself in the endless possibilities that Android offers. Remember, with a little exploration and personalization, your Android device can become an indispensable part of your daily life.

Here are some more Android articles you may find helpful:

Image Credit: Onur Binay

Filed Under: Android News, Guides, Mobile Phone News, Tablet News


Latest timeswonderful Deals

Disclosure: Some of our articles include affiliate links. If you buy something through one of these links, timeswonderful may earn an affiliate commission. Learn about our Disclosure Policy.

Categories
News

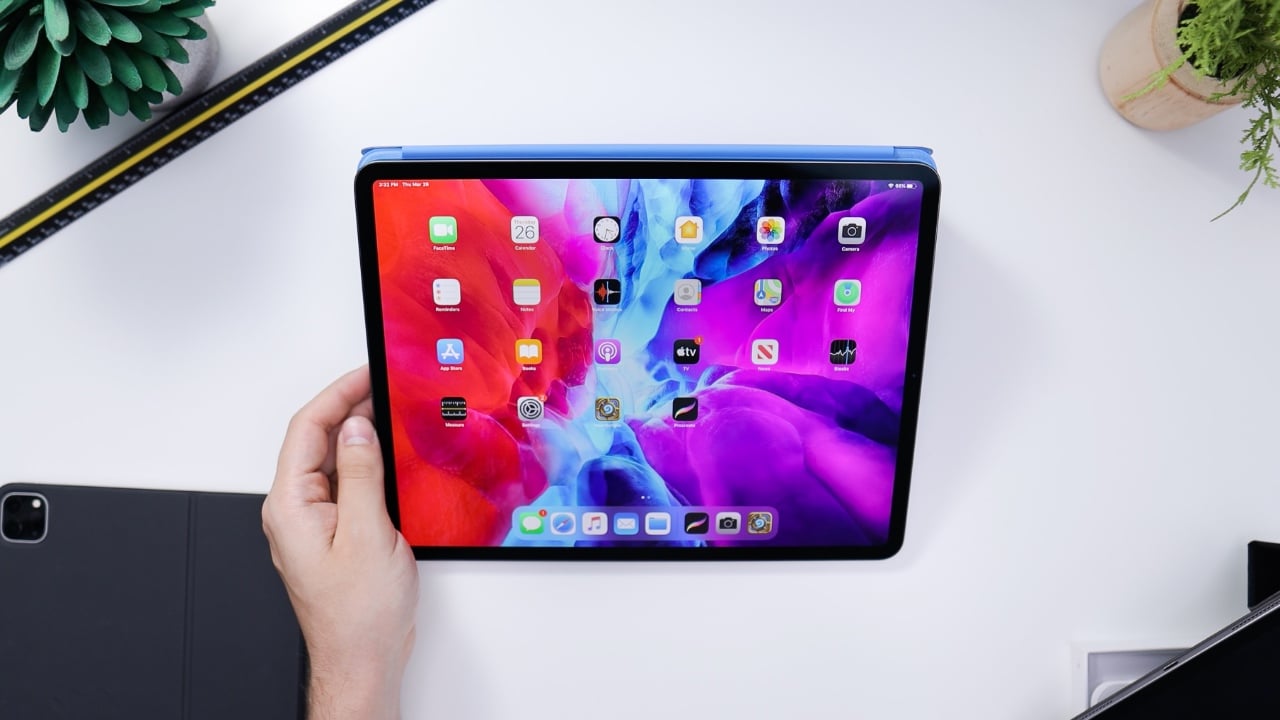
How to Set Up Your New iPad

The arrival of a new iPad is an exciting moment, marking the beginning of a journey into a world of enhanced productivity, entertainment, and creativity. However, setting up a new device can often be a daunting task, filled with unfamiliar options and technical jargon. Fear not, for this comprehensive guide will transform the setup process into a seamless and enjoyable experience.

Preparation: Gathering Essentials and Ensuring Compatibility

Before diving into the setup process, it’s essential to gather the necessary items to ensure a smooth experience:

  • Power Source: The iPad’s charging cable is crucial for powering up the device and ensuring it remains energized throughout the setup process.
  • Wi-Fi Connection: A reliable Wi-Fi connection is required to download updates, install apps, and sync data with iCloud.
  • Apple ID: If you don’t already have an Apple ID, you’ll need to create one to access the App Store, iCloud, and other Apple services.
  • Existing iPad or iPhone: If you have another compatible device, you can use Quick Start to transfer data and settings to your new iPad seamlessly.

Step 1: Turning On Your New iPad

  • Press and hold the Sleep/Wake button on the top edge of the iPad until the Apple logo appears.
  • Follow the on-screen instructions to complete the initial setup, which includes language selection, region, and Siri voice options.
  • Connect to Wi-Fi: Tap on the “Wi-Fi” field and select your preferred network. Enter the network password and tap “Join.”

Step 2: Using Quick Start for a Seamless Transfer

  • If you have another compatible iPad or iPhone with an active internet connection, you can use Quick Start to quickly transfer data and settings to your new iPad.
  • Place your new iPad near the existing device.
  • On the new iPad, tap “Set Up Manually” and then choose “Quick Start.”
  • On the existing device, follow the on-screen instructions to scan the QR code displayed on the new iPad.
  • Authenticate the transfer by entering your passcode on the existing device.

Step 3: Setting Up Your Apple ID and iCloud

  • Your Apple ID serves as your digital passport to the Apple ecosystem, allowing you to access apps, purchase content, and sync data across your devices.
  • If you already have an Apple ID, enter your email address and password.
  • If you don’t have an Apple ID, create one by providing a valid email address and creating a strong password.
  • Review and accept the Apple Terms and Conditions.
  • Turn on iCloud Drive to automatically sync your documents, photos, and other data across your Apple devices.

Step 4: Personalizing Your iPad Experience

  • Choose a passcode to secure your iPad and prevent unauthorized access.
  • Set up Face ID or Touch ID for convenient device unlocking and app authorization.
  • Customize your wallpaper to personalize the look and feel of your iPad.
  • Adjust display settings such as text size, brightness, and color temperature to suit your preference.
  • Enable or disable notifications from apps and services based on your preferences.
  • Install essential apps from the App Store, including productivity apps, entertainment providers, and social media platforms.

Step 5: Enjoying Your New iPad

Once the setup process is complete, you’re ready to explore the vast world of possibilities offered by the iPad. From browsing the web to creating stunning artwork, the iPad empowers you to work, play, and learn in ways never before experienced. Embrace the freedom and versatility that your new iPad has to offer, and embark on a journey of endless possibilities.

With your new iPad now fully set up and customized to your liking, you’re ready to embark on a journey of enhanced productivity, limitless creativity, and unparalleled entertainment. Whether you’re a student seeking to enhance your learning experience, a professional striving for greater efficiency, or a creative individual seeking to express your artistic vision, the iPad offers an unparalleled platform to achieve your goals.

As you explore the vast array of apps, features, and services available on the iPad, remember to embrace the flexibility and adaptability that this remarkable device provides. The iPad is a tool that can evolve alongside your needs and aspirations, transforming seamlessly from a powerful productivity powerhouse to a source of inspiration and entertainment.
So, grab your new iPad, connect to the world of endless possibilities, and prepare to unlock your full potential. With the iPad by your side, the journey of innovation, creativity, and achievement awaits.

Here are some other iPad articles you may find helpful:

Image Credit: Daniel Romero

Categories
News

How to Set Up You New iPhone

set up iphone

If you have received a new iPhone for Christmas, then you may want to know how to set the device up, this guide is designed to cover everything you need on how to set it up. s you begin your adventure with your new iPhone, allow us to be your companion in a smooth and straightforward setup process. We understand the importance of security and personalization for your device, and our goal is to ensure that every step of your journey is both secure and suited to your individual needs.

This extensive guide is designed to provide you with detailed insights and effective techniques that will help you unlock the full potential of your iPhone. We aim to turn this sophisticated piece of technology into an invaluable part of your daily life, ensuring it becomes a tool that not only meets but exceeds your expectations. From customizing settings to optimizing features, we’ll cover all the essentials and more, making sure your iPhone experience is as unique and rewarding as possible.

Step 1: Unveiling Your iPhone’s Potential

  • Unboxing and Preparation: Remove the protective stickers guarding your iPhone’s screen and back, ensuring they adhere to the included Lightning cable for safekeeping.
  • Powering Up and Initial Greetings: Connect your iPhone to a power source using the provided cable. Once the Apple logo appears, embark on the setup journey by following the on-screen prompts.

Step 2: Language and Connection Essentials

  • Language Selection: Choose the language that resonates with your comfort level, ensuring menus, apps, and other interfaces seamlessly align with your preferences.
  • Wi-Fi Integration: Connect to your preferred Wi-Fi network by entering the network password. This establishes internet access, enabling seamless communication and data exchange.

Step 3: Security and Passcode Protection

  • Face ID or Touch ID: Embrace Apple’s advanced biometric authentication technology, Face ID for facial recognition or Touch ID for fingerprint scanning. Follow the on-screen instructions to set up whichever suits your preference.
  • Passcode Creation: Enhance security by crafting a robust passcode, preferably a six-digit combination. This safeguard protects your iPhone from unauthorized access.

Step 4: Data Management with iCloud

  • iCloud: Your Digital Concierge: Experience the convenience of iCloud, Apple’s cloud storage service. Sign in with your existing iCloud account or create a new one to ensure your photos, contacts, and other vital data remain safely synchronized across your devices.
  • Data Migration (Optional): If you have an existing iPhone, seamlessly transfer your data, including photos, contacts, and app data, to your new device. This process ensures continuity and minimizes data loss.

Step 5: Siri, Your Voice-Activated Assistant

  • Siri: A Voice-Activated Companion: Discover the power of Siri, Apple’s intuitive voice assistant. Set up Siri and personalize its voice to control your iPhone hands-free, whether setting alarms, dictating messages, or seeking information.

Step 6: Personalization and Customization

  • Wallpaper Transformation: Customize the look and feel of your iPhone by selecting an eye-catching wallpaper from the vast collection or creating your own masterpiece.
  • Home Screen Rearrangement: Customize your home screen to suit your workflow and preferences. Arrange apps into folders, create convenient shortcuts, and eliminate clutter to optimize your iPhone’s usability.

Step 7: App Adventures and Endless Possibilities

  • Explore the App Store: Embark on a journey through the App Store, a treasure trove of applications tailored to your interests and needs. Download your favorite apps, discover new ones, and expand your iPhone’s capabilities.
  • Settings: Personalize Your Experience: delve into the Settings app to personalize your iPhone experience further. Adjust notifications, manage privacy settings, set up Do Not Disturb mode, and customize various aspects of your device’s operation.

Step 8: Data Backup and Safety

Regular Backups: Prioritize data security by regularly backing up your iPhone to iCloud or a computer using iTunes. This ensures your precious information remains protected in case of device loss or malfunction.

Summary

Congratulations on successfully setting up your new iPhone! With your iPhone now tailored to your liking, you’re ready to embrace the possibilities that await. From enhancing productivity and creativity to staying connected with loved ones, your iPhone is your gateway to an enriched digital experience. Embrace the limitless possibilities that await and unleash your iPhone’s true potential.

Here are some more helpful iPhone articles:

Filed Under: Guides


Latest timeswonderful Deals

Disclosure: Some of our articles include affiliate links. If you buy something through one of these links, timeswonderful may earn an affiliate commission. Learn about our Disclosure Policy.

Categories
News

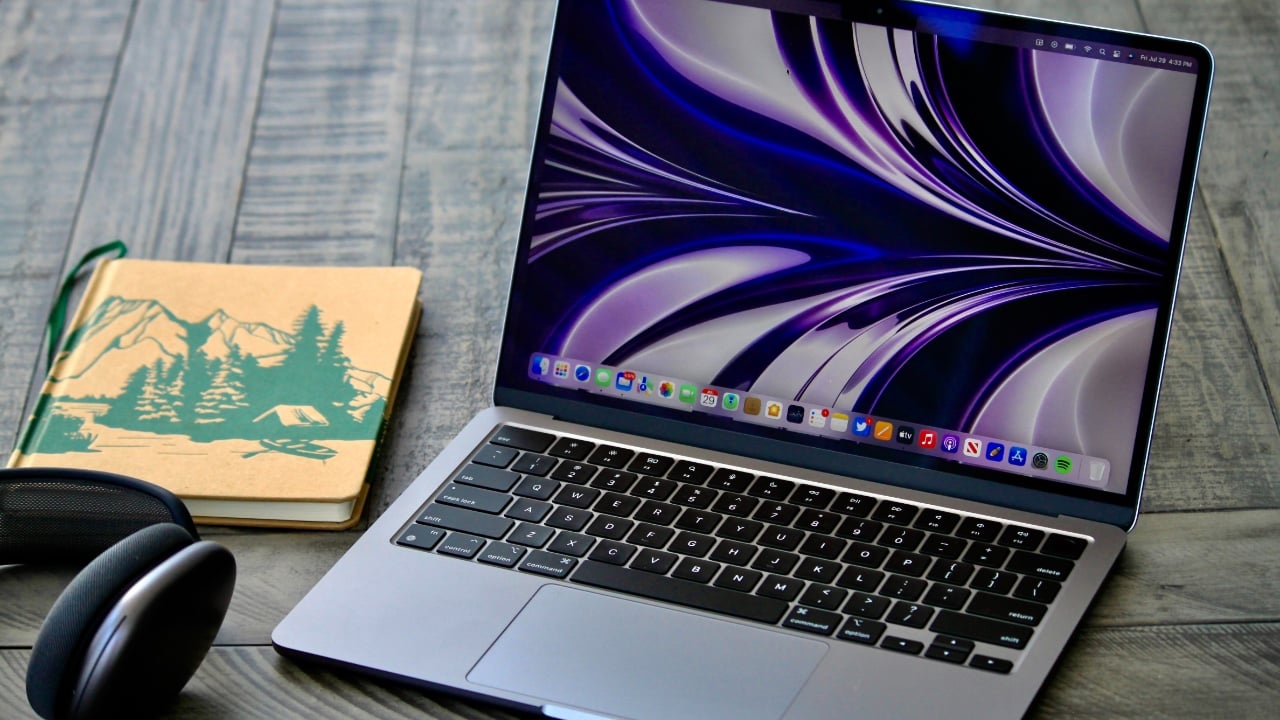
How to Set Up Your New MacBook or Mac

new macbook

If you are lucky enough to get yourself a new Mac or MacBook this holiday season, you will need to get the device set up, this guide is designed to cover everything you need to know about setting up your new Apple computer. Setting up a new MacBook or Mac involves several key steps to ensure a smooth and personalized experience.

It involves a series of important steps designed to optimize the user experience, ensuring that the device functions efficiently and suits your specific requirements. This article aims to offer an in-depth and thorough guide, outlining the essential procedures and considerations for configuring your new Apple computer effectively. From initial unboxing to the final customization touches, we’ll walk you through each stage of the setup process, helping you to get the most out of your new MacBook or Mac.

Unboxing and Initial Setup

  1. Unpack Your MacBook or Mac: Carefully unbox your new MacBook or Mac, ensuring that you have all the necessary components, including the power adapter and cable.
  2. Power On: Press the power button to turn on your Mac. You will be greeted with a welcome screen.
  3. Language and Region: Select your preferred language and region. This will determine the language used and the format of dates, times, and currencies.

Connecting to Wi-Fi

  1. Select a Wi-Fi Network: Choose your Wi-Fi network from the list and enter the password if required.
  2. Ethernet Option: If you prefer a wired connection and your Mac has an Ethernet port, connect an Ethernet cable from your router to your Mac.

Apple ID and Data Transfer

  1. Apple ID: Sign in with your Apple ID. If you don’t have one, you can create a new Apple ID.
  2. Data Transfer: If you’re switching from another Mac or a Windows PC, you can transfer your data using Apple’s Migration Assistant. This can include documents, apps, user accounts, and settings.

Setting Up macOS

  1. Terms and Conditions: Read and agree to Apple’s terms and conditions.
  2. Create a Computer Account: Set up your user account, including your username and password. You can also set a profile picture.
  3. Location Services: Decide whether to enable Location Services, which allow apps like Maps and Find My to use your location.
  4. Siri and Accessibility: Set up Siri, Apple’s voice assistant, if desired. You can also configure accessibility features to suit your needs.

Privacy and Security Settings

  1. FileVault: Consider enabling FileVault, which encrypts the data on your Mac for added security.
  2. Firewall: You may enable the firewall under Security & Privacy settings for additional protection.
  3. Apple Pay: If you wish to use Apple Pay, set it up by adding your credit or debit card information.

Personalization

  1. General Preferences: Customize the look and feel of your Mac by going to System Preferences. This includes setting your preferred wallpaper, choosing a dark or light mode, and adjusting the dock settings.
  2. Trackpad and Mouse Settings: Customize the trackpad and mouse settings to your liking, including gestures and scrolling options.

Installing Applications

  1. Mac App Store: Use the Mac App Store to find and install new applications.
  2. Third-Party Applications: For software not available on the App Store, download it from trusted websites. Ensure to allow installation of third-party apps in your security settings if necessary.

Backup and Sync

  1. Time Machine: Set up Time Machine with an external drive to regularly back up your Mac.
  2. iCloud: Utilize iCloud for syncing documents, photos, and other data across your Apple devices.

Final Steps

  1. Software Updates: Check for any available software updates and install them to ensure your Mac is up-to-date.
  2. Learn More: Explore the built-in Tips app or visit Apple’s website for more information on using macOS.

Conclusion

Setting up your new MacBook or Mac is a straightforward process that can be personalized to fit your needs. By following these steps, you can ensure that your new Mac is secure, efficient, and tailored to your preferences, providing a comfortable and productive computing experience.

This process, structured through a series of well-defined steps, lays the foundation for securing your device, enhancing its efficiency, and fine-tuning various settings and features to resonate with your personal tastes and usage patterns. Adhering to these guidelines guarantees that your new Mac will not only be safeguarded against potential security threats but will also operate at optimal efficiency. Furthermore, by personalizing your settings, you create a user environment that is not just functional but also enjoyable to work in, thereby elevating your overall computing experience to be both comfortable and highly productive. This detailed approach ensures that your Mac is not just a tool, but an extension of your digital life, customized to meet and exceed your everyday computing needs. You can find out more details about how to get started with your new Apple Mac over at Apple’s website.

Image Credit: James Yarema

Categories
News

1,500 drones flying in formation set two Guinness World Records

drones flying in formation

Guinness world records have been broken as the sky was illuminated by a breathtaking spectacle of drones flying in formation that captured the hearts of audiences around the globe. More than 1,500 drones took flight, setting not one, but two Guinness World Records. The drones painted the night with a retelling of “The Nutcracker,” a timeless holiday classic, achieving the largest display of a fictional character and the largest aerial image ever seen.

The performance was a marvel of technology and artistry, as the drones depicted the enchanting story of Clara and her Nutcracker toy, which springs to life. The audience was transported into a magical world, where the iconic battle between the Nutcracker and the Mouse King unfolded in the sky. The drones’ precision and the vibrant lights they emitted brought this beloved scene to life on an unprecedented scale, providing a fresh perspective on the traditional tale.

Drones flying in formation

As the story progressed, the drones seamlessly transitioned to the Land of Sweets, perfectly synchronized with Tchaikovsky’s immortal music. The sky was filled with formations resembling marching toy soldiers and spinning dolls, reaching a peak with a tribute to the Sugar Plum Fairy. The drones’ choreography reflected the grace and elegance of this central figure, adding a touch of magic to the holiday festivities.

The climax of the show was a grand visual of Santa Claus, complete with his sleigh and reindeer, all assembled by the drones to form a sparkling image that danced across the night. This image encapsulated the sheer joy and excitement of Christmas, leaving a powerful impression on all who watched.

Guinness World Records

1,500 drones flying in formation set two Guinness World Records

The event’s record-breaking status was confirmed by Guinness World Records adjudicator Michael Empric, with a total of 1,499 drones participating in the creation of this visual feast. The drone show was not only a testament to the advancements in aerial technology but also showcased the incredible potential of drones in the realm of storytelling. By blending the nostalgic elements of “The Nutcracker” with cutting-edge technology, the performance offered a truly unforgettable experience.

This innovative drone show is a testament to the power of reimagining traditional narratives through contemporary means. It provided a shared experience that resonated with the wonder of the holiday season, leaving a lasting impact on all who witnessed it. The fusion of classic storytelling with modern technology in this drone display demonstrates the endless possibilities for creativity and connection in our ever-evolving world. Here are some other articles you may find of interest on the subject of drones :

Filed Under: Geeky Stuff, Technology News, Top News


Latest timeswonderful Deals

Disclosure: Some of our articles include affiliate links. If you buy something through one of these links, timeswonderful may earn an affiliate commission. Learn about our Disclosure Policy.

Categories
News

Dune : Part Two film release date set for March 1st 2024

Dune Part Two film release date set for March

The release date for Dune: Part Two has been set for March 1st, 2024. This upcoming epic science fiction film is a much-awaited sequel to the 2021 film Dune, which garnered six Academy Awards. Notably, Dune: Part Two is the second of a two-part adaptation of the 1965 novel Dune by Frank Herbert.

The film’s director, Denis Villeneuve, is an award-winning filmmaker known for his unique storytelling and visual style. In Dune: Part Two, he continues the narrative of Frank Herbert’s bestseller, further exploring the intricate world of the desert planet Arrakis and the complex characters that inhabit it.

Watch all three trailers for the new second episode of Dune in release order below.

Villeneuve, who co-wrote the screenplay with Jon Spaihts, is teaming up again with a star-studded international cast. The ensemble includes Timothée Chalamet, Zendaya, Rebecca Ferguson, Josh Brolin, and Stellan Skarsgård, who are reprising their roles from the first film. Additionally, Austin Butler, Florence Pugh, Dave Bautista, Christopher Walken, Léa Seydoux, Souheila Yacoub, and Charlotte Rampling are joining the cast, bringing fresh dynamics to the narrative.

Dune film 2024 Timothée Chalamet

The plot of “Dune: Part Two” centers around the journey of Paul Atreides, played by Timothée Chalamet. As Paul unites with the Fremen people of Arrakis, he embarks on a quest to win the war against House Harkonnen. Simultaneously, he grapples with a personal conflict, torn between his love and the fate of the universe.

The production of “Dune: Part Two” is a collaboration of Mary Parent, Cale Boyter, Villeneuve, Tanya Lapointe, and Patrick McCormick. The executive producers include Joshua Grode, Herbert W. Gains, Jon Spaihts, Thomas Tull, Brian Herbert, Byron Merritt, Kim Herbert, and Kevin J. Anderson. Anderson also serves as a creative consultant, offering his expertise in the realm of science fiction.

Dune Part Two film

Villeneuve is also once again working with his “Dune” team, including Oscar-winning director of photography Greig Fraser, production designer Patrice Vermette, editor Joe Walker, visual effects supervisor Paul Lambert, costume designer Jacqueline West, and composer Hans Zimmer. Their collective talent is expected to bring the same cinematic excellence that was seen in the first film.

The release of “Dune: Part Two” is a testament to the enduring appeal of Frank Herbert’s “Dune.” As audiences around the world await the film’s release, they look forward to seeing how Villeneuve and his team bring the next chapter of this epic saga to life.

“Dune: Part Two” is set to be a cinematic event that promises to captivate audiences with its compelling narrative, stellar cast, and exceptional production. As the release date draws nearer, the anticipation for this sequel to the award-winning film adaptation of Frank Herbert’s novel continues to build.

Filed Under: Entertainment News, Top News


Latest timeswonderful Deals

Disclosure: Some of our articles include affiliate links. If you buy something through one of these links, timeswonderful may earn an affiliate commission. Learn about our Disclosure Policy.

Categories
News

Porsche 911 GT3 RS and Taycan Turbo S set new records

Porsche 911 GT3 RS

Porsche has revealed that the Porsche 911 GT3 RS and Porsche Taycan Turbo S have set new lap records at the Buddh International Circuit, the cars were driven by India’s first Formula 1 driver Narain Karthikeyan.

The 911 GT3 RS set a lap time of 1m 59.854 seconds and the  Taycan Turbo S set a lap time of 2m 10.313 seconds, which is impressive, you can see more details about these new records below.

Driving the GT3 RS, Narain Karthikeyan broke the previous record of 2m 00.266 seconds — set by Karthikeyan himself in a 911 GT2 RS in 2019 — and registered a new lap time of 1m 59.854 seconds. The new record makes the Porsche 911 GT3 RS the fastest production car around the Buddh International Circuit and the only one to lap the circuit under two minutes.

Registering speeds of over 250km/h on the straights, the 911 GT3 RS’s new record cements its place among the Stuttgart-based brand’s illustrious list of accomplishments.

The 525 PS 992-generation 911 GT3 RS is powered by Porsche’s 4.0-litre naturally aspirated flat-six engine (911 GT3 RS: Fuel consumption* combined (WLTP) 13.4 l/100 km, CO₂ emissions* combined (WLTP) 305 g/km). The GT3 RS, touted as the ultimate road-going track car, also gets its speed from a strong focus on aerodynamics, specifically additional downforce to give it more grip in corners and several degrees of adjustability via simple-to-use controls on the steering.

You can find out more details about the Porsche 911 GT3 RS and Porsche Taycan Turbo S over at the Porsche website at the link below

Source Porsche

Filed Under: Auto News


Latest timeswonderful Deals

Disclosure: Some of our articles include affiliate links. If you buy something through one of these links, timeswonderful may earn an affiliate commission. Learn about our Disclosure Policy.