Categories
News

Awesome iPhone Home Screen Tips & Tricks (Video)

iPhone home screen

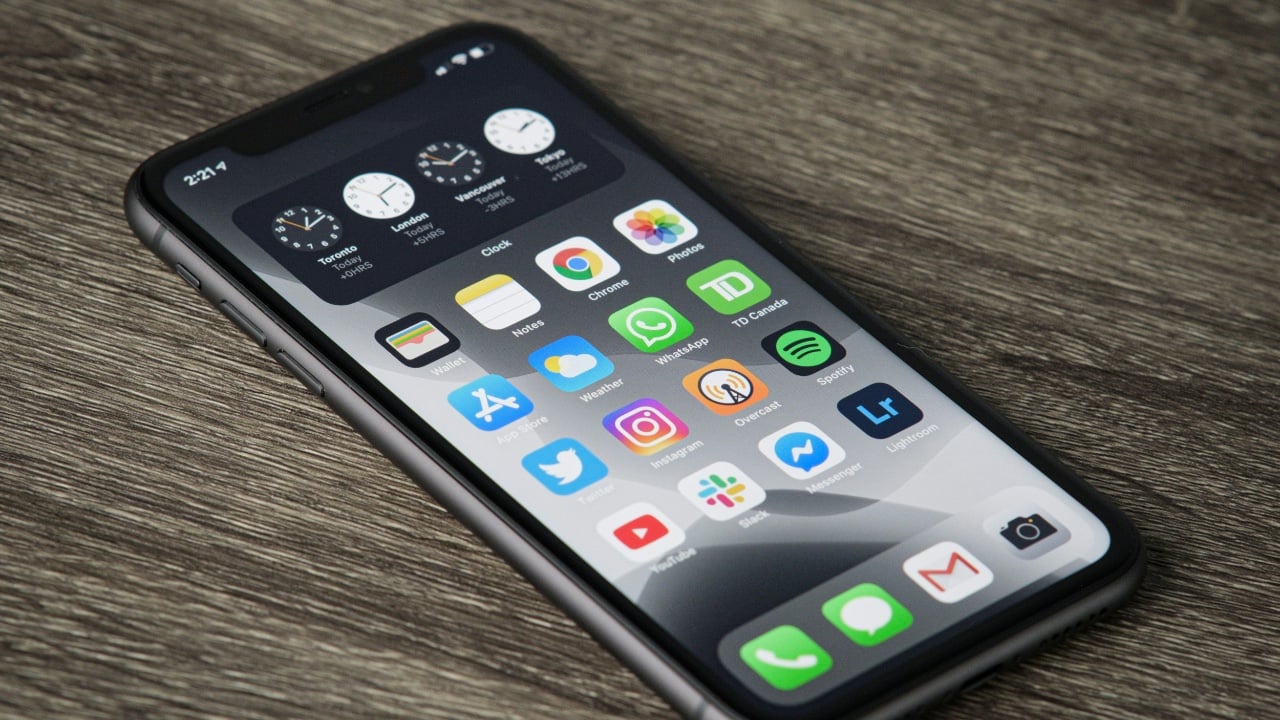
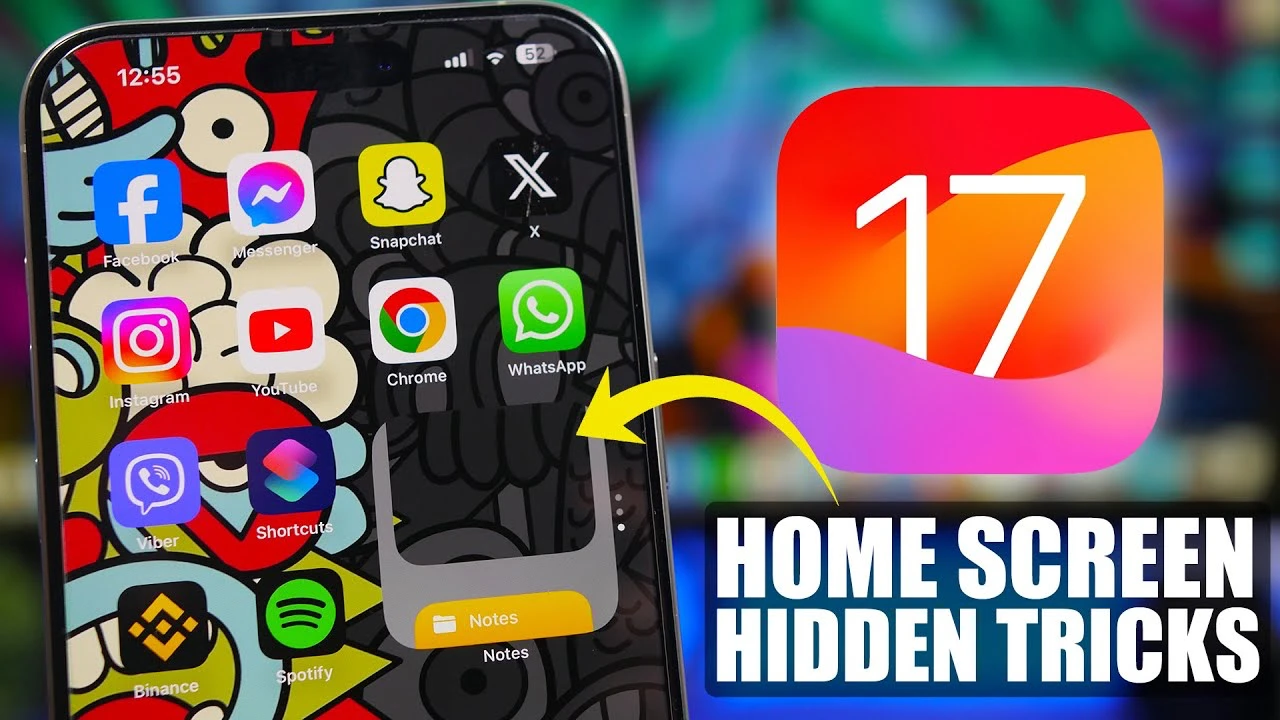
We have an awesome video from iReviews which shows us a range of iPhone Home Screen tips and tricks. With the release of iOS 17, iPhone users have been treated to an array of home screen tricks designed to enhance the overall user experience. These features not only streamline operations but also offer a level of customization that allows for a more personalized interaction with your device. Let’s delve into these useful tips and tricks that promise to elevate your iPhone experience.

Pinpoint and Share Your Location Instantly

Have you ever found yourself needing to mark your current location or share it without the hassle of navigating through apps? iOS 17 introduces a seamless way to do just this directly from the Maps app icon. A simple use of 3D Touch on the icon allows you to mark your current location or share it with others, bypassing the need to open the Maps app entirely.

Effortless Privacy with Quick Access to Safari’s Private Tab

For those moments when you seek the privacy of browsing without leaving a trace, the updated Safari app has got you covered. A quick 3D Touch on the Safari icon on your home screen now opens a new private tab instantly, making private browsing more accessible than ever.

Swift App Switching

Navigating through open apps is now more efficient with a simple swipe at the bottom of the screen. This gesture allows you to switch back to the last used app or swiftly move through your open applications, eliminating the need to engage the app switcher.

Simplified App and Page Management

Rearranging apps on your home screen has never been smoother. With the ability to drag an app and simultaneously switch pages or jump to the App Library using another finger, organizing your apps is now a breeze.

Dynamic Island Utilization

For iPhone models equipped with Dynamic Island, interacting with ongoing background activities such as music playback becomes a fluid experience. Swiping right or left on the Dynamic Island allows you to hide or display these activities at your convenience.

Spotlight Search Upgrades

Finding and organizing apps is more streamlined with enhancements to Spotlight Search. You can now drag apps from the search results directly onto the home screen. Plus, the “Go” button on the keyboard offers a shortcut to open the top search result immediately.

App Library Shortcuts

Navigating the App Library is quicker and more intuitive, thanks to the ability to tap on letters or drag your finger along the scrollbar. This feature enables you to jump directly to apps starting with a specific letter, simplifying the search process within your library.

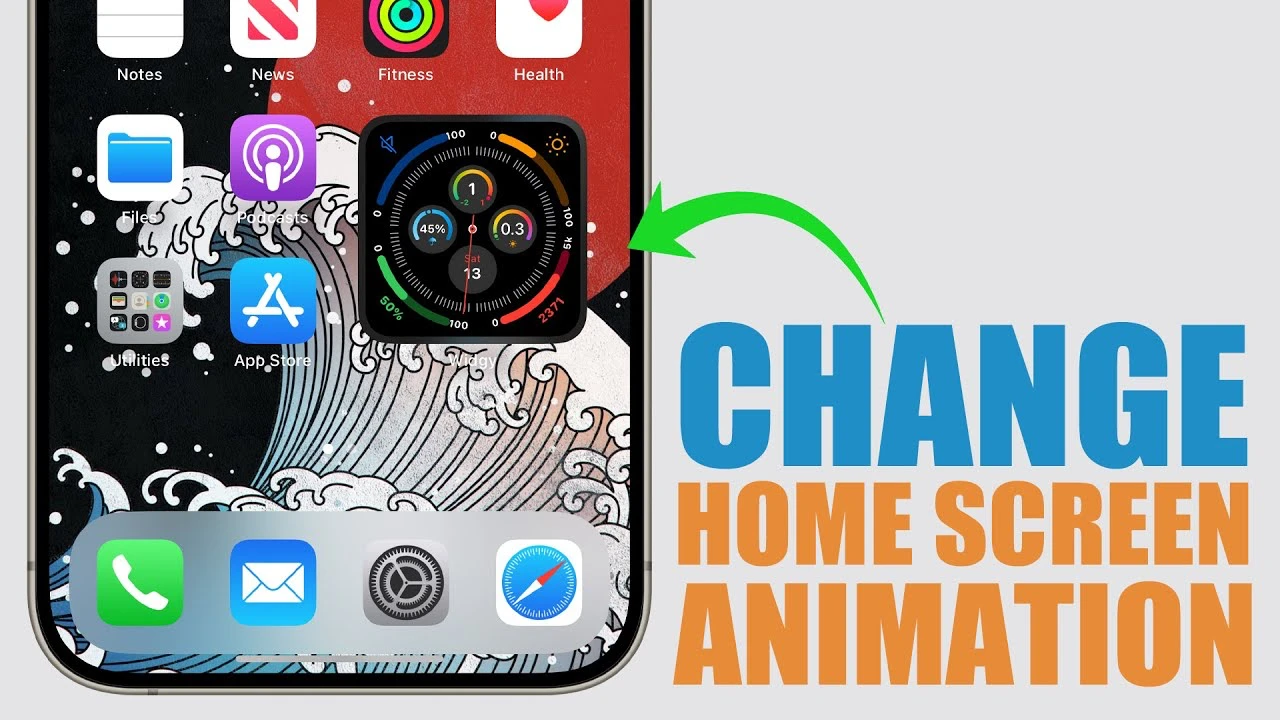
Concealing Home Screen Widgets

For those who prefer a minimalist home screen, iOS 17 introduces a clever method to hide widgets using a transparent overlay. This overlay can be swiped away to reveal the hidden widget, maintaining a clean aesthetic while keeping your widgets accessible.

Dockland for a Cleaner Look

Achieving a cleaner home screen look is now possible with Dockland, an app that modifies wallpapers to visually conceal the dock. This customization option allows for a more streamlined appearance, enhancing the visual appeal of your home screen.

Summary

These tips and tricks serve to not only improve the privacy and efficiency of using your iPhone but also offer a degree of customization that lets you tailor your device to your liking. From quick access to private browsing in Safari to a cleaner and more organized home screen, these features are designed to make your iPhone experience more enjoyable and productive. Whether you’re a seasoned iPhone user or new to the iOS platform, these enhancements are sure to contribute to a more efficient and personalized interaction with your device.

Source & Image Credit: iReviews

Filed Under: Apple, Apple iPad, Guides, Top News


Latest timeswonderful Deals

Disclosure: Some of our articles include affiliate links. If you buy something through one of these links, timeswonderful may earn an affiliate commission. Learn about our Disclosure Policy.

Categories
News

iOS 17.4 will remove Home Screen web apps in Europe

iOS 17.4

Apple’s iOS 17.4 is currently in beta, Apple recently released the third beta of the software and this update is bringing some major changes to the iPhone in Europe to comply with the new Digital markets App.

The update will introduce alternative app stores in Europe and alternative payment methods in apps and more, and now it has been revealed that iOS 17.4 will remove web apps from the Home Screen.

Apple is doing this for security and privacy reasons, as web apps on the Home Screen could potentially pose a risk to users, you can see more information from Apple on this below.

The iOS system has traditionally provided support for Home Screen web apps by building directly on WebKit and its security architecture. That integration means Home Screen web apps are managed to align with the security and privacy model for native apps on iOS, including isolation of storage and enforcement of system prompts to access privacy impacting capabilities on a per-site basis.

Without this type of isolation and enforcement, malicious web apps could read data from other web apps and recapture their permissions to gain access to a user’s camera, microphone or location without a user’s consent. Browsers also could install web apps on the system without a user’s awareness and consent. Addressing the complex security and privacy concerns associated with web apps using alternative browser engines would require building an entirely new integration architecture that does not currently exist in iOS and was not practical to undertake given the other demands of the DMA and the very low user adoption of Home Screen web apps. And so, to comply with the DMA’s requirements, we had to remove the Home Screen web apps feature in the EU.

You will still be able to access the website directly from your Home Screen with a bookmark, it will just not have the same features that the web apps did previously, you can find out more details over at Apple’s website at the link below. Apple is expected to release its iOS 18.4 software update in early March along with iPadOS 17.4 and a range of other updates.

Source Apple, 9 to 5 Mac

Image Credit: Thom Bradley

Filed Under: Apple, Apple iPhone, Top News


Latest timeswonderful Deals

Disclosure: Some of our articles include affiliate links. If you buy something through one of these links, timeswonderful may earn an affiliate commission. Learn about our Disclosure Policy.

Categories
News

AyaNeo Flip 120Hz dual screen Ryzen handheld games console

AyaNeo Flip DS dual screen AMD Ryzen handheld games console

The AyaNeo Flip DS is a new handheld PC, boasting a unique dual-screen design. However theAMD Ryzen handheld games console isn’t just about playing games; it’s about experiencing them in a whole new way to enjoy powerful mobile computing that fits in your pocket. The AyaNeo Flip DS is designed to captivate with its primary 7-inch 1080p display that boasts a smooth 120 Hz refresh rate, paired with a secondary 3.5-inch IPS touchscreen.

This dual-screen setup is a first in the portable gaming world, offering gamers the flexibility to multitask and play in ways they’ve never done before. Whether you’re a fan of fast-paced action games or strategic puzzles, the Flip DS is engineered to deliver a top-notch gaming experience.

At the core of this handheld marvel is an AMD Ryzen 7 7840U APU, a powerhouse that ensures your games run smoothly and look stunning. The device supports up to 64 GB of the latest LPDDR5X RAM, which means you can switch between games and apps without a hitch. Storage is no issue either, with an M.2 2230 PCIe 4.0 NVMe SSD that provides quick load times and plenty of space for all your favorite titles. And for those concerned about security, a built-in fingerprint sensor offers both convenience and protection, giving you quick access to your games while keeping your device secure.

Dual Screen Ryzen pocket PC and games console

7 inch 120 Hz AMD Ryzen pocket games console

But the AyaNeo Flip DS isn’t just about what’s on the inside. It also features an oculink port, which allows you to connect an external GPU. This means you can enjoy desktop-level gaming performance even when you’re not at your desk. With USB 4 support, the Flip DS ensures that you have the flexibility to connect to a variety of displays and accessories, transforming it from a handheld device into a comprehensive gaming station. Check out the hands-on review video kindly created by ETA Prime below for more insight into what you can expect from this powerful  and innovative handheld PC system.

Here are some other articles you may find of interest on the subject of handheld consoles :

AyaNeo Flip DS

Sound is just as important as visuals in gaming, and the AyaNeo Flip DS doesn’t disappoint. It comes equipped with dual stereo speakers that provide an immersive audio experience. If you prefer using headphones, a 3.5 mm audio jack ensures you can plug in your favorite pair for a more personal gaming session. The device also includes a micro SD card slot for expandable storage and two USB-C ports for connecting additional gaming peripherals.

The controls on the AyaNeo Flip DS are designed with gamers in mind. The d-pad features Dome switches for precision, while Hall-based analog sticks and tactile buttons ensure a responsive and comfortable gaming experience. The ergonomic design of the device makes it easy to play for hours without discomfort, with all controls conveniently placed for effortless access.

AyaNeo Flip DS features

The secondary screen of the AyaNeo Flip DS isn’t just for show; it’s a fully functional display that opens up new possibilities for multitasking and gameplay. It can support dual-screen emulators, display performance overlays, or run separate applications, adding a layer of functionality to handheld gaming that is rarely seen.

The AyaNeo Flip DS is aimed at gamers who demand the best in quality and versatility. Its dual-screen feature sets it apart from the competition, appealing to a broad spectrum of users. Whether you’re into classic games or the latest releases, the Flip DS has something for everyone. It’s a device that not only promises to deliver exceptional gaming experiences but also stands as a symbol of innovation and performance that you can hold in your hands.

The AyaNeo Flip DS dual screen AMD Ryzen handheld games console is now available via Indiegogo with earlybird pledges starting from $699 or £556 offering a considerable 22% discount off the recommended retail price. If all goes well worldwide shipping is expected to start sometime during March 2024.

Filed Under: Gaming News, Top News


Latest timeswonderful Deals

Disclosure: Some of our articles include affiliate links. If you buy something through one of these links, timeswonderful may earn an affiliate commission. Learn about our Disclosure Policy.

Categories
News

JSAUX FlipGo portable 16 inch dual screen displays

JSAUX FlipGo portable dual screen

Staying productive while on the move is more important than ever. For those who are constantly traveling or working remotely, the JSAUX FlipGo is a new device that promises to make working from anywhere easier and more efficient. This portable dual-screen display is designed to help you multitask and manage your workflow with ease, making it a valuable addition to any professional’s tech arsenal.

The FlipGo’s design is particularly noteworthy. It features a vertical screen stacking, which provides a square-like aspect ratio that’s perfect for handling multiple applications at once. This setup is great for those who need to work on split-screen tasks without the hassle of constantly turning their heads. The screens are separated by an ultra-narrow bezel, which helps create an immersive experience that keeps you focused on your work.

Early bird backing offers are now available for the radical project from roughly $329 or £263 (depending on current exchange rates), offering a considerable discount of approximately 41% off the retail price, while the Kickstarter crowd funding is under way.

One of the biggest challenges for mobile professionals is managing all their devices and keeping them powered up. The FlipGo addresses this issue with a USB-C connection that not only links the screen to your laptop but also charges it. This means you can have a clutter-free workspace and ensure your devices are always ready to go, which is essential for anyone who can’t afford to be tethered to a power outlet.

Portable dual screen display

JSAUX FlipGo dual screen display features

The FlipGo is also designed to be user-friendly, supporting touch and gesture controls that work with both macOS and Windows systems. This versatility means that no matter what platform you’re using, you can interact with your work in a way that feels natural and boosts your productivity.

To make sure the FlipGo fits into any work setting, it comes with a range of accessories. Whether you need to attach it to a monitor arm with the Snap VESA Adapter for a more traditional desk setup, or you prefer the flexibility of a Snap Stand or Flex Folio case/stand for different viewing angles, the FlipGo has you covered. These accessories are designed to adapt to your working environment, providing stability and versatility wherever you set up shop.

If the JSAUX FlipGo campaign successfully raises its required pledge goal and manufacturing progresses smoothly, worldwide shipping is expected to take place sometime around May 2024. To learn more about the JSAUX FlipGo portable dual screen display project explore the promotional video below.

One cable connection

The JSAUX FlipGo is more than just an extra screen; it’s a comprehensive solution for professionals who need to stay productive while away from their main office. It tackles the common problems faced by business travelers and digital nomads, making it an essential tool for anyone looking to enhance their mobile work capabilities.

For mobile professionals, the JSAUX FlipGo portable dual-screen display stands out as a top choice for improving work efficiency. With its thoughtful design, seamless connectivity, and adaptable accessories, the FlipGo is poised to become a vital component of your mobile office setup. Whether you’re in a coffee shop, airport lounge, or co-working space, the FlipGo is designed to help you get the most out of your workday, no matter where you are.

For a complete list of all available campaign pledges, stretch goals, extra media and key features for the portable dual screen display, jump over to the official JSAUX FlipGo crowd funding campaign page by proceeding to the link below.

Source : Kickstarter

Disclaimer: Participating in crowdfunding campaigns on sites like Kickstarter and Indiegogo involves inherent risks. While many projects successfully meet their goals, others may fail to deliver due to numerous challenges. Always conduct thorough research and exercise caution when pledging your hard-earned money as you might lose it all if the project fails.

Filed Under: Displays News, Top News


Latest timeswonderful Deals

Disclosure: Some of our articles include affiliate links. If you buy something through one of these links, timeswonderful may earn an affiliate commission. Learn about our Disclosure Policy.

Categories
News

ONEXPLAYER X1 large screen handheld games console

ONEXPLAYER X1 large screen handheld games console

It is now possible to experience the power of a high-end computer in the palm of your hand, one that not only lets you dive into the most demanding games but also transforms into a versatile workstation at a moment’s notice. This is the promise of the ONEXPLAYER X1, a new handheld device that’s capturing the attention of tech enthusiasts and gamers alike. It’s a bold step forward in portable computing, offering a level of performance and flexibility that challenges the very notion of what handheld devices can do.

At the heart of the ONEXPLAYER X1 is an Intel Core Ultra CPU, a powerhouse with up to 14 cores and 18 threads that brings the kind of performance you’d expect from a desktop computer right into your hands. This is paired with an integrated GPU that boasts Xe cores, ensuring that graphics are rendered beautifully on its large 10.95-inch display. The screen itself is a marvel, with a resolution of 2560×1600 and a smooth 120Hz refresh rate that makes everything from detailed spreadsheets to fast-paced action look crisp and fluid.

But the ONEXPLAYER X1 isn’t just about raw power. It’s designed to be as versatile as it is potent. It’s not just a gaming console; it’s a fully-fledged Windows tablet and laptop as well. This is made possible by its detachable keyboard system, which allows you to switch from gaming to typing in seconds. The keyboard is backlit and comes with a trackpad and folio case, making it perfect for getting work done on the go.

ONEXPLAYER X1

ETH Prime has once again been testing the new ONEXPLAYER X1  providing a good overview of what you can expect from the large screen handheld games console which is currently available to back via Indiegogo with early bird pledges starting from £843 or $1069 offering a 15% discount off the recommended retail price. If goes to plan worldwide shipping is expected to take place sometime during March 2024.

Here are some other articles you may find of interest on the subject of handheld games consoles :

For those who love gaming, the ONEXPLAYER X1 doesn’t disappoint. It comes with detachable controllers that feature Hall-based analog sticks and triggers, and even customizable RGB lighting for that extra touch of personalization. These controllers are designed to provide an immersive gaming experience, one that rivals traditional gaming consoles.

Handheld games console

Storage and memory are also top-notch, with 32GB of LPDDR5X RAM and a 1TB M.2 SSD, ensuring that you can multitask with ease and have plenty of room for all your files and games. And when it comes to connectivity, the ONEXPLAYER X1 has you covered with a Micro SD card slot, USB 3.2, USB 4, and even an Oculink port for connecting an external GPU, which expands its capabilities even further.

Battery life is crucial for any portable device, and the ONEXPLAYER X1 is equipped with a 65Wh battery that’s designed to last throughout the day. And when you do need to charge, the device supports 100W fast charging, so you can get back to full power quickly.

The ONEXPLAYER X1 also comes with the 1X console software suite, which allows users to adjust performance settings like TDP, fan curves, and RGB lighting to their liking. This level of customization means that whether you’re a gamer looking to optimize your play or a professional needing to adjust your workstation for peak performance, the ONEXPLAYER X1 can accommodate your needs.

This device has been put through its paces with a variety of games and benchmarks, and it has proven that it’s more than capable of handling whatever is thrown at it. It’s a device that appeals to both gaming enthusiasts and professionals who need a powerful portable workstation.

Currently, the ONEXPLAYER X1 is available for backing on Indiegogo, where it stands as a testament to the innovation happening in the realm of portable computing. The team behind the device is committed to providing continuous software updates to further enhance its performance, ensuring that the ONEXPLAYER X1 isn’t just keeping up with the latest technology—it’s pushing the envelope.

With the ONEXPLAYER X1, the future of handheld computing is here. It’s a device that offers the convenience of portability without sacrificing the power and versatility that users demand. Whether for work or play, the ONEXPLAYER X1 is poised to become an essential tool for anyone who wants to take their computing experience to the next level.

Filed Under: Gaming News, Top News


Latest timeswonderful Deals

Disclosure: Some of our articles include affiliate links. If you buy something through one of these links, timeswonderful may earn an affiliate commission. Learn about our Disclosure Policy.

Categories
News

How to Change Your iPhone Home Screen Animation (Video)

iPhone Home Screen Animation

If you are an iPhone user who’s been longing for a touch of customization on your device, particularly on the home screen, you will be pleased to know that iOS 17 brings a refreshing change. Gone are the days of the same old animations. This video below from iReviews will guide you through the simple yet transformative process of altering your iPhone’s home screen animation, offering a breath of fresh air to your user experience.

1. A Fresh Approach to Home Screen Animation in iOS 17
First things first, let’s talk about the introduction of new animation options in iOS 17. Historically, iPhone animations have remained consistent, providing a uniform experience. However, with the latest update, users have the opportunity to bring a personal touch to their devices. Whether you crave a different look or faster transitions, iOS 17 accommodates your preferences.

2. Systemwide Animation Modifications
Interested in a comprehensive change? Here’s how you can modify animations across your entire iOS system. It starts with a simple journey into your settings. Navigate to Settings > Accessibility > Motion. Here, you’ll find the option ‘Reduce Motion’, which, when enabled, reveals ‘Prefer Crossfade Transitions’. This setting swaps your standard animations for a smoother, crossfade style. Not only is this visually appealing, but it also enhances the performance on older iPhone models.

3. Tailoring Animations for Specific Apps or Home Screen
If you prefer a more targeted approach, iOS 17 allows for per-app animation customization. This feature is particularly useful for those who wish to maintain the default animations for certain applications while experimenting with new styles on others, like the home screen. To do this, venture back to Accessibility settings and scroll to ‘Per App Settings’. Here, you can add the home screen and library, enabling ‘Reduce Motion’ and ‘Prefer Crossfade Transition’ specifically for these areas. This results in a unique, personalized feel to your home screen and library.

4. Reversing Your Animation Choices
Change your mind? No problem. Reverting to the original animation style is as easy as swiping to delete the home screen from the ‘Per App Settings’ section. This flexibility ensures that you can experiment with different looks without any permanent commitment.

As you navigate through these settings, remember that your iPhone is a personal device, and its appearance should reflect your style and preferences. With these new options in iOS 17, customizing your phone is not only possible but also simple and fun.

You are now equipped with the knowledge to refresh your iPhone’s appearance with new animations. Whether you choose a systemwide change or a more specific adjustment, these steps will help you achieve a more personalized and efficient user experience. Remember, this is just one of the many features iOS 17 offers to enhance your iPhone usage.

Source & Image Credit: iReviews

Filed Under: Apple, Apple iPhone, Guides


Latest timeswonderful Deals

Disclosure: Some of our articles include affiliate links. If you buy something through one of these links, timeswonderful may earn an affiliate commission. Learn about our Disclosure Policy.

Categories
News

Samsung Screen Experience Zone opens at CES

Samsung Screen Experience Zone

Samsung has unveiled its latest high-end TVs at the Consumer Electronics Show in Las Vegas and they have now opened the Samsung Screen Experience Zone at CES where they are showcasing all of their latest TV and displays.

With more consumers desiring quality appliances to enjoy various forms of entertainment, Samsung has consistently sought to raise the bar for viewing experiences through its innovations. In line with this, the company showcased some of its premium appliances and newest services at the Screen Experience Zone in its CES booth. From the Neo QLED 8K ultra-large, high-definition TVs to Ballie smart home companion, the Screen Experience Zone was a must-see section for attendees.

As a TV market leader for nearly two decades, Samsung’s premium displays have continually set the standard for viewing experiences. Building off this expertise, Samsung integrated AI technology into its TVs to create the 2024 Neo QLED 8K — offering users superior viewing experiences with the latest technical features.

The Neo QLED 8K contains the NQ8 AI Gen3 Processor,­ the company’s most advanced AI-powered processor to date. The processor supports a neural processing unit (NPU) that is twice as fast as previous versions and an AI neural network eight times larger than before. As the processor utilizes deep learning and 8K AI Upscaling Pro technology, it automatically adjusts image and sound quality, delivering picture-perfect 8K content every time.

You can find out more information about the new Samsung Screen Experience Zone at the Consumer Electronics Show in Las Vegas over at the Samsung website at the link below.

Source Samsung

Filed Under: Displays News, Technology News


Latest timeswonderful Deals

Disclosure: Some of our articles include affiliate links. If you buy something through one of these links, timeswonderful may earn an affiliate commission. Learn about our Disclosure Policy.

Categories
News

Cyber Acoustics Flex center screen web camera

Cyber Acoustics Flex fully adjustable center screen and edge webcam

The CA Essential Webcam Flex by Cyber Acoustics is a multi-functional camera that offers a wide range of features, making it an indispensable tool for a variety of professional and personal purposes. Whether you’re a business professional, teacher, healthcare professional, or a streamer on platforms like YouTube or Twitch, the CA Essential Webcam Flex is designed to cater to your specific needs offering a fully adjustable edge and center screen webcam.

One of the standout features of the CA Essential Webcam Flex is its ability to serve multiple purposes. It is not just a webcam for video conferencing, but also a device that can be used for presentations, live interviews, webinars, livestreams, and demonstrations. This flexibility makes it a versatile tool that can be used in a variety of settings, from professional meetings to personal livestreams.

The CA Essential Webcam Flex offers two unique mounting positions: Center View and Table View. The Center View position allows for a more natural gaze, making video calls more engaging and personal. On the other hand, the Table View position is perfect for sharing documents, objects, lessons, and more. This makes the webcam an excellent tool for teachers, tabletop gamers, and anyone who needs to share physical objects or documents during a video call.

Flexible center screen webcam

The technical specifications of the CA Essential Webcam Flex are impressive. It offers high-quality 5MP video, HD autofocus, and low light correction. This ensures that your video is always clear and crisp, even in less than ideal lighting conditions. The webcam also features a rotatable arm adjustable up to 19 cm, further enhancing its versatility.

Here are some other articles you may find of interest on the subject of web cameras :

Another key feature of the CA Essential Webcam Flex is its dual omnidirectional microphones. These microphones capture sound from all directions, ensuring that your voice is clear and audible during video calls. This is particularly useful for live interviews, webinars, and livestreams where clear audio is essential.

The CA Essential Webcam Flex is compatible with Windows 10 & 11, Mac OS 10.6 or above, and Chromebooks. It also works with all conferencing and chat applications, including Zoom, Google Meet, Skype for Business, and Microsoft Teams. This broad compatibility makes it a convenient choice for users with different operating systems and conferencing preferences.

Specifications :

  • High-quality 5MP video up to 2592 x 1944 @ 30 FPS
  • HD autofocus and low light correction
  • Rotatable arm is adjustable up to 19 cm for both Table View and Center View mode
  • Wide 74.57-degree diagonal field of view with five levels of manual zoom
  • Dual omnidirectional microphones
  • USB-A plug-and-play, no software required
  • Compatible with Windows 10 & 11, Mac OS 10.6 or above, and Chromebooks
  • Compatible with all conferencing and chat applications, including Zoom, Google Meet, Skype for Business, and Microsoft Teams
  • Ensure privacy by rotating camera up when mounted at the top of a monitor

The webcam is a plug-and-play USB-A device, which means it does not require any additional software or applications. This makes it easy to use, even for those who are not tech-savvy. Moreover, the webcam ensures privacy by allowing the camera to be rotated up when mounted at the top of a monitor, providing users with peace of mind.

The CA Essential Webcam Flex is priced at $129.99, making it a worthwhile investment for those who need a high-quality, versatile webcam. With its unique features and broad compatibility, the CA Essential Webcam Flex is a game-changer in the world of webcams, offering users an unparalleled video conferencing experience.

Filed Under: Gadgets News


Latest timeswonderful Deals

Disclosure: Some of our articles include affiliate links. If you buy something through one of these links, timeswonderful may earn an affiliate commission. Learn about our Disclosure Policy.

Categories
News

How to Take Screenshots and Screen Recordings on Your iPhone

screenshot iPhone

In today’s digital landscape, capturing and sharing screen content has become an indispensable aspect of our smartphone usage. Whether it’s documenting crucial information, creating engaging tutorials, or sharing entertaining social media content, screen capture and recording capabilities have become essential tools for iPhone users. This comprehensive guide delves into the world of capturing and sharing your iPhone’s screen, providing detailed instructions on both screenshots and screen recordings.

Part 1: Capturing Screenshots: A Step-by-Step Guide

Screenshots are an excellent way to preserve the current state of your iPhone’s screen, capturing essential information, conversations, or visual elements. Let’s explore how to take and edit screenshots effectively.

Taking Screenshots with Ease:

  1. Locate the Crucial Buttons: Identify the side button (formerly known as the Sleep/Wake button) and the volume-up button on the right side of your iPhone.
  2. Press Simultaneously: Quickly press and release both the side button and the volume up button simultaneously. A distinct screenshot sound will confirm the successful capture, unless your device is in silent mode.

Taking Screenshots with AssistiveTouch:

  1. Enable the AssistiveTouch Feature: For iPhones with Touch ID or Face ID, navigate to Settings > Accessibility > AssistiveTouch and toggle the switch to enable the feature. For iPhones with home buttons, go to Settings > Accessibility > Home Button > AssistiveTouch and follow the same process.
  2. Access the AssistiveTouch Menu: Double-tap the home button or swipe up from the bottom edge of the screen to open the AssistiveTouch menu.

Capture with AssistiveTouch: Tap the “Devices” icon in the AssistiveTouch menu, then select “Screenshot” from the options.

Editing Screenshots with Precision:

  1. Access the Editing Shortcut: Once you’ve captured a screenshot, a thumbnail will appear in the lower-left corner of the screen. Tap the thumbnail to open the editing window.
  2. Manipulate the Screenshot: Use the editing tools provided, such as drawing tools, text insertion, and cropping options, to customize your screenshot to your liking.
  3. Save or Share Your Creation: Once satisfied with your edits, tap the Done button to save the modified screenshot or tap the Share icon to share it via various apps or services.

Part 2: Recording Screen Activities: Capturing Digital Moments

Screen recordings allow you to capture the entirety of your iPhone’s screen activity, making them ideal for creating tutorials, demonstrating gameplay, or documenting app usage. Here’s how to record screen activities effectively.

Recording Screen Activities with Control Center:

  1. Access the Control Center: Swipe down from the top-right corner of your iPhone’s display to open Control Center.
  2. Find the Screen Recording Button: Locate the Screen Recording button, which may require tapping the “Customize Controls” option to add it if it’s not visible.
  3. Initiate Screen Recording: Tap the Screen Recording button. A brief countdown will appear, followed by the start of the screen recording.
  4. End the Recording: To stop recording, open Control Center again and tap the red Stop Recording button.

Accessing Recorded Screen Recordings:

  1. Locate Your Recordings: All recorded screen recordings are stored in the Photos app. You can find them in the “Screen Recordings” album under the “Media Types” section.

Editing and Sharing Screen Recordings:

  1. Access the Editing Tools: Open a recorded screen recording in the Photos app. Tap Edit to access the editing tools.
  2. Crop and Annotate: Trim the video to your desired length using the crop tool and add annotations, text, or shapes using the Markup tool.

Summary

Mastering screen capture and recording on your iPhone empowers you to effectively document, share, and enhance your digital experiences. With these comprehensive guidelines, you can confidently capture and share your iPhone’s screen content, whether it’s preserving important information, creating engaging tutorials, or showcasing entertaining gameplay moments. You can find out more details on how to take screen recording and screenshots on your iPhone over at Apple’s website.

Image Credit: John Appleseed

Filed Under: Apple, Apple iPad, Guides


Latest timeswonderful Deals

Disclosure: Some of our articles include affiliate links. If you buy something through one of these links, timeswonderful may earn an affiliate commission. Learn about our Disclosure Policy.

Categories
News

How to Take a Screenshot or Screen Recordings on Your Mac

screenshot Mac

This guide is designed to show you how to take a screenshot and screen recordings on your Mac. In the digital age, screenshots and screen recordings have become essential tools for demonstrating tasks, troubleshooting issues, and preserving important moments. Whether you’re a student sharing notes, a professional providing instructions, or a creative individual capturing your screen for editing purposes, knowing how to effectively capture your Mac’s display is crucial.

Taking Screenshots

Apple’s built-in Screenshot tool provides a straightforward and versatile approach to capturing your Mac’s screen. It offers various options to suit your needs, from capturing the entire screen to selecting specific areas or windows.

1. Screenshot the Entire Screen

Pressing the Shift + Command + 3 shortcut simultaneously will capture the entire contents of your Mac’s screen. The captured screenshot will be saved to your desktop as a PNG file with the date and time of capture.

2. Capture a Specific Area

To capture only a portion of your screen, hold down the Shift + Command + 4 shortcut. Your cursor will transform into a crosshair pointer. Click and drag the crosshair to select the desired area, and the screenshot will be captured and saved to your desktop automatically.

3. Capture a Window

To capture a specific window without the surrounding desktop, hold down the Alt + Shift + Command + 3 shortcut. The window you’re currently focused on will be captured and saved to your desktop.

4. Editing Screenshots

Once a screenshot is captured, it will open in the Preview app for editing. You can use Preview’s various tools to crop, resize, add annotations, and even convert the screenshots to different formats.

Screen Recordings

Recording your Mac’s screen is particularly useful for demonstrating workflows, capturing presentations, or creating tutorials. Apple’s built-in Screen Recording tool provides a straightforward and efficient way to capture your screen’s activity.

1. Starting a Screen Recording

Press the Shift + Command + 5 shortcut to open the Screenshot tool. Click the “Record” button and a red recording indicator will appear. You can control the recording area using the crosshair pointer, similar to taking a screenshot.

2. Customizing Recording Options

Before starting the recording, click the “Options” button to customize the recording settings. You can adjust the recording quality, enable audio capture from your microphone or system audio, and set a start delay to allow you to prepare for the recording.

3. Stopping a Screen Recording

Once you’ve captured the desired footage, click the red recording indicator or press the Escape key to stop the recording. The screen recording will be saved to your desktop as a QuickTime Movie file.

Additional Tips

Screenshot Delay: For particularly complex tasks or presentations, you can set a start delay to allow you to prepare before the recording starts.

Full-Screen Recording: To capture an entire application’s window, press the Option key while recording.

Capture Selection: To capture a specific area within a window, frame the desired selection and press the Spacebar key while recording.

Capture Mouse Pointer: To include the mouse pointer in your recording, press the Command key while recording.

Conclusion

Gaining proficiency in the use of screenshots and screen recordings on your Mac is more than just a technical skill; it’s an art that can greatly amplify your efficiency and ability to communicate effectively. In the fast-paced digital world, where visual representation often speaks louder than words, these tools become indispensable. As a student, they can transform the way you compile and share educational materials, making study sessions more interactive and collaborative. For professionals, the ability to quickly capture and disseminate information through these means can streamline workflows and enhance presentations, allowing for clearer communication of complex ideas. Creative individuals, too, find immense value in these tools, as they provide a versatile medium for capturing artistic processes or showcasing portfolios in a dynamic format.

The utility of mastering screenshots and screen recordings extends beyond basic functionality. It includes developing a keen eye for what to capture and how to present it. This involves understanding the nuances of timing, framing, and highlighting key information. By delving into the step-by-step instructions provided and experimenting with the various tips and tricks, you can refine your technique and develop a more nuanced approach. This will enable you to capture your screen in a way that not only records the information but also conveys it in an engaging and informative manner.

In conclusion, by mastering the art of screenshots and screen recordings on your Mac, you equip yourself with a versatile set of skills that enhance your productivity and communication. These capabilities are not just functional; they’re transformative, enabling you to convey your ideas, thoughts, and experiences in a more impactful way. As you explore and utilize these tools, you’ll find yourself well-prepared to capture and share the contents of your Mac’s display for an array of purposes, from education and professional tasks to creative endeavors. You can find out more details about how to take screenshots and screen recordings on your Mac over at Apple’s website.

Here are some more Mac articles you may find useful:

Image Credit: yuhaimedia

Filed Under: Apple, Guides, Laptops


Latest timeswonderful Deals

Disclosure: Some of our articles include affiliate links. If you buy something through one of these links, timeswonderful may earn an affiliate commission. Learn about our Disclosure Policy.