Categories
News

How to Set Up Your New Android Phone or Tablet

Android Phone or Tablet

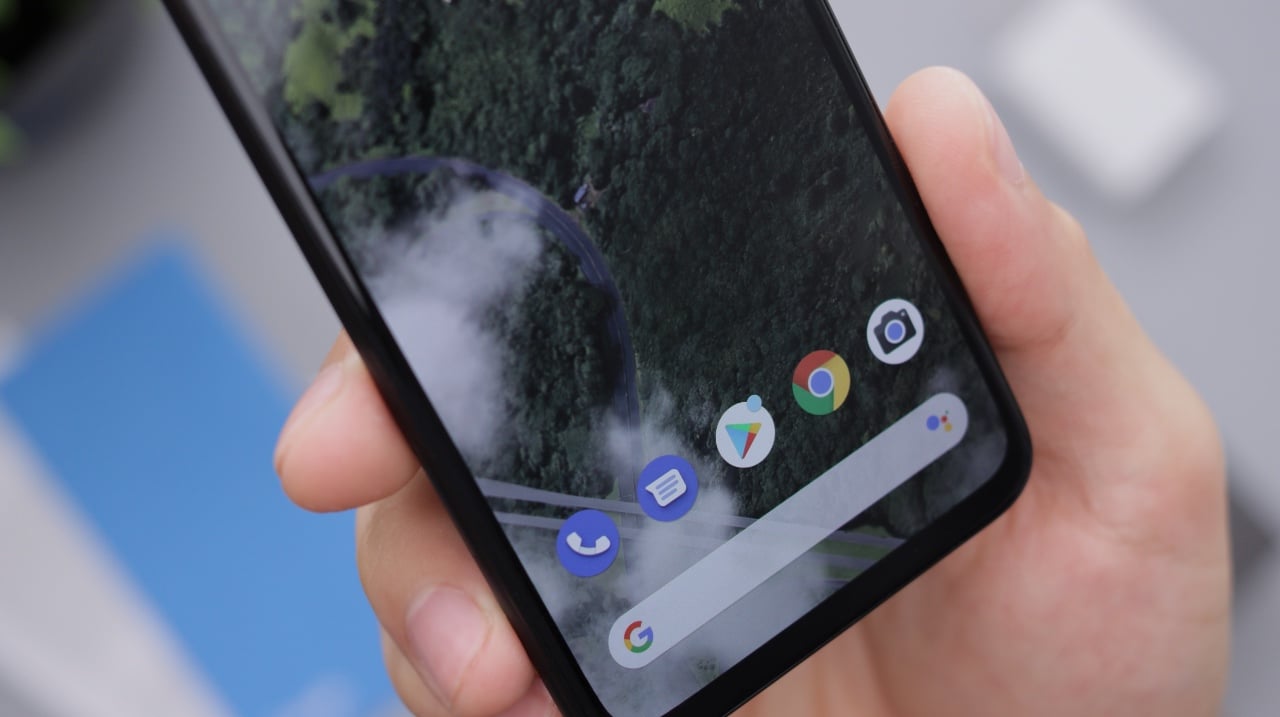
This guide is designed to show you how to set up your new Android Phone or Android tablet. Unboxing your shiny new Android phone or tablet is an exciting moment, marking the beginning of a journey filled with endless possibilities. However, before immersing yourself in the vast world of Android apps and features, it’s crucial to complete the initial setup process. This guide will walk you through each step, ensuring a smooth transition into the Android ecosystem.

Getting Started: Powering On and Connecting to Wi-Fi

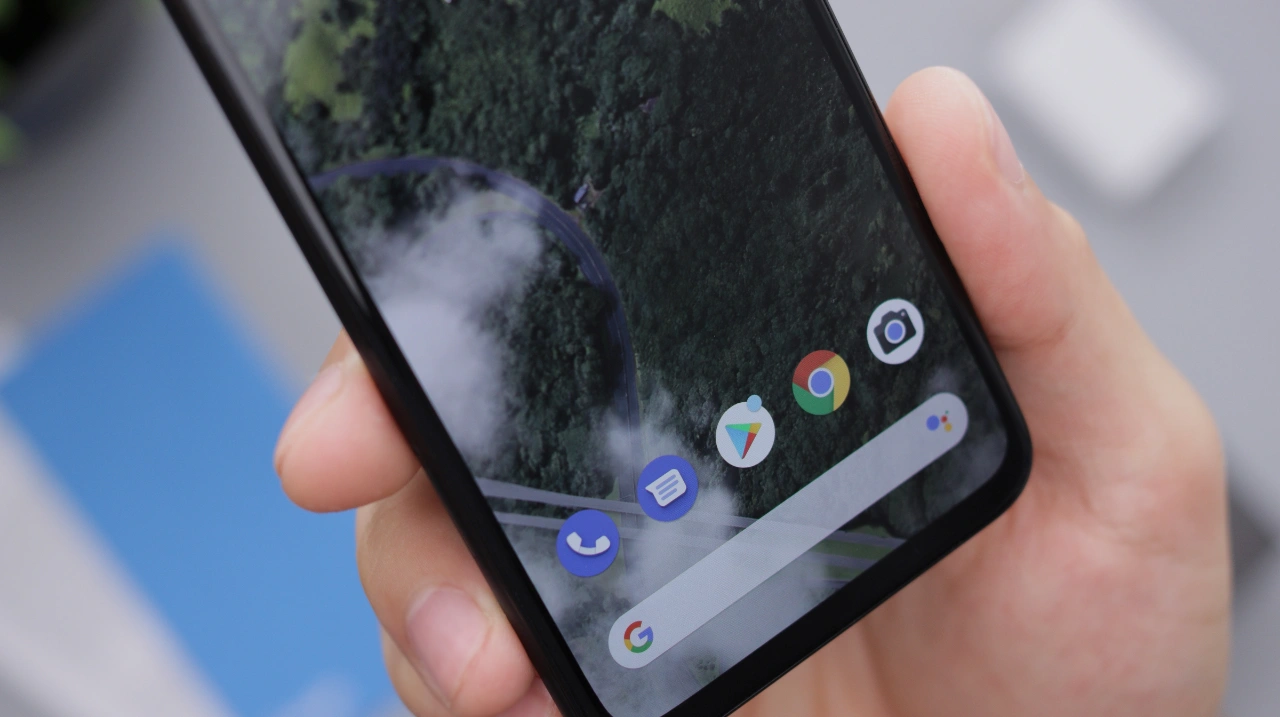
Power On: The first step is to turn on your new device. Simply press and hold the power button located on the side or top of the phone or tablet. Once the device powers on, you’ll be greeted with a welcome screen.

Connect to Wi-Fi: Connecting to a Wi-Fi network is essential for various aspects of Android setup, including downloading apps and accessing online services. Select the desired Wi-Fi network from the list and enter the password if prompted.

Personalizing Your Device: Setting Language and Themes

Choose Your Language: Select the language you prefer from the list of available options. This determines the language used for the user interface, menus, and other text-based elements.

Personalize Your Theme: Android offers a variety of themes to customize the look and feel of your device. Explore the available themes and choose one that aligns with your personal preference.

Google Account Sign-in: Unlocking the Power of Google Services

Google Account Sign-in: To fully utilize the capabilities of your Android phone or tablet, you’ll need to sign in with a Google account. This will allow you to access Google services like Gmail, Google Maps, and Google Play Store.

Data Transfer Options: If you’re switching from an iOS device or another Android device, you’ll be presented with options to transfer data, such as contacts, photos, and messages. Follow the on-screen instructions to seamlessly move your data to your new device.

Setting Up Biometric Authentication: Enhancing Security

Fingerprint Scanner: Many Android devices come equipped with fingerprint scanners for convenient and secure unlocking. Follow the on-screen instructions to register your fingerprint and enable it as a security option.

Face Unlock: Some Android devices also support face unlock, allowing you to unlock your phone by simply looking at it. If your device has this feature, follow the on-screen instructions to set it up.

Privacy and Security: Protecting Your Data

Location Access: Android devices can access your location to provide relevant information and services. However, you can control which apps can access your location and for what purposes. Go to Settings > Privacy > Location to manage location permissions.

App Permissions: Apps request various permissions to function properly. Carefully review app permissions before granting them, especially sensitive permissions like access to your contacts or microphone.

Additional Setup Steps: Fine-tuning Your Android Experience

Notifications: Android allows you to customize how notifications are displayed and managed. Go to Settings > Notifications to adjust notification settings for individual apps or change the overall notification behavior.

Gesture Controls: Android offers a variety of gesture controls to enhance navigation. Explore the available gestures and enable the ones you prefer in Settings > System > Gestures.

Summary:

Congratulations on successfully setting up your new Android phone or tablet! Now, it’s time to explore the vast world of Android apps, games, and services. Download your favorite apps, customize your home screen, and immerse yourself in the endless possibilities that Android offers. Remember, with a little exploration and personalization, your Android device can become an indispensable part of your daily life.

Here are some more Android articles you may find helpful:

Image Credit: Onur Binay

Filed Under: Android News, Guides, Mobile Phone News, Tablet News


Latest timeswonderful Deals

Disclosure: Some of our articles include affiliate links. If you buy something through one of these links, timeswonderful may earn an affiliate commission. Learn about our Disclosure Policy.

Categories
News

Shielding Your Android Phone from Security Threats

Android Security

This guide is designed to show you how you can protect your Android Phone from security threats. In today’s technology-driven world, smartphones have become an indispensable part of our lives. We rely on them for everything from communication and entertainment to managing our finances and storing sensitive information. However, this increased reliance also makes our smartphones prime targets for cybercriminals.

Android, the world’s most popular mobile operating system, can be particularly vulnerable to security threats. With its open nature and vast user base, Android devices are frequently targeted by malware, phishing scams, and other malicious attacks.

To effectively safeguard your Android phone from these evolving threats, a comprehensive approach is essential. Here’s a detailed guide to fortifying your Android device’s security:

Fortify Your First Line of Defense: The Screen Lock

Your phone’s screen lock serves as the gatekeeper to your personal data. A strong screen lock is crucial to prevent unauthorized access. Avoid using easily guessable patterns or PINs. Instead, opt for a complex alphanumeric password or a fingerprint lock. For added security, consider enabling two-factor authentication (2FA) for your screen lock, which requires an additional verification step, such as a code sent to your phone number or email address.

Embrace the Power of Updates

Software updates often contain critical security patches that address vulnerabilities and protect against known threats. Make it a habit to regularly check for and install updates for your Android operating system and all installed apps. Enable automatic updates whenever possible to ensure your device is always running the latest secure software.

Download Apps Responsibly: Stick to Trusted Sources

Malicious apps can infiltrate your device from third-party app stores or unverified websites. To avoid falling prey to these threats, stick to downloading apps from the official Google Play Store. Before installing an app, carefully review its developer, permissions, and user reviews. Avoid apps from unknown or suspicious developers, and be cautious of apps that request excessive permissions.

Unmask Phishing Scams: Protect Your Personal Information

Phishing scams are cleverly crafted attempts to trick you into revealing personal information or clicking on malicious links. Be wary of unsolicited emails, text messages, or social media messages that urge you to click on links or provide sensitive information. Never enter your credentials on suspicious websites or in response to unsolicited requests.

Enlist the Aid of a Mobile Security App: A Proactive Shield

A reputable mobile security app can provide an extra layer of protection by scanning for malware, blocking malicious websites, and offering features like anti-theft protection. Choose a security app from a trusted developer and ensure it is up-to-date.

Safeguard Your Wi-Fi Connections: Beware of Public Networks

Public Wi-Fi networks, while convenient, can be hotspots for cybercriminals to intercept your data. Avoid using public Wi-Fi networks for sensitive activities like online banking or shopping. If you must use public Wi-Fi, consider using a VPN (Virtual Private Network) for added security. A VPN encrypts your traffic, making it difficult for cybercriminals to snoop on your activity.

Social Media Sharing: Exercise Caution and Discretion

Social media platforms offer a convenient way to connect with friends and family, but they also present a potential security risk. Limit the personal information you share on social media. Avoid posting sensitive details like your home address, workplace, or travel plans, as this information could be used by cybercriminals to target you.

Regular Backups: Safeguard Your Precious Data

Regularly back up your important data, such as contacts, photos, and documents, to a cloud storage service or external drive. This ensures you have a copy of your data in case your phone is lost, stolen, or damaged. Cloud storage services like Google Drive and Dropbox offer convenient and secure backup options.

Tread Carefully with Third-Party Links: Verify Before You Click

Avoid clicking on links from unknown sources, even if they appear to be from legitimate websites or contacts. Hover over links to see the actual destination URL before clicking. If the URL looks suspicious or doesn’t match the sender’s email address, refrain from clicking and report the email as spam or phishing.

Keep Your Android Version Current: Embrace the Latest Security Enhancements

Older Android versions are more susceptible to security vulnerabilities. If possible, ensure your device is running the latest version of Android to benefit from the latest security enhancements. Regularly check for software updates and install them promptly.

Remember, vigilance is key in protecting your Android phone from security threats. Stay informed about the latest threats, adopt cautious online behavior, and keep your device secure to safeguard your personal information and privacy.

Filed Under: Android News, Guides


Latest timeswonderful Deals

Disclosure: Some of our articles include affiliate links. If you buy something through one of these links, timeswonderful may earn an affiliate commission. Learn about our Disclosure Policy.

Categories
News

How to Master Android Phone Photography in Android 14

Android Phone photgraphy

This guide is designed to show you how to master Android Phone Photography with the latest version of Google’s mobile OS. Android 14 has introduced a plethora of new features and enhancements to the default camera app, making it easier than ever to capture stunning photos with your Android smartphone. Whether you’re a seasoned photographer or just starting, this guide will equip you with the knowledge and techniques to elevate your mobile photography skills.

Understanding the Basics

Before diving into advanced techniques, let’s recap the fundamentals of smartphone photography:

  • Lighting: Proper lighting is crucial for capturing high-quality images. Utilize natural light whenever possible, as it tends to produce more flattering and realistic results.
  • Composition: The arrangement of elements within your frame is essential for conveying a compelling story. Employ the rule of thirds, leading lines, and negative space to create visually appealing compositions.
  • Focus: Ensure your subject is sharp and in focus by tapping on the desired area on the screen. Most Android phones offer advanced focus modes, such as continuous autofocus and subject tracking, for precise focusing.
  • Exposure: Adjust the exposure level to ensure your photos are neither too bright nor too dark. Use the exposure compensation slider on your camera app to fine-tune the exposure.

Exploring Android 14 Camera Features

Android 14 brings several exciting camera enhancements that can significantly improve your mobile photography experience:

  • Scene Optimization: The camera app can intelligently recognize various scenes and adjust the shooting parameters accordingly, ensuring optimal capture in various lighting conditions.
  • Ultra HDR: This feature expands the dynamic range of your photos, preserving details in both bright and dark areas.
  • AI-Powered Enhancements: Utilize AI-powered features like portrait mode and object removal to enhance your photos with professional-looking effects.

Capturing Stunning Landscapes and Cityscapes

When capturing landscapes and cityscapes, consider these tips:

  • Choose the Right Time: The best times for capturing landscapes are during the golden hour (just after sunrise or before sunset) or on overcast days when the light is softer and more diffuse.
  • Utilize Leading Lines: Use natural features like roads, rivers, or fences to guide the viewer’s eye through the scene and create a sense of depth.
  • Incorporate Negative Space: Balance the main subject with ample negative space to avoid clutter and emphasize the vastness of the landscape or cityscape.

Photographing Portraits and Close-Ups

For captivating portraits and close-ups:

  • Pay Attention to Lighting: Utilize natural light or softbox lighting to create a flattering glow on your subject’s face. Avoid harsh shadows and direct sunlight.
  • Find a Suitable Background: Choose a background that complements your subject and doesn’t distract from the main focus.
  • Focus on Emotions: Capture genuine expressions and emotions by engaging with your subject and making them feel comfortable.

Elevating Your Photography with Advanced Techniques

  • Manual Shooting Modes: Explore manual shooting modes to gain more control over exposure, shutter speed, and ISO settings.
  • Third-Party Camera Apps: Experiment with third-party camera apps that offer a wider range of features and shooting options.
  • Post-Processing: Utilize photo editing apps to enhance your images, adjusting brightness, contrast, and color to achieve your desired aesthetic.

Summary

Embarking on the path to excellence in Android phone photography is a continuous process, one that demands dedication, perseverance, and an openness to trying out varied approaches. The intricacies of photography can be quite intricate, involving an understanding of lighting, composition, and the right moment to capture an image. As you delve into this realm, it’s important to recognize that each photograph is a learning opportunity, a chance to refine your technique and artistic vision.

With the introduction of Android 14, the photographic potential of your device has been significantly enhanced. This latest operating system brings with it improved camera functionalities and more intuitive controls, enabling you to harness the full capabilities of your smartphone’s camera. Whether you’re aiming to capture the subtle interplay of light and shadow in a landscape or the fleeting expression on a person’s face, these advancements offer you a more robust toolkit.

In this guide, we’ve outlined a series of tips and techniques designed to help you maximize these new features. From understanding the basics of composition and lighting to exploring the more advanced settings of your Android device, these tips are tailored to help you enhance your photographic skills. As you apply these techniques, you’ll notice a gradual improvement in your work, leading to photographs that not only capture moments but also tell a story and evoke emotions.

Ultimately, the journey to mastering Android phone photography is as rewarding as it is challenging. It’s a journey that allows you to express your creativity, capture the world from your unique perspective, and share your vision with others. With the tips provided in this guide and the capabilities of Android 14 at your disposal, you are well-equipped to take this journey and create stunning, memorable photographs that reflect your growing expertise in the art of photography.

Image Credit: Angela Compagnone

Filed Under: Android News, Guides, Mobile Phone News


Latest timeswonderful Deals

Disclosure: Some of our articles include affiliate links. If you buy something through one of these links, timeswonderful may earn an affiliate commission. Learn about our Disclosure Policy.

Categories
News

How to find downloaded files on your Android Phone or Tablet

downloaded files android

This guide is designed to show you how to easily find your downloaded files on your Android Phone or Tablet. In the digital age, downloading files has become an integral part of our daily lives. Whether it’s grabbing a new app, saving a document, or capturing a cherished memory, our Android devices serve as repositories of our digital assets. However, with a constant influx of downloaded content, it can become challenging to locate specific files when needed. Fear not, as this comprehensive guide will unravel the mysteries of file management on your Android device, empowering you to effortlessly track down your downloaded files.

Method 1: Utilizing the Default File Manager App

Most Android devices come equipped with a built-in file manager app, aptly named “Files” or “My Files.” This native app acts as a central hub for organizing and managing your device’s storage, including downloaded files.

1. Access the File Manager App:

Locate the file manager app on your device’s home screen or app drawer. It may be labeled as “Files” (Google Pixel), “My Files” (Samsung Galaxy), or have a generic folder icon.

2. Navigate to the Downloads Folder:

Once the file manager app is open, look for a section or category labeled “Downloads.” This folder typically houses all the files you have downloaded from various sources, including web browsers, apps, and email attachments.

3. Browse and Manage Downloaded Files:

Within the Downloads folder, you should see a list of your downloaded files. The list may be arranged chronologically, alphabetically, or by file type. You can further organize the files by creating subfolders or using the search function.

Method 2: Employing the Files by Google App

If your device lacks a native file manager app or you prefer a more streamlined experience, consider using the Files by Google app. This free app, developed by Google itself, offers a user-friendly interface and powerful file management capabilities.

1. Download and Install Files by Google:

Access the Google Play Store and search for “Files by Google.”

Install the app on your device and launch it once the installation is complete.

2. Locate Downloaded Files:

On the app’s home screen, tap on the “Browse” tab located at the bottom of the screen.

Under the “Browse” tab, you should see a section or category labeled “Downloads.” Tap on it to view your downloaded files.

3. Manage and Organize Downloaded Files:

Similar to the default file manager app, the Files by Google app allows you to manage your downloaded files. You can sort them by name, date, or size, and you can also create subfolders for better organization.

Additional Tips for Locating Downloaded Files:

  • Check Web Browser Downloads: If you downloaded a file using a web browser, you can also access it directly from the browser’s download history.
  • Utilize Third-Party File Managers: If the default file manager or Files by Google doesn’t meet your needs, consider exploring third-party file manager apps available on the Google Play Store.
  • Use Search Functionality: Both the default file manager and Files by Google app offer search functionality, allowing you to quickly locate specific files by name or file type.
  • Organize Files Regularly: To avoid clutter and make it easier to find files, develop a habit of organizing your downloaded files regularly. Create subfolders, use file tags, and delete unnecessary files.

In conclusion, finding downloaded files on your Android device is a straightforward process, whether you rely on the built-in file manager app or opt for a third-party solution. By following the methods outlined in this guide and employing the additional tips provided, you can effortlessly navigate your device’s storage and retrieve the files you need with ease. Remember, a well-organized file system not only enhances accessibility but also optimizes your device’s performance.

Filed Under: Android News, Guides


Latest timeswonderful Deals

Disclosure: Some of our articles include affiliate links. If you buy something through one of these links, timeswonderful may earn an affiliate commission. Learn about our Disclosure Policy.

Categories
News

Zipper 3-in-1 zipping cable charges your phone, watch and laptop

Zipper 3-in-1 zipping cable charges your phone, watch and laptop

Wouldn’t it be great if you could have multiple cables in one, where tangled cords are a thing of the past, and where charging your phone, tablet, or laptop is as quick as a flash. This is the reality WEAST brings to the table with their innovative Zipper charging cable. This cleverly designed cable is transforming the way we power up our devices, making it an essential companion for anyone who relies on technology in their daily life.

The Zipper charging cable stands out with its unique design that resembles a zipper. This isn’t just for show; it’s a practical solution to the frustrating problem of tangled cables. With this design, you can easily keep your charging cables organized and ready to use without the hassle of untangling them every time you need to power up your devices. It’s a small but significant touch that enhances your overall user experience. Limited early bird offers are now available for the imaginative project from roughly $28 or £24 (depending on current exchange rates).

But the Zipper charging cable isn’t just about looks. It’s a powerhouse when it comes to versatility. It comes equipped with a lightning connector for Apple iPhones, a wireless charging module for the Apple Watch, and a USB Type-C connector for Android devices, tablets, and modern laptops. This means you can leave behind the days of carrying multiple cables for different devices and move towards a more streamlined charging approach. The convenience of having one cable for all your charging needs cannot be overstated.

Charging and data cable

Speed is crucial in today’s fast-moving world, and the Zipper charging cable understands that. With its 140W PD fast charging capability, you can quickly charge your devices, minimizing downtime and keeping you ready for whatever the day throws at you. This rapid charging feature is a lifesaver for those who can’t afford to be tethered to a charging port for long periods.

The Zipper cable isn’t just a one-trick pony; it’s also a master of multitasking. While your device charges, the cable allows for the simultaneous syncing of files and backing up of data. This means you can be productive and efficient, managing your digital life without skipping a beat. The ability to charge and transfer data at the same time is a boon for anyone who values productivity.

Assuming that the Zipper funding campaign successfully raises its required pledge goal and manufacturing progresses smoothly, worldwide shipping is expected to take place sometime around February 2024. To learn more about the Zipper 3-in-1 charging cable project survey the promotional video below.

One of the most practical aspects of the Zipper charging cable is its ability to charge multiple devices at once. The zipper design allows the cable to extend in different directions, making it perfect for communal settings like offices or homes where several devices might need charging at the same time. This feature is a game-changer for families or teams who need to stay powered throughout the day.

Durability and environmental responsibility are at the heart of the Zipper charging cable’s design. Made from high-grade, eco-friendly PVC with gold-plated connectors, the cable is resistant to corrosion and ensures a reliable connection. The adjustable length, which can extend from 1.1 to 2.2 meters, provides the flexibility to charge from various distances, accommodating your specific charging scenarios.

Zipper charging cable features

For those who love the great outdoors, the waterproof nature of the Zipper charging cable is a standout feature. It guarantees that your devices stay charged and safe from the elements, giving you the freedom to explore without worrying about your tech. Whether you’re hiking, camping, or simply enjoying a day at the beach, the Zipper cable is designed to endure the adventures you embark on.

The Zipper charging cable by WEAST is more than just a cable; it’s a robust, eco-conscious, and versatile ally for the modern tech user. Its distinctive design, fast charging capabilities, and compatibility with a wide range of devices make it an invaluable tool for anyone looking to improve their charging setup. Whether you’re at home, in the office, or braving the outdoors, the Zipper charging cable is engineered to keep you powered and connected on all your journeys. With this innovative charging solution, WEAST is ensuring that staying charged is convenient, efficient, and hassle-free.

For a complete list of all available project pledges, stretch goals, extra media and more features for the 3-in-1 charging cable, jump over to the official Zipper crowd funding campaign page by visiting the link below.

Source : Kickstarter

Disclaimer: Participating in Kickstarter campaigns involves inherent risks. While many projects successfully meet their goals, others may fail to deliver due to numerous challenges. Always conduct thorough research and exercise caution when pledging your hard-earned money.

Filed Under: Gadgets News, Top News


Latest timeswonderful Deals

Disclosure: Some of our articles include affiliate links. If you buy something through one of these links, timeswonderful may earn an affiliate commission. Learn about our Disclosure Policy.

Categories
News

How to Block Websites on Your Android Phone or Tablet

block websites Android

This guide will show you how to block websites on your Android Phone or tablet. In our increasingly digitalized world, taking control of your online experience has become a critical aspect of daily life, particularly in the context of safeguarding children from the plethora of harmful or inappropriate content that pervades the internet. Implementing website blocking on your Android phone or tablet is a proactive step towards this goal.

It serves as a robust shield against the infiltration of malicious websites, ensuring that your device remains secure and free from potential cyber threats. Moreover, this practice plays a pivotal role in filtering out content that is unsuitable or irrelevant, thereby fostering a safer, more controlled digital environment. By restricting access to certain websites, you not only protect younger users from the dangers of the internet but also encourage responsible and mindful internet usage. This approach is essential in cultivating a healthy relationship with technology, particularly for impressionable minds, and ensures that the digital space remains a source of positive growth and learning.

Why Block Websites on Android

There are several reasons why you might want to block websites on your Android device:

  • Protect Children from Inappropriate Content: Blocking websites with violent, sexually explicit, or age-inappropriate content can help safeguard children from harmful material.
  • Enhance Productivity: Blocking distracting or time-wasting websites can help improve focus and productivity.
  • Filter Out Unwanted Ads: Blocking ad networks and pop-up websites can provide a cleaner and more pleasant browsing experience.
  • Restrict Access to Malicious Websites: Blocking websites known for phishing scams, malware distribution, or other online threats can protect your device and personal information.

Methods for Blocking Websites on Android

There are several methods for blocking websites on Android devices:

  • Built-in Parental Controls: Many Android devices come with built-in parental control features that allow you to block specific websites, set time limits for app usage, and filter content. These settings are typically found in the device’s system settings or the “Digital Wellbeing” or “Parental Controls” section.
  • Third-party Browser Extensions: Browser extensions like BlockSite, AdGuard, and Parental Control Ultimate offer advanced website blocking capabilities, including scheduling blocking times, setting password protection, and filtering specific content categories.
  • Dedicated Website Blocking Apps: Dedicated website blocking apps like Net Nanny, Kidslox, and Google Family Link provide comprehensive parental control features, including website blocking, time limits, app restrictions, and location tracking.
  • Router-level Restrictions: Configuring your home Wi-Fi router’s parental control settings can block websites across all devices connected to the network. This method is effective for controlling internet access for all family members.
  • OpenDNS: OpenDNS is a free DNS service that allows you to filter and block websites at the network level. By changing your device’s DNS settings to OpenDNS, you can block specific websites without installing any software.

Additional Tips for Blocking Websites on Android

  • Identify Websites to Block: Make a list of websites you want to block, considering your specific needs and preferences.
  • Use Multiple Blocking Methods: Combining multiple blocking methods, such as built-in parental controls and third-party apps, can provide stronger protection.
  • Educate Children about Online Safety: Teach children about the importance of online safety and the dangers of inappropriate websites.
  • Monitor and Update Blocking Rules: Regularly review and update your blocking rules to ensure they are effective and up-to-date.
  • Seek Professional Help If Needed: If you need more advanced parental control solutions, consider consulting with a technology professional or using specialized parental control services.

Summary

Implementing website blocking on your Android device stands as a powerful tool in managing and optimizing your internet experience. This strategy is particularly effective in several key areas: it helps in regulating internet usage, ensuring that both you and your family members, especially children, spend time online in a productive and healthy manner. Moreover, it acts as a crucial barrier against harmful content, shielding younger users from the myriad of inappropriate materials that can be easily encountered online.

Beyond these protective measures, website blocking significantly enhances your overall browsing experience. It allows you to eliminate distractions and unwanted content, thereby creating a more focused and efficient online environment. This is particularly beneficial for those who seek to use the internet as a tool for learning and productivity.

The beauty of this approach lies in its flexibility. Android devices offer a variety of methods to block websites, each with its own set of features and levels of control. This diversity enables you to customize your device’s settings to align perfectly with your specific needs and preferences. Whether you’re looking to create a child-safe digital space or simply aiming to improve your focus while online, these tools can be adjusted to suit your unique requirements.

However, it’s important to remember that technology is only part of the solution. Staying vigilant in monitoring online activities, especially for children, is crucial. It’s equally important to engage in open conversations with them about the importance of online safety and the reasons behind certain restrictions. This educational approach helps in fostering a sense of responsibility and awareness about the digital world.

Lastly, the digital landscape is constantly evolving, with new websites emerging every day. Therefore, it’s essential to regularly update your blocking rules and settings. This ongoing maintenance ensures that your online environment remains up-to-date with the latest safety standards, continuing to provide a secure and enriching experience for all users.

Image Credit: Daniel Romero

Filed Under: Android News, Guides, Mobile Phone News


Latest timeswonderful Deals

Disclosure: Some of our articles include affiliate links. If you buy something through one of these links, timeswonderful may earn an affiliate commission. Learn about our Disclosure Policy.

Categories
News

How to Set Up Voicemail on Your Android Phone

voicemail Android

This guide is designed to show you how to set up voicemail on your Android Phone. In today’s fast-paced world, staying connected is crucial. While we rely heavily on text messages and social media, voicemail remains an essential tool for capturing missed calls and important messages. If you’re an Android user, setting up voicemail is a simple process that takes just a few minutes. This guide will walk you through the steps involved in setting up and customizing your voicemail on your Android device.

Understanding Voicemail Basics

Voicemail is a service that allows callers to leave voice messages for you when you’re unable to answer your phone. These messages are stored on a server and can be accessed at your convenience. Most Android devices have voicemail pre-installed, but you may need to activate it before you can use it.

Activating Voicemail

Activating voicemail is typically a straightforward process that can be done through your phone’s settings or by contacting your carrier. The specific steps may vary depending on your carrier and device, but the general process is as follows:

  • Open the Phone app on your Android device.
  • Access the Settings menu.
  • Locate the Voicemail option.
  • Follow the prompts to activate voicemail.
  • Set a PIN to protect your voicemail messages.

Recording a Personalized Greeting

A personalized voicemail greeting is a great way to introduce yourself to callers and let them know how they can reach you. You can record a custom greeting or choose from a variety of pre-recorded options. To record a custom greeting, follow these steps:

  • Access your voicemail settings.
  • Select the option to record a greeting.
  • Press the Record button and speak your greeting.
  • Save your recording.

Customizing Voicemail Settings

In addition to recording a personalized greeting, you can customize your voicemail settings to suit your preferences. These settings may include:

  • Notification options: Choose how you want to be notified of new voicemail messages, such as through a pop-up notification, an email, or a text message.
  • Greeting options: Select the greeting you want to use, either your custom greeting or a pre-recorded option.
  • Message storage options: Choose how long you want to keep your voicemail messages stored.
  • Advanced settings: Access additional voicemail settings, such as the ability to forward voicemail messages to another number or to transcribe voicemail messages into text.

Accessing Voicemail Messages

  • To listen to your voicemail messages, follow these steps:
  • Open the Phone app on your Android device.
  • Tap and hold the 1 key.
  • Enter your voicemail PIN if prompted.
  • Follow the prompts to listen to your voicemail messages.

Troubleshooting Voicemail Issues

  • If you’re having trouble with your voicemail, there are a few things you can try:
  • Check your voicemail settings: Make sure your voicemail is activated and that you have a personalized greeting recorded.
  • Reset your voicemail PIN: If you’ve forgotten your voicemail PIN, you can usually reset it through your carrier’s website or by calling customer service.
  • Contact your carrier: If you’re still having problems, contact your carrier’s customer service for further assistance.

Additional Tips

Here are a few additional tips for using voicemail effectively:

  • Check your voicemail regularly: Make a habit of checking your voicemail regularly so you don’t miss important messages.
  • Keep your greeting concise and informative: Your greeting should be brief and provide callers with enough information to know how to reach you.
  • Be mindful of your voicemail storage: If you’re running low on voicemail storage, consider deleting old messages or increasing your storage limit.

Summary

Voicemail remains a valuable tool for staying connected, even in today’s digital age. By setting up and customizing your voicemail on your Android device, you can ensure that you never miss an important message. With its ease of use and flexible settings, voicemail continues to be a reliable and convenient way to communicate with others. We hope that you find this guide on how to set up voicemail on your Android Phone helpful, if you have any tips or questions, please leave a comment below and let us know.

Image Credit: Thai Nguyen

Filed Under: Android News, Guides, Mobile Phone News


Latest timeswonderful Deals

Disclosure: Some of our articles include affiliate links. If you buy something through one of these links, timeswonderful may earn an affiliate commission. Learn about our Disclosure Policy.

Categories
News

How to Unblock Numbers on Your Android Phone

unblock numbers Android

We previously showed you how to unblock numbers on the iPhone, in this guide we will look at how to unblock numbers on your Android Phone. In the age of constant communication, having the ability to block unwanted calls and messages is a valuable feature offered by Android smartphones. However, situations may arise where you need to unblock a number that you previously blocked. This guide will provide a detailed and informative walkthrough on how to unblock a number on your Android phone.

Understanding Blocking on Android

Blocking a number on an Android phone essentially prevents that number from contacting you via calls or text messages. When a blocked number tries to call you, they will hear a busy signal or a message stating that the call cannot be completed. Similarly, when they send you a text message, they will receive a delivery failure notification.

Reasons for Unblocking a Number

There are various reasons why you might need to unblock a number. Perhaps you accidentally blocked a number you intended to keep in contact with, or maybe you want to re-establish communication with a previously blocked contact. Whatever the reason, unblocking a number is a straightforward process.

Unblocking a Number: Step-by-Step Guide

The specific steps involved in unblocking a number may vary slightly depending on the Android version and phone manufacturer. However, the general process remains consistent across different devices. Here’s a step-by-step guide:

  1. Open the Phone app: Locate and tap on the Phone app icon on your Android phone’s home screen or app drawer.
  2. Access Settings: Tap on the three vertical dots icon in the top right corner of the Phone app. This will open a menu with various options.
  3. Select “Settings“: From the menu that appears, choose the “Settings” option. This will open the Phone app’s settings menu.
  4. Navigate to “Blocked Numbers“: Scroll down the Settings menu and find the “Blocked Numbers” option. Tap on it to access the list of blocked contacts.
  5. Locate the Number to Unblock: Scroll through the list of blocked numbers until you find the one you want to unblock.
  6. Initiate Unblocking: Tap on the “X” icon next to the number you want to unblock. A pop-up will appear asking you to confirm your action.
  7. Confirm Unblocking: Tap on the “Unblock” button in the pop-up window to proceed with unblocking the number.
  8. Verify Unblocking: Once the confirmation is complete, the number will be removed from the blocked list. You should now be able to receive calls and text messages from that number.

Additional Methods for Unblocking Numbers

In addition to the standard method described above, there are two alternative ways to unblock a number:

  • Unblocking from Recent Calls: Open the Phone app and navigate to the Recent calls tab. Identify the recent call from the blocked number and tap on the “i” icon next to it. Then, select the “Unblock” option from the pop-up menu.
  • Unblocking from Messages app: Launch the Google Messages app and tap on the three-dot menu icon. Choose “Spam and blocked” from the options. Find the message from the blocked contact and tap on it. Select the “Unblock” option from the pop-up dialog box.

Summary

Unblocking a number on an Android phone is a simple and straightforward process that can be accomplished in just a few steps. By following the detailed instructions provided in this guide, you can easily manage your blocked contacts and ensure that you receive the calls and messages that matter to you. We hope that you find this guide helpful and informative, if you have any comments, questions, or suggestions, please leave a comment below and let us know.

Image Credit: TechieTech Tech

Filed Under: Android News


Latest timeswonderful Deals

Disclosure: Some of our articles include affiliate links. If you buy something through one of these links, timeswonderful may earn an affiliate commission. Learn about our Disclosure Policy.

Categories
News

How to uninstall apps from your Android Phone

uninstall apps android

This guide is designed to show you how to uninstall apps from your Android Phone or tablet. Android, renowned for its extensive and varied range of applications, meets the needs of a wide spectrum of users with its multifaceted app offerings. However, the very feature that makes Android phones so appealing – their ability to house numerous apps – can also lead to issues. Over time, these accumulated applications can cause your device to become cluttered, consuming valuable storage space and potentially draining your battery life at an accelerated rate. To combat this, it’s crucial to regularly uninstall unused or unwanted apps, ensuring your Android device remains clean, efficient, and optimized for peak performance.

This detailed guide is your ultimate resource for navigating the process of app uninstallation on your Android smartphone. We delve deep into not just the standard method of removing apps but also explore alternative approaches tailored for specific scenarios. Whether you are a seasoned Android user or new to the platform, our step-by-step guide empowers you to enhance your device’s functionality by efficiently managing your applications. By keeping your Android phone free from unnecessary apps, you’ll enjoy a smoother, faster, and more satisfying user experience

Method 1: Uninstalling Apps Using the Google Play Store

The most straightforward way to uninstall apps is through the Google Play Store, the official app marketplace for Android devices.

Steps:

  • Open the Google Play Store app.
  • Tap on your profile icon in the top right corner.
  • Select “Manage apps & devices.”
  • Choose “Manage.”
  • Locate the app you want to uninstall.
  • Tap on the app’s name.
  • Press the “Uninstall” button.
  • Confirm the uninstallation by tapping “OK.”

Method 2: Uninstalling Apps from the Home Screen

For quick removal of apps from the home screen, follow these steps:

  • Long-press on the app icon you want to uninstall.
  • Drag the icon to the “Uninstall” option that appears at the top or bottom of the screen.
  • Release the icon to confirm the uninstallation.

Method 3: Uninstalling Apps from Settings

Alternatively, you can uninstall apps directly from the device’s Settings menu:

  • Open the Settings app on your Android device.
  • Scroll down and tap on “Apps” or “Applications.”
  • Select the app you want to uninstall.
  • Tap on the “Uninstall” button.
  • Confirm the uninstallation by tapping “OK.”

Uninstalling Pre-installed Apps

Some Android devices come with pre-installed apps that cannot be completely removed. However, you can disable these apps to prevent them from running or updating.

Steps:

  • Follow the steps outlined in Method 3 to access the App Info page for the pre-installed app.
  • Instead of the “Uninstall” button, you will see a “Disable” option.
  • Tap on “Disable” to prevent the app from running and consuming resources.

Uninstalling System Apps

System apps, also known as bloatware, are deeply integrated into the Android system and cannot be uninstalled or disabled using standard methods. However, there are advanced techniques that involve rooting the device, which is beyond the scope of this guide.

Alternative Methods for Specialized Scenarios

In certain situations, you may need to employ alternative methods for uninstalling apps.

Using Third-party App Uninstaller Tools

Third-party app uninstaller tools can provide additional features like batch uninstallation and removal of stubborn apps. However, it’s crucial to choose a reputable and secure app to avoid compromising your device’s security.

Summary

Uninstalling apps on your Android device is a straightforward process that can be accomplished using various methods. By following the steps outlined in this guide, you can effectively declutter your device, reclaim storage space, and enhance its overall performance. We hope that you find this guide useful on how to uninstall apps on your Android Phone or tablet helpful,  if you have any questions or suggestions, please leave a comment below and let us know.

Filed Under: Android News, Guides, Mobile Phone News


Latest timeswonderful Deals

Disclosure: Some of our articles include affiliate links. If you buy something through one of these links, timeswonderful may earn an affiliate commission. Learn about our Disclosure Policy.

Categories
News

How to set up Wi-Fi calling on your Android Phone

Wi-Fi calling on your Android Phone

This guide is designed to show you how to set up Wi-Fi calling on your Android Phone. Wi-Fi calling is a feature that allows you to make and receive phone calls over a Wi-Fi network instead of your cellular network. This can be useful if you have poor cellular reception, such as when you’re indoors or in a basement. Wi-Fi calling can also be helpful when you’re traveling abroad, as it can save you money on roaming charges.

To use Wi-Fi calling, you’ll need a compatible Android phone and a Wi-Fi connection. You’ll also need to enable Wi-Fi calling on your phone. Most carriers support Wi-Fi calling, but it’s always a good idea to check with your carrier to make sure.

How to set up Wi-Fi calling

  1. Make sure your phone is compatible with Wi-Fi calling. You can check this by going to your phone’s Settings app and tapping on Connections. If you see an option for Wi-Fi calling, then your phone is compatible.
  2. Connect to a Wi-Fi network. Wi-Fi calling requires a Wi-Fi connection, so make sure you’re connected to a Wi-Fi network before you enable it.
  3. Enable Wi-Fi calling. To enable Wi-Fi calling, go to your phone’s Settings app and tap on Connections. Then, tap on Wi-Fi calling. You should see a toggle switch for Wi-Fi calling. Toggle the switch to On.
  4. Enter an emergency address. When you enable Wi-Fi calling, you’ll be asked to enter an emergency address. This is the address that emergency services will use to locate you if you make an emergency call over Wi-Fi.
  5. Place a call. Once you’ve enabled Wi-Fi calling, you can place a call just like you would normally. If you’re connected to a Wi-Fi network, your call will be placed over Wi-Fi. If you’re not connected to a Wi-Fi network, your call will be placed over your cellular network.

Tips for using Wi-Fi calling

  1. Make sure you’re connected to a strong Wi-Fi network. Wi-Fi calling requires a strong Wi-Fi connection in order to work well. If you have a weak Wi-Fi signal, your call may drop or you may experience poor audio quality.
  2. Try disabling other apps and services that are using your Wi-Fi connection. This can help to improve the performance of Wi-Fi calling.
  3. If you’re experiencing problems with Wi-Fi calling, try restarting your phone. This can often fix minor problems.
  4. If you’re still having problems with Wi-Fi calling, contact your carrier for help.

Troubleshooting Wi-Fi calling

If you’re having problems with Wi-Fi calling, there are a few things you can try:

  1. Make sure your phone is connected to a strong Wi-Fi network.
  2. Try disabling other apps and services that are using your Wi-Fi connection.
  3. Restart your phone.
  4. Contact your carrier for help.

Here are some additional troubleshooting tips:

  1. Check to make sure that your phone’s software is up to date.
  2. Try resetting your phone’s network settings. To do this, go to your phone’s Settings app and tap on System. Then, tap on Advanced and Reset options. Finally, tap on Reset Wi-Fi, mobile & Bluetooth.
  3. Try using a different Wi-Fi network.
  4. If you’re traveling abroad, make sure that your carrier supports Wi-Fi calling in the country you’re visiting.

Summary

Wi-Fi calling is a great way to improve your cell phone reception and save money on roaming charges. To set up Wi-Fi calling on your Android phone, simply follow the steps above. If you’re having problems with Wi-Fi calling, try the troubleshooting tips above.

Filed Under: Android News, Guides


Latest timeswonderful Deals

Disclosure: Some of our articles include affiliate links. If you buy something through one of these links, timeswonderful may earn an affiliate commission. Learn about our Disclosure Policy.