Categories
News

How to use Apple Mac Presenter Overlay features

How to use Apple Mac Presenter Overlay features

If you use your Mac or MacBook to create tutorial videos or presentations, it is definitely worth your while to learn more about how to use the Apple Mac Presenter Overlay features. Created by Apple and available on macOS Sonoma and later versions for Macs with Apple silicon, this functional and user-friendly tool is designed to enrich your video calls, streaming video recordings, and more. If you are a Mac user seeking to enhance your video presentations, this feature offers a fantastic and easy way to add professional overlay effects to your presentations.

Choose Between Large and Small Overlays

The Presenter Overlay on Mac offers two distinct styles: the large and the small overlay. Each style serves a unique purpose, catering to different presentation requirements.

  1. Large Overlay: This style places you, the presenter, prominently alongside the content you are sharing. It’s particularly useful when you want to maintain a strong presence during your presentation. The large overlay frames your shared screen next to you, allowing for a more immersive experience. Notably, this mode disables virtual backgrounds, showcasing your actual surroundings. It’s an excellent choice for presentations where body language and movement are integral.
  2. Small Overlay: If your content is the star of the show, the small overlay style is ideal. It displays your face in a compact, movable bubble. This gives prominence to the screen you’re sharing, while still keeping you visually present. You can effortlessly drag this bubble to any position on your screen, ensuring that it complements rather than obstructs your content.

Setting Up Overlays

Using these overlays is straightforward. Both styles are accessible via the screen-sharing menu in your video app. Simply select ‘Large’ or ‘Small’ from the menu, and use the video preview to ensure everything looks just right. If you opt for the large overlay and wish to reposition the shared screen, a simple click on the button with opposing arrows in the preview window does the trick.

1. Presenter Overlay

  • Requirements: macOS Sonoma or later on a Mac with Apple silicon.
  • Purpose: Elevates your presence by including you atop the content you’re sharing during a video call.

2. Presenter Overlay: Large

  • Usage: Keeps you prominent with your shared screen framed beside you.
  • Background: Your room is visible (virtual backgrounds disabled).
  • Activation: Select ‘Large’ from the screen-sharing menu in your video app.
  • Screen Movement: To move the shared screen, click the opposing arrows in the video preview’s lower-right corner.

3. Presenter Overlay: Small

  • Usage: Shows your face in a movable bubble, giving more space to the shared screen.
  • Activation: Select ‘Small’ from the screen-sharing menu in your video app.
  • Bubble Movement: Drag the bubble to reposition it in your video window.

4. Camera Modes and Controls

  • Center Stage: Keeps you centered as you move, available with Continuity Camera and iPhone 11 or later (excluding iPhone SE models).
  • Portrait Mode: Blurs the background, focusing on you, requires Apple silicon Mac laptop or Continuity Camera with iPhone XR or later.
  • Studio Light: Dims the background and illuminates your face, suitable for difficult lighting situations.
  • Desk View: Shows your desk and your face simultaneously, ideal for DIY videos or live sketches.

5. Manual Framing Adjustments

  • Requirements: macOS Sonoma or later with an Apple Studio Display or Continuity Camera with iPhone XR or later.
  • Center Stage: Ensure it’s off for manual adjustments.
  • Adjustments: Use zoom controls and pan within the video preview. Click ‘Recenter’ to center your face.

6. Mic Modes

  • Activation: Select ‘Mic Mode’ from the Video or Audio menu in the menu bar.
  • Voice Isolation: Prioritizes your voice while minimizing background noise.
  • Wide Spectrum: Captures both your voice and surrounding sounds.
  • Spatial Audio: Available on specific Mac models, enhances directional sound perception.

Keyboard Shortcuts

For frequent users, Apple offers the convenience of keyboard shortcuts. You can set these up through the Apple menu > System Settings > Keyboard, then navigate to Keyboard Shortcuts. Here, you can assign specific shortcuts to quickly toggle the Presenter Overlay on or off.

The Presenter Overlay feature is compatible with most video call applications that support screen sharing, making it a versatile tool for various platforms. Its primary benefit lies in making video calls more engaging and personalized. By allowing presenters to be visually part of their presentation, it fosters a more connected and interactive experience.

While the technology behind Presenter Overlay is sophisticated, its usage is designed to be simple and intuitive. This balance ensures that even users with minimal technical expertise can effectively leverage this feature to enhance their presentations.

The Presenter Overlay feature on Apple Mac is a valuable asset for anyone looking to make their video presentations more engaging and personal. Whether you prefer to be front and center or a subtle guide alongside your content, this feature offers the flexibility to suit your style. Remember, effective communication is not just about what you say but also how you present it. The Presenter Overlay feature ensures that your presence is felt, even through a screen.

If you would like to learn more about how to use your iPhone, iPad or MacBook. It might be worth your while jumping over to the official Apple support website. Or booking an appointment with an Apple Genius Bar representative who will be the able to provide further advice in person.

Filed Under: Apple, Guides, Top News


Latest timeswonderful Deals

Disclosure: Some of our articles include affiliate links. If you buy something through one of these links, timeswonderful may earn an affiliate commission. Learn about our Disclosure Policy.

Categories
News

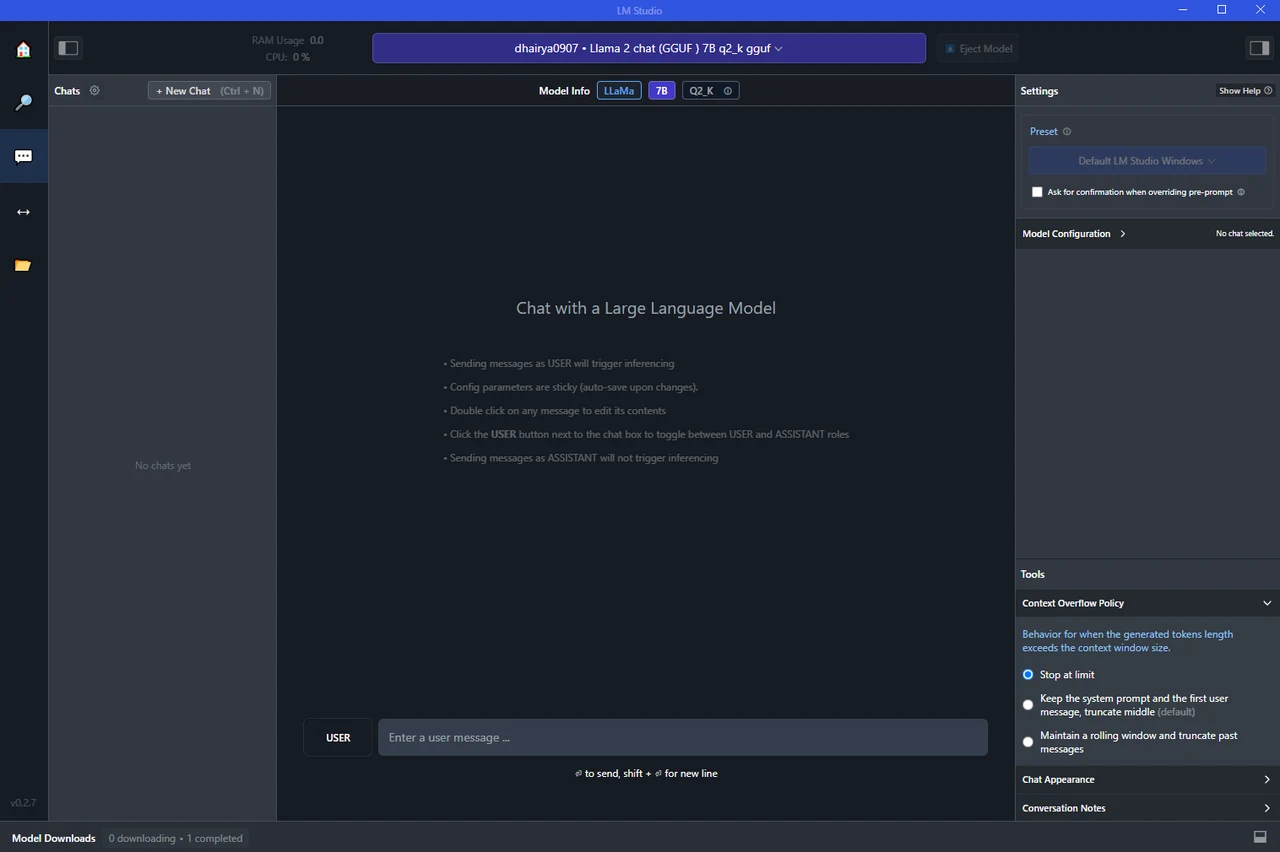
LM Studio makes it easy to run AI models locally on your PC, Mac

LM Studio makes it easy to run AI models locally on your PC Mac and Linux

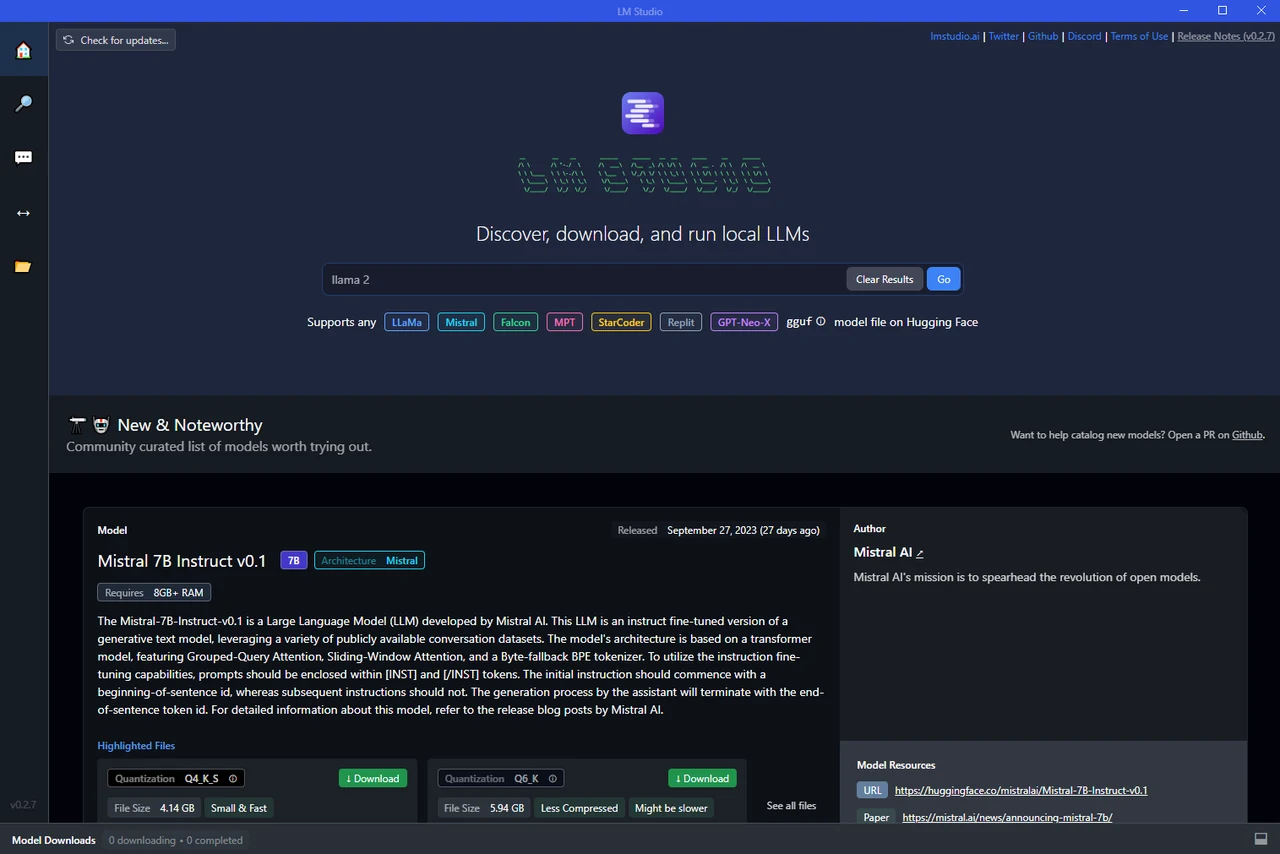
If you are interested in trying out the latest AI models and large language models that have been trained in different ways. Or would simply like one of the open source AI models running locally on your home network. Assisting you with daily tasks. You will be pleased to know that it is really easy to run LLM and hence AI Agents on your local computer without the need for third-party servers. Obviously the more powerful your laptop or desktop computer have the better, but as long as you have 8GB of RAM as a minimum you should be able to run at least one or two smaller AI models such as Mistral and others.

Running AI models locally opens up opportunities for individuals and small businesses to experiment and innovate with AI without the need for expensive servers or cloud-based solutions. Whether you’re a student, an AI enthusiast, or a professional researcher, you can now easily run AI models on your PC, Mac, or Linux machine.

One of the most user-friendly tools for this purpose is LM Studio, a software that allows you to install and use a variety of AI models. With a straightforward installation process, you can have LM Studio set up on your computer in no time. It supports a wide range of operating systems, including Windows, macOS, and Linux, making it accessible to a broad spectrum of users.

The user interface of LM Studio is designed with both beginners and advanced users in mind. The advanced features are neatly tucked away, so they don’t overwhelm new users but are easily accessible for those who need them. For instance, you can customize options and presets to tailor the software to your specific needs.

LM Studio dashboard

LM Studio dashboard chat box

Other articles we have written that you may find of interest on the subject of running AI models locally

LM Studio supports several AI models, including large language models. It even allows for running quantized models in GF format, providing a more efficient way to run these models on your computer. The flexibility to download and add different models is another key feature. Whether you’re interested in NLP, image recognition, or any other AI application, you can find a model that suits your needs.

Search for  AI models and LLMs

LM Studio dashboard

AVX2 support required

Your computer will need to support AVX2 here are a few ways to check what CPU or system is running. Once you know you can then do a quick search to see if the specifications list support for AVX2. You can also ask ChatGPT once you know your CPU.  obviously CPUs after it’s OpenAI’s cut-off date are most likely to support AVX2.

Windows:

  1. Open the Command Prompt.
  2. Run the command systeminfo.
  3. Look for your CPU model in the displayed information, then search for that specific CPU model online to find its specifications.

macOS:

  1. Go to the Apple Menu -> About This Mac -> System Report.
  2. Under “Hardware,” find the “Total Number of Cores” and “Processor Name.”
  3. Search for that specific CPU model online to check its specifications.

Linux:

  1. Open the Terminal.
  2. Run the command lscpu or cat /proc/cpuinfo.
  3. Check for the flag avx2 in the output.

Software Utility:

You can use third-party software like CPU-Z (Windows) or iStat Menus (macOS) to see detailed specifications of your CPU, including AVX2 support.

Vendor Websites:

Visit the CPU manufacturer’s website and look up your CPU model. Detailed specifications should list supported instruction sets.

Direct Hardware Check:

If you have the skill and comfort level to do so, you can directly check the CPU’s markings and then refer to vendor specifications.

For Windows users with an M2 drive, LM Studio can be run on this high-speed storage device, providing enhanced performance. However, as mentioned before, regardless of your operating system, one crucial factor to consider is the RAM requirement. As a rule of thumb, a minimum of 8 GB of RAM is recommended to run smaller AI models such as Mistral. Larger models may require more memory, so it’s important to check the specifications of the models you’re interested in using.

In terms of model configuration and inference parameters, LM Studio offers a range of options. You can tweak these settings to optimize the performance of your models, depending on your specific use case. This level of control allows you to get the most out of your AI models, even when running them on a personal computer.

One of the most powerful features of LM Studio is the ability to create a local host and serve your model through an API. This means you can integrate your model into other applications or services, providing a way to operationalize your AI models. This feature transforms LM Studio from a mere tool for running AI models locally into a platform for building and deploying AI-powered applications.

Running AI models locally on your PC, Mac, or Linux machine is now easier than ever. With tools like LM Studio, you can experiment with different models, customize your settings, and even serve your models through an API. Whether you’re a beginner or a seasoned AI professional, these capabilities open up a world of possibilities for innovation and exploration in the field of AI.

Filed Under: Guides, Top News


Latest timeswonderful Deals

Disclosure: Some of our articles include affiliate links. If you buy something through one of these links, timeswonderful may earn an affiliate commission. Learn about our Disclosure Policy.

Categories
News

Unlock the Power of PDFs with PDF Expert for Mac

PDF Expert for Mac

Have you ever wished you could do more with your PDFs? With PDF Expert, you can! This powerful software allows you to edit PDF documents on your Mac with ease. Whether you need to correct typos, rework entire sections of a document, or fill out forms, PDF Expert has you covered.

PDFs remain the best way to transmit documents, but editing them isn’t possible with standard Mac software. PDF Expert changes that, allowing you to edit PDF text, images, links, and outlines quickly and easily. Typo in a contract? Easy fix. Need to rework a complete section of a document? No problem. PDF Expert provides a series of essential functions that will transform the way you work with documents on your Mac. It recognizes text and OCR, makes edits, and fills out forms. And with the “Enhance” feature powered by AI, it will fix distortions, remove shadows and improve contrast so that even difficult-to-read documents look great.

Key Features of PDF Expert

  • Text and Image Editing: Change text, insert images, and add links with ease.
  • Document Organization: Merge PDFs, manage pages, and split PDFs into separate files.
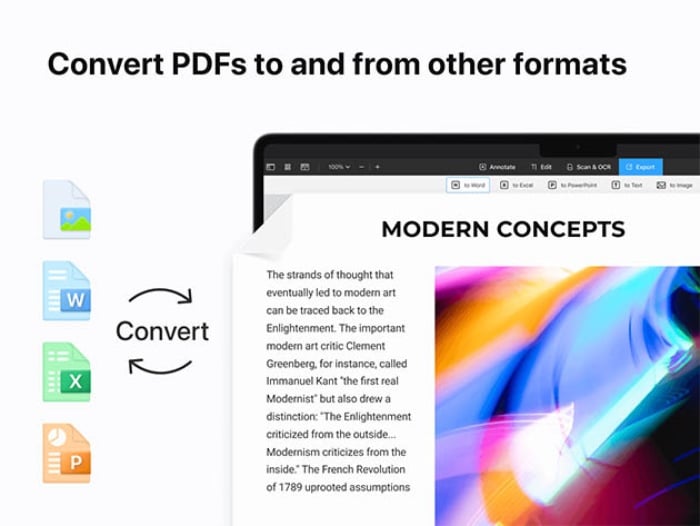
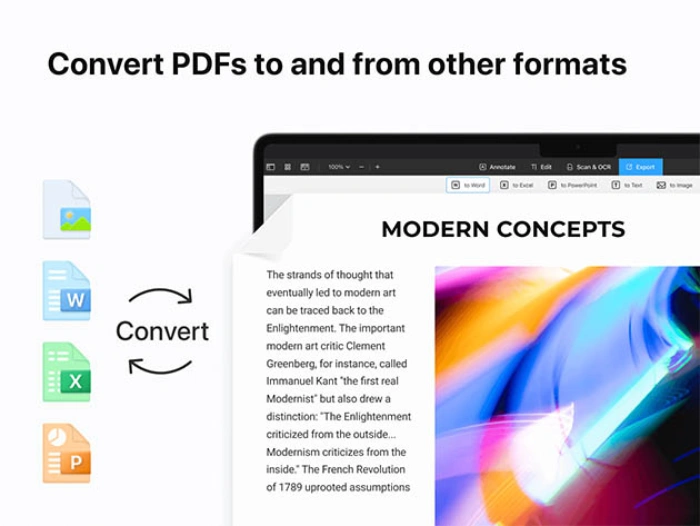
  • File Conversion: Convert JPG, PNG, Word, PPT, and Excel files to PDF, and convert PDFs into other formats.
  • Form Filling and Signing: Fill out PDF forms, sign documents, and redact confidential information.
  • Text Recognition and Enhancement: Recognize text in PDFs, enhance scans, and crop and split pages.

One of the standout features of PDF Expert is its “Enhance” function. Powered by AI, this feature can fix distortions, remove shadows, and improve contrast in documents. It’s like having a professional editor right at your fingertips.

The software is available in multiple languages, including English, French, German, Spanish, Italian, Portuguese, Chinese, Japanese, Russian, and Ukrainian. It requires macOS 12.0 & higher and is only available to new users. But don’t worry, your purchase provides lifetime access and must be redeemed within 30 days.

So why wait? Take control of your PDFs today with PDF Expert. With its powerful features and user-friendly interface, it’s the perfect tool for anyone who works with PDFs. Whether you’re a student, a professional, or just someone who wants to get more out of their documents, PDF Expert is the software for you.

Get this deal>

Filed Under: Deals


Latest timeswonderful Deals

Disclosure: Some of our articles include affiliate links. If you buy something through one of these links, timeswonderful may earn an affiliate commission. Learn about our Disclosure Policy.
Categories
News

Deals: Unlock the full potential of your Mac with MacPilot

MacPilot

Have you ever wished you could have more control over your Mac? That you could access hidden features, optimize your system, and truly customize your user experience? Well, your wish is about to come true. Introducing MacPilot, a tool that unlocks over 1,200 features on your Mac, enhancing your user experience and giving you unprecedented control.

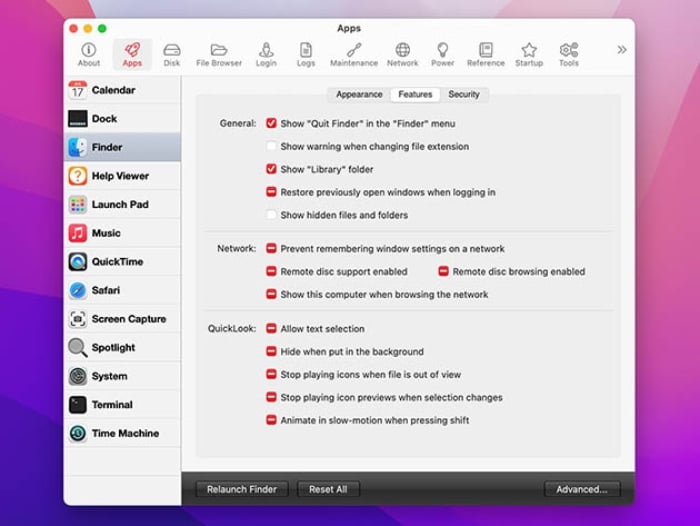
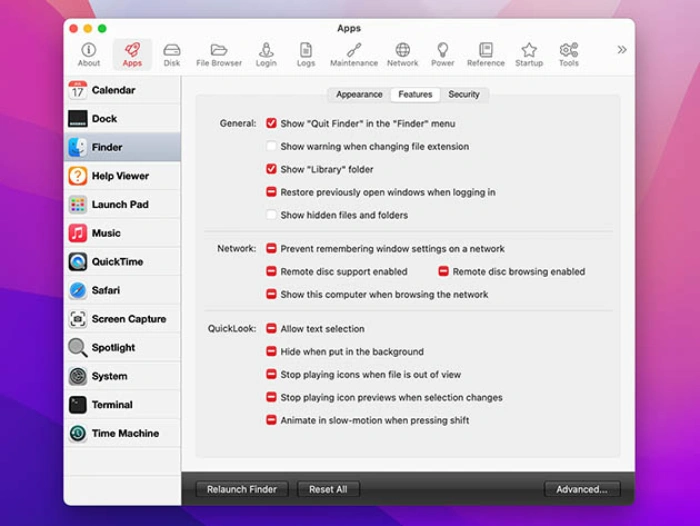
With MacPilot, you can display hidden files in Finder, disable the startup chime, add spacers and stacks to the Dock, and even change the screenshot file format. But that’s just the tip of the iceberg. You can also run maintenance tools, toggle animations, show the Quit menu, show the file path in the window titlebar, and use screensavers as the desktop.

Key Features of MacPilot

  • Unlocks over 1,200 hidden features on your Mac
  • Allows you to display hidden files in Finder
  • Enables you to disable the startup chime
  • Adds spacers and stacks to the Dock
  • Changes the screenshot file format
  • Runs maintenance tools and toggle animations
  • Shows the Quit menu and the file path in the window titlebar
  • Uses screensavers as the desktop

MacPilot doesn’t just give you control, it also provides a detailed system profile outlining advanced system information. You’ll have access to detailed information about your computer, from the graphics card and RAM bus speeds to the system serial number. It also provides a complete list of network ports, error codes, and key combos.

But don’t just take our word for it. MacPilot has received a 4.0/5 stars rating on MacUpdate and has been praised by Tech Journey as a “Swiss Army Knife” for user interface customization and system tweaks.

The system requirements for MacPilot are Mac OS X 10.15 or later. The purchase includes a lifetime license with all minor and major upgrades to the software free of charge. The license can be redeemed within 30 days of purchase and can be used on a maximum of three devices.

So why wait? Unlock the full potential of your Mac today with MacPilot. Developed by Koingo Software, Inc., a Canadian company that has been providing digital solutions since 1995, you can trust that you’re getting a quality product that will truly enhance your Mac experience.

Get this deal>

Filed Under: Deals


Latest timeswonderful Deals

Disclosure: Some of our articles include affiliate links. If you buy something through one of these links, timeswonderful may earn an affiliate commission. Learn about our Disclosure Policy.
Categories
News

How to Start a Gaming Blog on a Mac: Step-by-Step Guide

For the big video game enthusiasts, have you ever thought of sharing your solutions, tips and any other gaming insights you have gathered through your zeal for games? Then, it’s finally time to put this thought into action.

Gaming is no longer about a niche; it has now diversified to become a global activity as day in and day out, people join the industry as providers or consumers. As a result, gaming blogs and other content continue to emerge daily as gamers across places provide insights and share what they know about specific games. They can create more knowledge about the various games and, at other times, make it their source of income. How do you, as a gamer, start this gaming blog?

In this article, we will look at the process of launching your very own gaming blog on a Mac, covering everything from choosing a niche to setting up your blog and creating compelling content.

Determine Your Niche and Audience

You need to determine your niche and audience just as any blogger does. Identifying a specific focus will help you grow and remain relevant in the industry, allowing you to be unique and attract and maintain more audiences. Consider various gaming niche options such as esports coverage, retro gaming or even simple yet relevant gaming tips, tricks, and reviews.

Choose a Blogging Platform.

Choosing a blogging platform is essential to any blogger. Consider using platforms such as WordPress, a popular choice for Mac users due to its user-friendly design, versatility, and customization choices. Follow these steps to create a WordPress blog:

1. Get MAMP from their official website and install it.

2. Install WordPress: Navigate to the WordPress website and get the most recent version. After unzipping the file, store it in the ‘htdocs’ folder.

3. Create a database: Start MAMP, the servers, and phpMyAdmin. Make a database for your blog.

4. Install WordPress: Open your web browser and navigate to ‘localhost:8888’ or the MAMP port number. Follow the installation procedures, and when requested, enter your database information.

Promote and Monetize Your Blog

You need to promote your blog effectively if you want it to have more interaction. Utilize social media platforms, join gaming forums and communities, and contact other gaming bloggers for collaboration opportunities.

Consistency in posting and engagement with your audience will help establish your blog’s presence hence the need to know how to optimize mac for gaming. Ensure you have a powerful GPU and a fast CPU for better streaming, scalable gameplay functions, frame rates especially for games that feature 3D environments. Minimum RAM should be 8GB and a high-capacity SSD will guarantee you fast loading times.

You can also check your graphics settings, minimize background activities, declutter your disk, ensure your mac is cool at all times and find a reliable network connection for streaming ease. These will help you optimize your mac for gaming which means you will be ia better position to experience games fully and relate with your audience better.

Also, explore various monetization options, as you can earn money through affiliate marketing, sponsored content, selling digital products, or running ads. Just be sure to disclose any sponsored content to maintain transparency with your readers.

Customize Your Blog

Now that after set up your blog is up and running, it is time to customize it. Begin by choosing a gaming-focused theme that will help you attract and retain your readers. After that, create essential pages such as an About page, Contact page, and Privacy Policy. These will help secure your page and assure your readers.

For your blog to be personalized, endeavor to create original, captivating content. Once in a while, you can mix niches or section your page into different places. Ensure you use attractive images on the blog.

Conclusion

Starting a gaming blog on your Mac may be a thrilling and rewarding experience. By taking these steps, you may create a successful gaming blog that highlights your gaming enthusiasm and links you with a flourishing gaming community. So, get ready, open up your Mac, and start your game blogging trip immediately!