Categories
News

How to Clear the Cache on iPad and iPhone

However, this convenience comes with a caveat. As you continue to accumulate data in the cache over prolonged periods, the once-beneficial storage can become counterproductive. The cache may grow to a size that begins to encroach upon your device’s available storage space. Furthermore, this agglomeration of data can lead to diminished browsing performance and may even be the root cause of certain glitches or errors within websites and apps.

Therefore, the practice of regularly clearing your cache is recommended. Doing so not only reclaims storage space but also purges outdated or corrupt data that could be contributing to performance issues. Moreover, this process can assist in resolving some persistent problems that may have arisen during the use of websites or applications, as it forces a fresh retrieval of data, ensuring that the most current and functional versions are used. Engaging in this maintenance task can lead to a more efficient and smoother experience on your iOS devices.

Clearing Safari Cache

Safari is the default web browser on iPad and iPhone, and clearing its cache is a common way to optimize browsing performance. Here’s how to clear the Safari cache:

  • Open the Settings app on your iPad or iPhone.
  • Scroll down and tap on “Safari.”
  • Scroll down and tap on “Clear History and Website Data.”
  • Tap on “Clear History and Data” to confirm the action.

This will remove all website browsing history, cookies, and cached data from Safari.

For Other Browsers (like Chrome):

You can also clear the cache on third-party browsers like Chrome, Firefox and Edge on the iPhone and iPad.

  1. Open the browser app.
  2. Go to the app’s settings menu (often represented by three dots or lines).
  3. Find the Privacy section or something similarly named.
  4. Select “Clear Browsing Data” or a similar option.
  5. Choose what data to clear (like cached images and files) and confirm.

Clearing App Cache

Apps can also store cached data, which can take up storage space and potentially cause issues. Here’s how to clear app cache:

Open the Settings app on your iPad or iPhone.

  • Tap on “General.”
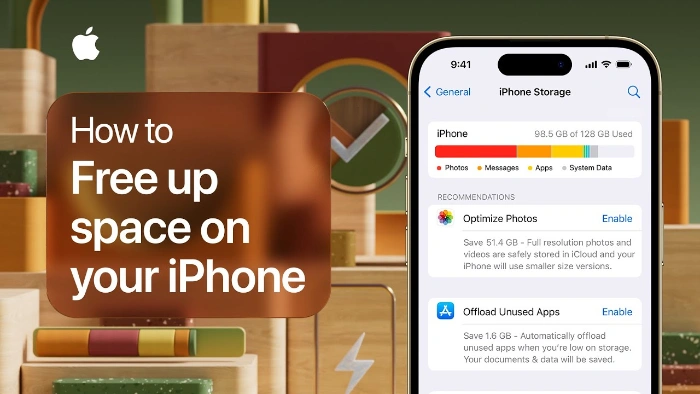
  • Tap on “iPhone Storage” (or “iPad Storage” on an iPad).
  • Wait for the list of apps to load.
  • Identify apps that are consuming a significant amount of storage space.
  • Tap on an app to view its storage details.

Tap on “Offload App” to remove the app from your device while preserving its data. To clear the app’s cache without removing the app, tap on “Delete App” and then confirm the action. After deleting the app, you can reinstall it from the App Store.

Additional Considerations

Clearing the cache can sometimes cause temporary issues with websites or apps as they reload data. However, these issues should resolve themselves quickly. If you encounter any persistent issues after clearing the cache, try restarting your device.

It’s important to note that clearing the cache is not a regular maintenance task. You only need to clear the cache if you’re experiencing performance issues or storage space constraints. Excessive cache clearing can impact your browsing experience as websites will need to reload data each time.

By following these steps, you can easily clear the cache on your iPad or iPhone and potentially improve its performance and free up storage space. We hope that you find this guide helpful and if you have any tips, questions, or comments, please leave a comment below and let us know.

Image Credit: Maury Page

Categories
News

How to use Point and Speak on iPhone or iPad

How to use Point and Speak on iPhone or iPad

Apple’s dedication to accessibility is evident in its wide array of features designed to assist users with visual impairments. If you are interested in learning how to use the Point and Speak accessibility features on iPhone or iPad this guide aims to provide a detailed overview of these features, focusing on how it can be effectively used during everyday life. For example you can use your iPhone to view your surroundings and receive audio descriptions or upload images you take using the camera to receive and audio description of it.

The Point and Speak features now available on Apple’s iOS mobile operating system feature are a significant development that has transformed the way users can interact and use their devices. It allows users to point their finger at text displayed on the screen, which is then read aloud by the iOS device. This feature is especially useful for individuals with blindness or low vision, as it allows them to interact with their device in a more intuitive and accessible way, thereby improving their overall user experience.

How to use Point and Speak on iPhone

To activate this feature, you need to enable the on your iPhone or iPad. The LiDAR is a unique Apple tool that works in tandem with the Point and Speak feature to provide a seamless user experience, making it easier for users to navigate their devices. Another key aspect of Apple’s accessibility features is the voice over detection mode. This mode can be activated by triple tapping the screen with four fingers. Once activated, you can point your device’s camera at an item, and the text will be read out loud. This feature is particularly useful for reading physical documents or identifying products, making it a valuable tool for users with visual impairments.

Other articles you may find of interest on the subject of Apple’s iOS mobile operating system :

How to receive image descriptions of your surroundings in Magnifier on iPhone

  1. Turn on Magnifier, then do one of the following:
  2. On models with a LiDAR Scanner: Tap the Detection Mode button, then tap the Image Descriptions button.
  3. On other models: Tap the Image Descriptions button.
  4. Position iPhone so the rear camera can get image descriptions of the world around you.
  5. If you don’t hear the speech feedback, make sure Silent mode is turned off. See Adjust the volume on iPhone.
  6. When you’re finished, tap Done to return to the Magnifier screen.

Customize settings for image descriptions

By following the instructions below you can turn on Magnifier, and then carry out one of the following:

  1. On models with a LiDAR Scanner: Tap the Detection Mode button, tap the Detection Mode Settings button, then tap Image Descriptions.
  2. On other models: Tap the Settings button, tap Settings, then tap Image Descriptions below Detectors.
  3. Turn on any combination of text and speech.
  4. Text: Image descriptions appear in the camera view.
  5. Speech: When you turn on Speech, iPhone speaks the description of the scenes and people detected in the camera view.
  6. When you’re finished, tap Back, then tap Done.

However, Apple reinforces the point that it is important to note that the detection mode should not be used in high-risk or emergency situations, as it may not always provide accurate or timely information. Therefore, users should exercise caution and use this feature responsibly. It’s also important to note that the Point and Speak feature may not be available in all countries or regions. Therefore, it’s recommended to check the availability of these features in your specific location to ensure you can fully utilize your device’s capabilities.

Apple’s accessibility features, such as the Point and Speak technology and voice over detection mode, provide valuable tools for users with visual impairments. By keeping your device updated and utilizing resources like the Apple Support YouTube channel, you can ensure you’re getting the most out of your Apple device. These features and resources demonstrate Apple’s commitment to making technology accessible to all.

Filed Under: Apple, Guides, Top News


Latest timeswonderful Deals

Disclosure: Some of our articles include affiliate links. If you buy something through one of these links, timeswonderful may earn an affiliate commission. Learn about our Disclosure Policy.

Categories
News

How to create a Personal Voice on the iPhone or iPad with iOS 17

personal voice ios 17

This guide is designed to show you how to create a personal voice on the iPhone or iPad with iOS 17. This is a new feature that was recently introduced with the release of the iOS 17 and iPadOS 17 software updates.

This feature allows you to create a synthesized voice that sounds eerily similar to your own, offering a more personalized experience when communicating with family and friends. Whether you’re using FaceTime, phone calls, or assistive communication apps, your Personal Voice can be your new digital identity. In this article, we’ll guide you through the step-by-step process of setting up your Personal Voice on iOS 17.

Prerequisites

Before diving into the setup process, make sure you meet the following requirements:

  • Operating System: iOS 17, iPadOS 17, or macOS Sonoma or later
  • Device Compatibility:
    • iPhone 12 or later
    • iPad Air (5th generation)
    • iPad Pro 11-inch (3rd generation) or later
    • iPad Pro 12.9-inch (5th generation) or later
    • Mac with Apple silicon
  • Security: Face ID, Touch ID, or a device passcode or password
  • Language: Currently, Personal Voice is available only in English.

Creating Your Personal Voice

On iPhone or iPad

  1. Open Settings: Navigate to the Settings app on your device. Tap on ‘Accessibility’, then tap on ‘Personal Voice’.
  2. Initiate Setup: Tap on ‘Create a Personal Voice’.
  3. Follow Instructions: The on-screen instructions will guide you through recording your voice. You’ll need to read a series of randomly chosen text prompts to record approximately 15 minutes of audio.

To Pause and Resume

  • Pause: Tap ‘Done’ or close the Settings app. Your progress will be saved.
  • Resume: Go back to Settings > Accessibility > Personal Voice, tap the voice you want to continue creating and tap ‘Continue Recording’.

On Mac

  1. Navigate to System Settings: Click on the Apple menu > System Settings, then click on ‘Accessibility’ in the sidebar and select ‘Personal Voice’.
  2. Initiate Setup: Click on ‘Create a Personal Voice’.
  3. Follow Instructions: Just like on iOS, you’ll be guided through the recording process.

To Pause and Resume

  • Pause: Click ‘Done’. Your progress will be saved.
  • Resume: Go back to System Settings > Accessibility > Personal Voice, click the ‘Show Detail’ button next to the voice you want to continue creating, and click ‘Continue Recording’.

Deleting a Personal Voice

If you wish to delete a Personal Voice, you can do so but be aware that it cannot be recovered.

On iPhone or iPad

  1. Open Settings > Accessibility > Personal Voice.
  2. Tap the voice you want to delete.
  3. Authenticate using Face ID, Touch ID, or enter your passcode.
  4. Tap ‘Delete Voice’ and confirm.

On Mac

  1. Navigate to System Settings > Accessibility > Personal Voice.
  2. Click the ‘Show Detail’ button next to the voice you want to delete.
  3. Enter your password.
  4. Click ‘Delete Voice’ and confirm.

Additional Features

  • Live Speech: Type to speak using your Personal Voice.
  • Share Across Devices: Sync your Personal Voice to other devices signed in to iCloud with your Apple ID.
  • Privacy and Security: Your Personal Voice is encrypted and stored securely on your device.

Summary

Creating a Personal Voice in iOS 17 is a straightforward process that offers a more personalized and secure way to interact with your digital world. With just a few steps, you can have a synthesized voice that sounds just like you, enhancing your communication experiences. You can find out more details about the Personal Voice Feature for the iPhone and iPad over at Apple’s website.

Filed Under: Apple, Apple iPad, Apple iPhone, Guides


Latest timeswonderful Deals

Disclosure: Some of our articles include affiliate links. If you buy something through one of these links, timeswonderful may earn an affiliate commission. Learn about our Disclosure Policy.

Categories
News

How to free up storage space on your iPhone or iPad

iPhone or iPad

This guide is designed to show you how to free up storage space on your iPhone and iPad. Running out of storage space on your iPhone or iPad can be frustrating, to say the least. Whether it’s a message that tells you there’s not enough room to take another photo or the inability to download that new app, managing storage can often feel like a never-ending chore. Fortunately, iOS makes it relatively easy to take control of your storage space with several built-in features. This guide will walk you through the best methods to free up space on your device, from initial preparations to advanced manual techniques.

Backup your data

Before you begin the journey of cleaning up your device’s storage, ensure that your data is secure. It’s advisable to back up your iPhone or iPad to either iCloud or a computer. This step is crucial, as it prevents any accidental loss of important data during the process.

Check storage usage

To get started, you’ll want to understand exactly what’s taking up all the space on your device. iOS provides an easy way to do this. Go to Settings, navigate to General, and then tap on iPhone/iPad Storage. You’ll see a graph that categorizes your storage usage, breaking it down by content type like photos, messages, and apps. This breakdown is a valuable starting point to decide what to tackle first.

Storage management recommendations

iOS offers storage management recommendations tailored to your specific usage. Within the iPhone/iPad Storage section, you’ll find suggestions that can help free up space. These recommendations might include offloading unused apps or deleting old conversations and attachments in Messages. The best part is that many of these actions can run automatically in the background, saving you time and effort.

Manually remove content

While automated suggestions are helpful, you may want to have more control over what gets deleted. For this, you can scroll through the list of apps in the iPhone/iPad Storage settings and opt to manually delete specific data. For example, if you have several old conversations with large attachments in Messages, you can review and delete them to free up considerable space.

Offload unused apps

Offloading apps is another manual option that can help you save space without sacrificing data. When you offload an app, it removes the app from your device but retains its associated data. This means you can reinstall it later without losing any information, making this an excellent option for apps you don’t frequently use but might need in the future.

Delete apps completely

If you need more drastic measures, you can opt to delete apps entirely. This action will remove both the app and all of its data, freeing up more room. Be sure you won’t need the data before choosing this option, as it’s irreversible.

Review the changes

Once you’ve made your changes, it’s a good idea to go back to your storage settings to assess the impact. This will allow you to see how much space you’ve successfully reclaimed, and help you decide if further action is needed.

In summary, freeing up space on your iPhone or iPad doesn’t have to be a Herculean task. By utilizing built-in iOS features and taking a bit of time to manually review your storage, you can effectively manage your device’s available space, ensuring a smoother and faster user experience.

Image Credit: Apple / Youtube

Filed Under: Apple, Apple iPhone, Guides


Latest timeswonderful Deals

Disclosure: Some of our articles include affiliate links. If you buy something through one of these links, timeswonderful may earn an affiliate commission. Learn about our Disclosure Policy.