Categories
News

Apple releases iOS 17.1 Release Candidate to developers

iOS 17.1 Release Candidate

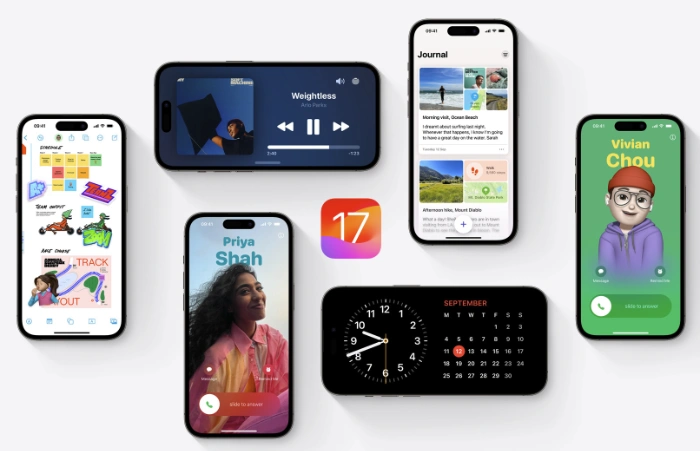
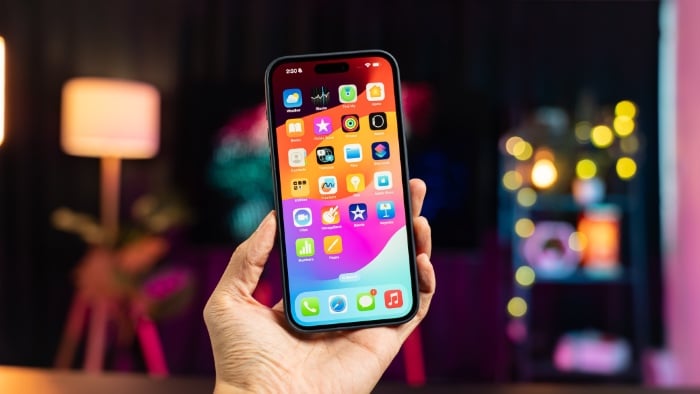
Apple has released iOS 17.1 Release Candidate to developers, this new beta was released a week after the previous version, and assuming there are no issues with the release candidate then this should be the final version that is released to everyone.

A Release Candidate” (RC) is a stage in the software development process that follows beta testing. It represents a version of the software that is considered nearly ready for public release, with most critical bugs already addressed. The RC is provided to testers to verify its stability and functionality. If no significant issues are identified, the RC can transition to the final, official release; otherwise, any discovered problems are rectified, and a new RC may be issued for further testing.

As well as releasing this new Release Candidate to developers, Apple has also released the software to public beta testers at the same time. The final version of iOS 17.1 is expected to be released next week.

The iOS 17.1 Beta 2 release introduces changes to AirDrop, now supporting transfers over both WiFi and Cellular connections. This means users no longer need to be nearby to complete transfers. Additionally, Apple has enabled the NameDrop feature to work between the iPhone and Apple Watch. Apple Music has also seen updates, allowing users to label songs, playlists, and other content as favorites.

We are expecting Apple to release their iOS 17.1 software update next Tuesday the 24th of October, we recently heard a rumor that this would be the release date for the software and it now looks like this date is correct. We can expect a range of other updates at the same time including iPadOS 17.1 watchOS 10.1, tvOS 17.1, and macOS Sonoma 14.1.

Source Apple

Image Credit: Amanz

Filed Under: Apple, Apple iPhone, Top News


Latest timeswonderful Deals

Disclosure: Some of our articles include affiliate links. If you buy something through one of these links, timeswonderful may earn an affiliate commission. Learn about our Disclosure Policy.

Categories
News

How to use Interactive Widgets in iOS 17 on the iPhone

Interactive Widgets

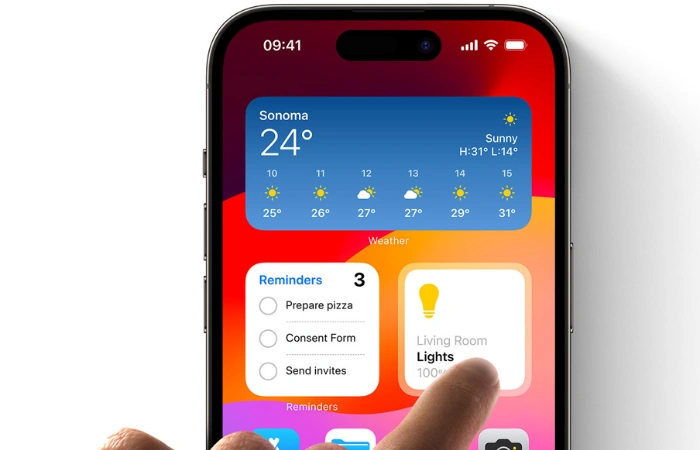
This guide will show you how to set up Interactive Widgets on the iPhone, you will need to be running the latest iOS 17 to use this feature. Interactive widgets are a new feature in iOS 17 that allows you to interact with your widgets directly from the home screen. This can be a huge time-saver, as it eliminates the need to open the app associated with the widget.

To use interactive widgets:

  • Tap and hold anywhere on the home screen until the icons start to jiggle.
  • Tap the “+” button in the upper-left corner of the screen to add a widget.
  • Browse the list of available widgets and select the one you want to add.\
  • Choose the size of the widget and tap “Add Widget.”
  • Once the widget is added to your home screen, tap on it to interact with it.

Here are some examples of how to use interactive widgets:

  • Music widget: Play, pause, skip, and go back to previous tracks without opening the Music app. You can also use the widget to adjust the volume, create a new playlist, or shuffle your music library.
  • Podcasts widget: Play, pause, skip, and go back to previous episodes without opening the Podcasts app. You can also use the widget to subscribe to new podcasts, mark episodes as played, and delete episodes.
  • Reminders widget: Mark reminders as complete or incomplete, add new reminders and view upcoming reminders without opening the Reminders app. You can also use the widget to snooze or delete reminders.
  • Home widget: Control your smart home devices without opening the Home app. You can turn on and off lights, adjust the thermostat, lock and unlock doors, and more.
  • Calendar widget: Create new events, view upcoming events, and edit existing events without opening the Calendar app. You can also use the widget to switch between different calendar views and search for events.
  • Weather widget: View the current weather conditions, forecast, and air quality index without opening the Weather app. You can also use the widget to add locations to your favorites and view weather alerts.

Here are some additional tips for using interactive widgets:

  • To resize a widget, tap and hold on it until the quick actions menu appears. Then, tap “Edit Widget.”
  • To move a widget, tap and hold on it until it starts to jiggle. Then, drag it to the desired location.
  • To delete a widget, tap and hold on it until the quick actions menu appears. Then, tap “Remove Widget.”

You can also add interactive widgets to the lock screen in iOS 17. To do this, follow these steps:

  • Swipe to the leftmost lock screen page.
  • Tap the “Customize” button.
  • Tap the “+” button in the upper-right corner of the screen to add a widget.
  • Browse the list of available widgets and select the one you want to add.
  • Choose the size of the widget and tap “Add Widget.”

Once the widget is added to your lock screen, you can tap on it to interact with it.

You can use multiple widgets for the same app. For example, you could have a large music widget on your home screen that shows the album artwork and playback controls, and a smaller music widget on your lock screen that shows the song title and artist.

You can stack widgets on top of each other to save space on your home screen. To do this, drag one widget on top of another. You can then swipe up or down to view the different widgets in the stack.

You can customize the appearance of some interactive widgets. For example, you can change the color of the background or the font of the text. To do this, tap and hold on the widget and then tap “Edit Widget.”

Interactive widgets are a powerful new feature in iOS 17 that can help you save time and be more productive. By following the tips above, you can learn how to use interactive widgets to the fullest. We hope that you find this guide on how to use Interactive Widgets in iOS 17 helpful, if you have any comments, tips or questions, please leave a comment below and let us know. You can find out more details about all of the new iOS 17 features over at Apple’s website.

Filed Under: Apple, Apple iPhone, Guides


Latest timeswonderful Deals

Disclosure: Some of our articles include affiliate links. If you buy something through one of these links, timeswonderful may earn an affiliate commission. Learn about our Disclosure Policy.

Categories
News

Raspberry Pi iOS Wayland update features and benefits

Raspberry Pi iOS Wayland

Learn more about the new Debian version, Bookworm, and its corresponding Raspberry Pi OS version. This release marks a significant milestone in the evolution of the Raspberry Pi ecosystem, introducing major architectural changes that promise to enhance performance, security, and user experience.

Debian Bookworm is primarily an incremental update from the previous Debian Bullseye release. However, it brings with it a host of improvements and updates that are set to redefine the Raspberry Pi experience. The most notable of these is the major architectural changes made to the Raspberry Pi Desktop, which was launched for the first time in the Bookworm release.

One of the most significant changes is the transition from X11 to Wayland as the display system. This move is expected to improve both performance and security. Wayland is now the default mode of operation for the desktop on Raspberry Pi 4 and 5, with plans to extend this to earlier platforms. This shift to Wayland is a major step forward, as it offers a more modern and efficient approach to managing windows and graphics on Linux-based systems.

New Raspberry Pi iOS released

Previous articles you may find of interest on the Raspberry Pi 5 mini PC :

In line with this transition, the taskbar application has been replaced with wf-panel-pi, a new application based on the example panel application from the authors of Wayfire. This change is part of the broader shift towards Wayland, and it promises to enhance taskbar operations on the Raspberry Pi Desktop.

To ensure compatibility with applications that make direct calls to X11, XWayland has been introduced. XWayland is an X11 display server that sits on top of Wayland, providing a bridge for these applications to function correctly in the new environment.

New plugins

The new Debian version also introduces two new plugins: the “Power” plugin, which monitors for power supply problems, and the “GPU” plugin, which shows a graph of the load on the Raspberry Pi’s GPU. These additions are expected to provide users with more detailed insights into their device’s performance and power status.

In terms of audio control, the PulseAudio interface has been replaced with the newer PipeWire audio system. This change is expected to provide better support for audio accompanying video, reduce latency, and improve Bluetooth audio device management.

Network Manager

NetworkManager has been introduced as the default network controller for Bookworm, replacing the previous system, dhcpcd. This change is expected to streamline network management and improve connectivity on Raspberry Pi devices.

Firefox browser

Finally, a Raspberry Pi-optimised version of Mozilla Firefox is now being offered as a second browser option. This version of Firefox has been optimised to utilise the hardware h.264 decoder on Raspberry Pi, improving performance and reducing CPU load when playing back HD video.

The release of Debian Bookworm and its corresponding Raspberry Pi OS version represents a significant step forward for the Raspberry Pi ecosystem. The major architectural changes, the introduction of new plugins and systems, and the optimisation of Mozilla Firefox for Raspberry Pi all promise to enhance the user experience and open up new possibilities for Raspberry Pi users. Download the latest Raspberry Pi operating system from the official website.

Filed Under: Guides, Top News


Latest timeswonderful Deals

Disclosure: Some of our articles include affiliate links. If you buy something through one of these links, timeswonderful may earn an affiliate commission. Learn about our Disclosure Policy.
Categories
News

How to create a Personal Voice on the iPhone or iPad with iOS 17

personal voice ios 17

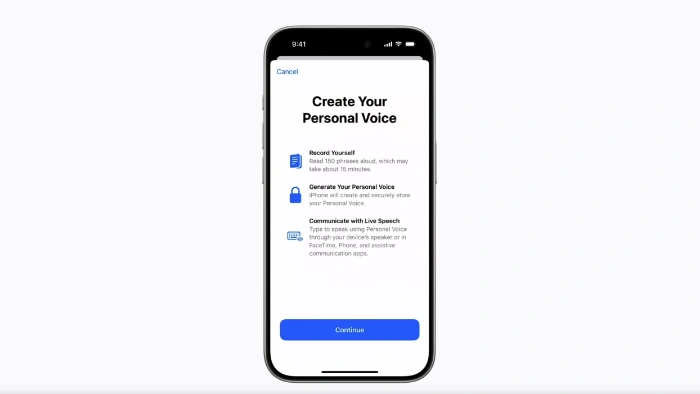
This guide is designed to show you how to create a personal voice on the iPhone or iPad with iOS 17. This is a new feature that was recently introduced with the release of the iOS 17 and iPadOS 17 software updates.

This feature allows you to create a synthesized voice that sounds eerily similar to your own, offering a more personalized experience when communicating with family and friends. Whether you’re using FaceTime, phone calls, or assistive communication apps, your Personal Voice can be your new digital identity. In this article, we’ll guide you through the step-by-step process of setting up your Personal Voice on iOS 17.

Prerequisites

Before diving into the setup process, make sure you meet the following requirements:

  • Operating System: iOS 17, iPadOS 17, or macOS Sonoma or later
  • Device Compatibility:
    • iPhone 12 or later
    • iPad Air (5th generation)
    • iPad Pro 11-inch (3rd generation) or later
    • iPad Pro 12.9-inch (5th generation) or later
    • Mac with Apple silicon
  • Security: Face ID, Touch ID, or a device passcode or password
  • Language: Currently, Personal Voice is available only in English.

Creating Your Personal Voice

On iPhone or iPad

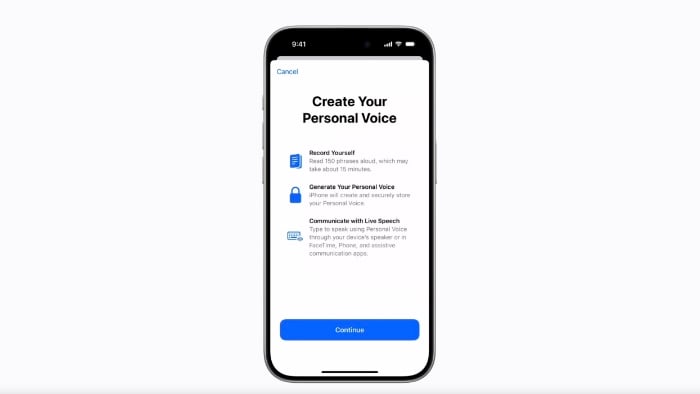
  1. Open Settings: Navigate to the Settings app on your device. Tap on ‘Accessibility’, then tap on ‘Personal Voice’.
  2. Initiate Setup: Tap on ‘Create a Personal Voice’.
  3. Follow Instructions: The on-screen instructions will guide you through recording your voice. You’ll need to read a series of randomly chosen text prompts to record approximately 15 minutes of audio.

To Pause and Resume

  • Pause: Tap ‘Done’ or close the Settings app. Your progress will be saved.
  • Resume: Go back to Settings > Accessibility > Personal Voice, tap the voice you want to continue creating and tap ‘Continue Recording’.

On Mac

  1. Navigate to System Settings: Click on the Apple menu > System Settings, then click on ‘Accessibility’ in the sidebar and select ‘Personal Voice’.
  2. Initiate Setup: Click on ‘Create a Personal Voice’.
  3. Follow Instructions: Just like on iOS, you’ll be guided through the recording process.

To Pause and Resume

  • Pause: Click ‘Done’. Your progress will be saved.
  • Resume: Go back to System Settings > Accessibility > Personal Voice, click the ‘Show Detail’ button next to the voice you want to continue creating, and click ‘Continue Recording’.

Deleting a Personal Voice

If you wish to delete a Personal Voice, you can do so but be aware that it cannot be recovered.

On iPhone or iPad

  1. Open Settings > Accessibility > Personal Voice.
  2. Tap the voice you want to delete.
  3. Authenticate using Face ID, Touch ID, or enter your passcode.
  4. Tap ‘Delete Voice’ and confirm.

On Mac

  1. Navigate to System Settings > Accessibility > Personal Voice.
  2. Click the ‘Show Detail’ button next to the voice you want to delete.
  3. Enter your password.
  4. Click ‘Delete Voice’ and confirm.

Additional Features

  • Live Speech: Type to speak using your Personal Voice.
  • Share Across Devices: Sync your Personal Voice to other devices signed in to iCloud with your Apple ID.
  • Privacy and Security: Your Personal Voice is encrypted and stored securely on your device.

Summary

Creating a Personal Voice in iOS 17 is a straightforward process that offers a more personalized and secure way to interact with your digital world. With just a few steps, you can have a synthesized voice that sounds just like you, enhancing your communication experiences. You can find out more details about the Personal Voice Feature for the iPhone and iPad over at Apple’s website.

Filed Under: Apple, Apple iPad, Apple iPhone, Guides


Latest timeswonderful Deals

Disclosure: Some of our articles include affiliate links. If you buy something through one of these links, timeswonderful may earn an affiliate commission. Learn about our Disclosure Policy.

Categories
News

How to fix common iOS 17 problems

iOS 17 problems

Apple’s iOS 17 software update was released last month along with the new iPhone 15 and iPhone 15 Pro range of smartphones. iOS 17 is a major new release of Apple’s mobile operating system, and as with any new software, it’s not without its problems.

Some of the most common issues reported by users include:

  • Problems with installation and updating: Some users have reported problems downloading and installing iOS 17, or getting their devices stuck in a boot loop after updating.
  • Battery drain: iOS 17 is known to consume more power than previous versions of the OS, especially on older devices.
  • App crashes and freezes: Some users have reported that their apps are crashing or freezing more often after updating to iOS 17.
  • Performance issues: Some users have reported that their devices are running slower or more sluggish after updating to iOS 17.
  • Other bugs and glitches: There are a number of other bugs and glitches that have been reported in iOS 17, such as problems with Face ID, Wi-Fi, and Bluetooth.

If you’re experiencing any of these problems, there are a few things you can try to fix them:

Problems with installation and updating

If you’re having trouble downloading or installing iOS 17, try the following:

  • Make sure you have a strong Wi-Fi connection.
  • Make sure you have enough free storage space on your device.
  • Try restarting your device.
  • If you’re still having trouble, try downloading the iOS 17 update file from Apple’s website and installing it manually.

If your device is stuck in a boot loop after updating to iOS 17, try force restarting it. To do this, press and hold the volume down button and the side button at the same time until you see the Apple logo.

Battery drain

If you’re experiencing battery drain after updating to iOS 17, there are a few things you can do to extend your battery life:

  • Reduce screen brightness.
  • Turn off unnecessary features, such as Bluetooth and Wi-Fi when you’re not using them.
  • Close unused apps running in the background.
  • Disable background app refresh.
  • Use Low Power Mode.

If you’re still having trouble with battery drain, try resetting your device’s battery statistics. To do this, go to Settings > Battery > Battery Health and tap Reset Battery Health.

App crashes and freezes

If you’re experiencing app crashes and freezes, try the following:

  • Make sure all of your apps are up to date.
  • Force quit the problematic app and relaunch it.
  • Clear the app’s cache.
  • Reinstall the problematic app.
  • If the problem persists, contact the app developer for support.

Performance issues

If you’re experiencing performance issues, such as lag or slowness, try the following:

  • Make sure you have enough free storage space on your device.
  • Close unused apps running in the background.
  • Restart your device.

If the problem persists, try resetting your device to factory settings. To do this, go to Settings > General > Transfer or Reset iPhone > Erase All Content and Settings.

Other bugs and glitches

If you’re experiencing other bugs and glitches, such as problems with Face ID, Wi-Fi, or Bluetooth, try the following:

  • Restart your device.
  • Update your device to the latest version of iOS 17.
  • Reset your device’s network settings. To do this, go to Settings > General > Transfer or Reset iPhone > Reset > Reset Network Settings.
  • If the problem persists, contact Apple Support for assistance.

If you’ve tried all of the above troubleshooting steps and you’re still experiencing problems with iOS 17, you may want to consider waiting for Apple to release a bug fix update. In the meantime, you can try using your device in Safe Mode, which disables all third-party apps and may help to resolve certain problems.

To start your device in Safe Mode, press and hold the volume down button while your device is restarting. Keep holding the volume down button until you see the Safe Mode screen. To exit Safe Mode, simply restart your device normally.

I hope this guide helps you to fix any common iOS 17 problems you may be experiencing. If you have any further questions, please don’t hesitate to leave a comment below. You can find out more details about iOS 17 and its range of features over at Apple’s website.

Filed Under: Apple, Apple iPhone, Guides


Latest timeswonderful Deals

Disclosure: Some of our articles include affiliate links. If you buy something through one of these links, timeswonderful may earn an affiliate commission. Learn about our Disclosure Policy.

Categories
News

iOS 16.7.1 and iPadOS 16.7.1 released

iOS 16.7.1

Apple has released iOS 16.7.1 for older models of the iPhone and iPad, this update is available for devices that are not able to upgrade to the recently released iOS 17 software.

The iOS 16.7.1 and iPadOS 16.7.1 software updates are important updates that you should seriously consider updating as they come with some important security updates.

Here are the release notes from Apple for the security update:

Released October 10, 2023

Kernel

Available for: iPhone 8 and later, iPad Pro (all models), iPad Air 3rd generation and later, iPad 5th generation and later, and iPad mini 5th generation and later

Impact: A local attacker may be able to elevate their privileges. Apple is aware of a report that this issue may have been actively exploited against versions of iOS before iOS 16.6.

Description: The issue was addressed with improved checks.

CVE-2023-42824

WebRTC

Available for: iPhone 8 and later, iPad Pro (all models), iPad Air 3rd generation and later, iPad 5th generation and later, and iPad mini 5th generation and later

Impact: A buffer overflow may result in arbitrary code execution

Description: The issue was addressed by updating to libvpx 1.13.1.

WebKit Bugzilla: 262365
CVE-2023-5217

It is recommended that you install the iS 16.7.1 and iPadOS 16.7.1 updates on your iPhone or iPad, you can install the update by going to Settings > General > Software update and then selecting Download and Install.

Source Apple

Filed Under: Apple, Apple iPad, Apple iPhone


Latest timeswonderful Deals

Disclosure: Some of our articles include affiliate links. If you buy something through one of these links, timeswonderful may earn an affiliate commission. Learn about our Disclosure Policy.
Categories
News

iOS 17.1 and iPadOS 17.1 Beta 3 released

iOS 17.1 beta 3

Apple has released IOS 17.1 beta 3 for the iPhone and iPadOS 17.1 beta 3 for the iPad to developers, they have also released a new public beta for of iOS 17.1 and iPadOS 17.1 to public beta testers.

The new iOS 17.1 beta 3 and iPadOS 17.1 beta 3 come a week after the previous betas and they bring a range of new features to the iPhone and iPad, they also include various bug fixes and performance improvements.

The latest update for iOS 17.1 Beta 3 introduces several changes, including enhanced AirDrop functionality that now supports transfers over both WiFi and cellular networks, eliminating the requirement for physical closeness for successful file sharing. Additionally, the update enables the NameDrop feature to work seamlessly between the iPhone and Apple Watch. Apple Music has also seen updates, allowing users to designate their favorite songs, playlists, and other media.

Moreover, this new beta version enriches the iPhone’s audio experience by adding an array of fresh text tones and ringtones. Tweaks have also been applied to the Books & Journal applications, and updates have been rolled out for Dynamic Island and other features.

The new betas of iOS 17.,1 and iPadOS 17.1 are now available for developers to download, you can find out more details over at Apple’s developer website at the link below. The new public beta is also available to download, you will need to sign up to Apple’s public beta testing program to try this software out.

As this is the third beta in the series we are expecting a couple more to be released before the final version of iOS 17.1 and iPadOS 17.1 land. These updates should be released either around the end of October or the start of November, as soon as we get some details on a release date, we will let you know.

Source Apple

Filed Under: Apple iPhone


Latest timeswonderful Deals

Disclosure: Some of our articles include affiliate links. If you buy something through one of these links, timeswonderful may earn an affiliate commission. Learn about our Disclosure Policy.
Categories
News

How to use offline Apple Maps in iOS 17

offline Apple Maps

This guide is designed to show you how to use offline Apple Maps, this is a new feature in Maps that was added with the recent iOS 17 software update. Navigating without an internet connection can be a daunting task, but Apple Maps on iOS 17 makes it easier than ever with its offline maps feature. This guide will walk you through the various methods to download and manage offline maps, as well as how to adjust settings to optimize your experience.

Before diving into the how-to, it’s important to understand why you might want to use offline maps. Offline maps allow you to access turn-by-turn directions, estimated arrival times, and details like hours and ratings on places even when you’re not connected to Wi-Fi or cellular data. This is particularly useful when you’re traveling in areas with poor network coverage or if you want to save on data usage.

Limitations and Considerations

  • Storage Space: Offline maps consume storage on your device. Before downloading, the Maps app will display the file size of the map.
  • Device Compatibility: You can view offline maps on your Apple Watch, provided your iPhone is on and within Bluetooth range (about 33 feet or 10 meters).
  • Syncing: Offline maps do not sync across your devices.
  • Availability: Offline maps are only available in select areas and features may vary by country and region.

Three Ways to Download Offline Maps

Method 1: Use Search in Maps

  1. Open the Maps App: Launch the Maps app on your iOS device.
  2. Search for a Location: Enter the location you want to download in the search field.
  3. Select the Location: Tap the place that appears in your search results.
  4. Download: Tap the “Download” button if available. If not, tap “More” and then tap “Download Map.”
  5. Adjust Area: If necessary, you can adjust the area that you want to include in your offline map. Once satisfied, tap “Download.”

Method 2: Drop a Pin

  1. Open the Maps App: Launch the Maps app.
  2. Drop a Pin: Tap an unmarked area on the map to drop a pin.
  3. Download: Tap the “Download” button.
  4. Adjust Area: Modify the area you want to include in your offline map, then tap “Download” again.

Method 3: Use Offline Maps Settings

  1. Open the Maps App: Launch the Maps app.
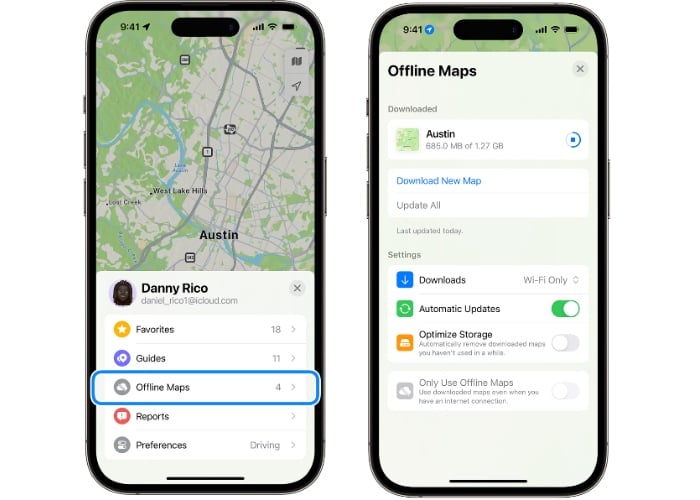
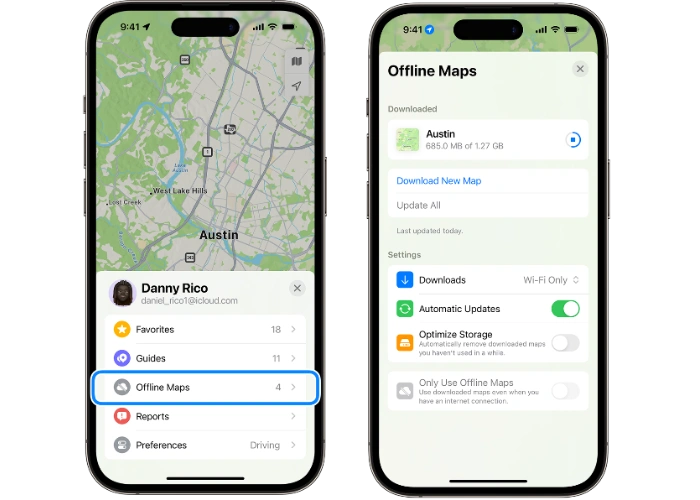
  2. Go to Settings: Tap your picture or initials next to the search field, then tap “Offline Maps.”
  3. Download New Map: Tap “Download New Map,” or select a map that you’ve previously used or that Maps suggests.
  4. Enter Location: Type in a location or select “Current Location.”
  5. Adjust Area and Download: Modify the map area size, then tap “Download.”

Managing Your Offline Maps

  • View Your Maps: To see your downloaded maps, tap your picture or initials next to the search field and then tap “Offline Maps.”
  • Edit or Delete: Tap the map you want to edit or delete. You can rename your map, resize the area, or view the file size. Tap “Delete Map” or “Done” when ready.

Adjusting Offline Maps Settings

  • Wi-Fi Only Downloads: Choose to download maps only when connected to a Wi-Fi network.
  • Automatic Updates: This is on by default and keeps your offline map up-to-date.
  • Optimize Storage: Automatically deletes unused offline maps after a certain period.
  • Only Use Offline Maps: Use your downloaded maps even when you have an internet connection.

By understanding these features and settings, you can make the most out of Apple Maps’ offline capabilities, ensuring that you’re never lost—even when you’re off the grid. We hope that you find this guide helpful, you can find out more details about the latest version of Apple Maps over at Apple’s website at the link below.

Source & Image Credit: Apple

Filed Under: Apple, Apple iPhone, Guides


Latest timeswonderful Deals

Disclosure: Some of our articles include affiliate links. If you buy something through one of these links, timeswonderful may earn an affiliate commission. Learn about our Disclosure Policy.