Categories
News

Create an AI second brain and chat to your documents

Create an AI second brain and chat to your documents

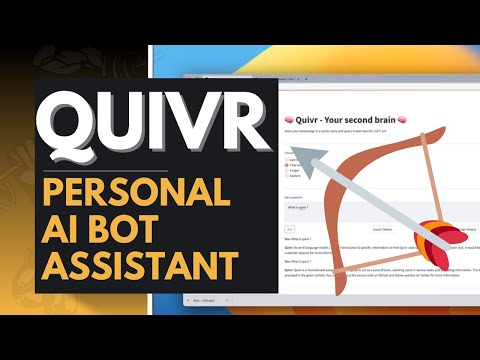
If you are interested in having the ability to give your large language model or preferred AI model a memory you might be interested in Quivr. A unique LLM data storage and query interface, designed to function as a second brain. Read this guide and watch the videos below to learn how to set up and use Quivr on a local machine.

Quivr has been specifically designed to use the power of Generative AI such as that provided by OpenAI’s ChatGPT,  Anthropic AI,  and other large language models to store and retrieve unstructured information. At the current time Quivr only supports a connection to ChatGPT but is looking to expand its capabilities as the project progresses to connect to other LLMs.

Quivr is an open-source software that accepts almost every type of document or media, including pictures, videos, PDFs, CSVs, and PowerPoint documents. It can be used with chat CPT and local models on a user’s computer, allowing users to upload files and ask questions about their content.

Adding memory to your AI model

One of the features that make Quivr unique is the ability to create different “brains” for different sets of documents. This allows users to separate personal and work documents or categorize documents based on projects, topics, or any other criteria. The software is production-ready and can be used to chat with documents at any time. Users can select different models, set the temperature, set the number of tokens, and even create API keys to code on top of Quivr

Other articles you may find of interest on the subject of improving your productivity :

What is a second brain and how is it used to improve productivity?

The term “second brain” in the context of activity and document handling refers to an external system for storing, organizing, and managing information, tasks, and documents that you encounter in your personal and professional life. The idea is to offload the cognitive work of remembering, sorting, and synthesizing information to this external system, thereby freeing up mental space and improving productivity and creativity.

The concept is rooted in productivity methods like Getting Things Done (GTD) by David Allen and takes advantage of modern digital tools to make the process more efficient. Tools like note-taking apps Notion, Obsidian, Devon Think 3 and others as well as task managers such as Asana, Omnifocus and even more specialized software for document handling can serve as components of one’s second brain.

However with the explosion of artificial intelligence over the last two years it has now become even easier to build your very own AI second brain. Using large language models or connections to existing GPT style chatbots you can quickly create a personal assistant and organise your documents that can be accessed using AI queries.

Here’s how a second brain might handle activities and documents:

  • Capture: The first step involves capturing all relevant information, tasks, and documents as they come. This could be meeting notes, ideas, to-do items, or important documents like invoices and contracts.
  • Organize: Once captured, these pieces of information are sorted into appropriate folders, tags, or databases. The system should be intuitive enough that you can find items easily.
  • Review: Periodically, the stored information is reviewed to update tasks, delete or archive obsolete information, and integrate new data.
  • Execute: With a well-organized second brain, you can focus on executing tasks more efficiently, knowing that all the contextual information you might need is readily available.
  • Synthesize: Finally, the second brain can help in synthesizing new ideas by connecting disparate pieces of information stored within it.
  • Search and Retrieve: Because the second brain is well-organized, searching for and retrieving documents or information becomes much easier than if they were scattered in various places.

The second brain essentially serves as an extension of your cognitive faculties, allowing you to manage activities and documents more efficiently than relying solely on your own memory and intuition.

Building an AI second brain with Quivr

Features of Quivr

  • Universal Data Acceptance: Quivr is capable of managing a wide range of data types, including text, images, and code snippets.
  • Generative AI: The platform utilizes advanced AI algorithms to aid in the creation and retrieval of information.
  • Speed and Efficiency: Quivr is engineered for quick and efficient data access.
  • Security: The platform offers robust security features, ensuring that you have full control over your data.
  • OS Compatibility: The software is compatible with Ubuntu 22 and newer versions.
  • File Compatibility: Quivr supports a variety of file types: Text, Markdown, PDF, PowerPoint, Excel (Upcoming), CSV, Word, Audio and Video.
  • Open Source: Quivr is an open-source platform, making it free to use and modify.

One of the key advantages of the Quivr AI second brain is its flexibility. The project can be put on the internet and walled behind authorization, allowing users to give access to friends or colleagues to chat with documents they create. This feature is particularly useful for collaborative projects where multiple users need to interact with the same set of documents.

Quivr is a powerful tool that takes document interaction to a new level. Its unique approach of creating an ‘AI second brain’ allows users to interact with their documents in a conversational manner, making it easier to extract information and insights. Whether you are a student, a professional, or just someone who deals with a lot of documents, building and AI second brain  using Quivr can be a valuable addition to your AI toolkit. For more information and to download the project to install locally jump over to the official GitHub repository

Filed Under: Guides, Top News


Latest timeswonderful Deals

Disclosure: Some of our articles include affiliate links. If you buy something through one of these links, timeswonderful may earn an affiliate commission. Learn about our Disclosure Policy.

Categories
News

How to create consistent characters with DallE 3

How to create consistent characters images with DallE

Since its availability OpenAI’s DallE 3 AI image generator has taken the world by storm providing an alternative to more established AI art creation services such as Midjourney, Stable Diffusion and others. If you need to create a series of images with consistent characters you might be pleased to know that this is possible in DallE 3. Although there are a number of different directions you can take depending on your needs and styles required. This quick guide will provide more information on how to use ChatGPT ‘s custom instructions to craft consistent characters within the DallE 3 platform. As well as how you can use variables combined with custom instructions to create engaging narratives using consistent characters.

Using variables with DallE 3

The use of variables is a key component in the creation of consistent characters in DallE 3. These variables enable the establishment of specific character traits that persist throughout the narrative, thereby providing a sense of continuity and coherence. This consistency is a vital element in the creation of believable characters that can truly connect with the audience.

Earlier methods of creating trying consistent characters has now been refined in DallE 3 providing much more refined results, thanks to custom instruction prompting. This method of creation has been showcased by YouTuber Gilbatree and more recently the Quick Start Creative channel below. Providing instruction on how you can easily create consistent characters using DallE 3. This revised method allows for more control over the character creation process, leading to more consistent and accurate results from DallE 3.

DallE 3 consistent character creation guide

Other articles you may find of interest on the subject of OpenAI’s DallE 3 AI art generator :

Custom instructions are a powerful tool in DallE 3. They allow users to provide a background and output description, essentially giving DallE 3 rules for output. This feature can be used to guide the tool in creating characters that align with the user’s vision. For instance you can use custom instructions to create a comic with a Western modern style, featuring an consistent as the main character. The use of custom instructions in DallE 3 also allows for the conversion of character descriptions into a comic style. This involves adapting the instructions to suit the specific needs of the comic characters you are trying to create.

When introducing characters in DallE 3, it can be beneficial to be less descriptive initially. This allows for more variety in their positioning, which can add depth and dynamism to the story. As the story progresses, more detailed descriptions can be used to further develop the characters. Having a clear vision for the project is crucial when using DallE 3. This vision guides the use of custom instructions and helps maintain consistency in the characters and the story. However, the process is not perfect and may require additional editing in software like Photoshop or Illustrator. But as OpenAI keeps refining its AI art generation technology and AI models you can expect the process to become easier and easier over time.

Applications of consistent characters

Being able to create consistent characters with an AI art generator is a fantastic skill to learn and can be applied in a wide variety of ways. Here are just a few examples of how you can use your newly acquired skill.

Book Design and Publishing

If you’re an aspiring author or a self-publisher, consistent and appealing character designs can add a new dimension to your work. You could use these characters in cover designs, illustrations, or even in promotional materials. This can elevate the overall aesthetic of your book and make it more marketable.

Animation and Filmmaking

Creating an animated short or feature film traditionally requires a huge team of artists and animators. With an AI generator, you can maintain character consistency across different scenes and expressions, drastically reducing the time and human resources needed. This could enable more individuals to venture into animation.

Game Design

For indie game developers, character design can be a significant bottleneck. Using AI to generate consistent and versatile characters can speed up the development process and allow for more focus on gameplay mechanics, story, and other crucial aspects of game design.

Marketing and Branding

If you’re looking to build a personal brand or even a small business, consistent characters can become mascots or representatives. These can be used in various promotional materials across different platforms, offering a unified and instantly recognizable brand image.

Creative Exploration

For artists and creatives, an AI art generator can be a tool for exploration. You can test out different styles, forms, and expressions quickly, allowing for a more rapid iteration and evolution of your creative ideas.

Fan Art and Community Building

Consistent character designs can also be beneficial for fan communities. If you’re a fan artist, you can generate multiple forms of a beloved character quickly, contributing to fan projects or even creating your own derivative works with ease.

Using custom instructions to create consistent characters in DallE 3 is a slightly tricky but rewarding process when creating consistent characters. Although before you start it’s best to have a clear vision, and apply careful use of variables and custom instructions, together with a willingness to edit and refine the output. While the process is not perfect, with patience and creativity, it can produce some impressive results.

Filed Under: Guides, Top News


Latest timeswonderful Deals

Disclosure: Some of our articles include affiliate links. If you buy something through one of these links, timeswonderful may earn an affiliate commission. Learn about our Disclosure Policy.

Categories
News

How to create realistic knolling photographs in Midjourney

creating knolling photographs in Midjourney

If you are interested in learning how to create knolling photographs using AI generators such as Midjourney, DallE 3 or Stable Diffusion to name just a few. Or are simply interested in learning more about what knolling photos are. This quick guide will provide more insight into how you can create fantastic layouts of individual items extremely quickly without the need to set up any lighting range products or get the right camera angle.

Christian Heidorn has created a fantastic introduction to creating realistic knolling photographs in Midjourney. Providing a great starting point and offering insight on how AI art generator is can be used to create search aesthetic photographs, which are great for for a wide variety of different applications. AI has been making huge changes to the way images are created and one area it can be used to great effect is in the creation of knolling photography.

What is knolling photography?

Knolling is a unique form of photography that involves arranging objects in parallel or at 90-degree angles, creating a sense of order and symmetry. Originated by Andrew Kromelow, this style is often used in product photography, flat lays, and even architectural images. To enhance your experience, AI art generators can automate and elevate several aspects of knolling photography.

Key elements when creating a knolling photo :

  • Alignment: Objects are placed in parallel or at right angles.
  • Contrast: Background and object colors should be complementary.
  • Spacing: Uniform spacing between objects is crucial.
  • Lighting: Natural or soft artificial lighting works best.

Traditionally, knolling requires a meticulous setup, which includes the perfect arrangement of objects, precise lighting, and high-quality post-processing. AI art generators are becoming increasingly proficient at automating these tasks, thus saving time and enhancing the final output.

Writing a knolling  prompt

Other articles you may find of interest on the subject of Midjourney and AI art :

You can even create realistic knolling photograph images of futuristic items those that do not yet exist. Experiment yourself by creating weird and wonderful imagery using items from your favorite films, comics or genres.

Using AI to make amazing knolling photography

Surface texture

Creating knolling images involves a certain level of control over various elements. One of these elements is the primary knolling prompt, which refers to the surface on which the objects are placed. This surface can be anything from a rustic wooden table to a sleek marble countertop, depending on the aesthetic the photographer is aiming for. By including this information in the prompt, photographers can control the backdrop of their knolling images and influence the overall mood and tone of the photograph.

Product layout

The layout of the objects is also a crucial aspect of knolling photography. Options for layout include symmetrical, equidistant, circular, and even chaotic arrangements. The choice of layout can drastically alter the visual impact of the image, giving photographers another tool to manipulate the viewer’s perception. For instance, a symmetrical layout might evoke feelings of balance and calm, while a chaotic arrangement could convey a sense of energy and dynamism.

Color selection

Color and style are other elements that photographers can control in knolling images. The color of the objects and the overall style in which they’re displayed can significantly influence the visual appeal of the image. Whether it’s a monochromatic scheme for a minimalist aesthetic or a vibrant palette for a more lively and dynamic look, the color and style choices can make or break a knolling photograph.

AI knolling photography

Knolling photography, despite its popularity, used to be a time-consuming process. However, advancements in technology and photography tools have made it possible to create knolling images directly within the Midjourney, saving time and money. By harnessing the power of AI art generators, even amateur photographers can produce stunning knolling images that would otherwise require hours of meticulous preparation and editing. So, whether you’re a seasoned photographer or a newbie looking to explore the fascinating world of knolling, AI has something to offer that can elevate your artistic endeavors to a whole new level.

Filed Under: Guides, Top News


Latest timeswonderful Deals

Disclosure: Some of our articles include affiliate links. If you buy something through one of these links, timeswonderful may earn an affiliate commission. Learn about our Disclosure Policy.

Categories
News

Create your very own speaking AI assistant using Node.js

How to build a speaking AI assistant using Node.js ChatGPT ElevenLabs and LangChain

Interested in building your very own AI assistant complete with voice and personality using a combination of Node.js, OpenAI Whisper and ChatGPT, ElevenLabs and LangChain? This guide offers more insight into how you can get started and features a video by Developers Digest that shows you how to combine the different technologies to create a speaking AI assistant in just nine minutes using Node.js as the primary platform.

In essence, Node.js enables JavaScript to be used for server-side scripting, unifying the programming language for both client and server, and making it easier for developers to build full-stack applications.  Node.js is a runtime environment that allows you to execute JavaScript code on the server side. Unlike client-side JavaScript that runs in the browser, Node.js is built to run on various platforms like Windows, macOS, and Linux, and is commonly used for building back-end services or APIs.

Node.js is built on Google’s V8 JavaScript engine and uses an event-driven, non-blocking I/O model, making it efficient for scalable applications. It has a rich ecosystem of libraries and frameworks available through its package manager, npm (Node Package Manager), which can be used to extend its functionality.

Building a personal AI assistant using Node.js

With the right tools and a little bit of coding knowledge, you can create an assistant that can listen to your commands, understand them, and respond in a natural, human-like voice. This article will guide you through the process of setting up a voice assistant using OpenAI API, ElevenLabs, and Node.js.

ElevenLabs is a voice AI company that creates realistic, versatile, and contextually-aware AI audio. They provide the ability to generate speech in hundreds of new and existing voices in over 20 languages. OpenAI, on the other hand, is an artificial intelligence research lab that provides powerful APIs for various AI tasks, including natural language processing and understanding.

Other articles we have written that you may find of interest on the subject of AI assistants

Why build your very own AI assistant?

  • Unified Tech Stack: Node.js allows you to write server-side code in JavaScript, potentially unifying your tech stack if you’re also using JavaScript on the client side. This makes development more streamlined.
  • Cutting-Edge Technology: ChatGPT is based on one of the most advanced language models available, offering high-quality conversational capabilities. Integrating it with your assistant can provide a robust natural language interface.
  • Customization: Using ElevenLabs and LangChain, you can customize the AI’s behavior, user experience, and even the data sources it can interact with, making your personal assistant highly tailored to your needs.
  • Scalability: Node.js is known for its scalable architecture, allowing you to easily expand your assistant’s capabilities or user base without a complete overhaul.
  • Learning Opportunity: The project could serve as an excellent learning experience in fields like NLP, AI, server-side development, and UI/UX design.
  • Open Source and Community: Both Node.js and some elements of the GPT ecosystem have strong community support. You can leverage this for troubleshooting, updates, or even contributions to your project.
  • Interdisciplinary Skills: Working on such a project would require a mix of skills – from front-end and back-end development to machine learning and user experience design, offering a well-rounded experience.
  • Innovation: Given that personal AI assistants are a growing field but still relatively new, your project could contribute new ideas or approaches that haven’t been explored before.
  • Practical Utility: Finally, building your own personal assistant means you can design it to cater to your specific needs, solving problems or automating tasks in your daily life.

To create your very own speaking AI assistant, you’ll need to acquire API keys from both ElevenLabs and OpenAI. These keys can be obtained by creating accounts on both platforms and viewing the API keys in the account settings. Once you have these keys, you can start setting up your voice assistant.

Creating a personal AI assistant capable of speech

The first step in creating your very own speaking AI assistant is to establish a new project directory. This directory will contain all the files and code necessary for your assistant. Within this directory, you’ll need to create an environment file (EnV) for your API keys. This file will store your keys securely and make them accessible to your code. Next, you’ll need to create an index file and an ‘audio’ directory. The index file will contain the main code for your assistant, while the ‘audio’ directory will store the audio files generated by your assistant.

Node.js

Once your directory structure is set up, you’ll need to install the necessary packages. These packages will provide the functionality needed for your assistant to listen for commands, understand them, and generate responses. You can install these packages using Node.js, a popular server-side scripting language that allows JavaScript to be used for server-side scripting. After installing the necessary packages, you’ll need to import them into your index file. This will make the functionality provided by these packages available to your code.

ChatGPT

With your packages imported, you can start setting up the OpenAI ChatGPT instance and keyword detection. The ChatGPT instance will handle the natural language processing and understanding, while the keyword detection will allow your assistant to listen for specific commands. Next, you’ll need to initiate and manage the recording process. This process will capture the audio commands given to your assistant and save them as audio files in your ‘audio’ directory.

OpenAI Whisper

Once your audio commands are saved, they can be transcribed using the whisper transcription from OpenAI. This transcription will convert the audio commands into text, which can then be understood by your assistant. With your commands transcribed, your assistant can check for keywords and wait for a response from the OpenAI Language Model (LLM). The LLM will analyze the commands and generate a text response. This text response can then be converted to audio using ElevenLabs’ AI audio generation capabilities. The audio response will be saved in your ‘audio’ directory and can be played out to the user.

Finally, you can customize your assistant to perform certain actions or connect to the internet for further functionality. Creating your very own speaking AI assistant is a fascinating project that can be accomplished with a few tools and some coding knowledge. With ElevenLabs and OpenAI, you can create an assistant that can listen, understand, and respond in a natural, human-like voice.

Filed Under: Guides, Top News


Latest timeswonderful Deals

Disclosure: Some of our articles include affiliate links. If you buy something through one of these links, timeswonderful may earn an affiliate commission. Learn about our Disclosure Policy.

Categories
News

How to create vector graphics using AI

How to create vector graphics using AI and Adobe Illustrator

During its recent Adobe Max 2023 conference a wide variety of new AI features and enhancements were showcased by Adobe some of which are already available to use in its suite of creative applications. If you need to create vector images and graphics you might be interested in one AI feature which is been added to Adobe Illustrator in the form of the aptly named Vector AI. This innovative feature is powered by Adobe Firefly, and has been specifically designed to aid users when creating vector graphics. It is a generative AI-powered tool that complements the existing suite of tools in Illustrator, providing users with an efficient and intuitive method to generate editable vector graphics.

The Text to Vector Graphic (beta) feature operates on a simple yet ingenious principle: it converts brief descriptions provided by users into a variety of vector graphics. Whether the user wants to create a subject, scene, icon, or pattern, Illustrator generates multiple variations based on the brief. This feature not only generates standalone graphics but also produces scalable and editable patterns, offering a wide range of creative possibilities.

This new feature provides users with a high degree of control over the output. The Properties panel allows users to adjust various options as needed, including the level of detail in the output and the style of the vector or image. Furthermore, the generated vector graphic is arranged in logical groups for easy editing, enhancing the user experience and streamlining the creative process.

Vector AI images and graphics

The Text to Vector Graphic (beta) feature is available in the Illustrator app wherever Adobe provides its services, with the exception of China. It is included in users’ existing Illustrator subscription, without any additional fee, making it a valuable addition to the creative toolkit of Illustrator users. However, it is important to note that an internet connection is required to use this feature.

Other articles we have written that you may find of interest on the subject of AI art :

Easily craft vector graphics using Adobe Illustrator’s Text to Vector Graphic feature, now in beta. Just describe your idea in words and let the software do the rest.

How to create Vector Elements using AI

  1. Initiate: Choose to create your vector graphic either in context or on a blank canvas.
  2. Placeholder: Utilize the Rectangle tool to insert a rectangle where your vector graphic will go.
  3. Select: Pick the rectangle using the Selection tool. A Contextual Task Bar will appear.
  4. Generate: Click on ‘Generate (beta)’ and pick your desired vector type—’Subject,’ ‘Scene,’ or ‘Icon.’
  5. Describe: Enter a brief description or choose a sample prompt to define your vector.
    • Pro Tip: Use straightforward language. Phrases like “sunset over hills” or “woman reading book” yield the best results.
  6. Customize: In the Properties panel, you can:
    • Disable ‘Match active artboard style’ if needed.
    • Adjust detail settings.
    • Opt for an existing style.
  • Inspiration: Learn how style choices affect your final output.
  1. Execute: Hit ‘Generate (beta)’. Preview variations and select your favorite.

How to create Vector Patterns using AI

  1. Choose Object: Use the Selection tool to pick an object for pattern application.
  2. Fill/Stroke: Click on either ‘Fill’ or ‘Stroke’ in the toolbar.
  3. Pattern Type: In the Contextual Task Bar, select ‘Generate (beta)’ and then ‘Pattern.’
  4. Description: Input a description or pick a sample prompt for your pattern.
  5. Color Control: Fine-tune color settings in the Properties panel.
  6. Generate: Click ‘Generate (beta)’ and choose the pattern that suits you best.
  • Note: The generated patterns will be repeating tiles.
  • Previewed patterns are stored as swatches for future use.
  • Access this feature through Window > Text to Vector Graphic (beta).

Text to Vector Graphic

The system requirements for the Text to Vector Graphic (beta) feature are the same as those for the Illustrator app, ensuring that all Illustrator users have access to this innovative tool. This feature is designed for Illustrator users of all levels, making it a versatile tool for both beginners and seasoned professionals.

One of the standout features of this new tool is its ability to accelerate creative workflows. By quickly creating subjects, scenes, icons, or patterns using everyday language, it allows users to bring their ideas to life faster and more efficiently.

Moreover, the Text to Vector Graphic (beta) feature introduces a new kind of tamper-evident metadata, known as Content Credentials. These are applied to the assets it generates, ensuring the integrity and authenticity of the created graphics. This unique feature is a testament to Adobe’s commitment to maintaining high standards of quality and trust in its products.

Adobe Illustrator’s new Text to Vector Graphic (beta) feature combines the power of AI with the simplicity of text descriptions to generate a wide range of vector graphics. With its user-friendly interface, customizable options, and efficient workflows, it is set to revolutionize the way vector graphics are created. This innovative tool is a testament to Adobe’s commitment to enhancing the creative process, and it is sure to be warmly welcomed by Illustrator users worldwide. For more information on the latest AI tools to be added to Adobe Illustrator jump over to the official website.

Filed Under: Guides, Top News


Latest timeswonderful Deals

Disclosure: Some of our articles include affiliate links. If you buy something through one of these links, timeswonderful may earn an affiliate commission. Learn about our Disclosure Policy.

Categories
News

How to create the perfect ChatGPT prompt formula

perfect ChatGPT prompt formula

This guide is designed to show you how to create the perfect ChatGPT prompt formula, there are a number of different things that you can do to improve chatGPT responses by improving your prompts.

The art of interacting with ChatGPT, or any other sophisticated language model, lies in mastering the craft of prompt formulation. Crafting the ideal prompt can be the difference between receiving a generic response and obtaining a highly nuanced, tailored answer. In this guide, we’ll delve into the intricacies of creating the perfect ChatGPT prompt formula to maximize your interactions.

Understanding the Underlying Mechanism

Before we dive into the art of prompt crafting, it’s crucial to have a basic understanding of how ChatGPT operates. ChatGPT is an autoregressive model, meaning it generates responses token by token, based on the information provided in the prompt and its extensive training data. The more explicit and clear your prompt, the better the model can generate a response tailored to your needs.

Begin with a Clear Objective

The first step in crafting an effective prompt is to have a clear objective in mind. Are you seeking a concise answer, a detailed explanation, or perhaps a creative story? Your desired outcome should shape the structure and content of your prompt. For instance, if you’re looking for a brief summary, you might start your prompt with “In a few sentences, explain…”.

Be Explicit and Specific

General or ambiguous prompts can lead to generic responses. If you’re looking for information about a niche topic or a specific aspect of a broader subject, be sure to specify that in your prompt. For instance, instead of asking, “Tell me about apples,” you might say, “Describe the nutritional benefits of Granny Smith apples in comparison to Red Delicious.”

Utilize Open-ended Questions

Open-ended questions can elicit more detailed and comprehensive responses. Instead of asking, “Is X better than Y?”, consider phrasing your query as, “What are the advantages and disadvantages of X compared to Y?”

Guide the Model’s Tone and Style

You can steer ChatGPT’s response style by setting a tone in your prompt. For instance, if you’re looking for a humorous take on a topic, you might begin with, “In a light-hearted manner, explain…”. Conversely, for a more scholarly tone, you could prompt, “Provide a detailed academic analysis of…”.

Experiment with System Instructions

System instructions are high-level directives that guide the model’s behavior. For example, you might include an instruction like, “You are a 19th-century historian,” to obtain a response in a specific historical context. These instructions can be a powerful tool to tailor the model’s perspective.

Account for Potential Biases

While ChatGPT is designed to be as neutral as possible, no model is entirely free from biases. Being aware of potential biases and framing your prompts to mitigate them can lead to more balanced and accurate responses.

Iterative Prompting

Don’t be afraid to engage in a back-and-forth with the model. If the initial response isn’t quite what you’re looking for, refine your prompt and ask follow-up questions. This iterative process can hone in on the exact information or style you’re seeking.

Use Contextual Information Sparingly

While it can be tempting to provide extensive background information, remember that ChatGPT operates best with concise, direct prompts. If you find yourself writing a lengthy prompt, consider breaking it up into multiple interactions or refining your question to be more direct.

Stay Updated on Model Iterations

ChatGPT and similar models are continually evolving. Staying updated on the latest versions and their capabilities can help you craft even more effective prompts over time.

Summary

Crafting the perfect ChatGPT prompt is both an art and a science. With a clear objective, explicit details, and a touch of creativity, you can maximize the potential of your interactions with this powerful language model. As with any skill, practice makes perfect, so don’t be afraid to experiment and refine your approach over time.

We hope that you find our guide on how to create the perfect ChatGPT prompt formula helpful and informative, if you have any comments, suggestions, or questions, please let us know in the comments section below.

Filed Under: Guides


Latest timeswonderful Deals

Disclosure: Some of our articles include affiliate links. If you buy something through one of these links, timeswonderful may earn an affiliate commission. Learn about our Disclosure Policy.

Categories
News

How to create the perfect Google bard prompt formula

Google bard prompt formula

This guide will show you how you can create the perfect Google Bard prompt formula. Google Bard is a powerful new language model from Google AI that can be used for a wide variety of tasks, including generating text, translating languages, writing different kinds of creative content, and answering your questions in an informative way. However, to get the best results from Bard, it is important to know how to craft the perfect prompt.

In this guide, we will walk you through the process of creating the perfect Google Bard prompt formula, step by step. We will also provide examples and tips to help you get started.

Clearly articulate the task

The first step is to clearly articulate the task that you want Bard to perform. What do you want Bard to generate, translate, write, or answer? Be as specific as possible.

For example, instead of saying “Write a poem,” you could say “Write a poem about a cat in the style of William Shakespeare.” Or, instead of saying “Translate this sentence into French,” you could say “Translate this sentence into French: ‘I love to eat baguettes.’”

Provide context

Once you have clearly articulated the task, you need to provide Bard with enough context to complete it successfully. This may include providing Bard with information about the topic, the audience, or the desired tone of voice.

For example, if you are asking Bard to write a blog post about a new product, you should provide Bard with information about the product, its features, and its target audience. You may also want to specify the tone of voice that you want Bard to use, such as informative, conversational, or persuasive.

Provide exemplars

If possible, it is helpful to provide Bard with exemplars of the type of output that you are looking for. This can help Bard to better understand your expectations and to generate output that meets your needs.

For example, if you are asking Bard to write a poem in the style of William Shakespeare, you could provide Bard with some examples of Shakespeare’s poetry. Or, if you are asking Bard to translate a sentence into French, you could provide Bard with some examples of translated sentences.

Specify the persona

If you want Bard to generate output from a specific persona, you need to specify that persona in your prompt. This can include specifying the age, gender, occupation, and personality of the persona.

For example, if you want Bard to write a blog post from the perspective of a CEO, you should specify that persona in your prompt. You may also want to provide Bard with additional information about the CEO, such as their background, their industry, and their company’s mission.

Direct the output format

If you want Bard to generate output in a specific format, you need to direct the output format in your prompt. This may include specifying the length of the output, the type of content (e.g., poem, code, script), or the desired style (e.g., formal, informal, conversational).

For example, if you want Bard to generate a 1000-word blog post about a new product, you should specify that in your prompt. You may also want to specify the type of content that you want Bard to generate (e.g., a product review, a how-to guide, or a comparison article).

Use correct spelling and grammar

It is important to use correct spelling and grammar in your prompts. By paying meticulous attention to these details, you greatly enhance the ability of Bard to comprehend your requests more effectively. In turn, this diligent practice will result in Bard producing outputs that not only meet but often exceed the desired level of quality.

Here are some additional tips for crafting the perfect Google Bard prompt:

  • Be as specific as possible. The more specific you are in your prompt, the better Bard will be able to understand your needs and generate the desired output.
  • Provide context. Bard needs to understand the context of your request in order to generate the best possible output. Provide Bard with as much context as possible, including the topic, the audience, and the desired tone of voice.
  • Provide exemplars. If possible, provide Bard with exemplars of the type of output that you are looking for. This will help Bard to better understand your expectations and to generate output that meets your needs.
  • Specify the persona. If you want Bard to generate output from a specific persona, you need to specify that persona in your prompt. This can help Bard to generate output that is more authentic and engaging.
  • Direct the output format. If you want Bard to generate output in a specific format, you need to direct the output format in your prompt. This may include specifying the length of the output, the type of content, or the desired style.
  • Use correct spelling and grammar. It is important to use correct spelling and grammar in your prompts. This will help Bard to better understand your requests and to generate output that is high quality.

By following the tips in this guide, you will be able to craft the perfect Google Bard prompt formula. This will help you to get the most out of Bard and to generate high-quality output that meets your needs.

Remember, the more specific you are in your prompt, the better Bard will be able to understand your needs and generate the desired output. Provide Bard with as much context as possible, including the topic, the audience, and the desired tone of voice. If possible, provide Bard with exemplars of the type of output that you are looking for. Specify the persona if you want Bard to generate output from a specific persona. Direct the output format if you want Bard to generate output in a specific format. And finally, use correct spelling and grammar in your prompts.

With a little practice, you will be able to create Google Bard prompts that generate the outputs you need and want. We hope that you find out guide on how to create the perfect Google Bard prompt formula helpful, if you have any comments, tips or questions, please leave a comment below and let us know. You can find out more details about Google Bard over at the official website.

Filed Under: Guides


Latest timeswonderful Deals

Disclosure: Some of our articles include affiliate links. If you buy something through one of these links, timeswonderful may earn an affiliate commission. Learn about our Disclosure Policy.

Categories
News

How to create the perfect (fake) studio backgrounds using AI

How to make fake studio set backgrounds for video creation

Unfortunately we can’t always film our streams, tutorials or vlogs in amazing real-life locations. However thanks to the explosion in AI tools and technologies over the last 12 months it is now possible to make the perfect fake studio background for your stream.  Using a variety of different software applications it is possible to create studio backgrounds using images and even drop them in after you have filmed your video. Making it very easy to change locations, props and layouts.

Creating AI-enhanced video backgrounds for  is a relatively new AI technique that has transformed the world of video production. It allows creators to design visually appealing backgrounds without the need for expensive equipment or elaborate sets. This quick guide show you how to create your very own studio backgrounds. Taking you through the process of modelling the perfect studio settings for your streams using AI, from shooting the video to exporting the final product.

The first step in creating AI-enhanced video backgrounds is shooting the video with consistent lighting and a steady camera. This is crucial as it ensures that the footage is clear and of high quality, which will make the editing process easier. It is recommended to film in front of a blank setup, as this will allow for greater flexibility when it comes to adding or changing elements in the scene.

Designing the perfect (fake) studio set and backgrounds

Once the footage has been shot, it can be imported into an editing software such as Premiere Pro. Here, a still frame is taken from the footage and moved into Adobe Firefly, a powerful editing tool that allows users to make desired changes to the snapshot. Adobe Firefly’s ‘generative fill’ tool is particularly useful for this process, as it allows users to add or change elements in the scene. This tool offers three different options for the new elements, allowing for a range of realistic or exaggerated effects.

However, it’s important to note that the technology is not perfect and may require some trial and error to achieve the desired results. To make the process smoother, it is recommended to select individual sections and adjust them one at a time. Once the desired changes have been made, the edited image can be exported as a JPEG or brought back into Premiere Pro. Watch the video below to learn more about how this can be done.

 Previous articles we have written that you might be interested in on the subject AI tools to help improve your workflow and save you time and money.

The next step is to add the new background to the video using an online tool such as vidmix.app. This involves integrating the image with the original footage by placing it over the top and using a mask to blend the two together. To make the scene look more natural, a subtle noise layer or film grade overlay can be added on top of everything. This technique can also be used to extend video backgrounds, creating a wider shot or allowing for a longer zoom.

The final step in creating AI-enhanced video backgrounds is to color grade the entire scene to ensure everything blends together seamlessly. This involves adjusting the color balance, contrast, and saturation of the scene to create a cohesive look. The process involves extending the canvas size in Adobe Firefly and using the generative fill tool to create the extended background. The new background is then blended with the original footage in Premiere Pro, creating a seamless, wider shot.

Using Adobe firefly to create fake studio backgrounds

Benefits of fake AI generated studio sets and backgrounds

  • Cost-Effectiveness: Building or renting physical sets can be expensive and time-consuming. AI-generated backgrounds can be far more cost-effective.
  • Flexibility: The ability to switch backgrounds allows for a more dynamic setting or adapting to different themes/topics without the need for physical changes.
  • Professionalism: A clean, well-designed digital background can give the video a more polished and professional look, which could attract more viewers or sponsors.
  • Space Efficiency: You don’t need to allocate physical space for different sets, allowing you to operate even from a small room.
  • Resource Optimization: Digital sets can be reused across multiple projects without additional costs, and can be easily updated or customized.
  • Creative Control: AI-generated backgrounds allow for almost unlimited creativity, which might be impractical or impossible in a physical setting. For instance, one could simulate a newsroom, outer space, or a historical setting with ease.
  • Focus on Content: With the setting taken care of, content creators can focus on the content itself—be it the dialogue, the performance, or other aspects of the video.
  • Quick Iteration: If you’re split-testing viewer engagement with different backgrounds, AI makes it easy to swap settings quickly.
  • Consistency: If you’re running a series of videos, maintaining a consistent setting is much easier when it’s digital.
  • Technical Advantages: Some advanced digital backgrounds can integrate interactive elements or special effects directly, which would require post-production work otherwise.


Creating AI-enhanced video studio or set background is a process that involves shooting high-quality footage, editing a snapshot from the footage, adding a new background, and blending the new background with the original footage. While the technology is not perfect and may require some trial and error, the end result is a visually appealing video background that can enhance any stream or video production. Don’t forget this is what can be created now and new AI enhancements are being rolled out on a monthly basis. So as always we will keep you up to speed and make sure we provide you with the latest AI technologies, tools and techniques.

Filed Under: Guides, Top News


Latest timeswonderful Deals

Disclosure: Some of our articles include affiliate links. If you buy something through one of these links, timeswonderful may earn an affiliate commission. Learn about our Disclosure Policy.

Categories
News

How to write DallE 3 prompts to create amazing AI art for free

How to write DallE 3 prompts to create amazing AI art

Since the stealthy rollout of OpenAI’s DallE 3 AI art image creator and its integration into Microsoft’s Bing Image Creator  more and more impressive artwork has been created using easy to write text based prompts. when compared to other AI art generators such as Midjourney that require a more technical approach to writing prompts with the use of parameters. DallE 3 will simply understand what you type in trying to create the best image it can using that text as reference

OpenAI’s DallE 3 has shown an extraordinary ability to generate complex images based on specific prompts, demonstrating a deep understanding of language and context. The quality and accuracy of the generated images are remarkable, and the speed and efficiency of the image generation process are equally impressive.

How to write DallE 3 prompts for amazing results

DallE 3’s ability to generate complex images based on specific prompts is one of its most impressive features. Take a simple phrase or sentence and transform it into a detailed, visually stunning image. For instance, if you were to input the prompt “a futuristic cityscape at sunset,” DallE 3 would generate an image that not only captures the essence of a cityscape but also incorporates elements of futurism and the warm hues of a setting sun.

This ability to interpret and visualize prompts makes DallE 3 a powerful tool for artists, designers, and anyone in need of unique visual content. Not forgetting that it is also available for free in Microsoft’s Bing  Image Creator allowing you to create a wealth of AI art without parting with any hard earned cash.

 Previous articles we have written that you might be interested in on the subject OpenAI’s DallE 3 :

The AI’s understanding of language and context is another aspect that sets it apart. DallE 3 doesn’t just take keywords from a prompt and generate random images based on those words. Instead, it understands the context of the prompt and generates images that accurately reflect that context.

For example, if the prompt is “a cat wearing a top hat and monocle,” DallE 3 won’t just generate an image of a cat and a separate image of a top hat and monocle. It will generate an image of a cat actually wearing these items, demonstrating a nuanced understanding of language and context.

Demonstration of the power of DallE 3

The quality and accuracy of the generated images are also worth noting. DallE 3’s images are not just visually appealing; they are also accurate representations of the prompts. The colors are vibrant, the details are sharp, and the overall composition of the images is balanced and aesthetically pleasing. This high level of quality and accuracy makes DallE 3 a reliable tool for creating visual content.

The potential of the AI for creating humorous or fantastical scenarios is another exciting aspect. With DallE 3, the only limit is your imagination. You can input prompts that are whimsical, absurd, or fantastical, and DallE 3 will generate images that bring these prompts to life. This feature opens up a world of possibilities for storytelling, entertainment, and creative expression.

Lightning fast AI art generation

The speed and efficiency of the image generation process are also impressive. DallE 3 can generate images in a matter of seconds, making it a convenient tool for those who need visual content quickly. This speed and efficiency do not compromise the quality of the images, which remains consistently high.

DallE 3 prompts

The impressive capabilities of OpenAI’s DallE 3 AI art generator, make it a powerful tool for generating high-quality, contextually accurate images based on specific prompts. Its speed and efficiency, coupled with its ability to create humorous or fantastical scenarios, make it a versatile tool for a variety of applications. DallE 3 is now available to try out in Microsoft’s Bing Image Creator for free and is currently rolling out as an integration into OpenAI’s ChatGPT AI tool although it might not be available to everyone right now but will be available to those with ChatGPT Plus accounts in the coming weeks.

Don’t forget OpenAI will be holding its first ever developer conference and is expected to announce a wide variety of new enhancements to its range of AI tools and services. As always we will keep you up to speed on any announcements, new AI tools or enhancements to existing ChatGPT capabilities.

Filed Under: Guides, Top News


Latest timeswonderful Deals

Disclosure: Some of our articles include affiliate links. If you buy something through one of these links, timeswonderful may earn an affiliate commission. Learn about our Disclosure Policy.

Categories
News

How to create a Personal Voice on the iPhone or iPad with iOS 17

personal voice ios 17

This guide is designed to show you how to create a personal voice on the iPhone or iPad with iOS 17. This is a new feature that was recently introduced with the release of the iOS 17 and iPadOS 17 software updates.

This feature allows you to create a synthesized voice that sounds eerily similar to your own, offering a more personalized experience when communicating with family and friends. Whether you’re using FaceTime, phone calls, or assistive communication apps, your Personal Voice can be your new digital identity. In this article, we’ll guide you through the step-by-step process of setting up your Personal Voice on iOS 17.

Prerequisites

Before diving into the setup process, make sure you meet the following requirements:

  • Operating System: iOS 17, iPadOS 17, or macOS Sonoma or later
  • Device Compatibility:
    • iPhone 12 or later
    • iPad Air (5th generation)
    • iPad Pro 11-inch (3rd generation) or later
    • iPad Pro 12.9-inch (5th generation) or later
    • Mac with Apple silicon
  • Security: Face ID, Touch ID, or a device passcode or password
  • Language: Currently, Personal Voice is available only in English.

Creating Your Personal Voice

On iPhone or iPad

  1. Open Settings: Navigate to the Settings app on your device. Tap on ‘Accessibility’, then tap on ‘Personal Voice’.
  2. Initiate Setup: Tap on ‘Create a Personal Voice’.
  3. Follow Instructions: The on-screen instructions will guide you through recording your voice. You’ll need to read a series of randomly chosen text prompts to record approximately 15 minutes of audio.

To Pause and Resume

  • Pause: Tap ‘Done’ or close the Settings app. Your progress will be saved.
  • Resume: Go back to Settings > Accessibility > Personal Voice, tap the voice you want to continue creating and tap ‘Continue Recording’.

On Mac

  1. Navigate to System Settings: Click on the Apple menu > System Settings, then click on ‘Accessibility’ in the sidebar and select ‘Personal Voice’.
  2. Initiate Setup: Click on ‘Create a Personal Voice’.
  3. Follow Instructions: Just like on iOS, you’ll be guided through the recording process.

To Pause and Resume

  • Pause: Click ‘Done’. Your progress will be saved.
  • Resume: Go back to System Settings > Accessibility > Personal Voice, click the ‘Show Detail’ button next to the voice you want to continue creating, and click ‘Continue Recording’.

Deleting a Personal Voice

If you wish to delete a Personal Voice, you can do so but be aware that it cannot be recovered.

On iPhone or iPad

  1. Open Settings > Accessibility > Personal Voice.
  2. Tap the voice you want to delete.
  3. Authenticate using Face ID, Touch ID, or enter your passcode.
  4. Tap ‘Delete Voice’ and confirm.

On Mac

  1. Navigate to System Settings > Accessibility > Personal Voice.
  2. Click the ‘Show Detail’ button next to the voice you want to delete.
  3. Enter your password.
  4. Click ‘Delete Voice’ and confirm.

Additional Features

  • Live Speech: Type to speak using your Personal Voice.
  • Share Across Devices: Sync your Personal Voice to other devices signed in to iCloud with your Apple ID.
  • Privacy and Security: Your Personal Voice is encrypted and stored securely on your device.

Summary

Creating a Personal Voice in iOS 17 is a straightforward process that offers a more personalized and secure way to interact with your digital world. With just a few steps, you can have a synthesized voice that sounds just like you, enhancing your communication experiences. You can find out more details about the Personal Voice Feature for the iPhone and iPad over at Apple’s website.

Filed Under: Apple, Apple iPad, Apple iPhone, Guides


Latest timeswonderful Deals

Disclosure: Some of our articles include affiliate links. If you buy something through one of these links, timeswonderful may earn an affiliate commission. Learn about our Disclosure Policy.