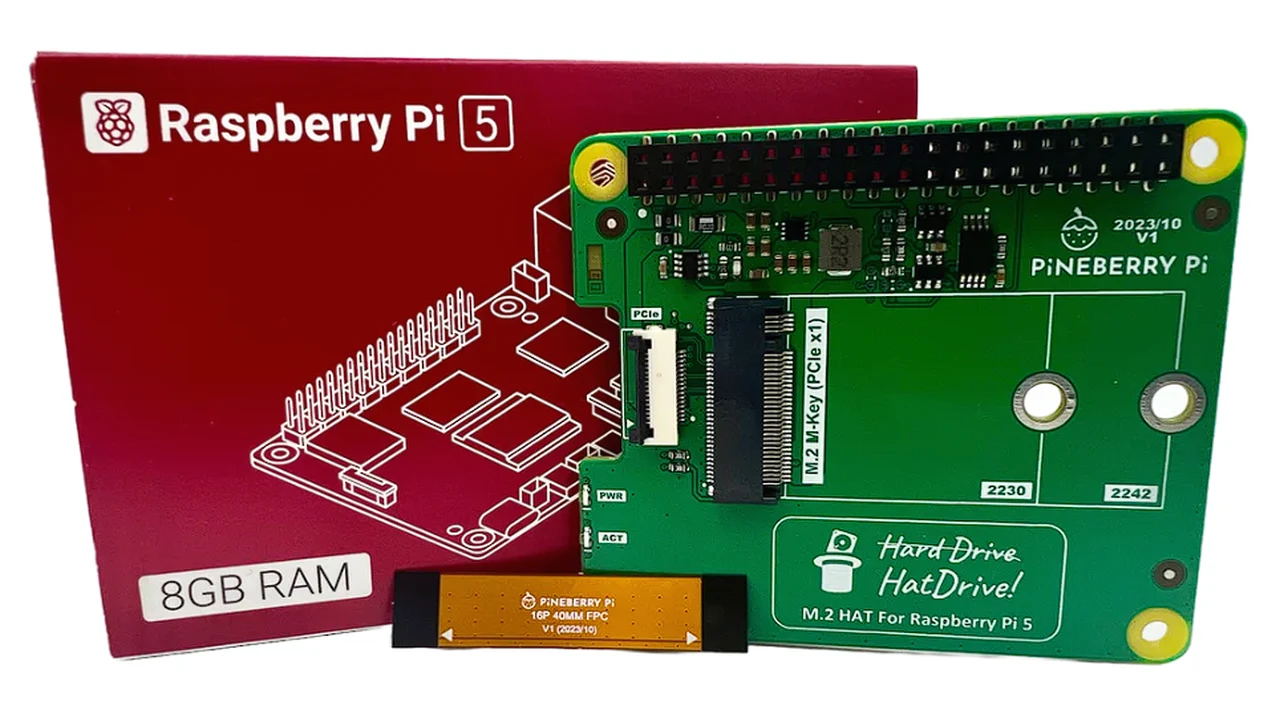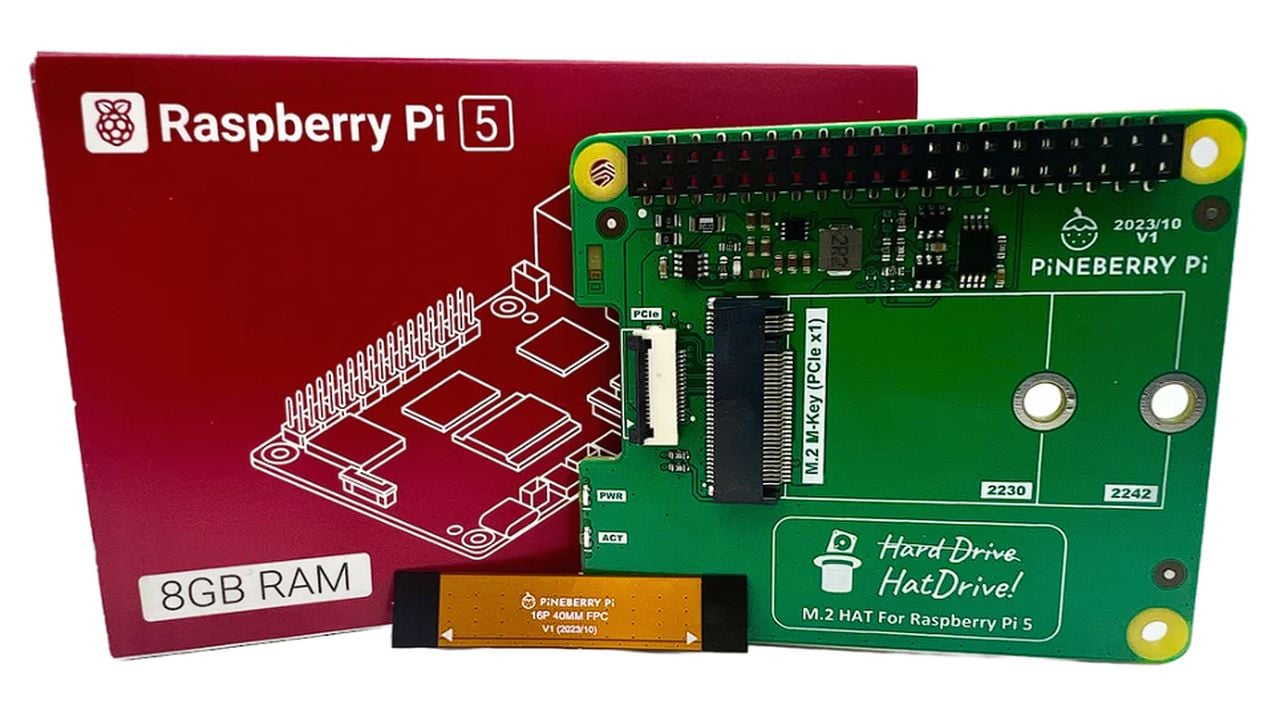
If you are looking to add faster, more reliable or simply just extra storage to your new Raspberry Pi 5 mini PC you will be pleased to know that Pi enthusiast Jeff Geerling has created a great video showing you how easy it is using the Pineberry Pi HatDrive. The Raspberry Pi 5 expansion board has been designed to provide optimal airflow, together with easy access to GPIO expansion, securely mounts underneath the board and is compatible with NVMe drives up to 2280.
For enthusiasts and semi-technical users alike, the introduction of Raspberry Pi NVMe SSD HATs, such as the HatDrive Top Edition and HatDrive BM1 by Pineberry Pie, is an exciting development. These devices tap into the Raspberry Pi 5’s PCI Express interface, offering a significant boost in storage performance compared to traditional micro SD cards. This guide will walk you through the process of supercharging your Raspberry Pi with these innovative storage solutions.
The Raspberry Pi 5 is a versatile and compact computer that has captured the imagination of hobbyists and professionals around the world. With the release of the HatDrive Top Edition and HatDrive BM1, users can now easily enhance their Raspberry Pi’s storage capabilities. These HATs connect through the PCI Express interface, a feature that marks a significant step forward in storage technology for the Raspberry Pi. By upgrading to an NVMe SSD, you’ll not only expand your device’s storage capacity but also enjoy faster data transfer rates, which can streamline your projects and workflows.
Advantages of SSD’s over SD cards
The advantages of NVMe SSDs over micro SD cards are clear. NVMe technology offers superior read/write speeds, which translates to quicker boot times for your Raspberry Pi OS and faster data access. This speed is particularly beneficial for applications that require quick data retrieval, such as media servers or file storage solutions. The NVMe SSDs, when paired with the Raspberry Pi 5, provide a noticeable improvement in performance, making them an attractive option for users looking to push their devices further.
- Faster Read/Write Speeds: SSDs provide significantly faster data transfer rates compared to SD cards. This speed boost enhances overall system performance, leading to quicker boot times, faster file transfers, and more responsive applications.
- Greater Durability: SSDs have no moving parts, making them more resistant to physical shock and less prone to mechanical failure. This makes them a more robust option for projects that might involve movement or less stable environments.
- Longer Lifespan: SSDs generally have a longer lifespan than SD cards. They can handle more read/write cycles before failure, which is crucial for applications that involve frequent data writing.
- Higher Capacity Options: SSDs are available in larger capacities than SD cards, allowing for more storage space for applications, data, and files. This is particularly useful for data-intensive projects or media storage.
- Better Reliability: SSDs tend to be more reliable over time. SD cards, especially lower-quality ones, are more susceptible to corruption and data loss over extended periods of heavy use.
- Improved Heat Management: While SSDs can generate more heat than SD cards, they are also better equipped to handle it. This can result in more stable performance under load, assuming proper thermal management is in place.
- Enhanced Data Security: Some SSDs come with built-in encryption capabilities, offering better data security than standard SD cards. This is beneficial for sensitive data storage.
Other articles we have written that you may find of interest on the subject of Raspberry Pi 5 :
Raspberry Pi 5 SSD setup
The PCI Express interface on the Raspberry Pi 5 is not just for storage; it opens the door to a range of enhancements. This versatile connection allows users to explore various PCI Express-compatible devices, potentially adding new functionalities to their Raspberry Pi setup. To begin your upgrade, you’ll need to flash the Raspberry Pi OS onto your NVMe SSD. Following a detailed setup guide for the Raspberry Pi NVMe SSD will help ensure a smooth transition. Once the OS is installed, booting from the NVMe SSD is a simple process, provided you adhere to the correct instructions.
After installing the operating system, the next step is to configure the software settings. It’s crucial to adjust the Raspberry Pi settings to recognize the NVMe SSD as the primary boot device. This step is essential in the configuration process and ensures that your Raspberry Pi utilizes the full potential of the NVMe SSD. A robust power supply is vital for this upgrade. NVMe SSDs consume more power than micro SD cards, so it’s important to ensure that your power adapter can handle the increased demand. This will help prevent any power-related issues that could affect performance or cause system instability.
Once your system is up and running, it’s time to benchmark the performance of your Raspberry Pi with the new NVMe SSD. Benchmarking will provide you with concrete data on the speed improvements and help you optimize your setup further. You’ll be able to see firsthand the performance gains that come with this storage upgrade.
Compatibility, power and reliability
But it’s not just about speed. NVMe SSDs are also built to last. With no moving parts inside, they are less prone to mechanical failure compared to traditional hard drives. This makes them an excellent choice for projects where reliability is paramount, such as in situations where the Raspberry Pi is part of a larger, mission-critical system.
However, as with any technological upgrade, there are practicalities to consider. Not all Raspberry Pi models are ready to work with NVMe SSDs out of the box. Depending on your model, you might need additional hardware, like an NVMe to USB adapter or a specialized expansion board (often referred to as a HAT), to make the connection possible. This not only adds to the cost but also to the complexity of your setup.
Another consideration is power. NVMe SSDs are more power-hungry than their SATA counterparts. This could be a stumbling block if your Raspberry Pi project is battery-powered or if you’re trying to keep energy consumption to a minimum. It’s a trade-off between the performance benefits and the practical aspects of power supply and hardware compatibility.
Cooling your Pi SSD
With enhanced performance comes increased heat generation, making effective thermal management essential. NVMe SSDs typically operate at higher temperatures than micro SD cards. Therefore, it is important to ensure that your Raspberry Pi 5 case is equipped with sufficient ventilation to maintain safe operating temperatures. Adequate thermal management is crucial to prevent overheating and to ensure the durability of your device.
Before initiating this upgrade, confirming the compatibility of your NVMe SSD with the Raspberry Pi is vital. Not every NVMe SSD is compatible with all HAT devices. Thus, conducting prior research is imperative. This ensures that the SSD you select operates as intended and helps avoid potential disappointment.
By integrating an NVMe SSD into your Raspberry Pi 5 with a HAT device like those offered by Pineberry Pie, you’ll enjoy faster boot times, quicker data transfers, and improved reliability. This guide aims to ensure that you have a smooth installation and configuration process, allowing you to unlock the full capabilities of your Raspberry Pi 5. With this upgrade, your Raspberry Pi will be better equipped to handle demanding applications, making it a more powerful tool in your tech arsenal. Whether you’re a hobbyist looking to experiment with new projects or a professional seeking to optimize your workflow, the addition of an NVMe SSD to your Raspberry Pi 5 is a step toward enhanced computing performance.
Filed Under: Hardware, Top News
Latest timeswonderful Deals
Disclosure: Some of our articles include affiliate links. If you buy something through one of these links, timeswonderful may earn an affiliate commission. Learn about our Disclosure Policy.

