
Recently Midjourney released a new feature that allows users to quickly and easily create unique styles which they can use on new AI art creations. The Midjourney style tuning process allows you to easily create new artwork offering anywhere between 32 to 256 variations.
These Midjourney styles can then be saved to be used at a later date to recreate similar imagery or shared with others. Once you’ve found the perfect style that vibes with your vision, getting your masterpiece out of the tool and into the world is a breeze. Just grab the job ID from the image link, and you’re all set to sprinkle your digital art across any project you like.
With Midjourney, you can add a seed number to your prompt, and just like that, you’re not just creating an image—you’re crafting a one-of-a-kind piece that’s as unique as your fingerprint. This seed number is like a secret sauce that ensures no one else can replicate your artwork. It’s all yours, and that’s pretty special.
Mixing styles is where things get really fun. Think of style codes as the spices in your creative kitchen. Blend different codes together, and you create a unique flavor that makes your art stand out. And if you’re feeling adventurous, throw in a “– -style random” command to add a dash of surprise to your work. Who knows what amazing styles you’ll discover?
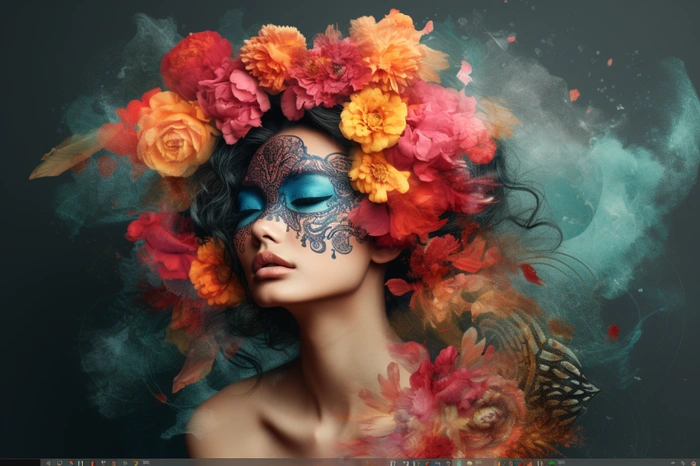
Midjourney style tuning
Check out the excellent Midjourney user guide below created by Future Tech Pilot which features a number of useful ideas on how you can streamline your Midjourney workflow and create fantastic AI artwork.
- Midjourney’s style tuning feature allows users to create a wide range of styles, from 32 up to 256 options, for their creative projects.
- Users can access and download individual images from the style tuning grid by using the job ID found in the image link.
- The seed number provided with the prompt does not guarantee the recreation of the same set of images, indicating that the images generated are unique and cannot be exactly replicated.
- Style codes can be combined to create unique art by linking multiple codes with a hyphen, resulting in a blend of the chosen styles.
- Users can generate completely random style codes by using the command “- -style random,” which can be further customized by linking several random styles or specifying the length and percentage of selections from the tuning quiz.
- The style tuning feature includes a “repeat” option that allows users to generate multiple iterations of a style, with a maximum limit of 40 repeats.
- Users can recover the tuning test that created a specific style code by entering the code into a designated URL, but this does not work with randomly generated codes.
- A community-created style decoder website can decode random style codes to reveal the instructions on how they were made, providing insight into the creation process.
- The “sticky style” setting enables users to apply their last used style code to all future prompts automatically, saving time for those who wish to consistently use a particular style.
- When creating a tuning quiz, users can use multi-prompts to exclude specific elements (e.g., colors) by assigning negative values, as the “no” parameter is not recognized within tuning.
Perfection doesn’t come easy, but with the “repeat” feature, you’re on your way there. This handy tool lets you generate up to 40 variations of a style, giving you a whole array of subtle tweaks to choose from.
Ever wonder where a certain style came from? With the style code recovery function, you can trace the steps back to the original tuning test of any style code. But remember, this doesn’t work for those random styles. For those, you might need a little help from a community-developed style decoder to crack the code of your mysterious creations. Here are some other articles you may find of interest on the subject of AI art.
AI artwork consistency
Consistency can be just as important as creativity. That’s where “sticky style” comes in. This feature locks in your chosen style code for all your prompts, making it a breeze to maintain a cohesive look across your artwork. It’s like having a signature style that everyone recognizes as uniquely you.
When you’re fine-tuning your art, control is key. With multi-prompts in tuning quizzes, you can get super specific by excluding elements you don’t want, just by assigning negative values. This level of detail ensures that your final piece is exactly as you envisioned, without any unwanted surprises.
Collaboration is a big part of the creative process, and Midjourney makes it easy. Turn on the “embeds and link previews” option in your settings, and you’ll be able to share your tuning quiz links directly in chat. This keeps everyone on the same page and makes teamwork a whole lot smoother.
So there you have it. Midjourney’s style tuning isn’t just a tool; it’s a gateway to a world where your digital art can truly shine. By getting to grips with its features, from picking the perfect style to crafting images that are unmistakably yours, you’ll be able to create art that doesn’t just turn heads—it speaks with your voice. Dive in, experiment, and watch as your AI digital artistry reaches heights you never thought possible.
Filed Under: Guides, Top News
Latest timeswonderful Deals
Disclosure: Some of our articles include affiliate links. If you buy something through one of these links, timeswonderful may earn an affiliate commission. Learn about our Disclosure Policy.