Categories
News

Build your own AI agent workforce – step-by-step guide

Build your own AI agent workforce - step-by-step guide

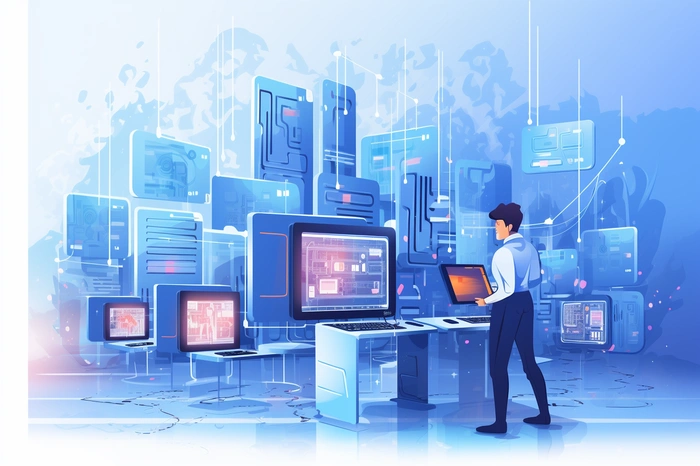
Building your very own AI workforce of virtual helpers or AI agents is a lot easier than you might think. If you have a computer running over 8 GB of RAM you can easily install your own personal AI using Ollama in just a few minutes. Once installed Ollama allows you to easily install a wide variety of different AI models however you will need more RAM to run the larger models such as Llama 2 13B. As large language models tend to consume a significant amount of RAM. Although if you would like to get more advanced and improve the performance of your LLM this can be done using StreamingLLM.

Microsoft’s AutoGen has emerged as a powerful tool for creating and managing large language model (LLM) applications. This innovative framework enables the development of LLM applications using multiple agents that can converse with each other to solve tasks. The agents are customizable, conversable, and seamlessly allow human participation. They can operate in various modes that employ combinations of LLMs, human inputs, and tools.

AutoGen was developed by Microsoft with the aim of simplifying the orchestration, automation, and optimization of complex LLM workflows. It maximizes the performance of LLM models and overcomes their weaknesses. This is achieved by enabling the building of next-gen LLM applications based on multi-agent conversations with minimal effort.

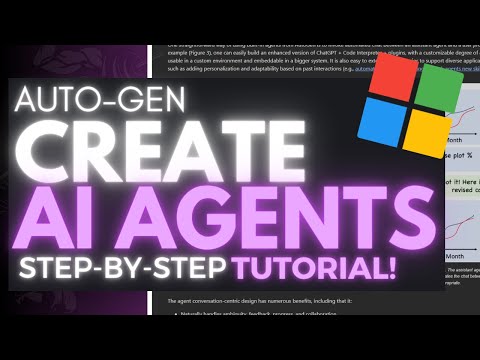
Build a team of AI assistants using AutoGen

Watch the video below to learn more about building your very own AI workforce to help you power through those more mundane tasks allowing you to concentrate on more important areas of your life or business. Follow the step-by-step guide kindly created by the team over at WorldofAI.

Previous articles you may find of interest on Microsoft’s AuotGen  framework :

One of the key features of AutoGen is its ability to create multiple AI agents for collaborative work. These agents can communicate with each other to solve tasks, allowing for more complex and sophisticated applications than would be possible with a single LLM. This multi-agent conversation capability supports diverse conversation patterns for complex workflows. Developers can use AutoGen to build a wide range of conversation patterns concerning conversation autonomy, the number of agents, and agent conversation topology.

AutoGen’s architecture is highly customizable and adaptable. Developers can customize AutoGen agents to meet the specific needs of an application. This includes the ability to choose the LLMs to use, the types of human input to allow, and the tools to employ. Furthermore, AutoGen seamlessly allows human participation, meaning that humans can provide input and feedback to the agents as needed.

AutoGen features

  • Multi-Agent Conversations: Enables development of LLM applications using multiple, conversable agents that interact to solve tasks.
  • Customizable and Conversable Agents: Agents can be tailored to fit specific needs and can engage in diverse conversation patterns.
  • Human Participation: Seamlessly integrates human inputs and feedback into the agent conversations.
  • Versatile Operation Modes: Supports combinations of LLMs, human inputs, and tools for varied use-cases.

Performance and optimization

  • Workflow Simplification: Eases the orchestration, automation, and optimization of complex LLM workflows.
  • Performance Maximization: Utilizes features to overcome LLM weaknesses and maximize their performance.
  • API Enhancement: Provides a drop-in replacement for openai.Completion and openai.ChatCompletion with additional functionalities like performance tuning and error handling.

Application scope

  • Diverse Conversation Patterns: Supports a variety of conversation autonomies, number of agents, and topologies.
  • Wide Range of Applications: Suits various domains and complexities, exemplified by a collection of working systems.

Technical details

  • Python Requirement: Needs Python version >= 3.8 for operation.
  • Utility Maximization: Optimizes the use of expensive LLMs like ChatGPT and GPT-4 by adding functionalities such as tuning, caching, and templating.

Installation of AutoGen requires Python version 3.8 or higher. Once installed, AutoGen provides a collection of working systems with different complexities. These systems span a wide range of applications from various domains and complexities, demonstrating how AutoGen can easily support diverse conversation patterns.

AutoGen also enhances the capabilities of existing LLMs. It offers a drop-in replacement of openai.Completion or openai.ChatCompletion, adding powerful functionalities like tuning, caching, error handling, and templating. For example, developers can optimize generations by LLM with their own tuning data, success metrics, and budgets. This feature helps maximize the utility out of the expensive LLMs such as ChatGPT and GPT-4.

In terms of its potential, AutoGen stands out in comparison to other AI agents. Its ability to support diverse conversation patterns, its customizable and conversable agents, and its seamless integration of human participation make it a powerful tool for developing complex LLM applications.

Microsoft’s AutoGen is a groundbreaking tool that enables the creation and management of large language model applications. Its multi-agent conversation framework, customizable and conversable agents, and seamless integration of human participation make it a powerful tool for developers. Whether you’re looking to optimize the performance of existing LLMs or create complex, multi-agent applications, AutoGen offers a robust and flexible solution.

AutoGen is an open-source, community-driven project under active development (as a spinoff from FLAML, a fast library for automated machine learning and tuning), which encourages contributions from individuals of all backgrounds.

Filed Under: Guides, Top News


Latest timeswonderful Deals

Disclosure: Some of our articles include affiliate links. If you buy something through one of these links, timeswonderful may earn an affiliate commission. Learn about our Disclosure Policy.

Categories
News

A Step-by-Step Guide to Home Renovation

Embarking on a home renovation can be both an exhilarating and daunting endeavor. Transforming a space, breathing new life into rooms, and reimagining interiors can be deeply rewarding. However, without a clear roadmap, renovation projects can quickly become overwhelming. With careful planning, a touch of creativity, and a systematic approach, homeowners can navigate the complexities of renovating with ease and confidence.

This guide breaks down the home renovation process into actionable steps, ensuring that you’re well-equipped to take on this transformative journey, making your dream home a reality while avoiding common pitfalls.

1. Assess and Prioritize

Before diving into the renovation, conduct a thorough assessment of your home. List down areas that need immediate attention and those that can wait. This will help prioritize tasks and allocate budgets more effectively. Ensure you consider both functional issues, like leaky roofs, and aesthetic concerns, such as outdated interiors.

2. Set a Realistic Budget

Determine how much you’re willing to spend on the renovation. Include a contingency fund for unforeseen expenses. Research costs for materials, labor, permits, and other potential expenses. This will help avoid unpleasant financial surprises midway through the project.

3. Create a Design Plan

Visualize the end goal. Do you envision a modern kitchen, a more spacious living room, or perhaps a luxurious bathroom? Sketch your ideas, collect inspiration from magazines or online platforms, and consider hiring a professional designer if it’s within your budget.

4. Assemble Your Team

Identify the professionals you’ll need. Depending on the scale and complexity, this might include architects, interior designers, or specialty contractors. Ensure you check references, read reviews, and interview potential candidates to find the right fit for your project.

The Roofer Perspective: Roof Renovation Essentials

An often overlooked yet critical component of home renovation is the roof. Engaging with a Lemont roofer can shed light on the importance of maintaining and, if necessary, overhauling this protective shield.

  • Inspection: Start with a thorough inspection to identify damages or potential issues. A professional roofer can pinpoint areas that need repair or replacement.
  • Material Selection: Based on your home’s architecture, choose materials that offer durability, weather-resistance, and aesthetic appeal.
  • Safety Protocols: Ensure the team adheres to safety guidelines to prevent accidents during the renovation process.

5. Obtain Necessary Permits

Many home renovation projects require permits from local authorities. These ensure that the changes meet safety and zoning standards. Check with your local municipality or council about the necessary documentation and obtain them before commencing work.

Modern Bathroom Upgrades

One of the most sought-after upgrades in modern homes is a walk-in shower. Bringing in expertise from a walk-in shower installer can make this addition smooth and efficient.

  • Design and Space Planning: Decide where the shower will fit best in your bathroom layout, considering plumbing and space constraints.
  • Material Choices: From tiles to showerheads, choose materials that marry function and aesthetics.
  • Waterproofing: An essential step. Ensure proper sealing and drainage to avoid future water damage.

6. Schedule and Supervise

With your team in place and permits secured, chart out a timeline. Schedule tasks sequentially, ensuring that foundational work, like plumbing or electrical updates, precedes finishing touches. Regularly supervise the progress to ensure the project stays on track and meets your standards.

7. Address Unexpected Challenges

Despite meticulous planning, unforeseen challenges can arise. It could be hidden mold, structural issues, or delayed materials. Stay flexible, consult with your team, and adjust timelines or budgets as needed.

8. Final Inspection and Quality Check

As your renovation wraps up, it’s vital to walk through every room meticulously. Inspect each completed task, ensuring that it meets your expectations and adheres to set standards. Look out for overlooked details or minor imperfections. Having a checklist in hand can help in this stage. Addressing these issues promptly will save future hassles, ensuring that the final result truly captures your envisioned dream home.

9. Celebrate and Maintain

With the renovation complete, it’s time to enjoy and celebrate your revamped space. However, regular maintenance checks, especially for high-wear areas or critical components like roofing, ensure your home remains in top shape for years to come.

Conclusion

Home renovation is more than just upgrading spaces; it’s about crafting environments that resonate with your personality, preferences, and needs. While the process might present challenges, the rewards of a beautifully renovated home are unparalleled. By following this step-by-step guide, homeowners can navigate the renovation journey with clarity, purpose, and confidence, creating spaces that truly feel like home.

Categories
News

How to Start a Gaming Blog on a Mac: Step-by-Step Guide

For the big video game enthusiasts, have you ever thought of sharing your solutions, tips and any other gaming insights you have gathered through your zeal for games? Then, it’s finally time to put this thought into action.

Gaming is no longer about a niche; it has now diversified to become a global activity as day in and day out, people join the industry as providers or consumers. As a result, gaming blogs and other content continue to emerge daily as gamers across places provide insights and share what they know about specific games. They can create more knowledge about the various games and, at other times, make it their source of income. How do you, as a gamer, start this gaming blog?

In this article, we will look at the process of launching your very own gaming blog on a Mac, covering everything from choosing a niche to setting up your blog and creating compelling content.

Determine Your Niche and Audience

You need to determine your niche and audience just as any blogger does. Identifying a specific focus will help you grow and remain relevant in the industry, allowing you to be unique and attract and maintain more audiences. Consider various gaming niche options such as esports coverage, retro gaming or even simple yet relevant gaming tips, tricks, and reviews.

Choose a Blogging Platform.

Choosing a blogging platform is essential to any blogger. Consider using platforms such as WordPress, a popular choice for Mac users due to its user-friendly design, versatility, and customization choices. Follow these steps to create a WordPress blog:

1. Get MAMP from their official website and install it.

2. Install WordPress: Navigate to the WordPress website and get the most recent version. After unzipping the file, store it in the ‘htdocs’ folder.

3. Create a database: Start MAMP, the servers, and phpMyAdmin. Make a database for your blog.

4. Install WordPress: Open your web browser and navigate to ‘localhost:8888’ or the MAMP port number. Follow the installation procedures, and when requested, enter your database information.

Promote and Monetize Your Blog

You need to promote your blog effectively if you want it to have more interaction. Utilize social media platforms, join gaming forums and communities, and contact other gaming bloggers for collaboration opportunities.

Consistency in posting and engagement with your audience will help establish your blog’s presence hence the need to know how to optimize mac for gaming. Ensure you have a powerful GPU and a fast CPU for better streaming, scalable gameplay functions, frame rates especially for games that feature 3D environments. Minimum RAM should be 8GB and a high-capacity SSD will guarantee you fast loading times.

You can also check your graphics settings, minimize background activities, declutter your disk, ensure your mac is cool at all times and find a reliable network connection for streaming ease. These will help you optimize your mac for gaming which means you will be ia better position to experience games fully and relate with your audience better.

Also, explore various monetization options, as you can earn money through affiliate marketing, sponsored content, selling digital products, or running ads. Just be sure to disclose any sponsored content to maintain transparency with your readers.

Customize Your Blog

Now that after set up your blog is up and running, it is time to customize it. Begin by choosing a gaming-focused theme that will help you attract and retain your readers. After that, create essential pages such as an About page, Contact page, and Privacy Policy. These will help secure your page and assure your readers.

For your blog to be personalized, endeavor to create original, captivating content. Once in a while, you can mix niches or section your page into different places. Ensure you use attractive images on the blog.

Conclusion

Starting a gaming blog on your Mac may be a thrilling and rewarding experience. By taking these steps, you may create a successful gaming blog that highlights your gaming enthusiasm and links you with a flourishing gaming community. So, get ready, open up your Mac, and start your game blogging trip immediately!

Categories
News

Mastering the Art of Braiding: Step-by-Step Tutorials with Ywigs

Braiding is not just a hairstyle; it’s an art form that allows you to express your creativity and individuality. Whether you’re a seasoned braider or just starting, Ywigs is here to guide you through some captivating braiding tutorials that will help you perfect your skills and unleash your inner stylist.

Getting Started with Ywigs

Before diving into the tutorials, let’s make sure you have everything you need:

Ywigs’ braiding hair(https://ywigs.com), available in various styles and lengths.

Comb or brush for detangling.

Hair ties, clips, or bands to secure sections.

1.2 Preparing Your Workspace:

Ensure good lighting and a comfortable chair.

Keep your hair tools organized and within reach.

Classic Three-Strand Braid

2.1 Step-by-Step Guide:

Start with clean, detangled hair.

Divide your hair into three equal sections.

Cross the right section over the middle, then the left section over the new middle section.

Repeat until you reach the end of your hair.

Secure with a hair tie.

2.2 Ywigs’ Tips:

Our bulk braiding hair(https://www.ywigs.com/collections/human-braiding-hair) is perfect for adding volume and length to your three-strand braids.

Experiment with different color combinations to create unique looks.

French Braid

3.1 Step-by-Step Guide:

Begin with a section of hair at the crown.

Divide it into three sections.

Cross the right section over the middle, then the left section over the middle.

Add a small section of hair from the sides to each section before crossing.

Continue until you reach the nape of your neck.

Finish with a regular braid.

3.2 Ywigs’ Tips:

Our wet and wavy braiding hair provides texture and dimension to your French braid.

Experiment with side French braids or a French braid updo.

Dutch Braid

4.1 Step-by-Step Guide:

Similar to the French braid, but cross the sections under the middle instead of over.

Create a sleek, inverted braid close to the scalp.

4.2 Ywigs’ Tips:

Use our bulk braiding hair for a thicker Dutch braid.

Try a Dutch braid ponytail or bun for a trendy look.

Chapter 5: Fishtail Braid

5.1 Step-by-Step Guide:

Divide your hair into two equal sections.

Take a small strand from the outside of the right section and cross it over to the left.

Repeat on the other side.

Continue alternating sides until you reach the end.

Secure with a hair tie.

5.2 Ywigs’ Tips:

Our wet and wavy braiding hair adds a beachy, textured effect to your fishtail braid.

Try a side-swept fishtail braid for a romantic look.

Box Braids with Ywigs

6.1 Step-by-Step Guide:

Start with clean, detangled hair.

Part your hair into small, even sections.

Use Ywigs’ bulk braiding hair for each section.

Begin braiding, adding extensions as you go.

Secure the ends.

6.2 Ywigs’ Tips:

Our wet and wavy braiding hair

(https://www.ywigs.com/collections/human-braiding-hair/products/wet-wavy-bulk-hair-extensions-for-braiding)

offers a wide range of colors to create stunning combinations.

Experiment with different lengths for a dynamic box braid style.

With Ywigs as your guide, you’re ready to embark on a braiding journey that will transform your look and boost your confidence. These step-by-step tutorials provide a solid foundation, but remember that braiding is an art form where you can let your imagination run wild. Express yourself, experiment with colors, textures, and styles, and let your braids tell your unique story.