Categories
News

Dxuscreen dual screen touchscreen laptop and tablet

Dxuscreen dual screen touchscreen laptop and tablet

The age of single-screen laptops appears to be on the wane, with dual-screen laptops, such as the Dxuscreen, taking center stage. This innovative piece of technology offers an array of features designed to enhance productivity and offer new avenues for work and leisure alike.

The Dxuscreen is a dual-screen laptop specifically designed to facilitate multitasking. Whether you’re a busy professional juggling multiple tasks or a digital artist working on intricate designs, the Dxuscreen’s dual screens can combine or separate as needed, providing a wide array of options to suit your specific needs. Early bird pledges are now available for the creative project from roughly $699 or £557 (depending on current exchange rates), offering a considerable discount of approximately 40% off the fixed retail price, while the Kickstarter crowd funding is under way.

One of the standout features of the Dxuscreen is its ability to manually sense stock curve trends. This feature makes it an invaluable tool for professionals in the financial sector who need to keep an eye on the stock market. Furthermore, the laptop boasts portable coding capabilities, making it a versatile tool for developers and programmers.

Dual screen touchscreen laptop

For the gaming enthusiasts, the Dxuscreen handles a diverse range of games with ease, regardless of their size. This makes the laptop an excellent choice for both casual and hardcore gamers. Moreover, the device supports drawing and writing, further expanding its applicability.

The Dxuscreen offers three synchronized modes for diverse work options, catering to a wide range of professional needs. Whether you’re drafting a document, designing a website, or analyzing data, the laptop’s versatile modes can adapt to your requirements. The laptop can also be used as an e-book for outdoor reading, making it a great companion for those who love to read on the go.

If the Dxuscreen campaign successfully raises its required pledge goal and the project progresses smoothly, worldwide shipping is expected to take place sometime around February 2024. To learn more about the Dxuscreen dual screen touchscreen laptop and tablet project audit the promotional video below.

The Dxuscreen features a hidden keyboard and a matching keyboard for traditional users. The hidden keyboard acts as a screen when not in use and pops out when typing is required, offering a seamless transition between modes. The Dxuscreen’s high-quality carbon fiber composite housing ensures optimal electrical and thermal conductivity, enhancing the device’s performance. The signal receiver is centered for faster internet speeds, ensuring that you stay connected wherever you are.

The laptop is powered by a large capacity battery, providing a durable power supply for long hours of use. It also supports PD Fast Charge, allowing for rapid charging and even the ability to charge your phone, making it a reliable companion for those always on the move. Despite its wide array of features, the Dxuscreen maintains a minimalist design. It is ultra-thin and lightweight, making it easy to carry around. The laptop features two USB-C ports and a power port, keeping it simple yet functional.

Specifications

specifications

The Dxuscreen dual-screen laptop offers a host of features that cater to a wide range of needs, from professional tasks to leisure activities. Its versatility, coupled with its sleek design and durable construction, makes it a standout choice in today’s market of dual-screen laptops. For a complete list of all available pledge options, stretch goals, extra media and product capabilities for the dual screen touchscreen laptop and tablet, jump over to the official Dxuscreen crowd funding campaign page by proceeding to the link below.

Source : Kickstarter

Disclaimer: Participating in Kickstarter campaigns involves inherent risks. While many projects successfully meet their goals, others may fail to deliver due to numerous challenges. Always conduct thorough research and exercise caution when pledging your hard-earned money.

Filed Under: Laptops, Top News


Latest timeswonderful Deals

Disclosure: Some of our articles include affiliate links. If you buy something through one of these links, timeswonderful may earn an affiliate commission. Learn about our Disclosure Policy.

Categories
News

How to take screen recordings on your Mac

screen recordings Mac

This guide is designed to show you how to take screen recordings on your Mac.The skill of screen recording on a Mac holds significant value across a diverse spectrum of users, including professionals, educators, and casual users, each finding unique applications for this technology. For professionals, the ability to record their screen becomes an indispensable tool in their digital arsenal. It enables them to create detailed tutorials, demonstrate software functionalities, or provide clients with walk-throughs of complex processes, all of which can enhance communication and productivity in a business environment. Educators, on the other hand, find screen recording particularly beneficial for developing educational content. They can record lectures, create instructional material, and even capture educational webinars, thus enriching the learning experience for their students.

In addition, casual users benefit from the ease and efficiency of macOS’s built-in screen recording tools. They can capture moments of gameplay, creating memories or tutorials for gaming communities, or record video calls with friends and family for posterity. The process of recording such activities is made straightforward and user-friendly by macOS, which is designed to cater to the needs of users at all levels of technical expertise.

The Built-in macOS Screen Recording Tool

Since macOS Mojave, Apple has included a screen recording feature within the Screenshot toolbar. This tool is a significant upgrade from the previous method that required QuickTime Player.

Accessing the Screen Recording Tool

  1. Shortcut Method: Press Command + Shift + 5 to open the Screenshot toolbar. This shortcut is a quick and easy way to access both screenshot and screen recording functions.
  2. Via Launchpad: You can also access this tool through the Launchpad by navigating to the ‘Other’ folder and selecting ‘Screenshot.

Using the Screen Recording Tool

  1. Selection: Once the toolbar is open, you’ll see options to record the entire screen or just a selected portion. Choose the one that suits your need.
  2. Options: Before starting the recording, click on ‘Options’. Here, you can select where to save your recording, set a timer, choose whether to show mouse clicks in the recording, and more.
  3. Microphone: If you want to include audio, such as voiceovers, select a microphone.
  4. Starting the Recording: After setting up your preferences, click ‘Record’. For full-screen recording, it starts immediately. For a portion of the screen, you’ll need to drag to select the area first.

Stopping the Recording

  • Click the ‘Stop’ button in the menu bar, or press Command + Control + Esc.

Editing and Sharing

  • Once recorded, the video thumbnail appears briefly in the bottom right corner. Click on it to open the editing window where you can trim the recording. You can then share it directly from there.

Advanced Screen Recording with QuickTime Player

For those who need more control or wish to record their screen along with other media inputs, QuickTime Player is a suitable option.

Steps to Record with QuickTime Player

  1. Open QuickTime Player and go to File > New Screen Recording.
  2. Select Recording Options: Similar to the Screenshot toolbar, you can choose to record the entire screen or a portion, and select audio input sources.
  3. Recording: Click the ‘Record’ button and follow similar steps as the Screenshot toolbar for recording.

Additional Features

  • QuickTime Player allows recording of iPhone or iPad’s screen when the device is connected to the Mac.
  • It offers more editing features compared to the Screenshot toolbar.

Third-Party Applications

For users with more specific needs, such as professional-grade video editing or advanced recording settings, third-party applications like OBS Studio or Camtasia might be more appropriate. These applications offer extensive customization, including higher frame rates, multiple audio sources, and integrated video editing suites.

Tips for Effective Screen Recordings

  1. Prepare Your Screen: Clean up your desktop and close unnecessary applications to avoid distractions.
  2. Use Do Not Disturb Mode: This prevents notifications from appearing during your recording.
  3. Test Your Audio: If recording voice, ensure your microphone is properly configured and test it before starting.
  4. Practice: If you’re recording a tutorial or presentation, it’s useful to practice your script to reduce errors.

Conclusion

Screen recording on a Mac extends far beyond mere functionality; it’s an essential skill that blends versatility and utility. In today’s digital age, the ability to capture and share screen content is invaluable, whether you’re a content creator, educator, or professional. Utilizing the built-in tools in macOS offers a straightforward and efficient solution for quick screen captures. These tools are designed with user-friendliness in mind, making them ideal for everyday tasks such as creating brief tutorials, recording video calls, or capturing live-streaming events.

Screen recording on a Mac is a versatile and valuable skill. Whether using the built-in tools for quick captures or sophisticated third-party applications for professional videos, understanding these tools enhances productivity and creativity.

Remember, while the built-in tools are sufficient for most purposes, exploring third-party options can be beneficial for specialized requirements. Keep your software updated to access the latest features and improvements from Apple. You can find out more details about this feature over at Apple’s website.

Image Credit: N.Tho.Duc

Filed Under: Guides


Latest timeswonderful Deals

Disclosure: Some of our articles include affiliate links. If you buy something through one of these links, timeswonderful may earn an affiliate commission. Learn about our Disclosure Policy.

Categories
News

How To Share Your iPhone Screen On FaceTime

share iphone screen FaceTime

This guide is designed to show you how to share your iPhone screen on FaceTime. In today’s technology-driven world, the ability to share your screen seamlessly has become increasingly important for collaboration, presentations, and even casual interactions. FaceTime, Apple’s renowned video calling service, offers a convenient feature that allows you to share your iPhone screen with others during a call. Whether you’re showcasing a new app, guiding someone through a complex process, or simply sharing a funny video, screen sharing on FaceTime makes it effortless to engage with others in a more interactive and immersive way.

Prerequisites for Screen Sharing

Before embarking on your screen-sharing journey, ensure that both your device and the recipient’s meet the necessary requirements:

  • Compatible Devices: Both devices must be an iPhone 5s or later running iOS 12 or later.
  • Network Connectivity: A stable Wi-Fi or cellular connection is crucial for smooth screen sharing.
  • FaceTime Compatibility: Ensure that the FaceTime app is installed and up-to-date on both devices.

Initiating Screen Sharing

  • Launch FaceTime: Begin by opening the FaceTime app and initiating a video call with the desired person.
  • Access Share Content: Once the call is established, locate the “Share Content” button, typically represented by a rectangle with an upward arrow.
  • Initiate Screen Sharing: Tap the “Share Content” button, followed by the “Share My Screen” option. This will commence the screen-sharing session, displaying your entire iPhone screen to the recipient.

Sharing Specific Apps

For instances where you want to share a specific app rather than your entire screen, follow these steps:

  • Select the App: Navigate to the app you wish to share and tap on it.
  • Initiate App Sharing: Once the app is selected, tap on the “Share My Screen” option. This will limit the shared content to the chosen app.

Terminating Screen Sharing

When you’re ready to conclude the screen-sharing session, simply follow these steps:

  • Access Share Content: Tap on the “Share Content” button to bring up the sharing options.
  • End Screen Sharing: Select the “Stop Sharing” option to terminate the screen-sharing session.

Joining a Screen Sharing Session

If you’re the recipient of a screen-sharing session, follow these steps to join:

  • Join Screen Sharing Prompt: Locate the “Open next to Join Screen Sharing” prompt.
  • Initiate Joining: Tap on the prompt to join the screen-sharing session and view the shared screen.
  • Enlarging and Moving the Shared Screen: To enlarge the shared screen, tap on it. To move the shared screen, tap and drag it.
  • Exiting Screen Sharing: To leave the screen-sharing session, tap on the “Share Content” button, followed by the “Leave Screen Sharing” option.

Additional Tips for Enhanced Screen Sharing

  • Optimize Network Connection: For optimal performance, prioritize a Wi-Fi connection over cellular data.
  • Control Screen Sharing via Control Center: Utilize the Control Center to pause or resume the screen-sharing session.
  • Annotate and Draw on Shared Screen: Leverage the Control Center to draw or annotate on the shared screen for enhanced communication.
  • Troubleshooting: If encountering issues, ensure both devices have the latest software updates and restart the FaceTime app.

Screen sharing on FaceTime offers a valuable tool for collaboration, presentations, and even casual interactions. By following these guidelines, you can seamlessly share your iPhone screen with others, enhancing your FaceTime experience and fostering more engaging connections. You can find iout more details about charing your screen on your iPhone in FaceTime over at Apple’s website.

Image Credit: Harry Cunningham

Filed Under: Apple, Apple iPhone, Guides


Latest timeswonderful Deals

Disclosure: Some of our articles include affiliate links. If you buy something through one of these links, timeswonderful may earn an affiliate commission. Learn about our Disclosure Policy.

Categories
News

Benefit of Giant Led Screen for Advertising

In today’s fast-paced world, where competition is fierce, advertising has become an integral part of every business’s success strategy. One of the latest innovations in the world of advertising is the use of giant LED screen which also know as Jumbotron screen. These massive screens are gaining popularity for their ability to captivate audiences, deliver powerful messages, and leave a lasting impression. In this article, we will delve into the numerous benefits of using giant LED screen for advertising.

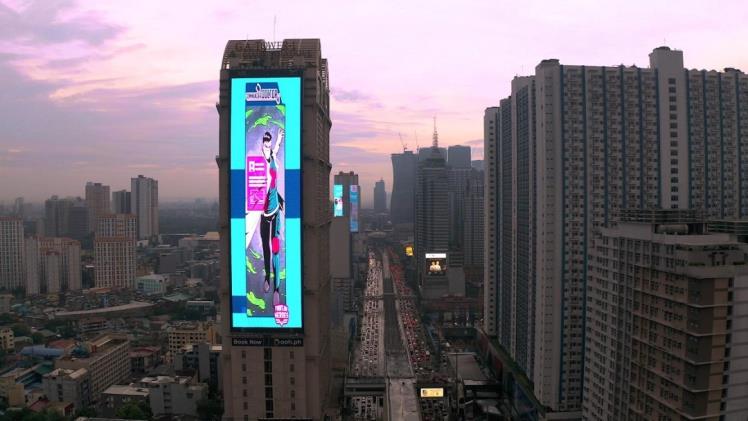
Giant LED screens, often seen in bustling city centers and busy intersections, have become a game-changer in the world of advertising. Their immense size and vibrant displays capture the attention of passersby, making them an invaluable tool for businesses looking to stand out in a crowded market.

One of the primary benefits of giant LED screens is their unmatched visibility. These screens are visible from a distance, ensuring that your message reaches a broad audience. In the realm of advertising, visibility is paramount, and LED screens excel in this regard. Their radiant presence shines through both day and night, thanks to the luminous Giant LED screen technology. Even in broad daylight or the darkness of night, the brilliance of the display remains undiminished, making your content perpetually eye-catching. The ability to grab the attention of passersby at any time is a formidable asset, ensuring that your message is not just seen but leaves an indelible mark, regardless of the hour.

In contrast to conventional static billboards, the use of massive LED screens offers a remarkable level of versatility. These vibrant digital displays open up a world of possibilities by enabling the presentation of videos, animations, and live updates, enhancing the effectiveness of your advertising endeavors. Unlike their static counterparts, Jumbotron screens breathe life into your campaigns, captivating audiences with captivating visuals and providing real-time information. With the ability to adapt content on the fly, these screens cater to the ever-evolving tastes and preferences of your target audience, ensuring that your message remains relevant and impactful. The dynamic nature of LED screens revolutionizes the advertising landscape, elevating it to a dynamic, engaging, and information-rich experience that captures attention and leaves a lasting impression.

While the initial investment in a giant LED screen may seem significant, it proves to be cost-effective in the long run. With the ability to display multiple ads and change content easily, you can save on printing costs and reach a larger audience.

The vivid hues and stunning high-definition imagery presented on LED screens possess an enchanting allure. They possess the innate ability to ensnare the gaze of onlookers, simplifying the task of communicating your message and etching it indelibly into their memory. These brilliant colors and crystal-clear visuals serve as a magnetic force, effortlessly pulling the audience into the world of your content. With such captivating displays, the power to convey your message becomes not just easy but remarkably effective. In an age where attention spans are fleeting, LED screens stand as a beacon of engagement, ensuring that your message not only reaches but resonates with your audience, creating a lasting imprint that endures long after the screen goes dark.

Giant LED screen are tirelessly at work around the clock, guaranteeing that your message remains in the spotlight throughout every hour of the day and night. This unceasing presence is a potent tool for amplifying your advertising endeavors, particularly in bustling, high-traffic locales. In a world that never sleeps, these screens tirelessly broadcast your message, ensuring it reaches a diverse audience at all hours. The consistency of exposure they provide is a valuable asset, allowing your brand to etch itself into the collective consciousness of passersby, whether it’s the break of dawn or the stillness of the night. The continuous operation of these screens is a testament to their unwavering commitment to showcasing your message and maximizing its impact.

Jumbotron screens provide a remarkable level of flexibility, allowing you to precisely target your desired audience. By tailoring your content to the time of day or the unique demographics of the surrounding area, you can ensure that your message strikes a chord with the most relevant individuals. This adaptability is akin to a finely tuned instrument in your advertising toolkit. Whether it’s dawn, noon, or dusk, or if you find yourself in a bustling urban center or a serene suburban neighborhood, LED screens empower you to customize your message accordingly. This dynamic approach not only captures the attention of the right people but also fosters a deeper connection, as your content aligns seamlessly with the specific interests and needs of your intended audience, making your message all the more impactful and resonant.

Certain large LED screens integrate touch or motion-sensing technology, fostering viewer interaction with the content. This interactive dimension not only enhances engagement but also boosts brand recall and customer involvement. When viewers can actively participate, whether by touching the screen or triggering motion-based responses, it transforms passive observation into an immersive experience. This heightened level of involvement creates a memorable connection between the audience and the brand, increasing the likelihood of them recalling your message and forging a deeper engagement. Interactive LED screens thus serve as a compelling avenue to captivate your audience and leave a lasting impression.

Compared to traditional print advertising, LED screens are more environmentally friendly. They eliminate the need for paper, reducing waste and contributing to a greener planet.

Digital advertising on LED screens allows for precise tracking and analytics. You can measure the effectiveness of your campaigns in real-time and make adjustments as needed to optimize results.

Giant LED screens are incredibly versatile. They can be used for advertising, public announcements, event promotions, and more. Their adaptability makes them a valuable asset for businesses.

A continuous and attention-grabbing presence on giant LED screen can substantially elevate brand recognition. The frequent exposure of your brand through these displays fosters trust and familiarity among viewers. When people encounter your brand consistently on such prominent platforms, it establishes a sense of reliability and recognition, strengthening the bond between your brand and its audience. This consistency not only enhances visibility but also reinforces the positive image of your brand, making it more memorable and trustworthy in the eyes of your target audience.

The possibilities are endless when it comes to creating content for giant LED screens. You have the creative freedom to design captivating and unique advertisements that resonate with your target audience.

Incorporating giant LED Screen into your business strategy can be a game-changer, offering a substantial edge over competitors. These vibrant screens empower you to stand out in a crowded market and effortlessly seize the gaze of prospective customers. The visual impact of these colossal displays not only elevates your brand’s presence but also ensures that your message resonates powerfully with your target audience. In an era where attention spans are fleeting, these LED screens serve as a captivating beacon, drawing people in and leaving a lasting impression. So, when considering ways to gain a competitive edge, remember that these monumental screens aren’t just an investment in technology; they’re an investment in the future success and visibility of your business.

In conclusion, the benefits of using giant LED screens for advertising are undeniable. They offer enhanced visibility, dynamic content, cost-effective solutions, and numerous other advantages that can take your advertising efforts to the next level. As technology continues to advance, these screens will play an increasingly vital role in the world of marketing.

  • Are giant LED screens suitable for all types of businesses?

Yes, giant LED screens can benefit businesses of all sizes and industries.

  • Can I change the content on a giant LED screen frequently?

Absolutely! LED screens allow you to update content as often as you like.

  • Do LED screens require a lot of maintenance?

LED screens are low-maintenance and built to last.

  • How can I measure the success of my LED screen advertising campaigns?

You can track performance through analytics and audience engagement metrics.

  • What is the lifespan of a giant LED screen?

LED screens have a long lifespan, often exceeding 100,000 hours of use.

Categories
News

How to personalize your Lock Screen in iPadOS 17

iPad Lock Screen

iPadOS 17 introduces a number of new features for personalizing your Lock Screen, including the ability to add widgets, change the font and color of the clock, and create multiple Lock Screens.

Add widgets

Widgets are small apps that can be added to your Lock Screen to provide you with quick access to information and functionality. To add widgets to your Lock Screen:

  • Tap and hold on to your Lock Screen until the Customize button appears.
  • Tap Customize.
  • Tap the + button in the top right corner.
  • Select the widgets you want to add.
  • Tap Done.

You can add up to three widgets to the bottom of your Lock Screen, or one large widget to the top right corner. To reposition a widget, tap and hold on it, then drag it to the desired location.

Change the font and color of the clock

To change the font and color of the clock on your Lock Screen:

  • Tap and hold on to your Lock Screen until the Customize button appears.
  • Tap Customize.
  • Tap the clock.
  • Select the desired font and color.
  • Tap Done.

Create multiple Lock Screens

You can create multiple Lock Screens and switch between them at any time. To create a new Lock Screen:

  • Tap and hold on to your Lock Screen until the Customize button appears.
  • Tap Customize.
  • Tap the + button in the top right corner.
  • Tap New Lock Screen.
  • Select the desired wallpaper and widgets.
  • Tap Done.

To switch between Lock Screens:

  • Tap and hold on to your Lock Screen until the Lock Screen gallery appears.
  • Swipe left or right to select the desired Lock Screen.
  • Tap the Lock Screen to switch to it.

Other personalization options

In addition to adding widgets and changing the font and color of the clock, you can also personalize your Lock Screen by:

  • Choosing a different wallpaper.
  • Adding a photo filter to your wallpaper.
  • Enabling notifications for specific apps.
  • Adding a link to your Focus settings.

To access these personalization options:

  • Tap and hold on your Lock Screen until the Customize button appears.
  • Tap Customize.
  • Tap the ••• button in the top right corner

Tips and tricks

Here are a few tips and tricks for personalizing your Lock Screen in iPadOS 17:

  • You can create a Lock Screen for each of your Focus modes. This way, you can only see the notifications and widgets that are relevant to the Focus mode you’re currently in.
  • You can use Smart Stacks to group similar widgets together. This way, you can save space on your Lock Screen and still access all of your favorite widgets.
  • You can use Live widgets to get real-time information from your favorite apps. For example, you can add a Live widget to your Lock Screen to see the current weather, traffic conditions, or sports scores.
  • You can use interactive widgets to perform actions without having to unlock your iPad. For example, you can add an interactive widget to your Lock Screen to play or pause music, skip to the next track, or adjust the volume.

Here are some additional tips for personalizing your Lock Screen in iPadOS 17:

  • Use a personal photo or artwork as your wallpaper.
  • Add widgets that are relevant to your interests and needs. For example, if you’re a student, you could add widgets for your calendar, assignments, and upcoming exams.
  • Choose a font and color for the clock that matches your overall aesthetic.
  • Create multiple Lock Screens for different occasions. For example, you could have one Lock Screen for work, one Lock Screen for school, and one Lock Screen for personal time.
  • Use Focus modes to create different Lock Screens for different activities. For example, you could have a Lock Screen for when you’re working on a project, a
  • Lock Screen for when you’re relaxing, and a Lock Screen for when you’re sleeping.\
  • Experiment with different personalization options to find what looks and works best for you.

Summary

iPadOS 17 offers a number of new ways to personalize your Lock Screen. By adding widgets, changing the font and color of the clock, and creating multiple Lock Screens, you can make your iPad’s Lock Screen as unique as you are. I hope this guide has helped you learn how to personalize your Lock Screen in iPadOS 17. Have fun creating a new Lock Screen for your iPad. You can find iout more details about the rnage of new features in iOS 17 at the link below.

Image Credit: Apple

Filed Under: Apple, Apple iPad, Guides


Latest timeswonderful Deals

Disclosure: Some of our articles include affiliate links. If you buy something through one of these links, timeswonderful may earn an affiliate commission. Learn about our Disclosure Policy.