Categories
News

Argon NEO 5 BRED Raspberry Pi 5 case

Argon NEO 5 BRED Raspberry Pi 5 case

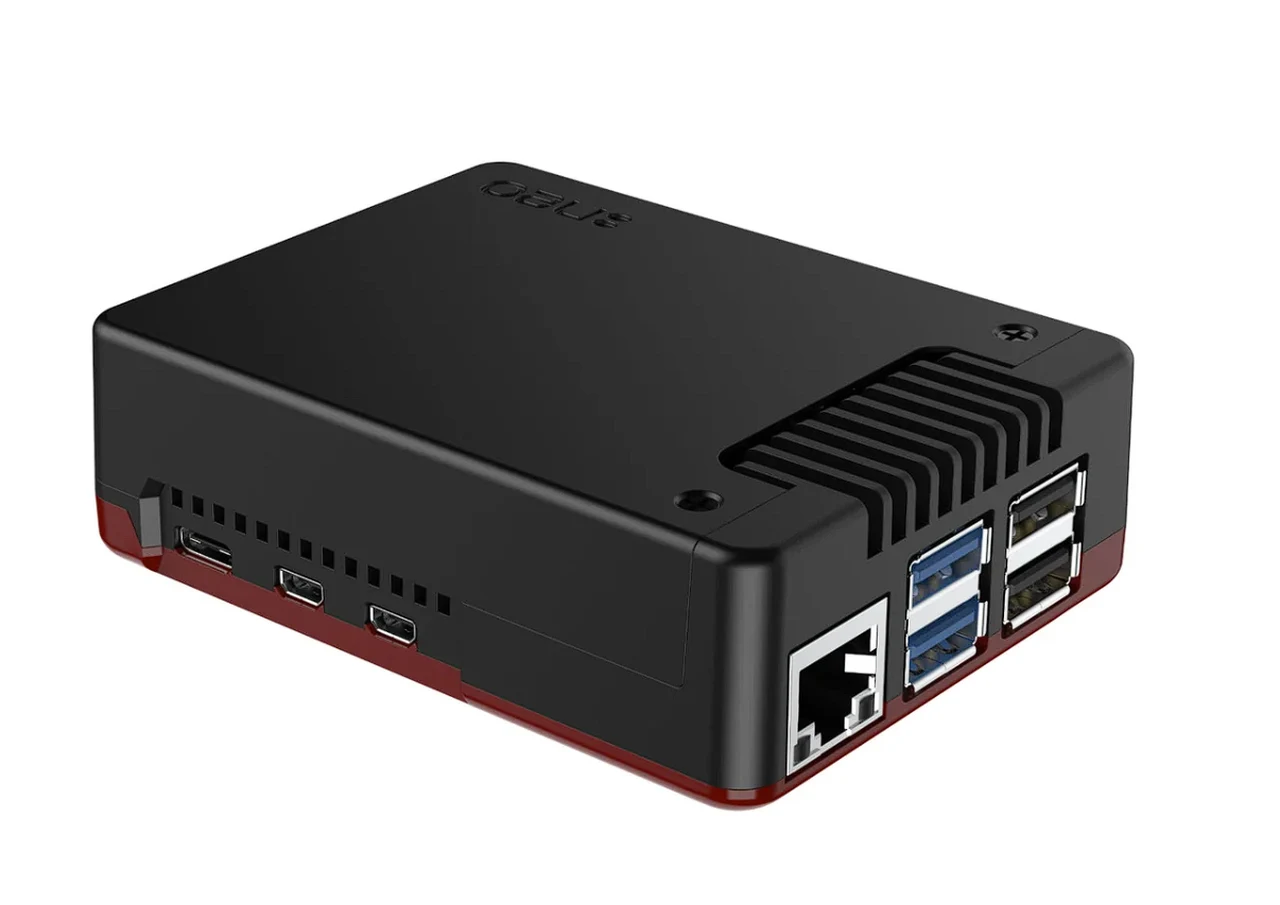
For enthusiasts and professionals who use the Raspberry Pi 5, the Argon NEO 5 BRED case is a significant upgrade that combines enhanced cooling with a sleek design. This case is not just about giving your device a new look; it’s about improving its functionality and ensuring it runs smoothly under any workload.

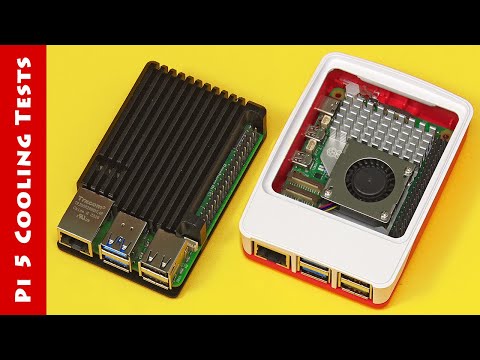
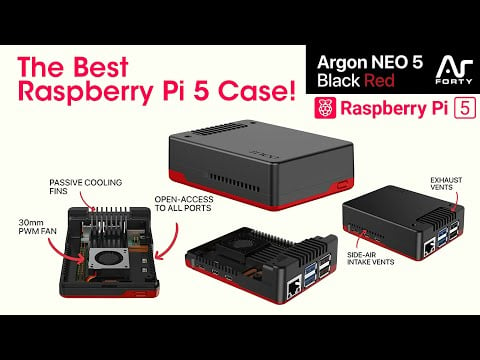
Crafted from aluminum, the Argon NEO 5 BRED case acts as a passive cooling system. Its design includes cooling fins that effectively dissipate heat, which is crucial for maintaining the Pi 5’s performance during intensive tasks. For users who need even more cooling power, the case comes equipped with a 30mm PWM fan. This fan, along with the strategically placed air intake vents, works to boost airflow and heat transfer, keeping your device at the ideal operating temperature.

Argon NEO 5 BRED Raspberry Pi 5 case design

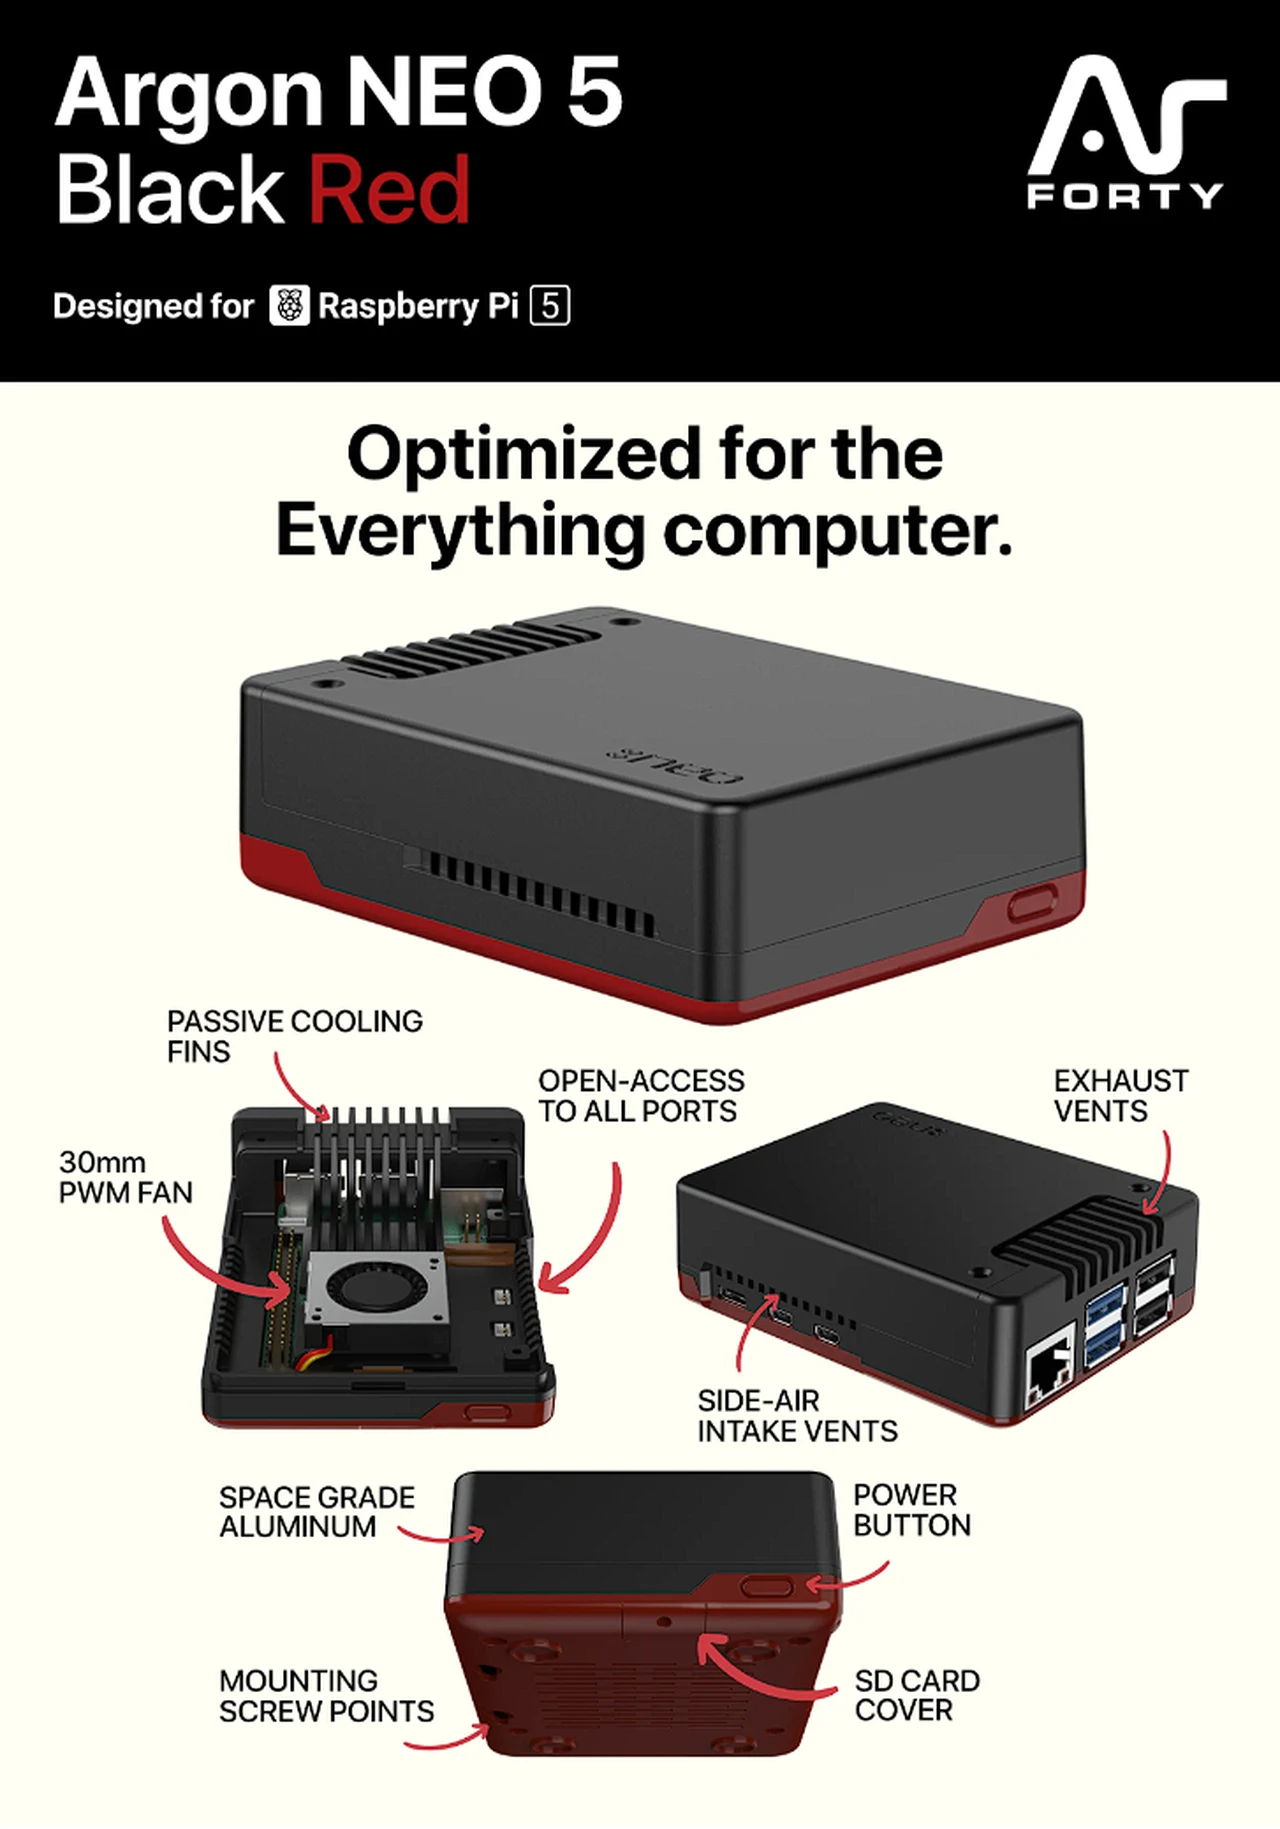
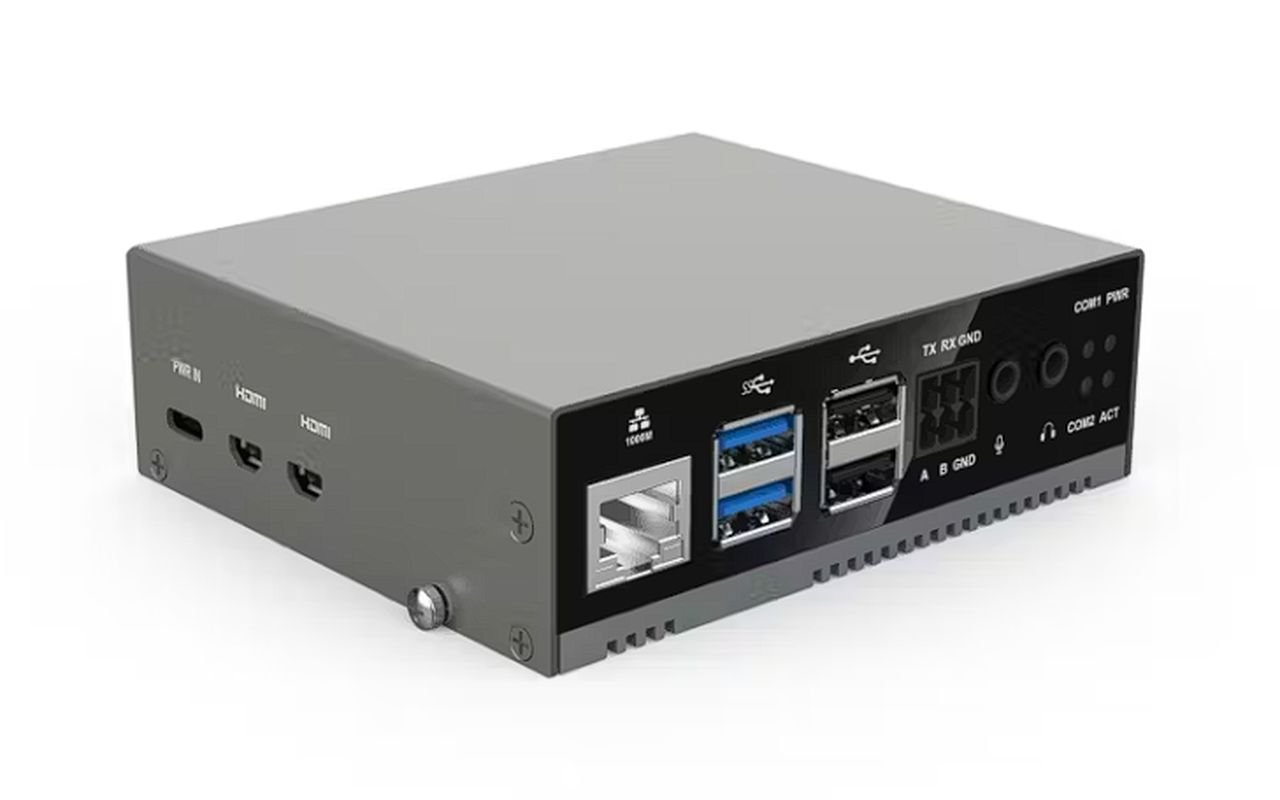
The case is designed with user convenience in mind, offering easy access to all the necessary I/O ports. A special feature is the Micro SD card cover, which allows for quick and secure storage media changes. Additionally, the case has rubber feet to prevent slipping and to provide stability on a variety of surfaces.

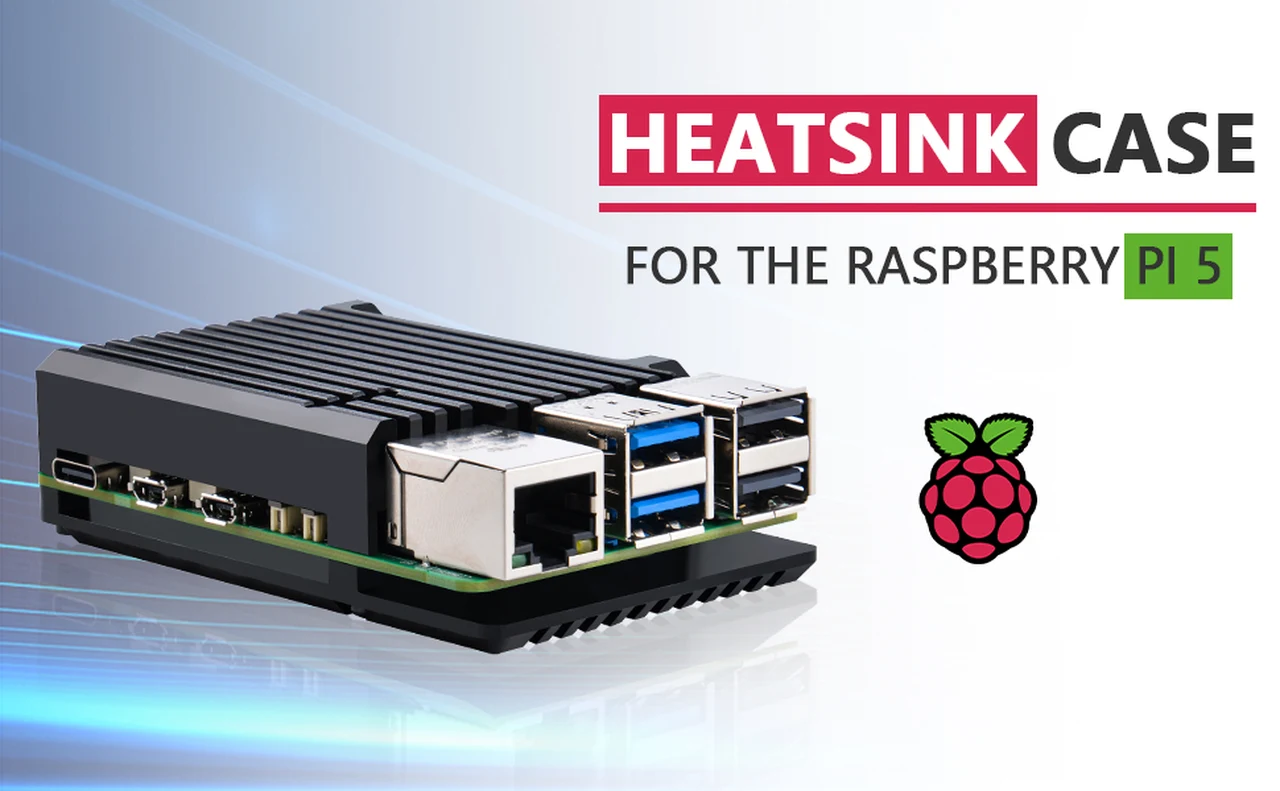
Raspberry Pi 5 case : Argon NEO 5 BRED

Here are some other articles you may find of interest on the subject of the Raspberry Pi 5 mini PC

Installation of the Argon NEO 5 BRED case is a simple process. The package includes thermal pads that help transfer heat from the Pi 5 to the case efficiently. The assembly is user-friendly, with a straightforward screw design that lets you set up your device quickly and without any complications.

Optimize the power of  Pi 5

  • The Argon NEO 5 is redesigned specifically to meet the high demands of the Raspberry Pi 5.
  • Impressive thermal dissipation solution for both passive and active cooling.
    • Aluminum case enclosure with passive cooling fins that act as the heatsink
    • Air intake vents allow for cool air to enter the case
    • 30mm PWM fan helps with the airflow and push out hot air to exhaust vents

Simple and beautifully designed

  • Made with aluminum alloy and polished with a Black & Red finish for stunning aesthetics.
  • Easy assembly for the 3 part case with the Raspberry Pi 5.
  • Small foot print  allows to bring it anywhere – or easily mount to your desired station with built in mounting points.
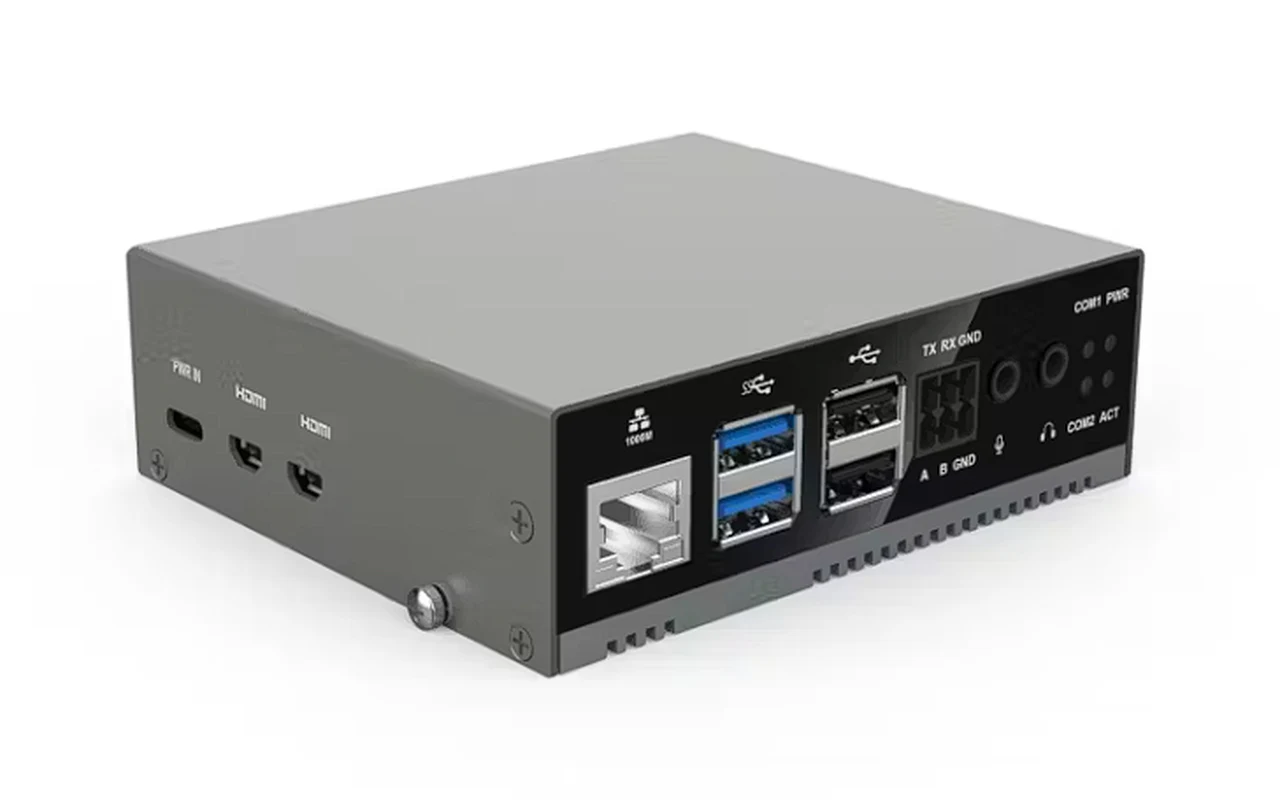
  • Complete access to all ports with the removable top cover.

Superior protection & security

  • Space grade aluminum helps protect Raspberry Pi 5 board from physical damage.
  • The case has a screw on top cover to keep the ports safe when not in use.
  • Optional SD card cover to protect your data even further.

Native Raspberry Pi 5 board support

  • Integrated power button
  • LED light display

Tests have shown that the Argon NEO 5 BRED case is effective at keeping the Pi 5 cooler than when it is used without any additional cooling measures. It performs on par with the official active cooler from the Raspberry Pi Foundation, offering reliable thermal management.

When considering the cost, the Argon NEO 5 BRED case is an affordable option for those looking to upgrade their Raspberry Pi 5 experience. The aluminum construction is not only functional for cooling purposes but also provides a professional appearance that can enhance the look of your workspace.

Overall, the Argon NEO 5 BRED Raspberry Pi 5 case is a smart choice for anyone who uses the amazing mini PC for various projects, whether they are hobbyists, professionals, or educators. It ensures that your device stays cool, operates efficiently, and looks good doing it.

Filed Under: DIY Projects, Hardware


Latest timeswonderful Deals

Disclosure: Some of our articles include affiliate links. If you buy something through one of these links, timeswonderful may earn an affiliate commission. Learn about our Disclosure Policy.

Categories
News

Rebuilding a Game Gear from the 90s with a Raspberry Pi

Raspberry Pi powered Game Gear retro handheld games console
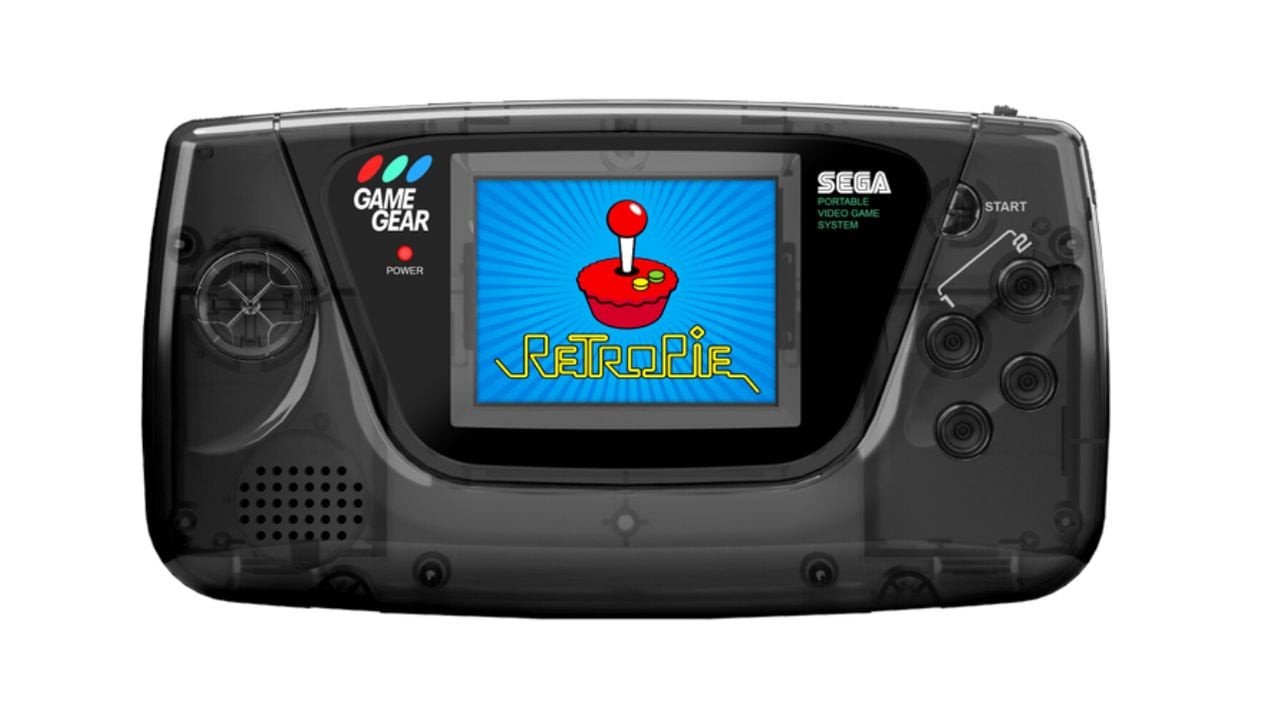
The nostalgia of the Sega Game Gear is undeniable for those who grew up in the ’90s, but imagine taking that sentiment and infusing it with today’s technology. This is exactly what happened when a defunct Game Gear that was revitalized using a Raspberry Pi, the already iconic credit-card-sized computer that has become a staple in modern DIY electronics projects.

The result is a handheld console that not only pays homage to its roots but also delivers a performance that far exceeds its original capabilities. Check out the video kindly created by Jeff Geerling to learn more about the rebuild process in the parts you need to purchase to transform a broken Sega Game Gear into a  retro gaming handheld.

The Game Gear, once a fierce competitor to Nintendo’s Game Boy, has become a collector’s item, with fully operational units becoming increasingly scarce. The ingenious solution to this scarcity is to repurpose a non-working Game Gear, which not only preserves the essence of vintage gaming but also showcases the creativity of tech enthusiasts. The process begins with acquiring a custom kit from Zega Mame Gear, designed specifically to integrate a Raspberry Pi into the Game Gear’s shell. This kit is essential, providing all the parts needed to swap out the outdated hardware for something much more powerful.

Raspberry Pi powered Game Gear retro handheld console

Here are some other articles you may find of interest on the subject of retro gaming :

The transformation requires careful attention to detail. The Raspberry Pi must be meticulously installed into the Game Gear’s housing, and the original controls need to be configured to work with the new setup. This project is not just about technical prowess; it’s a labor of love that taps into the joy of hands-on crafting and the satisfaction of breathing new life into a classic device.

Once completed, the revamped Game Gear becomes a testament to the evolution of gaming technology. The Raspberry Pi at its core allows for the emulation of a variety of classic gaming systems, a feat that demonstrates just how far technology has come. This small device can now do what was once thought to be the domain of much larger, more complex machines.

The sense of accomplishment that comes with finishing this project is profound. It’s not just about playing games; it’s about the journey of resurrecting a piece of history and pushing the boundaries of what modern technology can do. The door is now open for more projects like this, encouraging enthusiasts to merge their cherished gaming memories with the technological advancements of today.

Transforming a Sega Game Gear with a Raspberry Pi is more than a mere technical exercise. It symbolizes a bridge between different times, combining the nostalgia of childhood gaming with the progress of contemporary tech. It’s a rewarding challenge that, once achieved, offers a unique sense of pride and a greater appreciation for how far gaming technology has come. This project is an enticing venture for both avid gamers and DIY hobbyists, venturing into the world of handheld console emulation with a fresh perspective.

Image Credit : Zega Mame Gear

Filed Under: DIY Projects, Top News


Latest timeswonderful Deals

Disclosure: Some of our articles include affiliate links. If you buy something through one of these links, timeswonderful may earn an affiliate commission. Learn about our Disclosure Policy.

Categories
News

Raspberry Pi 5 industrial PC with M.2 NVMe storage adapter

Raspberry Pi 5 industrial PC with M.2 NVMe storage adapter

EDATEC, a specialist in embedded and industrial electronics, has made strides in the realm of industrial computing with the introduction of the ED-IPC3020, an industrial computer powered by a Raspberry Pi 5. This innovative device is the first of its kind to support M.2 NVMe storage, marking a significant advancement in the field.

The Raspberry Pi 5, which powers the ED-IPC3020, features a quad-core 2.4GHz Arm Cortex-A76 processor. This processor offers robust computing power, enabling the device to handle complex tasks with ease. The ED-IPC3020 is housed in a rugged fanless chassis, making it a compact and reliable solution for industrial computing.

One of the most notable features of the ED-IPC3020 is its support for M.2 NVMe solid-state storage through an adapter board. This feature allows for high-speed, high-capacity storage, which is crucial in an industrial setting where large amounts of data are often processed and stored.

Industrial PC powered by Raspberry Pi 5

In addition to its impressive storage capabilities, the ED-IPC3020 offers a multitude of ports, including Ethernet, USB 3.0, USB 2.0, RS485 and RS232 serial ports, and stereo analog audio in and out. This wide array of ports ensures that the device can connect with a variety of other devices, making it a versatile addition to any industrial computing setup.

The ED-IPC3020 also excels in terms of its display capabilities. It features dual 4Kp60 HDMI display output, ensuring high-quality visuals for any task. The device also includes built-in RTC, further enhancing its functionality.

Software-wise, the ED-IPC3020 supports a range of operating systems, including the Raspberry Pi OS. This flexibility allows users to choose the operating system that best fits their needs, providing a customizable computing experience.

Wireless connectivity is another advantage of the ED-IPC3020. It supports dual-band 802.11ac Wi-Fi and Bluetooth 5.0, allowing for seamless connection to wireless networks and devices.

In terms of its electrical and mechanical characteristics, the ED-IPC3020 is designed to operate in a wide range of temperatures, from -25°C to 60°C. This makes it a suitable choice for environments with extreme temperature conditions. The device has also received certifications from the FCC and CE, testifying to its quality and safety.

Finally, the ED-IPC3020 is available with either 4GB or 8GB of RAM, catering to different computing needs. Prices for this Raspberry Pi 5-powered industrial computer start at $165, making it an affordable solution for industrial computing.

EDATEC’s ED-IPC3020 offers a comprehensive solution for industrial computing. With its powerful Raspberry Pi 5 processor, support for M.2 NVMe storage, wide range of ports, and versatile software options, it is a robust and reliable option for any industrial computing setup. Its electrical and mechanical characteristics, along with its wireless capabilities and regulatory certifications, make it a standout choice in the market. For more information and full specifications jump over to the official EDATEC website.

Here are some other articles you may find of interest on the subject of Raspberry Pi 5 :

Filed Under: Hardware, Top News


Latest timeswonderful Deals

Disclosure: Some of our articles include affiliate links. If you buy something through one of these links, timeswonderful may earn an affiliate commission. Learn about our Disclosure Policy.

Categories
News

Building a Raspberry Pi 4G LTE Router

Building a Raspberry Pi 4G LTE Router

Imagine turning a simple, affordable Raspberry Pi mini PC into a powerful 4G LTE router that can spread high-speed internet to your other projects and devices. By leveraging OpenWRT, an open-source firmware, you can transform your Raspberry Pi into a networking powerhouse, sharing a 4G connection both through cables and wirelessly. Let’s dive into how you can upgrade your Raspberry Pi into a multi-purpose networking device.

The Raspberry Pi is a versatile little computer that can be repurposed as an efficient 4G LTE router. To start, you’ll need a Raspberry Pi, a compatible 4G LTE USB modem, and a SIM card with an active data plan. The goal is to install OpenWRT on the Raspberry Pi, which will manage the 4G connection from the USB modem.

OpenWrt, a Linux-based operating system, is specifically designed for embedded devices. It diverges from the traditional approach of offering a single, unchanging firmware. Instead, OpenWrt offers a writable filesystem complemented by package management capabilities. This structure liberates users from the constraints of vendor-supplied application selections and configurations, enabling them to tailor their devices with a variety of packages to meet diverse application needs.

The setup process for creating a Raspberry Pi 4G LTE Router includes :

– Installation of OpenWRT operating system on Raspberry Pi
– Flashing the OpenWRT firmware onto the Raspberry Pi’s memory card
– Inserting a 4G LTE SIM card into a USB Modem and connecting it to the Raspberry Pi
– Configuring OpenWRT settings and setting up a password for security
– Installing additional packages to enable USB Modem connectivity
– Creating a new WAN interface for the LTE 4G USB Modem
– Deleting previous WAN interfaces to ensure the router uses the USB Modem for internet access
– Setting up a wireless network to share the 4G connection with other devices

For developers, OpenWrt serves as a versatile framework, allowing the creation of applications without the necessity of developing an entire firmware. For users, this translates into unparalleled customization potential, empowering them to utilize their devices in innovative ways that surpass original design intentions.

Raspberry Pi 4G LTE Router

The first step is to get the OpenWRT firmware that matches your Raspberry Pi model. You can use a program like Balena Etcher to write this firmware onto your Raspberry Pi’s SD card. Once you’ve flashed the firmware, insert the SD card into your Raspberry Pi and power it up to begin the setup process.

Here are some other articles you may find of interest on the subject of Raspberry Pi 5 :

After OpenWRT is operational, insert the 4G LTE SIM card into the USB modem and connect it to the Raspberry Pi. You might need to add some extra OpenWRT packages to make sure the system can recognize and work with the USB modem properly.

Now, with the modem connected, it’s time to set up OpenWRT to direct internet traffic through it. You’ll need to create a new WAN interface for the USB modem within OpenWRT and make it the preferred route for internet connectivity. It’s also crucial to secure your network by setting a strong password.

The following task is to enable a Wi-Fi network on your Raspberry Pi. You’ll configure the wireless settings within the OpenWRT interface, including the network name (SSID) and security encryption. This allows other devices to connect to your newly created 4G LTE router.

Once everything is configured, you should test your Raspberry Pi router. Connect a device to the Wi-Fi network and check if you can access the internet. If you can browse online, your Raspberry Pi is now successfully functioning as a 4G LTE router.

With a Raspberry Pi and OpenWRT, you can craft a custom 4G LTE router that offers internet access to various devices. This setup is particularly useful in areas where broadband access is scarce, providing a dependable internet connection wherever mobile network coverage is available.

Image Credit : NETVN82

Filed Under: DIY Projects, Top News


Latest timeswonderful Deals

Disclosure: Some of our articles include affiliate links. If you buy something through one of these links, timeswonderful may earn an affiliate commission. Learn about our Disclosure Policy.

Categories
News

MagPi magazine issue 137 take you on a Raspberry Pi adventure

Raspberry Pi in The MagPi magazine issue 137

The world of Raspberry Pi is vast and exciting, offering endless possibilities for exploration, learning, and innovation. For those who are new to this domain, or for seasoned enthusiasts looking for fresh ideas, the latest issue of the official Raspberry Pi magazine, MagPi 137, is an invaluable resource. Providing a comprehensive array of Raspberry Pi projects, tutorials, and guides, this issue is an adventure into the world of mini PC systems.

The journey begins with a beginner’s guide to Raspberry Pi. This guide is not just a mere introduction; it is a comprehensive tutorial that offers information, hints, and various projects that Raspberry Pi newcomers can try out. From coding to robotics, the guide covers a wide range of areas, ensuring that the readers get a holistic understanding of what Raspberry Pi is all about.

MagPi Raspberry Pi magazine issue 137

Raspberry Pi 5

One of the most intriguing projects featured in MagPi 137 is the restoration of an Amiga computer using Raspberry Pi. The project uses the Amiga Forever emulator in conjunction with Raspberry Pi to load ROMs into the restored classic computer. It’s a fascinating blend of the old and the new, demonstrating the versatility and power of Raspberry Pi.

The magazine also highlights the BlueROV2, an underwater ROV powered by Raspberry Pi 4. Equipped with a bespoke Navigator Flight Controller, this ROV can survey underwater depths, highlighting the potential for Raspberry Pi in scientific research and exploration.

Art and gaming enthusiasts will be intrigued by the project that transforms a giant Game Boy artwork into a gaming console using Raspberry Pi. It’s a testament to the creativity and innovation that Raspberry Pi can inspire, merging the worlds of art, technology, and gaming in a unique and captivating way.

The magazine also features a project called CinePI, which is an open-source cinema camera that uses Raspberry Pi. This project demonstrates how Raspberry Pi can be used to customize and upgrade equipment, in this case, by enabling the use of larger sensors in the camera.

For those interested in building their own personal digital assistant (PDA), the magazine includes a tutorial on how to do so using a Raspberry Pi Zero W and a Blackberry-style keyboard. This project is a testament to the versatility and capability of Raspberry Pi, enabling users to create their own customized devices.

For those interested in circuit design, there is a tutorial on designing a circuit using KiCad that can be used with Raspberry Pi Pico. This tutorial provides a step-by-step guide, making it an invaluable resource for those looking to explore this aspect of Raspberry Pi.

The issue concludes with a review of the MyCobot 280 Pi, a professional robot arm powered by a built-in Raspberry Pi 4. The robot arm, featuring six degrees of freedom due to its six joints controlled by large servos, is a clear demonstration of the power of Raspberry Pi in professional applications.

The official MagPi Raspberry Pi magazine always offers readers a treasure trove of information, ideas, and inspiration for anyone interested in Raspberry Pi. From beginners to seasoned enthusiasts, this issue offers something for everyone, making it a must-read for anyone looking to embark on a Raspberry Pi adventure.


Filed Under: DIY Projects, Top News


Latest timeswonderful Deals

Disclosure: Some of our articles include affiliate links. If you buy something through one of these links, timeswonderful may earn an affiliate commission. Learn about our Disclosure Policy.

Categories
News

Raspberry Breadstick development board $55

Raspberry Breadstick development board features a unique form factor

The Raspberry Breadstick is a unique development board designed to simplify the process of electronic prototyping.  Its unique form factor, which is specifically designed to make prototyping more straightforward and organized. Offers users a versatile platform that caters to both beginners and experienced hobbyists, providing a wide range of features.  One of the standout features of the Raspberry Breadstick is its elimination of long jumper wires. By strategically spreading its I/O pins along the length of the breadboard, the board reduces the need for these wires, resulting in a clean, clutter-free workspace.

This unique design not only simplifies the prototyping process but also ensures efficient use of every available pin. The board’s efficient pin spacing keeps the component layout organized, making it easier for users to manage their projects. The Raspberry Breadstick is also notable for its programming support. It is compatible with CircuitPython and MicroPython, offering users a hassle-free coding experience. These programming languages are known for their simplicity and ease of use, making them ideal for beginners. Additionally, the board also supports the Arduino programming language, broadening its appeal to a more extensive range of users.

The Raspberry Breadstick comes with an impressive array of built-in features. It includes 24 RGB LEDs, which can be used for a variety of purposes, including creating visually appealing projects. The board also features a 6-axis IMU for rotation and accelerometer data, providing users with the capability to incorporate motion sensing into their projects. There’s also a POV wand for visual effects, further enhancing the board’s versatility.

Powering the Raspberry Breadstick is a RP2040 Microcontroller. This powerful chip boasts a dual ARM Cortex-M0+ @ 133 MHz Clock, 264 kB on-chip SRAM, and 16 MB Flash. It also has native USB support, 4 x 12-bit ADCs, 18 x GPIO Pins rated for 3.3 V, and hardware Serial, I2C, and SPI support. The board also supports One-Wire and MIDI via CircuitPython’s libraries.

Raspberry Breadstick pinout

Here are some other articles you may find of interest on the subject of Raspberry Pi

The board features a LSM6DSMTR 6-Axis IMU with an accelerometer and gyroscope. It also has 24 SK9822 addressable LEDs that are DotStar compatible. Powering the board is a USB-C with Power Delivery that can request up to 3 A at 5 V from USB-PD devices.

Despite its multitude of features, the Raspberry Breadstick maintains a compact layout. The board measures just 0.4″ x 6.45″ x 0.2″ without headers, making it ideal for projects where space is at a premium.

The Raspberry Breadstick development board is an innovative tool that simplifies the process of electronic prototyping. Its unique design, broad programming support, and impressive array of features make it a versatile platform suitable for both beginners and experienced hobbyists. Whether you’re interested in learning about electronics or looking to bring your creative ideas to life, the Raspberry Breadstick is a tool worth considering.

The Raspberry Breadstick is now available to purchase from the Crowd Supply website priced at $55 with shipping expected to take place shortly after funding is completed towards the end of January 2024

Raspberry Breadstick  specifications

  • Powerful RP2040 Microcontroller
    • Dual ARM Cortex-M0+ @ 133 MHz Clock
    • No EEPROM
    • 264 kB on-chip SRAM
    • 16 MB Flash (External IC)
  • I/O support
    • Native USB support
    • Read-Only Boot ROM initializes device as USB drive, eliminating need for external programming hardware
    • 4 x 12-bit ADCs
    • 18 x GPIO Pins rated for 3.3 V
    • Hardware Serial, I2C, and SPI support
    • One-Wire support via CircuitPython’s adafruit_onewire library
    • MIDI support via CircuitPython’s usb_midi library
  • 6-Axis IMU
    • LSM6DSMTR
    • Accelerometer: X, Y, Z
    • Gyroscope: Roll, Pitch, Yaw
  • Onboard RGB LEDs
    • 24 SK9822 addressable LEDs
    • DotStar Compatible with Separate Data & Clock Pins
    • Powered by 5 V rail
  • USB-C with Power Delivery
    • Can request up to 3 A at 5 V from USB-PD devices e.g. computers, wall-adapters, portable power banks
    • There is a 3A PTC fuse on board for overcurrent protection
    • The voltage is regulated down to 3.3 V (600 mA) for the microcontroller and user devices
  • Compact Layout
    • Measures 0.4″ x 6.45″ x 0.2″ (10 mm x 164 mm x 5 mm) without headers
    • Lean format leaves 4 breadboard holes clearance on either side of the breadstick

Filed Under: Gadgets News, Top News


Latest timeswonderful Deals

Disclosure: Some of our articles include affiliate links. If you buy something through one of these links, timeswonderful may earn an affiliate commission. Learn about our Disclosure Policy.

Categories
News

Raspberry Pi 5 cooling fan vs passive heatsinks compared

Raspberry Pi 5 cooling heatsink case

When it comes to keeping your Raspberry Pi 5 cool, the decision between different cases and cooling systems can be crucial. The Geek Pi/52 Pi heat sink case and the official Raspberry Pi 5 case are two popular options that cater to different preferences and needs. This comparison aims to help you choose the right solution for your setup.

The Geek Pi/52 Pi heat sink case is known for its cost-effectiveness and its passive cooling feature. It has a large heat sink that covers the entire board, designed to dissipate heat without the need for fans or other cooling devices. On the other hand, the official Raspberry Pi 5 case offers a combination of a fan and a heat sink, providing a dual approach to manage the device’s temperature. This case is made to fit the Raspberry Pi 5 perfectly.

To evaluate these cooling solutions, the Computers Explained conducted stress tests on the Raspberry Pi 5. Monitoring the temperature for 20 minutes while the device was under heavy use. Providing us with a clear idea of how each cooling system performs when the Raspberry Pi is working hard. Check out the video below to learn more about the testing process and the results.

GeeekPi Raspberry Pi 5 aluminium passive cooling case

  • Pi 5 Aluminum Case
    • Compatible with Raspberry Pi 5 8GB/4GB.
  • Passive Cooling Design
    • No need for an extra fan.
    • The case itself acts as a heatsink.
    • Built-in Heatsink Pillars for better heat dissipation.
    • Includes a thermal pad for passive cooling.
    • Capable of cooling the Raspberry Pi without a fan and without noise.
  • Sturdy and Portable
    • Made of high-quality aluminum alloy material.
    • Durable construction.
    • Provides strong and durable protection for the Raspberry Pi.
  • Wireless Internet Access
    • Open body design for reliable WiFi and Bluetooth reception.
    • No concerns about WiFi signal interference.
  • Packing List
    • 1 x Raspberry Pi 5 Case.
    • 8 x Thermal Pads (including 4pcs for backup).
    • 1 x Screws Pack.

The results showed that the official active cooler could reduce temperatures significantly, especially when the top of the case was removed. This suggests that the case might limit airflow. Another point to consider is the noise from the fan in the official case, which was quite noticeable. This could be an issue for those who need a quiet environment.

Christopher Barnett also looked at the Geek Pi/52 Pi heat sink case. It was easy to install, but it’s important to check that it fits well with the Raspberry Pi 5’s connectors. Since it’s a passive cooling system, it relies entirely on the heat sink to control the temperature, which means there’s no fan noise to worry about.

Tests indicated that while passive cooling can be effective, active cooling systems tend to keep the device cooler during intense operations. However, the silence of the passive heat sink case might be preferable for settings where noise is a concern. The official active cooler stands out for its efficient temperature management and is also quieter than expected. It allows for easy access to the Raspberry Pi’s connectors, which can be a significant advantage. Meanwhile, the Geek Pi/52 Pi heat sink case is a great choice for those who prioritize a silent, fanless design. When deciding between these cooling options, consider what’s most important for your use of the Raspberry Pi 5.

Filed Under: Hardware, Top News


Latest timeswonderful Deals

Disclosure: Some of our articles include affiliate links. If you buy something through one of these links, timeswonderful may earn an affiliate commission. Learn about our Disclosure Policy.

Categories
News

Build Raspberry Pi audio and video projects using the PicoVision

Raspberry Pi Pico Vision digital video stick

PicoVision, a small Raspberry Pi powered board equipped with two RP2040 chips. These chips, developed by the development team at Raspberry Pi, serve as the central processing unit (CPU) and graphics processing unit (GPU) respectively. The CPU executes code and interacts with other devices, while the GPU is responsible for generating high-resolution animations and digital video (DV) signals.

The unique configuration of the RP2040 chips in the PicoVision uses two Pseudo Static Random Access Memories (PSRAMs) as a front and back buffer. Essentially, while the CPU writes to one PSRAM, the GPU reads from the other, applies effects, and generates the DV signals. This simultaneous operation significantly enhances the device’s performance and capability to handle complex tasks.

PicoVision pins

One of the standout features of the PicoVision is its high-resolution DV output. This is possible thanks to the GPU, which was developed with the assistance of software wizard Mike Bell. The GPU can display high-resolution animations, making it an ideal tool for creating and running homebrew games, drawing digital art, recreating demos, visualising data, emulating CeeFax, and creating signage.

The PicoVision is available to purchase priced at £34.50 p from Pimoroni and is equipped with a variety of connectors and slots to facilitate its use. It features an HDMI connector, allowing it to be plugged into any HDMI display. Additionally, it has line out audio, a microSD card slot, and a Qw/ST connector. The device also includes on-board reset and user buttons, adding to its user-friendly design.

For those interested in programming, the PicoVision offers the flexibility of using either C++ or MicroPython. Furthermore, users have access to PicoGraphics libraries, PicoVector, and PicoSynth, providing a wide range of tools to create and customize their projects.

PicoVision board

The PicoVision leverages the features of the Raspberry Pi Pico W and RP2040. The Raspberry Pi Pico W Aboard, which serves as the CPU, features a Dual Arm Cortex M0+ with 264kB of SRAM, 2MB of QSPI flash supporting XiP, and 2.4GHz wireless / Bluetooth 5.2. The RP2040, functioning as the GPU, mirrors the Dual Arm Cortex M0+ with 264kB of SRAM, connects to the CPU as an I2C peripheral device, and uses 2 x 8MB PSRAM chips for frame double-buffering.

Additional features of the PicoVision include digital video out via the HDMI connector, a PCM5100A DAC for line level audio over I2S, a microSD card slot, three user buttons, a reset button, a status LED, and a Qw/ST connector. Moreover, the PicoVision comes fully-assembled, making it a convenient and accessible tool for users of all levels.

In summary, the PicoVision is a versatile and powerful digital video stick. Its dual RP2040 chips, high-resolution DV output, and range of connectors and programming options make it a valuable tool for a variety of applications. Whether you’re a digital artist, a game developer, or simply a tech enthusiast, the PicoVision opens up a world of possibilities. For a more in-depth review jump over to the Raspberry Pi Foundation website.

Filed Under: Hardware, Top News


Latest timeswonderful Deals

Disclosure: Some of our articles include affiliate links. If you buy something through one of these links, timeswonderful may earn an affiliate commission. Learn about our Disclosure Policy.

Categories
News

How to setup a Raspberry Pi SNMP monitor

building and installing a Raspberry Pi SNMP monitor
If you would like to monitor the traffic on your home network or are thinking of exploring deeper into the world of network management. You might be pleased to know that building a Raspberry Pi SNMP (Simple Network Management Protocol) monitor can be a rewarding project. As well as provide plenty of information on your network traffic allowing you to examine it in a little more detail and monitor devices throughout your home or small business

Building an SNMP is not only a great way to learn about networking, but it also provides you with a powerful tool for monitoring your home or small office network. In this guide, we will take you through the process of setting up your very own Raspberry Pi SNMP monitor.

Before we dive into the building process, it’s important to grasp some fundamental concepts. SNMP is a protocol used for managing devices on IP networks. Devices that support SNMP include routers, switches, and servers, among others. Raspberry Pi, a small and affordable computer, is perfect for such a project due to its versatility and low power consumption.

Table of contents :

A remarkable aspect of SNMP is its ability to provide valuable insights into the performance of these devices. It can monitor network health, check the status of various devices, and even alter configurations on them remotely. This functionality is critical for network administrators to promptly identify and rectify issues, thereby maintaining the network’s optimal performance and reliability.

Now, why choose a Raspberry Pi for this project? The Raspberry Pi, a compact and cost-effective computer, emerges as an ideal candidate for several reasons. First and foremost, its small size and low power consumption make it a practical choice for continuous running as a network monitor. Despite its diminutive stature, the Raspberry Pi packs enough computing power to handle the demands of SNMP monitoring effectively. Additionally, its versatility and open-source nature allow for extensive customization and adaptability, making it a favorite in various tech projects, including network monitoring.

What you will need to build a Raspberry Pi SNMP

To start, you will need:

  • A Raspberry Pi (any model will do, but newer models offer better performance)
  • A microSD card (8 GB or more)
  • An Ethernet cable or Wi-Fi connection
  • A power supply for your Raspberry Pi
  • An SSH client on your computer (like PuTTY for Windows or Terminal for macOS)

Setting up your Raspberry Pi

  1. Install the Operating System: Begin by installing Raspberry Pi OS on your microSD card. You can download it from the Raspberry Pi website and use software like Raspberry Pi Imager to flash it onto the card.
  2. Initial Configuration: Once the OS is installed, insert the microSD card into your Raspberry Pi, connect it to your network, and power it up. Use SSH to log into your Raspberry Pi from your computer.
  3. Update Your Raspberry Pi: It’s crucial to update your Raspberry Pi to the latest software. Simply enter sudo apt-get update and sudo apt-get upgrade in the terminal.

Installing SNMP

Now that your Raspberry Pi is up and running, it’s time to install SNMP:

  1. Install SNMP Packages: Run sudo apt-get install snmp snmpd snmp-mibs-downloader.
  2. Configure SNMP: Edit the SNMP configuration file by typing sudo nano /etc/snmp/snmpd.conf. Here, you can set community strings and allowed hosts.
  3. Restart SNMP Service: After configuration, restart the SNMP service with sudo systemctl restart snmpd.

Configuring SNMP monitoring

With SNMP installed, let’s set up monitoring:

  1. Choose SNMP Management Software: There are various SNMP management tools available, such as Nagios or Zabbix. Choose one that suits your needs and install it on your Raspberry Pi.
  2. Add Devices to Monitor: In your SNMP management software, add the devices in your network that you want to monitor. This typically involves specifying the IP address and SNMP community string of each device.

Using a SNMP monitor

  1. View and Analyze Data: You can now view data from your monitored devices. Look for trends, performance issues, or other insights that SNMP provides.
  2. Set Up Alerts: Most SNMP tools allow you to set up alerts for specific conditions, such as a device going offline or high bandwidth usage.

Benefits of monitoring your network

Quality of Service (QoS) Monitoring
QoS is vital for optimizing network performance, especially in bandwidth-limited environments. The key is to identify essential traffic types, like video conferencing or critical business applications. Advanced users might explore tools like tc and iptables for in-depth QoS management, while others might prefer simpler solutions like Wondershaper or OpenWrt.

DNS Monitoring with Pi-Hole
Transforming a Raspberry Pi into a Pi-hole serves multiple purposes: it provides DNS privacy, blocks ads, and offers detailed network information. The Pi-hole acts as your DNS server, translating domain names into IP addresses locally, leading to enhanced network speed and security.

Intrusion Detection and Prevention
Beyond basic traffic analysis, securing your network against threats is imperative. Open-source programs like Suricata and Zeek are invaluable for this. Suricata combines an Intrusion Detection System (IDS) and an Intrusion Prevention System (IPS), while Zeek monitors for suspicious activities, aiding in broader network configuration and performance measurement.

Firewall & Security Auditing
While most routers come with a default firewall, a Raspberry Pi allows for more granular control. Using iptables or UFW (Uncomplicated Firewall) enables you to set specific rules for traffic filtering and conduct thorough security audits.

SNMP Traps and Alerts
Setting up Simple Network Management Protocol (SNMP) traps on a Raspberry Pi lets you proactively monitor your network. Applications like Net-SNMP can alert you to specific network events, ensuring prompt responses to potential issues.

VPN Monitoring
A Raspberry Pi can also assist in monitoring and controlling your Virtual Private Network (VPN). Tools like OpenVPN allow you to ensure that your VPN is consistently operational, enhancing your network’s privacy and security.

Troubleshooting tips

  • Ensure your Raspberry Pi has a stable network connection.
  • Check that your SNMP community strings and IP addresses are correctly configured.
  • If you encounter issues, reviewing the logs of your SNMP tool can provide valuable insights.

Building an SNMP monitor with a Raspberry Pi is a great way to gain hands-on experience in network management. By following the steps outlined above, you’ll have a functional and efficient network monitoring tool at your disposal. Remember, the world of networking is vast, and there’s always more to learn and explore. Happy monitoring!

Filed Under: DIY Projects, Top News


Latest timeswonderful Deals

Disclosure: Some of our articles include affiliate links. If you buy something through one of these links, timeswonderful may earn an affiliate commission. Learn about our Disclosure Policy.

Categories
News

Official Raspberry Pi MagPi magazine issue 136 now available

Official Raspberry Pi MagPi magazine issue 136 now available
The Official Raspberry Pi MagPi Magazine just dropped its 136th issue, and it’s packed with goodies that’ll make your tech-loving heart skip a beat. Whether you’re a seasoned pro or just getting started, this edition has something for everyone.

Let’s talk about the buyer’s guide first. It’s like a treasure map for Raspberry Pi enthusiasts. You’ll find all sorts of cool stuff, from sturdy and stylish cases to kits that’ll get you started on robotics, circuits, and even 3D printing. It’s the perfect place to start if you’re looking to give your Raspberry Pi projects a serious upgrade or just want to tinker with something new.

Now, onto something that might be heating up your Raspberry Pi projects—literally. The latest Raspberry Pi 5 is a beast, but with great power comes great… heat. Don’t sweat it, though. Issue 136 has got your back with some top-notch advice on thermal control. You’ll learn about the best cooling solutions out there and how to keep your Pi chill, so it can keep performing at its best.

Raspberry Pi MagPi magazine December 2023

For the speed demons out there, overclocking is like a secret sauce for boosting your Raspberry Pi’s performance. The magazine walks you through how to crank up the CPU and GPU speeds safely. It’s like giving your Pi a shot of espresso, but you’ve got to do it right, or you might end up with a fried Pi instead of a fast one. So, follow those step-by-step instructions carefully, and you’ll be on your way to a snappier system.

overclocking the Raspberry Pi 5

Here are some other articles you may find of interest on the subject of Raspberry Pi 5

Gaming on a Raspberry Pi? You bet! Cloud gaming is all the rage, and your Raspberry Pi 5 is ready to join the party. Imagine playing the latest games without shelling out big bucks for a fancy console. Issue 136 will show you how to set up your Pi for cloud streaming, so you can game on without the need for high-end hardware at home. It’s a game-changer for sure.

But wait, there’s more! Ever thought about giving an old radio a new lease on life? The magazine features a super cool upcycling project that turns a vintage radio into a world-tuning wonder. It’s a mix of old-school charm and new tech, streaming global radio stations and showing off a world map on a nifty integrated screen. It’s projects like these that show off the Raspberry Pi’s magic—blending the past with the present in the coolest ways.

So, there you have it. The Official Raspberry Pi MagPi Magazine Issue 136 is like a Swiss Army knife for Pi enthusiasts. It’s got a rich buyer’s guide, tips on keeping your Pi cool, overclocking hacks, cloud gaming know-how, and creative upcycling projects. It’s a one-stop-shop for learning, inspiration, and a whole lot of fun. Whether you’re a Raspberry Pi veteran or just starting out, you’re sure to find something in these pages that’ll spark your imagination and get those creative juices flowing. Happy tinkering!

Filed Under: DIY Projects, Top News


Latest timeswonderful Deals

Disclosure: Some of our articles include affiliate links. If you buy something through one of these links, timeswonderful may earn an affiliate commission. Learn about our Disclosure Policy.