Android smartphones generally offer two different photo gallery apps – they’ll have Google Photos, and their own app as part of the brand’s suite of software (similar to how many Android phones can have two mail and browser apps). But it would be a lot simpler for your image management if you could combine the apps into one – and that might soon be the case for a few Android phone brands.
As first reported by Android Police, with the release of OxygenOS 14 and ColorOS 14 – both based on Android 14 – on OnePlus, Oppo and Realme phones, and Gallery app version 3.62.10-global on Xiaomi, the devices now all offer Google Photos integration in their own photo gallery app.
To turn it on, just open the gallery app, go into the app’s settings menu, look for a ‘Backup to Google Photos option’, and tap the Backup toggle. This will take you to the main Google Photos app, which will double-check that you want to give the gallery app access to Google Photos; if you confirm and complete the process you’ll be able to not only back up your snaps and videos to Google Photos through the gallery app, but you’ll be able to see your whole Google Photos library in the app too.
The only thing that doesn’t sync up are albums you create – your gallery app albums won’t appear in Google Photos, and your Google Photos albums won’t appear in the gallery app.
To turn off Google Photos integration on your OnePlus, Oppo, Realme, or Xiaomi phone you’ll just need to open up Google Photos, go to your settings, open the ‘Apps & devices’ menu, and then select Google Photos access. Here you can change which third-party apps have access to your library.
Where is Samsung’s support?
Where is the Samsung’s Google Photos support? (Image credit: Future / Samsung)
Unfortunately, Samsung users are missing out on the Google Photos integration, as are owners of devices that don’t support Android 14 – though interestingly Google Photos does offer support for gallery apps running on Android 11 or later, so there’s a chance we might see it come to older devices.
As for Samsung, while it has partnered with Google on devices like the upcoming Samsung XR headset, bringing Google’s Wear OS to its Galaxy Watches, and an improved Nearby Share, there’s no telling when or even if it’ll add Google Photos support to its gallery app. While the two brands may cooperate in many areas, they’re still independent, and some odd app interactions – like a lack of Google Photos integration – can persist for longer than most would expect.
Get the hottest deals available in your inbox plus news, reviews, opinion, analysis and more from the TechRadar team.
So we’ll have to wait and see if Google Photos integration will come to Samsung in the future, but we’d be surprised if it doesn’t at some point, given how useful this solution is for people who hate having to use two different image library apps.
Despite what my hairline would imply, Craig Federighi is not family. Just friend. Image: D. Griffin Jones/Cult of Mac
You can quickly tag photos on your iPhone with the names of your friends, family members and pets so you can easily find pictures of them later on. The Photos app will detect pictures of people automatically — you just need to give them a name.
If you want to fine-tune the results, I’ll show you how to do that. And now in iOS 17, you can even tag pets (cats and dogs) in your photos.
How to tag photos on iPhone with faces and pet names
In the Photos app, tap the Albums tab and open the People album. You should see some faces in there already — your iPhone works in the background to identify faces, even if it doesn’t know their names.
Review and confirm additional photos
Tap the ⋯ menu in the top-right corner and select Review Photos to make sure the app identified images correctly. Tap to uncheck images that are of someone else.
At the bottom, tap Review More Photos. It’ll scan your photo library for extra pictures that might be the person you have open, where it just needs you to confirm.
Tap Done to finish.
Tap on a person or pet and enter a name
Tap on a person, then tap Add Name at the top. Match it to someone in your contacts if possible.
When it comes to pets, the system officially supports only dogs and cats, according to Apple Support. However, I found some success in tagging raccoons as well. No such love for birds, fish, hamsters or lizards.
Merge two people
If one of your friends changed appearance, or if you have pictures of someone from when they were a baby all the way into adulthood, someone might appear in your People & Pets album twice.
To merge them into one, just tap and hold on a face and drag it into another one. You’ll see a confirmation dialog, “Is this the same person?” Tap Merge Photos to merge them or Cancel if it was a mistake.
Manually tag photos with faces
On the iPhone, if you’re looking at a picture, swipe up to show more information. You’ll see picture metadata — where it was taken, which lens, what time, etc. — but you’ll also see a small row of faces along the bottom of the picture.
Tap on one of these faces to make sure the app correctly identified the people in the photo. In several cases, Photos thought a friend of mine in a particular set of pictures was a brand-new person. Tap Add Name, enter the person’s name, and they’ll be merged with the rest of the photos.
Photos only shows a new person in the People & Pets area if there are a lot of pictures of them spread out over time. If there’s only one or two pictures of a face the app can’t identify, you need to root them out if you want the album to be fully accurate.
Tagging photos is a lot easier on Mac than on iPhone. In the menu bar, click View > Show Face Names. You’ll see faces circled with their name written underneath, so you can quickly and easily identify if a picture is correctly tagged.
How to use smarter search
Once you’ve tagged all the faces of people you know, you can take advantage of Photos’ smart search feature. You can combine criteria like dates, times, people, locations and even the contents of the picture. Like “scout, indy, christmas tree” for holiday photo shoots with my dogs (Scout and Indy), or “griffin, italy” to find vacation pictures.
Note: We originally published this post on January 26, 2024.
Upgrade your iPhone photography with this $23 portable LED stream light. Photo: Cult of Mac Deals
Social media and FaceTime mean we’re all shooting more iPhone videos and photos than ever — sometimes in lighting conditions that are far from ideal. This Mini Foldable Stream Light is easy to take anywhere, so it provides better lighting anytime (and anywhere) you plan to be streaming video or taking pix.
Mini Foldable Stream Light delivers better lighting for streaming
The big advantage this streaming light provides is a wide range of color temperatures. If you’ve ever shot a video and thought it looked too red or too blue, what you’re observing is the color temperature of the light out of balance with what your iPhone perceives as white. Fortunately, this portable iPhone accessory can fix this widespread problem easily.
With 24 LED RGB modes to choose from, it’s easy to match your light with the illumination around you. Or, you can use color effects to set the mood. The 66 professional bright eye care beads provide smooth and even light with no flickering, so you can focus on capturing your image without worrying about the darkness or contrast.
This portable key light doubles as an iPhone stand
The Mini Foldable Stream Light serves dual purposes, as it also unfolds into an iPhone stand. Adjust the plastic stand, clamp in your iPhone and then flip up the light (or leave it down if you need a more natural effect). The stand also can serve as a handle for stabler shoots as you’re moving.
The entire package can be stowed in a pocket when folded up, so it’s always with you when you’re ready to shoot. It runs on its own separate 1,000mAh battery that lasts up to eight hours, so it won’t sap your iPhone’s juice.
Save on portable streaming light for better iPhone photos and videos
Get crisper and more effective videos and photos on your iPhone with this Mini Foldable Stream Light, now just $22.99.
TikTok appears to be planning to expand into photo sharing via the launch of a new “TikTok Photos” app, according to TheSpAndroid blog.
A large number of references to the app were discovered in the latest version of TikTok, revealing some of its functionality, integrations, and even its app icon. Among these, phrases like “Open TikTok Photos,” “Get TikTok Photos,” and “Share this post to TikTok Photos” suggest direct connections between the existing video platform and the new photo-sharing app.
TikTok has allowed users to post photo-based content in a video or carousel format for some time, but the app currently has no real alternative to dedicated photo-sharing social media platforms. TikTok Photos likely seeks to directly challenge Instagram’s dominance in the photo-sharing space. Instagram has increasingly focused on video content, including Reels, in an effort to compete with TikTok’s video dominance.
The official launch date and regional availability of “TikTok Photos” is unknown, but the presence of extensive references to it within TikTok’s code suggests that an announcement could be imminent.
Apple appears to be internally testing iOS 17.4.1 for the iPhone, based on evidence of the software update in our website’s logs this week. Our logs have revealed the existence of several iOS 17 versions before Apple released them, ranging from iOS 17.0.3 to iOS 17.3.1. iOS 17.4.1 should be a minor update that addresses software bugs and/or security vulnerabilities. It is unclear when…
While the iPhone 16 Pro and iPhone 16 Pro Max are still around six months away from launching, there are already many rumors about the devices. Below, we have recapped new features and changes expected so far. These are some of the key changes rumored for the iPhone 16 Pro models as of March 2024:Larger displays: The iPhone 16 Pro and iPhone 16 Pro Max will be equipped with larger 6.3-inch…
Earlier this week, Apple announced new 13-inch and 15-inch MacBook Air models, the first Mac updates of the year featuring M3 series chips. But there are other Macs in Apple’s lineup still to be updated to the latest M3 processors. So, where do the Mac mini, Mac Studio, and Mac Pro fit into Apple’s M3 roadmap for the year ahead? Here’s what the latest rumors say. Mac Mini Apple announced …
iOS 17.4 was released last week following over a month of beta testing, and the update includes many new features and changes for the iPhone. iOS 17.4 introduces major changes to the App Store, Safari, and Apple Pay in the EU, in response to the Digital Markets Act. Other new features include Apple Podcasts transcripts, an iMessage security upgrade, new emoji options, and more. Below, we…
Best Buy this weekend has a big sale on Apple MacBooks and iPads, including some of the first notable M2 iPad Pro discounts in months, alongside the best prices we’ve ever seen on MacBook Air, MacBook Pro, iPad Air, and more. Some of these deals require a My Best Buy Plus or My Best Buy Total membership, which start at $49.99/year. In addition to exclusive access to select discounts, you’ll get…
There are lots of questions about how to take solar eclipse photos with your iPhone. Firstly, can a solar eclipse harm your iPhone’s camera or lenses? Won’t the sun’s rays damage the camera?
Not according to Apple. Cupertino says it’s safe to photograph a total solar eclipse with your iPhone; but be sure to protect your eyes.
However, photographing the solar eclipse is hard without the right tools. To get a good picture of the solar eclipse with your iPhone, you’re going to need a 12-18x telephoto lens attachment, a solar filter and a tripod. Make sure you have everything you need before the big day next month.
Here’s how you can get prepared. Watch our new video or keep reading below.
This post contains affiliate links. Cult of Mac may earn a commission when you use our links to buy items.
How to take solar eclipse photos on iPhone
A total solar eclipse is one of the most awe-inspiring sights in all of nature. It’s dramatic and beautiful, especially when the moon’s shadow finally blots out the sun. The sudden darkness of the totality is stunning and unlike anything you’ll have ever seen.
To photograph it, preparation is key. The more prepared you are now, the more you can live the moment as the eclipse is happening without worrying about capturing it on your iPhone.
The Great American Eclipse
April 8, 2024 is the Great American Eclipse, so called because the path of totality will cover Mexico, Texas, the Midwest and the border between New England and Canada. There won’t be another total solar eclipse like it until 2044 and 2045. Check NASA’s website for maps of its path across the United States.
Taking a good picture of a total solar eclipse is a big challenge. Even your best iPhone shot is not going to rival images made by pros. Nonetheless, you can still get good snaps with proper preparation.
Never look at the sun directly
Note: Never look at the solar eclipse through a camera lens, telescope or binoculars: This will fry your eyes instantly. Don’t even look at the sun with your naked eyes. Doing so can damage your eyesight permanently, even when the sun is mostly eclipsed. It’s only safe to look at the eclipse during totality, when the sun is entirely blocked by the moon.
Prepare to photograph the eclipse now
If you want to get good pictures of the total eclipse — especially the spectacular ring of fire — pulling out your iPhone at the last second isn’t going to cut it.
Now is the time to stock up on filters, lenses and tripods — all of which can be acquired pretty inexpensively — and make sure your Apple Watch is set up to act as a remote. It’s also a good idea to practice photographing the sun now, preferably in the same location you’ll be watching the eclipse.
Pro tip: The full moon will give you a good idea of how large the sun will appear during the eclipse. Practice photographing the moon now, and it’ll give you a good idea of how big the sun will appear with your iPhone’s standard lenses or a telephoto attachment.
1. Avoid blur; get a tripod
A compact tripod might be all you need. Photo: SwitchEasy
A tripod will keep your phone steady at the perfect angle. You can pay better attention to everything else going on if you don’t need to worry about holding the phone in your hands.
2. Attach iPhone with a tripod phone mount
If you have a tripod but you don’t have a way to mount your phone, I highly recommend a MagSafe tripod mount.
For getting a good video of the darkness in the middle of the day, a tripod and a phone mount is all you’ll need. But if you want to try to get solar eclipse photos of the sun itself, here are three more things you’ll want to pick up.
3. Make your own iPhone solar filter
Just tape one of the lenses over your phone cameras. Image: Kesseph
Pointing your phone camera at the sun won’t hurt your phone’s camera sensor — it’ll just be really hard to get a picture that isn’t blurry. If you want a good, clear picture of the sun, you’ll need a solar filter.
If you have a spare pair of solar eclipse glasses, you already have one! Just cut it up and tape the filter over the lens of your phone. Don’t use sunglasses — they’re nowhere near strong enough.
If you don’t have any old eclipse glasses, these VisiSolar Smartphone Photo Filters are well suited for use with an iPhone. The large circular filter entirely covers the three-lens camera setup of the latest Pro models. For best results, remove your case first.
Note: You’ll want to remove any filters during totality. You’ll need filters right up to the moment the sun is blotted out, but when the sun is fully eclipsed, you should ditch the filters. The sun’s corona is much fainter than the photosphere, so any pictures taken at this time with a filter will be extremely murky. It’s also safe to look at the eclipsed Sun with your naked eye. In fact, you won’t see much of anything if you’re still looking through your eclipse glasses or a filter.
4. Get way better eclipse shots with a zoom lens
With the Moment case, you can just screw an additional telephoto lens onto your phone. Photo: D. Griffin Jones/Cult of Mac
If you want a good picture of the solar corona (the white ring of light called the “ring of fire”), you’ll need a bit more zoom than you get out of the box with your iPhone.
If you put a 2× zoom lens over the iPhone 15 Pro Max 5× Telephoto lens, then you’ll get an impressive 10× optical zoom for a great shot of the sun.
The Moment Tele Lens is the easiest way to get more zoom, using their simple screw-on system.
It’s a lot to buy, but when you have the whole system, you’ve effectively doubled the capability of your iPhone camera.
5. Use a camera app with manual controls
Halide gives you the manual controls the iPhone camera app doesn’t. Screenshot: D. Griffin Jones/Cult of Mac
Sometimes, the stock Camera app on the iPhone doesn’t play nicely with the Moment lenses — much less the weird lighting conditions of a solar eclipse.
If you want fine-tuned manual controls, just like a full-size dedicated camera, I recommend using Halide. This app lets you manually set the lens, the focus, the exposure, the resolution and more.
Tap the 1× button in the bottom corner to manually set the lens; drag your finger up or down on the camera screen to set the exposure. Tap AF to turn off autofocus and set the focus manually. For capturing the sky, you can drag it all the way to 1.0 for maximum distance.
Halide packs in loads of pro features, but thanks to its clever design, it isn’t impossible for novices to figure out like a DSLR camera.
Price: $2.99/month, $11.99/year or $59.99 lifetime Download from: App Store
6. Mount your iPhone on a telescope
Mount your iPhone in an actual telescope. Image: Celestron
Even better than zoom lenses is a telescope. You’ll need an iPhone mount like Celestron’s $80 NexYZ DX Kit, which holds your iPhone next to the eyepiece and includes a Bluetooth shutter release remote. You can even pick up a cheap scope, like the Celestron EclipSmart, for $130, which includes a solar filter.
7. Trigger eclipse pictures with Apple Watch — Siri is even better
Control your iPhone camera from your Apple Watch. Photo: D. Griffin Jones/Cult of Mac
Once you’ve got everything set up — tripod, lenses, and filters — you’ll want to make sure your Apple Watch can act as an iPhone camera remote. Luckily, it’s easy. Open the Camera Remote app on your Apple Watch. Twist the Digital Crown to zoom. To adjust exposure, just tap on the key area of the photo on your Apple Watch’s face. To take the shot, tap the Shutter button. By default, there’s a three-second delay.
Even better, use Siri. Just tell your Apple Watch: “Take a picture” and it’ll snap a shot with your iPhone. Make sure this works beforehand and you won’t have to take your eyes off the eclipse as it is happening.
You can also try using your iPhone’s timer setting.
8. To get a great eclipse shot, practice beforehand
For many of us, this upcoming total solar eclipse is literally going to be a once-in-a-lifetime event. Don’t ruin it by futzing about with your iPhone. Best to practice now, before the big day. Luckily, the sun is going to be the same brightness as the sun during an eclipse, so play around with filters and lenses now.
You’ll want to figure out the best composition for your photos, so try to figure out where the sun will be in the sky during the total eclipse.
Can a solar eclipse damage iPhone cameras?
Photographing the sun will not damage your iPhone’s camera or lens. The cameras and lenses are designed to capture light — that’s the sea they swim in — and even direct rays from the sun won’t harm them.
However, leaving your iPhone camera and lens pointed directly at the sun may cause your iPhone to overheat. According to Apple, iPhones are designed to operate at temperatures between 32º to 95º F. Apple explicitly advises against “leaving your device in direct sunlight for an extended period of time.”
If your iPhone overheats, it’ll automatically regulate its behavior to prevent damage, including shutting off the screen, dialing back charging and disabling wireless. If your iPhone overheats, you should see a warning message on the screen.
To avoid overheating, use your iPhone only for short stretches of time, and definitely try shading it when not in use.
Can you look at a solar eclipse with your iPhone?
Theoretically, yes, you could watch the total solar eclipse on your iPhone’s screen instead of looking at it directly. But why would you want to?
Watching the eclipse onscreen is going to be blurry, wobbly and overexposed. Plus, holding your iPhone up to the eclipse, you greatly risk looking directly at the sun instead. Plus, you’re going to need a solar filter for your iPhone, and if you have one, you might as well use it to look at the sun directly. It’s not worth the trouble.
Don’t forget to take pictures around you
To be honest, the best pictures you’ll likely take during the total solar eclipse won’t be of the sun. It’ll be the landscape and people around you. Be sure to get pictures of your friends and family watching the eclipse with you. Take a selfie with the eclipsed sun behind you. Or get a Reservoir Dogs shot of everyone in their eclipse glasses.
Again, it’s a good idea to practice. Before the big day, take some photos of people and your surroundings just before or after sunset. The light level at twilight will be similar to the totality.
Check out more tips on how to take the best pictures.
Unlock the full potential of your iPhone’s camera with simple yet powerful techniques for capturing breathtaking landscape photographs. Whether you’re an amateur photographer or a seasoned pro, the art of landscape photography is within your grasp, especially when using the device that’s always with you: your iPhone. The video below from iPhone Photography School delves into essential tips and strategies, distilled from expert advice, to help you elevate your landscape images from good to epic.
The Golden Hour Glow: Harnessing Light and Time of Day
One of the most transformative elements in photography is light. The soft, warm glow during the golden hour—shortly after sunrise or before sunset—can turn an ordinary scene into a stunning photograph. This magical lighting condition enriches the colors and textures of the landscape, highlighting the beauty of nature in its purest form. By planning your photo sessions around these times, you can capture the landscape in a captivating array of colors and contrasts.
Mastering Composition and Perspective
Composition is more than just framing a beautiful scene; it’s about creating a visual narrative. To achieve depth and intrigue in your landscape photos, consider incorporating elements in the foreground, middle ground, and background. This technique draws the viewer’s eye through the image, creating a sense of immersion. Don’t hesitate to experiment with different vantage points. Sometimes, a slight change in perspective, such as kneeling down or climbing higher, can dramatically alter the impact of your photo.
Leveraging iPhone Camera Capabilities
The versatility of the iPhone’s camera, with its array of lenses from wide to telephoto, offers a plethora of creative possibilities. Each lens can frame the landscape in unique ways, allowing you to capture vast expanses or zoom in for detailed shots. Utilizing iPhone-specific features, such as tapping to adjust exposure or employing leading lines, can guide the viewer’s attention and enhance the overall composition of your photo.
Adapting to Environmental Variabilities
Nature is unpredictable, and its ever-changing conditions can be challenging yet rewarding to capture. Embrace the variability of light and shadow, and use it to your advantage by being flexible and creative. Moving around to explore different angles and compositions can uncover hidden photographic gems. Dynamic elements like moving clouds or changing shadows add drama and a sense of time to your photos, making them more compelling.
Capturing the Moment: Dynamic Scenes and Transient Light
The transient nature of landscape photography means that sometimes you have only a moment to capture the perfect shot. Be on the lookout for unique and dynamic scenes that can add a layer of interest to your photographs. The play of light and shadows, especially during the golden hour, can transform a landscape into a mesmerizing scene full of depth and emotion.
Photography is as much about seeing as it is about capturing, and with these techniques, you’re well on your way to taking epic landscape photos with your iPhone. Remember, the best camera is the one you have with you, and by mastering a few simple techniques, you can turn your iPhone into a powerful tool for landscape photography. Explore, experiment, and enjoy the process of capturing the beauty of the world around you.
Source & Image Credit: iPhone Photography School
Filed Under: Apple, Apple iPhone, Guides
Latest timeswonderful Deals
Disclosure: Some of our articles include affiliate links. If you buy something through one of these links, timeswonderful may earn an affiliate commission. Learn about our Disclosure Policy.
In the dynamic world of mobile photography and videography, the Samsung Galaxy S24 Ultra emerges as a formidable contender, brimming with advanced AI-based camera features designed to elevate your creative pursuits. Whether you’re a casual shutterbug or a serious videographer, understanding how to harness these capabilities can transform your visual storytelling. Here’s a detailed guide to mastering the art of photography with the Galaxy S24 Ultra.
Unlocking the Power of Slow Motion
Have you ever wished to add a dramatic flair to your videos with slow motion? The Galaxy S24 Ultra makes this possible without needing to plan your shot in advance. By adjusting playback speed settings, you can convert standard videos into mesmerizing slow-motion clips. This flexibility allows you to bring a new perspective to moments captured in real time.
High-Frame-Rate Recording for Crystal-Clear Quality
For those who are particular about video clarity and smoothness, the Galaxy S24 Ultra doesn’t disappoint. It offers the ability to record 4K videos at an impressive 120 frames per second in both Pro Video and Slow Motion modes. This feature ensures that your videos are not just smooth but also of the highest quality, suitable for professional projects or personal archives.
Exploring the Telephoto Camera
The new 50-megapixel telephoto camera on the Galaxy S24 Ultra is a game-changer for zoom photography. Capable of shooting in high resolution and recording 8K video, this camera brings distant subjects closer with unparalleled clarity. However, optimizing these shots to get the best results may require a bit of practice.
Dual Record Mode: A Creative Leap Forward
Replacing the Director’s View, the Dual Record Mode is a boon for content creators. This innovative feature allows you to record from multiple cameras simultaneously in 4K, offering a dynamic way to capture scenes from different perspectives. It’s ideal for vlogs, interviews, or any scenario where capturing the essence of the moment from multiple angles is crucial.
Advanced Auto Framing and Object Tracking
The updated auto-framing feature now includes the ability to switch between different lenses and zoom levels, significantly improving subject tracking in videos. Whether you’re recording a moving subject or a static landscape, the Galaxy S24 Ultra ensures your subject remains in sharp focus, making your videos look professionally shot.
Exceptional Stabilization Techniques
Shaky videos are a thing of the past with the Galaxy S24 Ultra’s standard stabilization feature. It stands toe-to-toe with other leading smartphones, ensuring your recordings are smooth and steady, even in the most action-packed scenarios.
Leveraging AI Editing Tools
The AI editing tools available on the Galaxy S24 Ultra are nothing short of revolutionary. From removing unwanted objects or people from your photos to adding elements, expanding images, and enhancing photo quality through AI remastering, these tools empower you to achieve the perfect shot every time.
Creating 24-Hour Time Lapse Videos and More
Imagine transforming a day’s worth of photos into a 24-hour time-lapse video. The Galaxy S24 Ultra makes it possible, along with providing suggestions for photo enhancements. Additionally, the Super HDR feature and the ability to create GIFs or collages for social media sharing open new avenues for creative expression.
Seamless Camera Sharing for Enhanced Interoperability
An upcoming feature that promises to further integrate the Galaxy S24 Ultra into your ecosystem is the ability to use its cameras as webcams for tablets. This enhancement is a testament to Samsung’s commitment to improving device interoperability and user experience.
Summary
The Samsung Galaxy S24 Ultra, with its suite of AI-driven camera capabilities, sets a new standard for mobile photography and videography. By familiarizing yourself with these features and experimenting with them, you will be pleased to discover the vast potential for creative expression and professional-grade results that this smartphone offers. Whether you are capturing the mundane or the extraordinary, the Galaxy S24 Ultra is your ally in bringing your vision to life.
Source & Image Credit: Jonathan Casey
Filed Under: Android News, Camera News, Mobile Phone News
Latest timeswonderful Deals
Disclosure: Some of our articles include affiliate links. If you buy something through one of these links, timeswonderful may earn an affiliate commission. Learn about our Disclosure Policy.
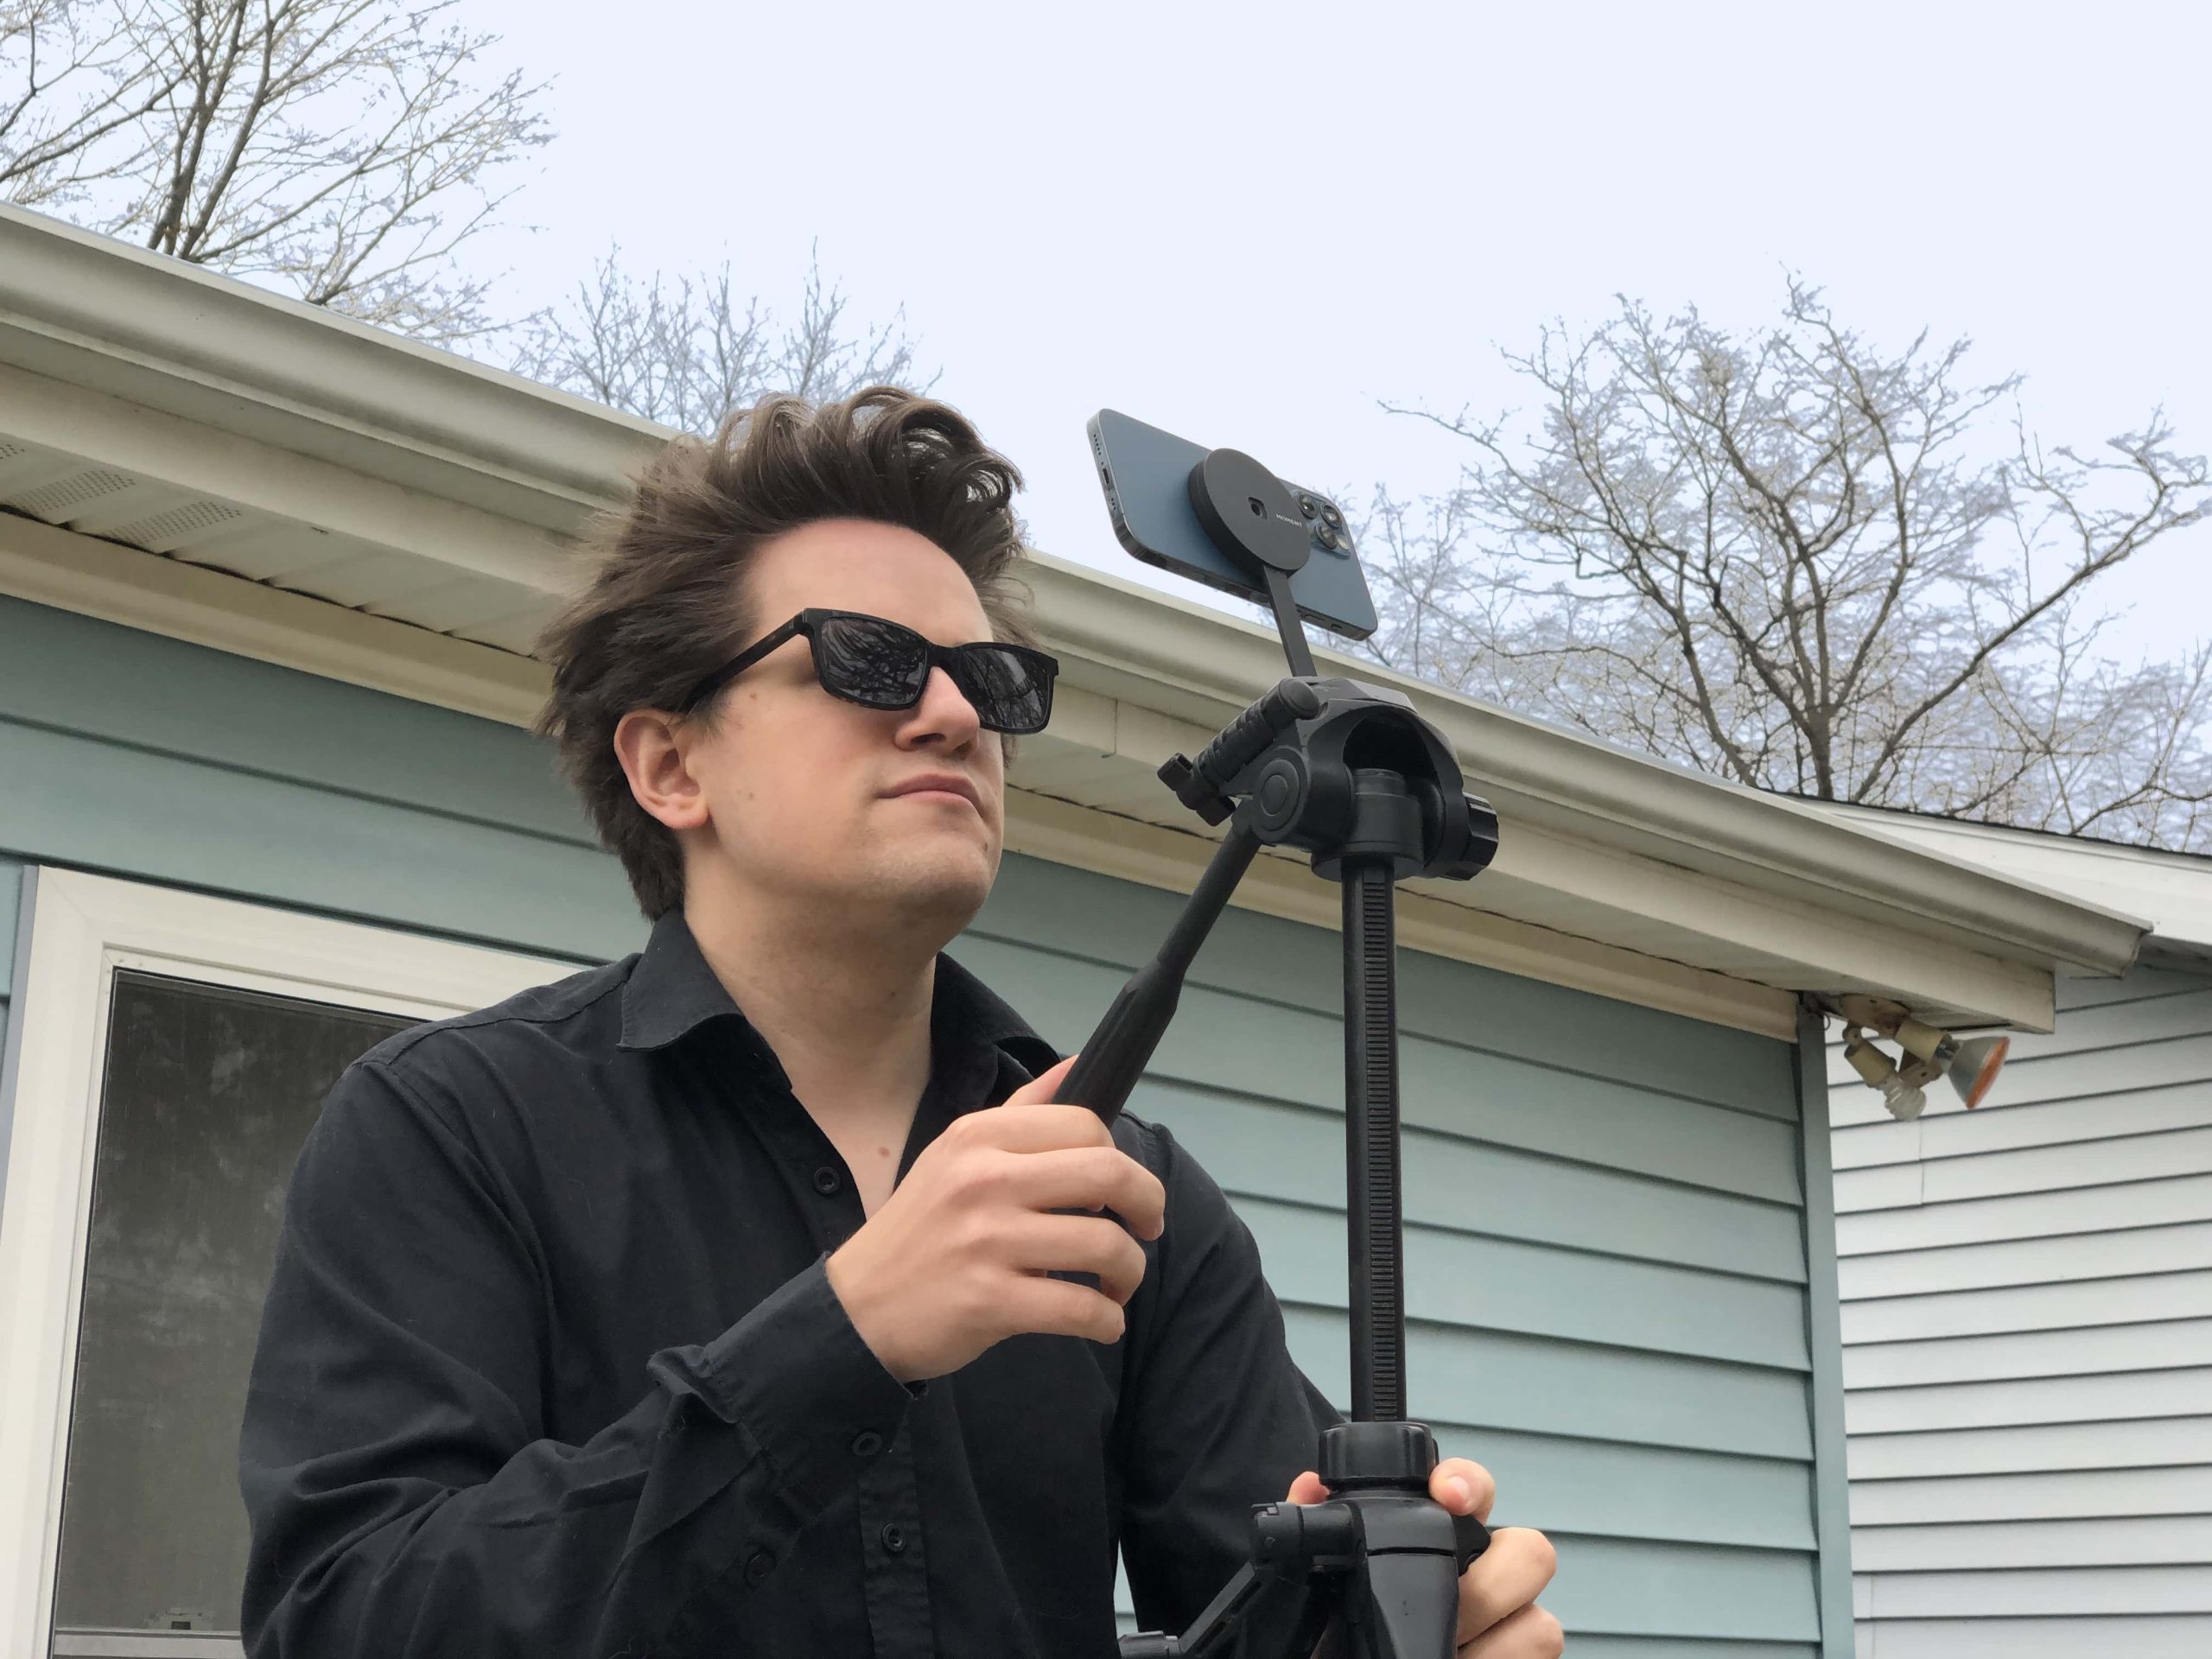
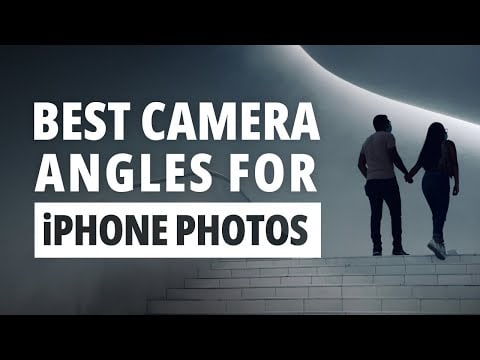
Unlocking the full potential of iPhone photography involves more than just pointing and shooting, there are a number of things to take into account to take great iPhone photos. It’s about diving deep into the art of angles and perspectives, transforming the mundane into the magnificent. If you’re eager to elevate your iPhone photography game, you’ll be pleased to know that mastering a few key principles can lead to stunning visual results. Let’s explore a great video from iPhone Photography School on how you can harness unique angles to capture breathtaking iPhone photos.
Step Away from the Ordinary
The majority of iPhone photos are snapped from the eye level of a standing adult. However, this common approach rarely does justice to the potential of your photographic subject. By simply changing your perspective, you can add a layer of depth and intrigue to your images. Here’s how:
Seek Out Uncommon Perspectives: Challenge yourself to view your subject from an array of angles. Whether it’s crouching low or finding a higher vantage point, the effort can dramatically alter the composition and impact of your photo.
Embrace the Exploration: Before you settle on your shot, take a moment to work the scene. Move around your subject, experiment with different heights, and play with the angles. This process can unveil hidden gems, even in the most ordinary subjects.
Practical Insights: The Stump Example
Consider the example of photographing a stump. At first glance, it might not seem like a compelling subject. However, by getting closer, changing your angle, or even utilizing different lenses, you can reveal the stump’s intricate details and textures, transforming it into a captivating focal point.
Capturing Larger Subjects
The principles of perspective and angle exploration apply just as effectively to larger subjects, such as buildings or natural landmarks. Walking around to find the optimal angle and lighting condition can significantly enhance the visual appeal of your photographs.
The Role of Light and Composition
Understanding the direction of light and its interaction with your subject is crucial. Additionally, how you frame your subject, the elements you choose to include in the foreground and background, and seeking out symmetry or engaging juxtapositions can all contribute to a more visually appealing photograph.
Discover Unique Vantage Points
To truly make your photos stand out, strive to find unique spots that offer a distinct view of your subject. This might require a bit of creativity and patience, but the results are often worth the effort. It’s about seeing the world from a perspective that others might overlook.
Patience Pays Off
One of the most valuable pieces of advice for aspiring iPhone photographers is to not rush the process. Taking your time to thoroughly explore and experiment with different perspectives and angles can lead to extraordinary results. Photography is not just about capturing what you see; it’s about conveying how you see it.
By embracing these strategies, you’re not just taking photos; you’re crafting stories and capturing emotions. Each image becomes a testament to your creativity and perspective, offering a window into the world as you see it. So, grab your iPhone and start exploring the myriad of angles at your disposal. The perfect shot is out there, waiting for you to discover it. Source & Image Credit: iPhone Photography School
Filed Under: Apple, Apple iPhone, Guides, Top News
Latest timeswonderful Deals
Disclosure: Some of our articles include affiliate links. If you buy something through one of these links, timeswonderful may earn an affiliate commission. Learn about our Disclosure Policy.
If you cahnge your iPhone camera settings you can improve the photos that you take with your iPhone. In the realm of mobile photography, the iPhone 15 Pro and Pro Max have set new benchmarks, offering unparalleled capabilities for both amateur and professional photographers alike. If you’re eager to elevate your photography game, mastering the optimal settings and editing techniques on your iPhone can transform your images from good to breathtaking. Here’s a video from The Drone Creative on how to harness the power of your iPhone’s camera and Lightroom Mobile for capturing and editing high-quality photographs.
Optimal Camera Settings for Premium Image Quality
The journey to capturing mesmerizing photos begins with tweaking your camera settings. Here’s what you need to know:
Choose High-Efficiency Format: To maximize storage without sacrificing quality, select the high-efficiency format in your camera settings. This smart move ensures your photos are saved in a space-efficient manner while maintaining excellent image fidelity.
Enable ProRAW with ProRAW Max: For those who crave creative control and wish to capture images with the highest dynamic range, enabling ProRAW and setting it to ProRAW Max is essential. This feature not only offers a wider dynamic range but also grants more flexibility in post-processing, allowing you to fine-tune your images to perfection.
Preserve Your Preferred Settings: Navigate to the Preserve Settings menu to make sure your camera app remembers your preferences across different modes and controls. This customization ensures a seamless shooting experience, tailored to your style.
Advanced Camera Features to Enhance Your Photography
Beyond the basic settings, the iPhone 15 Pro and Pro Max boast several advanced features designed to improve your photographic outcomes:
Utilize Grid and Level for Composition: Leveraging the grid and level features can significantly aid in composing balanced and visually appealing shots. These tools are invaluable for aligning horizons and structuring your photos with precision.
Avoid Mirror Front Camera for True Representation: For a more accurate depiction in your selfies, it’s advisable to turn off the mirror front camera option. This ensures your photos represent scenes as they are, without mirroring the image.
Disengage ‘Prioritize Faster Shooting’: Though it might seem counterintuitive, disabling the “Prioritize Faster Shooting” option can prevent the automatic reduction in image quality, especially in fast-paced scenarios.
Lens Correction and Macro Control: For enthusiasts of close-up photography, the lens correction and macro control features are a boon. They help in capturing detailed shots with clarity, enhancing the overall quality of your macro photographs.
Editing Mastery with Lightroom Mobile
After capturing your shots, editing them on Lightroom Mobile can elevate their visual appeal. Here’s how to make the most of this powerful editing tool:
Start with the Correct Profile: Selecting the Apple ProRAW profile is the first step in the editing process, ensuring your photos retain their natural charm while providing a solid foundation for further adjustments.
Enhance with Vibrance and Saturation: Adjusting vibrance and saturation can breathe life into your photos, making them pop with color and energy. However, it’s crucial to find the right balance to avoid oversaturation.
Selective Edits Using Masking: Lightroom Mobile’s masking feature allows for selective editing, particularly useful for skies. Adjusting highlights and color temperature can dramatically change the mood of your photo, making skies appear more vibrant or moody.
Background Compression Technique: The telephoto lens on your iPhone is your ally in creating a unique perspective through background compression. This technique makes distant objects appear larger and closer, adding a creative twist to your photos.
Editing Walkthroughs for Personalized Results
To help you grasp the practical application of these tips, consider detailed walkthroughs for editing photos in Lightroom Mobile. These step-by-step guides showcase how to apply adjustments for vibrance, contrast, and more, emphasizing the flexibility of ProRAW images in tailoring edits to your taste.
As you delve into the world of iPhone photography, remember, experimentation is key. Engage with these settings and editing techniques, adjusting them to fit your unique vision. And don’t forget to share your creations, inviting feedback and fostering a community of photography enthusiasts.
Your journey towards mastering iPhone photography doesn’t end here. Continue exploring, experimenting, and sharing your work. The iPhone 15 Pro and Pro Max, coupled with Lightroom Mobile, are powerful tools at your disposal, capable of turning your visions into stunning visual stories.
Source & Image Credit: The Drone Creative
Filed Under: Apple, Apple iPhone, Guides
Latest timeswonderful Deals
Disclosure: Some of our articles include affiliate links. If you buy something through one of these links, timeswonderful may earn an affiliate commission. Learn about our Disclosure Policy.
If you want to take awesome photos with your iPhone, this guide covers a range of tips that can help you improve your iPhone photography. In today’s digital age, the iPhone has transformed from a mere communication device into a powerful photographic tool, capable of capturing moments in stunning detail and creativity. If you’re keen on elevating your iPhone photography skills, you’re in the right place. This guide delves into a variety of tips and techniques to enhance your photo quality and unleash your creative potential.
Mastering the Art of iPhone Photography
Exploring Panoramic Possibilities: Did you know you can switch the direction of your panoramic shots? This feature is particularly useful for capturing tall structures in their entirety, creating a dramatic effect of towering height. Vertical panoramas can add a new dimension to your photography, offering a fresh perspective on familiar landscapes.
Stability with Timer: The absence of a tripod need not deter you from achieving stable shots. The timer function on your iPhone serves as an excellent tool to reduce hand shake. By setting a short delay, you can ensure your hands are steady by the time the photo is taken, resulting in clearer and more focused images.
Long Exposure Magic: Utilize the Live Photo feature to create mesmerizing long exposure images. This technique is perfect for capturing the silky smooth flow of water or the bustling movement of city lights, adding a professional touch to your photos with the illusion of a slow shutter effect.
Unlocking High-Resolution Photography: For iPhone models equipped with a 48-megapixel sensor, enabling high-resolution settings is a game-changer. This allows for capturing images with extraordinary detail, giving you the flexibility to crop photos without compromising on quality.
Preserving Your Preferred Settings: Adjust the “Preserve Settings” option to save your favorite camera settings. This ensures that your preferred configurations are automatically applied every time you launch the camera app, streamlining your photography process.
Composition Mastery: Enable grid and level tools within your camera settings to aid in capturing well-composed, balanced shots. These tools serve as invaluable guides for aligning your subjects and horizons, making your photos more aesthetically pleasing.
The Wonders of Night Mode: In low light conditions, resist the urge to use flash. Instead, opt for night mode to enhance the quality of your photos. This feature intelligently adjusts the camera settings to capture clear and vibrant images even in the darkest environments.
Creative Angles and Perspectives: Don’t be afraid to experiment with different angles and perspectives. The compact and versatile design of the iPhone’s camera lenses allows for creative experimentation, enabling you to capture unique and engaging photos.
Burst Mode for Perfect Timing: Fast-moving subjects or the perfect group shot are no longer a challenge with burst mode. This feature takes multiple photos in quick succession, ensuring you capture the best moment every time.
Manual Exposure Control: Learn how to manually adjust and lock the exposure to maintain consistent lighting across your shots. This skill is essential for dealing with challenging lighting conditions and achieving professional-looking results.
Lens Variety for Every Occasion: Experiment with the iPhone’s various lenses (wide, ultra-wide, zoom) to discover the best fit for your scene. Each lens offers a unique perspective, enabling you to capture everything from expansive landscapes to detailed close-ups.
Perfecting Portrait Mode: Take advantage of portrait mode to achieve a beautiful bokeh effect, where your subject is in sharp focus against a softly blurred background. Experimenting with different lighting and aperture settings can further enhance the visual impact of your portraits.
Elevate Your iPhone Photography Today
Embarking on your iPhone photography journey opens up a world of creative possibilities. By exploring these tips and techniques, you’ll not only improve the quality of your photos but also discover a new avenue for artistic expression. Whether you’re capturing the serene beauty of nature or the dynamic energy of urban life, your iPhone is a powerful tool that can help you bring your vision to life. Remember, the key to great photography is experimentation and practice, so grab your iPhone and start exploring the endless photographic opportunities that await.
Source & Image Credit: Proper Honest Tech
Filed Under: Apple, Apple iPhone, Guides
Latest timeswonderful Deals
Disclosure: Some of our articles include affiliate links. If you buy something through one of these links, timeswonderful may earn an affiliate commission. Learn about our Disclosure Policy.