Categories
News

How to delete duplicate contacts on your iPhone

duplicate contacts iPhone

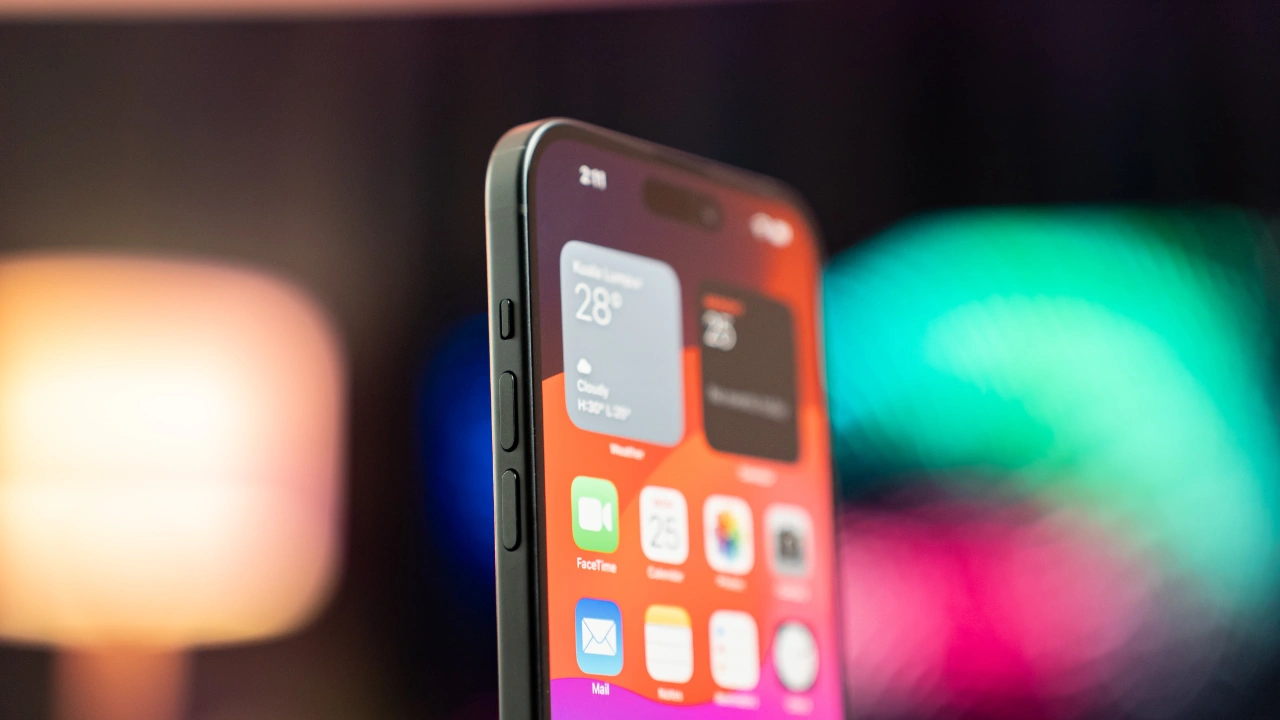
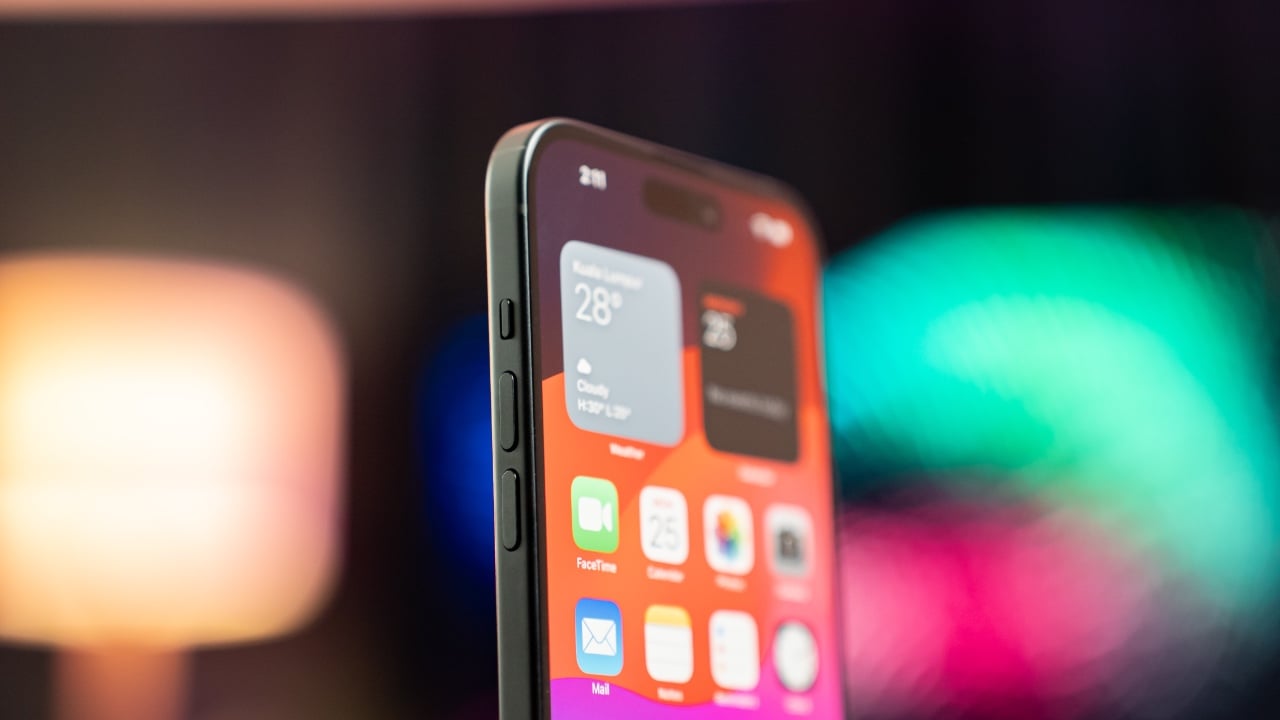
Duplicate contacts can be a frustrating nuisance on your iPhone. These redundant entries not only overcrowd your address book, leading to unnecessary clutter, but they also complicate the process of locating the correct contact information when it’s most needed. Moreover, these duplicates can create additional challenges, particularly when attempting to synchronize your contact list across multiple devices, potentially leading to confusion and errors in data management. Thankfully, there are several straightforward methods available to efficiently remove these duplicate contacts from your iPhone, thereby streamlining your contact list and enhancing your overall user experience.

Identifying Duplicate Contacts

  • The first step to deleting duplicate contacts is to identify them. There are a few different ways to do this.
  • Manually: You can manually review your contacts and identify duplicates. This can be time-consuming, but it’s the most accurate way to identify duplicates.
  • Use the built-in duplicate detector: Your iPhone has a built-in duplicate detector that can help you identify potential duplicates. To use it, go to Settings > Contacts and tap Duplicates Found.

Use a third-party app: There are a number of third-party apps that can help you identify and delete duplicate contacts. These apps can be helpful if you have a large number of contacts.

Merging Duplicate Contacts

Once you’ve identified your duplicate contacts, you can merge them. There are a few different ways to do this as well.

  • Use the built-in merge feature: Your iPhone has a built-in merge feature that you can use to merge duplicate contacts. To use it, go to Contacts and select the two contacts you want to merge. Tap Edit and then tap Link Contacts.
  • Use a third-party app: If you’re using a third-party app to identify duplicate contacts, you may also be able to use it to merge them.

Deleting Duplicate Contacts

Once you’ve merged your duplicate contacts, you can delete the ones that are no longer needed. To do this, go to Contacts, select the contact you want to delete, and tap Delete.

Preventing Duplicate Contacts

There are a few things you can do to prevent duplicate contacts from being created in the first place.

  • Make sure your contacts are up-to-date: Make sure your contacts are up-to-date by regularly syncing them with your iCloud account.
  • Import contacts carefully: When importing contacts from another device or service, make sure you don’t import duplicates.
  • Use a contact management app: A contact management app can help you keep your contacts organized and prevent duplicates from being created.

Additional Tips

  • Here are a few additional tips for deleting duplicate contacts on your iPhone:
  • Back up your contacts: Before you start deleting contacts, make sure you back them up. This way, you can restore them if you accidentally delete a contact.
  • Be careful not to delete important contacts: When deleting duplicate contacts, be careful not to delete any important contacts.
  • Use a trusted third-party app: If you’re using a third-party app to identify or delete duplicate contacts, make sure it’s a trusted app from a reputable developer.

Summary

Deleting duplicate contacts on your iPhone can be a tedious task, but it’s worth it to keep your address book clean and organized. By following the tips in this article, you can easily delete duplicate contacts and make your iPhone’s address book more user-friendly.

Image Credit: Amanz

Filed Under: Apple, Apple iPhone, Guides


Latest timeswonderful Deals

Disclosure: Some of our articles include affiliate links. If you buy something through one of these links, timeswonderful may earn an affiliate commission. Learn about our Disclosure Policy.

Categories
News

How to block websites on your iPhone or iPad

block websites iPhone ipad

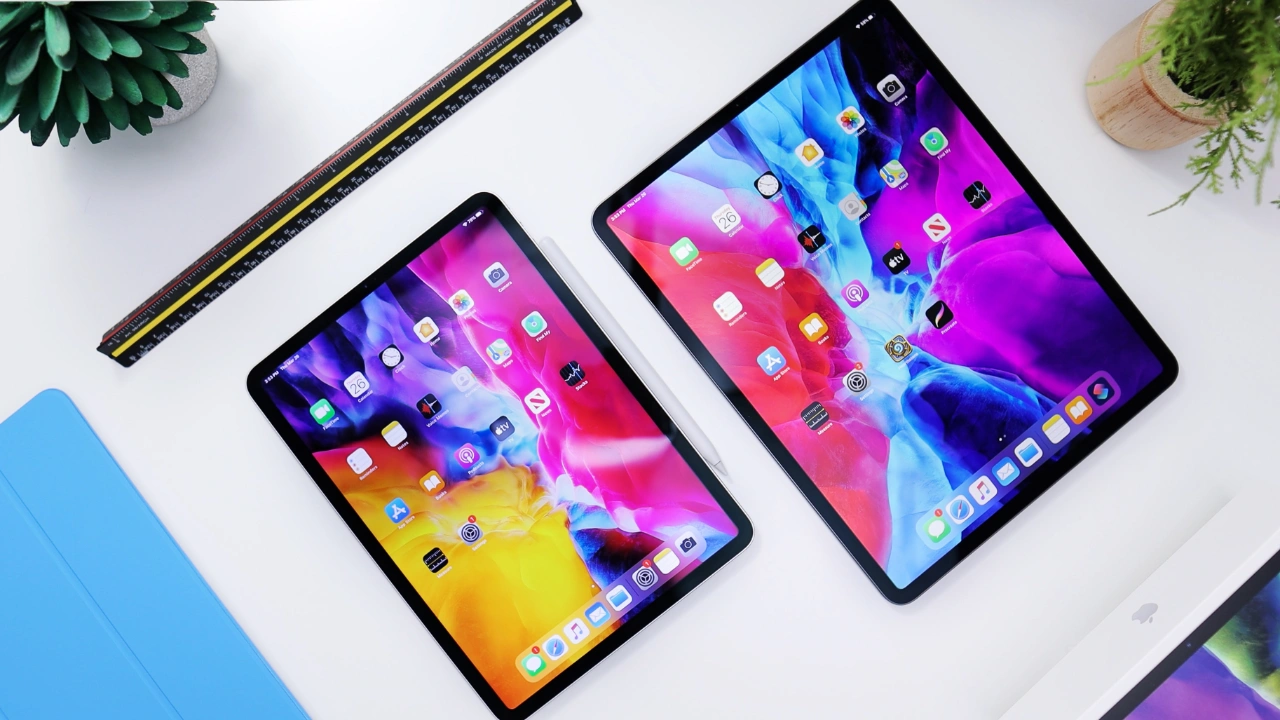
This guide will show you how to block websites on your iPhone or iPad, you will be able to block specific websites and also specific types of websites, this can be done with Apple’s Screen Time feature and also with third-party apps and more. This is as good idea if your kids use your iPhone or iPad from time to time, if they have their own device then you can set up parental controls on their device.

In the modern era of constant online connectivity, it’s increasingly necessary to exercise control over the digital content accessible to us and our families. This is particularly crucial when considering the exposure of children to the vast array of content on the internet, some of which might be inappropriate or harmful. Apple’s iOS, the operating system used by iPhones and iPads, is equipped with various features and supports a range of third-party applications that enable users to block specific websites, thereby offering a more controlled internet experience.

Understanding the Importance of Blocking Websites

  1. Child Safety: One of the primary reasons to block websites on your device is to protect children from accessing inappropriate content.
  2. Productivity: Limiting access to certain websites can help in reducing distractions, thereby enhancing productivity, especially for students or professionals.
  3. Internet Addiction Management: Controlling website access can be a step towards managing internet usage and addiction.

Using Built-in iOS Features

Apple’s iOS provides built-in functionalities to help manage and restrict access to certain types of content, including websites.

Screen Time: A Comprehensive Tool

Screen Time, a feature integrated into iOS, is particularly useful for managing screen time and imposing content restrictions. Here’s how you can use it:

  • Navigate to the Settings app and select Screen Time.
  • If it’s your first time using Screen Time, you will need to activate it by following the on-screen prompts.
  • Within Screen Time, go to Content & Privacy Restrictions and enter your Screen Time passcode if you’ve set one up.
  • Enable Content & Privacy Restrictions by toggling the switch to the On position.
  • Choose Content Restrictions followed by Web Content.

Blocking Adult Websites:

  • In the Web Content menu, select ‘Limit Adult Websites’.
  • Under ‘Never Allow’, add the URL of any website you wish to block.

Blocking Specific Websites:

  • Alternatively, choose ‘Allowed Websites Only’ and manually enter the URLs of websites you want to permit.
  • For restricting explicit language, navigate back to Web Content and select ‘Explicit Language’, then opt for ‘Don’t Allow’.

Securing Your Settings with a Passcode:

  • To prevent unauthorized changes to these settings, use a Screen Time Passcode, which can be set up in the Screen Time menu.

Leveraging Third-Party Applications

In addition to iOS’s built-in features, several third-party apps offer enhanced capabilities for website blocking:

  • Freedom: Known for its comprehensive content filtering, Freedom allows users to block various online distractions.
  • BlockSite: This app is useful for blocking websites, apps, and even games.
  • Kidslox: Kidslox offers a broader range of parental control features, including website blocking.

Additional Factors to Consider

  • Workarounds to Website Blocking: It’s crucial to be aware that tech-savvy individuals, particularly teenagers, might find ways to bypass these restrictions. Therefore, it’s important to couple these technical solutions with open discussions about responsible internet use.
  • Regular Software Updates: Keep your devices updated with the latest iOS version to ensure you have the most current security features and bug fixes.
  • Transparent Communication: Discuss the implementation of website blocking with your family, especially children, to maintain transparency and understand their viewpoints.

By effectively utilizing tools like Screen Time, third-party applications, and fostering an environment of open communication, you can create a safe and focused online environment for yourself and your family on your iPhone or iPad. We hope that you find this guide helpful and informative, if you have any questions, tips or comments, please leave a comment below and let us know.

Image Credit: Daniel Romero

Categories
News

What are the different sizes of iPhone wallpaper

different sizes of iPhone wallpaper

This guide is designed to show you what the different sizes of wallpaper are for various models of the iPhone and also what screen resolutions these devices have. If you want to create a custom wallpaper for your iPhone you will need to find out what resolution your iPhone model has in order to work out what size wallpaper you need.

Personalizing your iPhone is a great way to express your individuality and make your device feel more like your own. One of the simplest yet most effective ways to personalize your iPhone is by changing your wallpaper. With a wide variety of stunning wallpapers available online and in the iOS app store, you can easily find one that perfectly matches your style and preferences.

Different iPhone Wallpaper Sizes

To ensure that your chosen wallpaper fits perfectly on your iPhone screen, it is important to use the correct size. Each iPhone model has a unique screen size, and therefore requires a specific wallpaper resolution.

Here is a comprehensive list of iPhone wallpaper sizes for various iPhone models:

Device Name Screen Resolution
iPhone 6 750 x 1334
iPhone 6 Plus 1080 x 1920
iPhone 6s 750 x 1334
iPhone 6s Plus 1080 x 1920
iPhone SE (2016) 640 x 1136
iPhone 7 750 x 1334
iPhone 7 Plus 1080 x 1920
iPhone 8 750 x 1334
iPhone 8 Plus 1080 x 1920
iPhone X 1125 x 2436
iPhone XS 1125 x 2436
iPhone XS Max 1242 x 2688
iPhone XR 828 x 1792
iPhone 11 828 x 1792
iPhone 11 Pro 1125 x 2436
iPhone 11 Pro Max 1242 x 2688
iPhone SE (2020) 750 x 1334
iPhone 12 1170 x 2532
iPhone 12 mini 1125 x 2436
iPhone 12 Pro 1170 x 2532
iPhone 12 Pro Max 1284 x 2778
iPhone 13 mini 1080 x 2340
iPhone 13 1170 x 2532
iPhone 13 Pro 1170 x 2532
iPhone 13 Pro Max 1284 x 2778
iPhone 14 1170 x 2532
iPhone 14 Plus 1284 x 2778
iPhone 14 Pro 1176 x 2556
iPhone 14 Pro Max 1290 x 2796
iPhone 15 1179 x 2556
iPhone 15 Plus 1290 x 2796
iPhone 15 Pro 1179 x 2556
iPhone 15 Pro Max 1290 x 2796

Changing Your iPhone Wallpaper

Once you have found the perfect wallpaper, changing it on your iPhone is a breeze. Follow these simple steps to set a new wallpaper for your iPhone:

  • Locate the desired wallpaper: Find the wallpaper you want to use on your iPhone. You can search online, use a wallpaper app, or even take your own photo.
  • Save the wallpaper: Save the wallpaper to your iPhone’s Photos app.
  • Open the Settings app: On your iPhone, tap the Settings app icon to open it.
  • Navigate to Wallpaper: Scroll down in the Settings menu and tap on the “Wallpaper” option.
  • Choose Wallpaper Source: Select the source of the wallpaper you want to use. If the wallpaper is saved in your Photos app, tap on “Choose a New Wallpaper.”
  • Select the wallpaper: Find the wallpaper you saved earlier and tap on it to select it.
  • Position the wallpaper: Drag and drop the wallpaper to position it on your screen as you like. You can also zoom in or out to adjust the size and fit.
  • Set as Wallpaper: Once you are satisfied with the positioning, tap on the “Set Wallpaper” button. You can choose to set it as both the Lock Screen and Home Screen wallpaper or set it as one or the other.

Summary

Switching up your iPhone wallpaper is super easy and a cool way to make your phone more ‘you. It’s like giving your phone a mini-makeover! Imagine flipping through tons of awesome wallpapers – think amazing landscapes, funky abstract art, sleek patterns, or bold colors. It’s all about finding that one that just clicks with you.

Each wallpaper can totally switch up your phone’s vibe, matching your mood or whatever you’re into at the moment. And hey, this might be a small tweak, but it really spices up how you feel about your phone every day. So why not jump into the fun world of wallpapers? Whether you’re into chill vibes, bold statements, classy looks, or just something that makes you smile, there’s definitely a wallpaper out there that’s as unique as you are. Go on, give your iPhone a fresh new look that screams ‘this is me!’ You’ll love how it adds a bit of zing to your day and makes your phone feel even more like your own little sidekick. We hope taht you find this guide helpful, if you have any comments or questions, please leave a comment below and let us know.

Here are some more useful iPhone articles:

Filed Under: Apple, Apple iPhone, Guides


Latest timeswonderful Deals

Disclosure: Some of our articles include affiliate links. If you buy something through one of these links, timeswonderful may earn an affiliate commission. Learn about our Disclosure Policy.
Categories
News

12 Tips & Tricks for Safari on the iPhone

12 Tips & Tricks for Safari on the iPhone

This guide will show you a range of tips and tricks that you can use with the Safari browser on your iPhone. Safari, Apple’s native web browser, is a powerhouse of features waiting to be explored.

In this article, we’ll unveil 12 valuable tips and tricks to maximize your browsing experience, making it more efficient, tailored, and enjoyable. Whether you’re a seasoned iPhone user or new to the iOS ecosystem, these insights are sure to elevate your Safari game. These handy tips were created by Proper Honest Tech and you can see their awesome video below.

1. Sharing Tab Groups: Ever found yourself wanting to share a bunch of related links with friends or colleagues? Safari makes this effortless with its tab group sharing feature. Simply select links from a tab group, copy them, and paste into your preferred messaging app. This feature is a boon for collaborative work or when planning trips and events.

2. Saving Multiple Images Quickly: Stumbled upon a collection of images you’d love to keep? Safari allows you to drag and stack multiple images from search results and directly drop them into the Photos app. This quick and intuitive method saves time, letting you curate your image collection on-the-go.

3. Reopening Closed Tabs: Accidentally closed a tab? No problem! Just give your iPhone a shake to undo the closure, instantly bringing back the recently closed tab. This feature is a real time-saver, especially when you’re juggling between multiple tabs.

4. Reader Mode Automation: For those who enjoy a clutter-free reading environment, Safari’s Reader mode is a godsend. Automate this feature for your favorite news and blog sites to always enjoy a clean, distraction-free reading experience.

5. iCloud Tabs for Cross-Device Browsing: With iCloud tabs, you can start browsing on your iPhone and seamlessly continue on your iPad or Mac. This cross-device functionality is perfect for those who are always on the move but want to stay connected with their online activities.

6. Disabling ‘Preload Top Hit’: For users mindful of data usage and battery life, disabling the ‘Preload Top Hit’ feature is a smart move. This prevents Safari from loading the top search result in the background, saving valuable resources.

7. Adding Safari Pages to Reminders: Never forget to revisit a webpage again. You can easily add Safari pages to your Reminders list either through the share sheet or by using Siri. This integration helps in better organizing your web activities with your daily tasks.

8. Searching Open Tabs: Lost in a sea of tabs? Use Safari’s search feature in the tab view to quickly locate the tab you need. This is incredibly useful for those who tend to keep numerous tabs open simultaneously.

9. Sharing Multiple Tabs: Grouping and sharing several tabs at once is a breeze in Safari. This is particularly handy for research projects or when planning a group event, as you can drag and stack tabs and then drop them into an email or message.

10. Reducing Captchas with Automatic Verification: Frequent captchas can be a nuisance. By enabling ‘Automatic Verification’ in your iPhone settings, you can significantly reduce the number of captchas you encounter, streamlining your browsing experience.

11. Navigating Between Tabs with Swipes: Effortlessly move between your open tabs using simple left and right swipes at the bottom of the Safari page. This gesture-based navigation makes browsing smooth and intuitive.

12. Image Upload Options: When uploading images, Safari gives you control over your privacy and file preferences. Choose to include or exclude metadata, resize the image, or select a different file format based on your needs.

Summary

These 12 tips and tricks are just the beginning of what Safari on the iPhone has to offer. By incorporating these features into your daily browsing routine, you’ll discover a more personalized, efficient, and enjoyable web experience. Dive in and explore what Safari can do for you today!

Source Proper Honest Tech

Image Credit: Amanz

Filed Under: Apple, Apple iPhone, Guides


Latest timeswonderful Deals

Disclosure: Some of our articles include affiliate links. If you buy something through one of these links, timeswonderful may earn an affiliate commission. Learn about our Disclosure Policy.
Categories
News

How to speed up your iPad or iPhone

speed up iPad

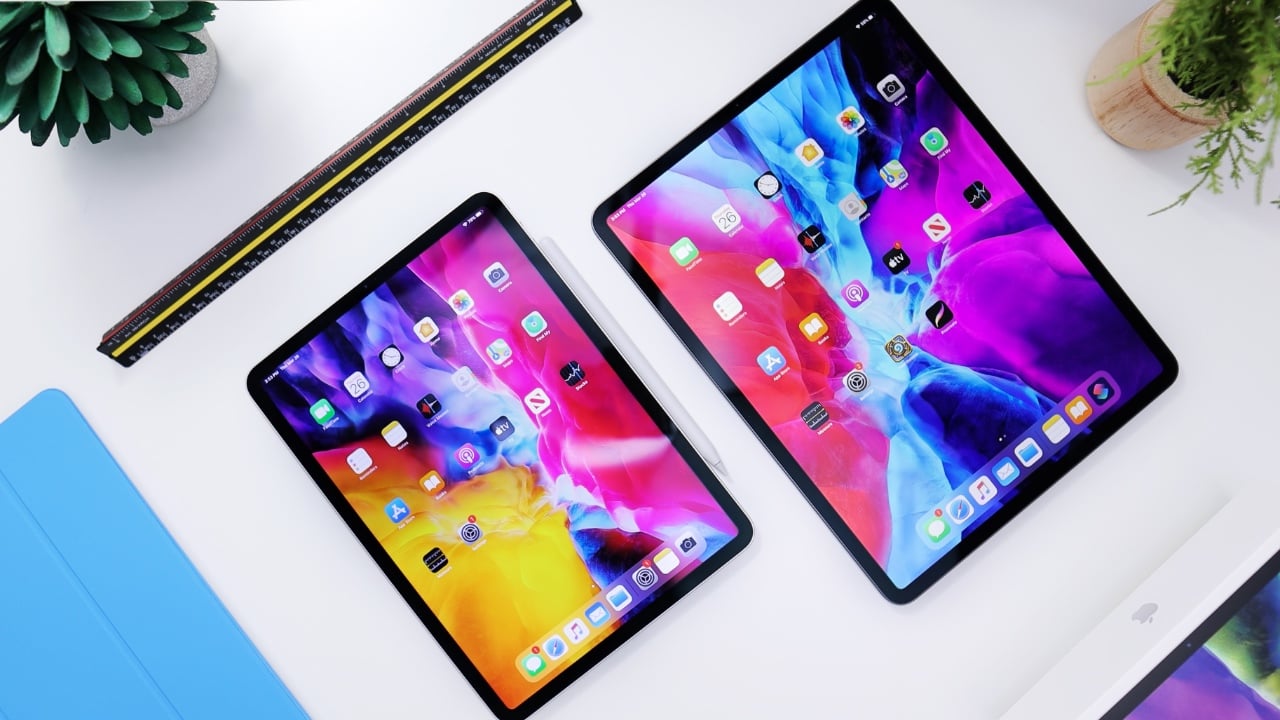
This guide will show you how to speed up your iPhone or iPad. As you enjoy the seamless experience of your iPad or iPhone, it’s not uncommon for the device to begin to lag as time progresses. This gradual decrease in performance may stem from a myriad of causes that can dampen the sleek efficiency Apple users cherish. Let’s delve into the potential culprits and explore comprehensive strategies to speed up your iPad or iPhone.

Storage Woes: The Silent Speed Thieves

The scarcity of storage space is a prime suspect in the case of a sluggish iPad or iPhone. A nearly full storage not only hampers the swift loading of apps but also escalates the chances of unexpected crashes. Poring over your device’s storage via Settings > General > [Device] Storage offers a revealing glance at what might be hogging space. Cleaning out the digital cobwebs by removing redundant apps and files can breathe new life into your device’s performance.

The Hidden Cost of Background App Refresh

An often-overlooked feature that could be siphoning your device’s speed is the Background App Refresh setting. While useful, it can drain your battery life and impede overall responsiveness. To gain back control and conserve power, navigate to Settings > General > Background App Refresh to disable the function either entirely or for select apps.

Accessibility Features: A Double-Edged Sword

Accessibility services, such as VoiceOver and Zoom, are instrumental for users who need them, but they may inadvertently affect your device’s speed. Tweaking these settings can strike a balance between utility and performance.

The Pitfalls of Outdated Software

Neglecting software updates is akin to driving a car without a tune-up. Outdated versions of iOS or iPadOS can lead to a slew of performance issues, hence staying up-to-date is crucial. You can update your device via Settings > General > Software Update, ensuring access to the latest features and performance optimizations.

Revving Up Your Device: Pro Tips to Restore Speed

  1. The Power of a Fresh Start: Regular Restarts A simple yet effective trick is the age-old practice of restarting your device. This action clears out the temporary clutter and can significantly improve speed. For iPads, hold the Sleep/Wake button along with the Home button until the Apple logo graces the screen. For iPhones, the process involves holding the Sleep/Wake button, sliding to power off, and then restarting with the same button.
  2. Pruning the Digital Garden: Delete Unused Apps and Files Evaluate your app garden and pluck out the weeds—those unused apps and files. This not only tidies up your device but also liberates storage, allowing your device to breathe and operate more freely.
  3. Disabling Background App Refresh Take charge of which apps refresh in the background by disabling this feature wholly or for individual apps. This not only saves on battery life but can also help in maintaining a brisk device performance.
  4. Streamlining Visuals: Reducing Transparency and Motion Excessive visual effects can sometimes detract from performance. You can optimize this by turning off certain features like Reduce Transparency and Reduce Motion in the Accessibility settings.
  5. Location Services: Only When Necessary Location services can be a drain on resources. Scrutinize which apps truly require real-time location data and disable it for those that don’t through Settings > Privacy > Location Services.
  6. Dealing with Unresponsive Apps A frozen app can be a speed bump in your device’s performance. Double-press the Home button and swipe up on any app that isn’t responding to close it.
  7. Embracing the New: Updating Your Device Stay current with the latest iOS or iPadOS version to ensure your device is fortified with the latest bug fixes and performance enhancements.
  8. A Clean Slate: Resetting All Settings As a more comprehensive step, resetting all settings may resolve persistent sluggishness without affecting your data.
  9. Factory Reset: The Last Resort Should all else fail, restoring your device to factory settings is the ultimate step. Remember to back up your data before this nuclear option.
  10. Professional Help: Visiting an Apple Store In instances where your efforts prove futile, seeking the expertise of Apple Store technicians can unearth the root cause and provide a tailored solution.

For those looking to maintain an iPad or iPhone that operates at peak performance, adopting these strategies will go a long way. Enhanced user experience and prolonged device longevity are just a few steps away, ensuring that your Apple device remains a steadfast companion in your daily digital adventures. We hope taht you find outr guide on how to speed up the iPhone or iPad helpful. If you have any suggestions or questions, please let us know in the comments below. You can find out more information over at Apple’s website.

Filed Under: Apple, Apple iPad, Apple iPhone, Guides


Latest timeswonderful Deals

Disclosure: Some of our articles include affiliate links. If you buy something through one of these links, timeswonderful may earn an affiliate commission. Learn about our Disclosure Policy.
Categories
News

How to Clear the Cache on iPad and iPhone

However, this convenience comes with a caveat. As you continue to accumulate data in the cache over prolonged periods, the once-beneficial storage can become counterproductive. The cache may grow to a size that begins to encroach upon your device’s available storage space. Furthermore, this agglomeration of data can lead to diminished browsing performance and may even be the root cause of certain glitches or errors within websites and apps.

Therefore, the practice of regularly clearing your cache is recommended. Doing so not only reclaims storage space but also purges outdated or corrupt data that could be contributing to performance issues. Moreover, this process can assist in resolving some persistent problems that may have arisen during the use of websites or applications, as it forces a fresh retrieval of data, ensuring that the most current and functional versions are used. Engaging in this maintenance task can lead to a more efficient and smoother experience on your iOS devices.

Clearing Safari Cache

Safari is the default web browser on iPad and iPhone, and clearing its cache is a common way to optimize browsing performance. Here’s how to clear the Safari cache:

  • Open the Settings app on your iPad or iPhone.
  • Scroll down and tap on “Safari.”
  • Scroll down and tap on “Clear History and Website Data.”
  • Tap on “Clear History and Data” to confirm the action.

This will remove all website browsing history, cookies, and cached data from Safari.

For Other Browsers (like Chrome):

You can also clear the cache on third-party browsers like Chrome, Firefox and Edge on the iPhone and iPad.

  1. Open the browser app.
  2. Go to the app’s settings menu (often represented by three dots or lines).
  3. Find the Privacy section or something similarly named.
  4. Select “Clear Browsing Data” or a similar option.
  5. Choose what data to clear (like cached images and files) and confirm.

Clearing App Cache

Apps can also store cached data, which can take up storage space and potentially cause issues. Here’s how to clear app cache:

Open the Settings app on your iPad or iPhone.

  • Tap on “General.”
  • Tap on “iPhone Storage” (or “iPad Storage” on an iPad).
  • Wait for the list of apps to load.
  • Identify apps that are consuming a significant amount of storage space.
  • Tap on an app to view its storage details.

Tap on “Offload App” to remove the app from your device while preserving its data. To clear the app’s cache without removing the app, tap on “Delete App” and then confirm the action. After deleting the app, you can reinstall it from the App Store.

Additional Considerations

Clearing the cache can sometimes cause temporary issues with websites or apps as they reload data. However, these issues should resolve themselves quickly. If you encounter any persistent issues after clearing the cache, try restarting your device.

It’s important to note that clearing the cache is not a regular maintenance task. You only need to clear the cache if you’re experiencing performance issues or storage space constraints. Excessive cache clearing can impact your browsing experience as websites will need to reload data each time.

By following these steps, you can easily clear the cache on your iPad or iPhone and potentially improve its performance and free up storage space. We hope that you find this guide helpful and if you have any tips, questions, or comments, please leave a comment below and let us know.

Image Credit: Maury Page

Categories
News

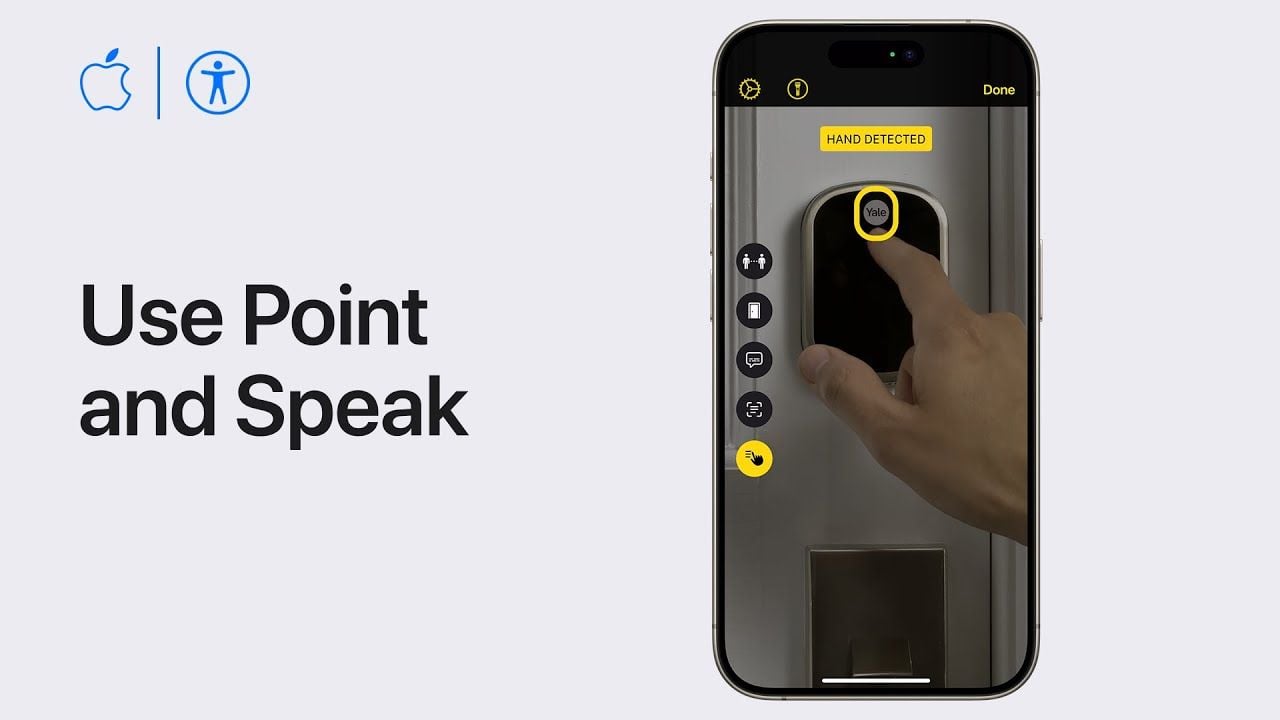
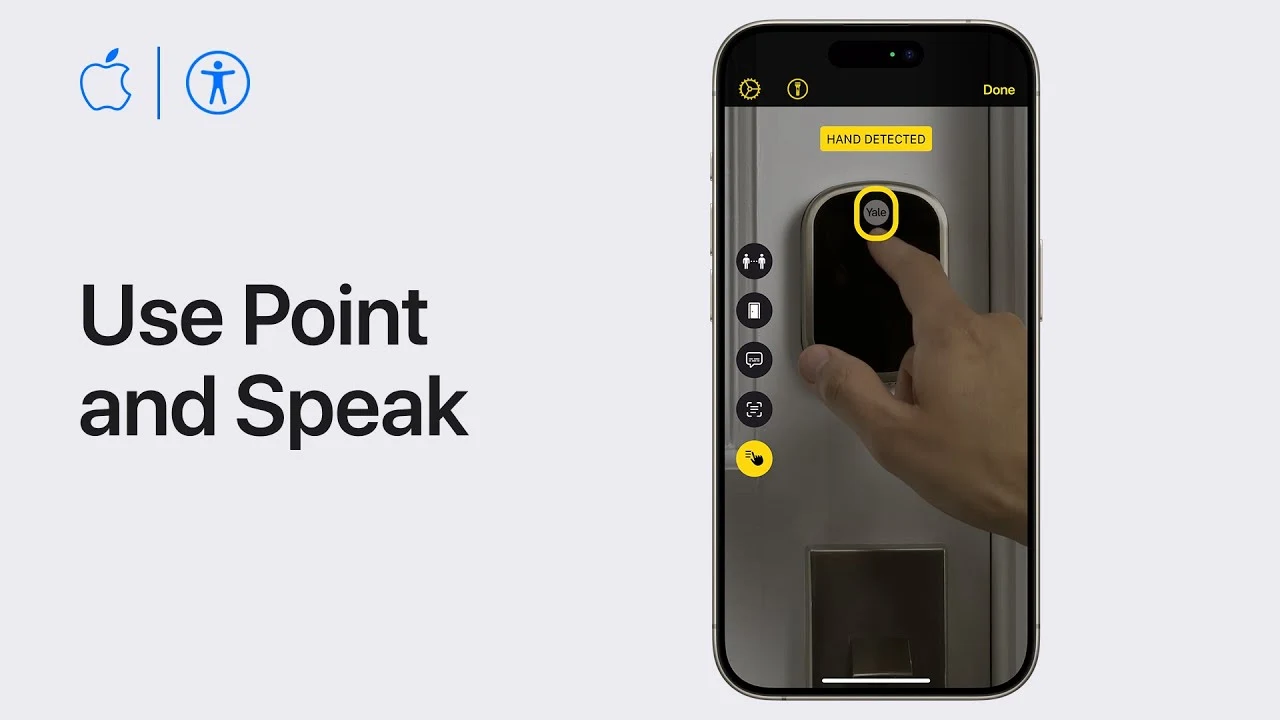
How to use Point and Speak on iPhone or iPad

How to use Point and Speak on iPhone or iPad

Apple’s dedication to accessibility is evident in its wide array of features designed to assist users with visual impairments. If you are interested in learning how to use the Point and Speak accessibility features on iPhone or iPad this guide aims to provide a detailed overview of these features, focusing on how it can be effectively used during everyday life. For example you can use your iPhone to view your surroundings and receive audio descriptions or upload images you take using the camera to receive and audio description of it.

The Point and Speak features now available on Apple’s iOS mobile operating system feature are a significant development that has transformed the way users can interact and use their devices. It allows users to point their finger at text displayed on the screen, which is then read aloud by the iOS device. This feature is especially useful for individuals with blindness or low vision, as it allows them to interact with their device in a more intuitive and accessible way, thereby improving their overall user experience.

How to use Point and Speak on iPhone

To activate this feature, you need to enable the on your iPhone or iPad. The LiDAR is a unique Apple tool that works in tandem with the Point and Speak feature to provide a seamless user experience, making it easier for users to navigate their devices. Another key aspect of Apple’s accessibility features is the voice over detection mode. This mode can be activated by triple tapping the screen with four fingers. Once activated, you can point your device’s camera at an item, and the text will be read out loud. This feature is particularly useful for reading physical documents or identifying products, making it a valuable tool for users with visual impairments.

Other articles you may find of interest on the subject of Apple’s iOS mobile operating system :

How to receive image descriptions of your surroundings in Magnifier on iPhone

  1. Turn on Magnifier, then do one of the following:
  2. On models with a LiDAR Scanner: Tap the Detection Mode button, then tap the Image Descriptions button.
  3. On other models: Tap the Image Descriptions button.
  4. Position iPhone so the rear camera can get image descriptions of the world around you.
  5. If you don’t hear the speech feedback, make sure Silent mode is turned off. See Adjust the volume on iPhone.
  6. When you’re finished, tap Done to return to the Magnifier screen.

Customize settings for image descriptions

By following the instructions below you can turn on Magnifier, and then carry out one of the following:

  1. On models with a LiDAR Scanner: Tap the Detection Mode button, tap the Detection Mode Settings button, then tap Image Descriptions.
  2. On other models: Tap the Settings button, tap Settings, then tap Image Descriptions below Detectors.
  3. Turn on any combination of text and speech.
  4. Text: Image descriptions appear in the camera view.
  5. Speech: When you turn on Speech, iPhone speaks the description of the scenes and people detected in the camera view.
  6. When you’re finished, tap Back, then tap Done.

However, Apple reinforces the point that it is important to note that the detection mode should not be used in high-risk or emergency situations, as it may not always provide accurate or timely information. Therefore, users should exercise caution and use this feature responsibly. It’s also important to note that the Point and Speak feature may not be available in all countries or regions. Therefore, it’s recommended to check the availability of these features in your specific location to ensure you can fully utilize your device’s capabilities.

Apple’s accessibility features, such as the Point and Speak technology and voice over detection mode, provide valuable tools for users with visual impairments. By keeping your device updated and utilizing resources like the Apple Support YouTube channel, you can ensure you’re getting the most out of your Apple device. These features and resources demonstrate Apple’s commitment to making technology accessible to all.

Filed Under: Apple, Guides, Top News


Latest timeswonderful Deals

Disclosure: Some of our articles include affiliate links. If you buy something through one of these links, timeswonderful may earn an affiliate commission. Learn about our Disclosure Policy.
Categories
News

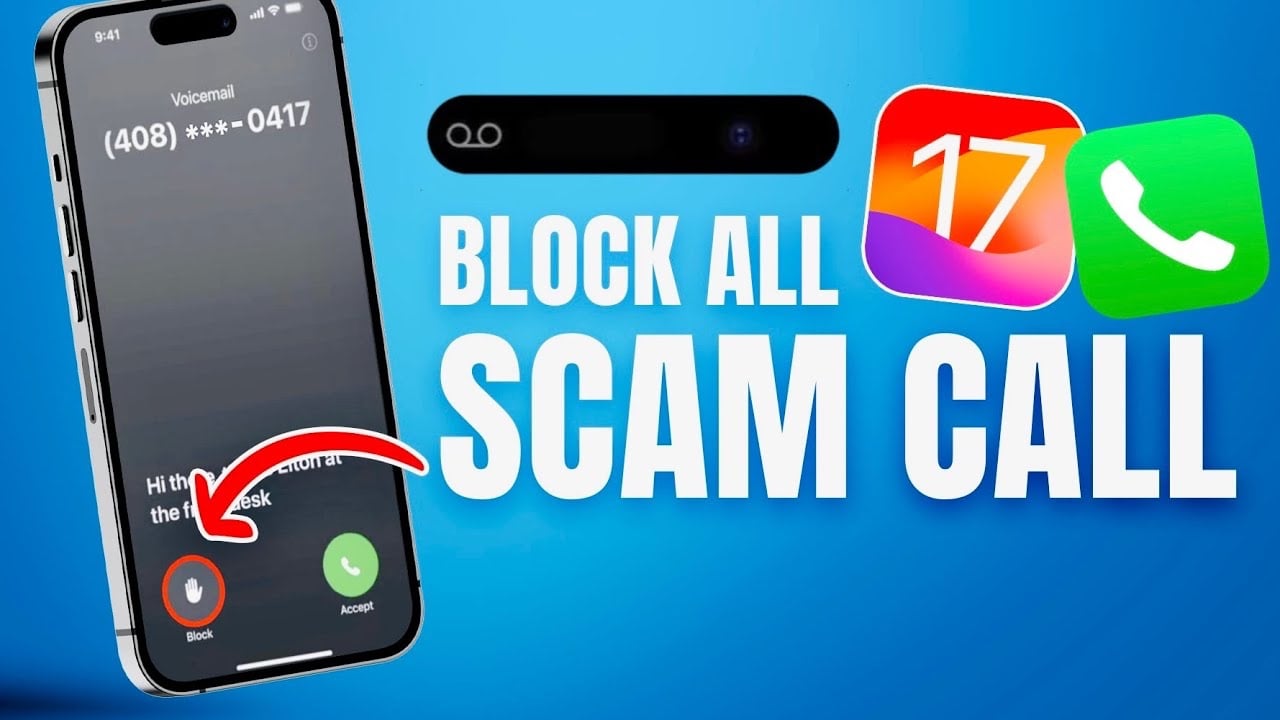
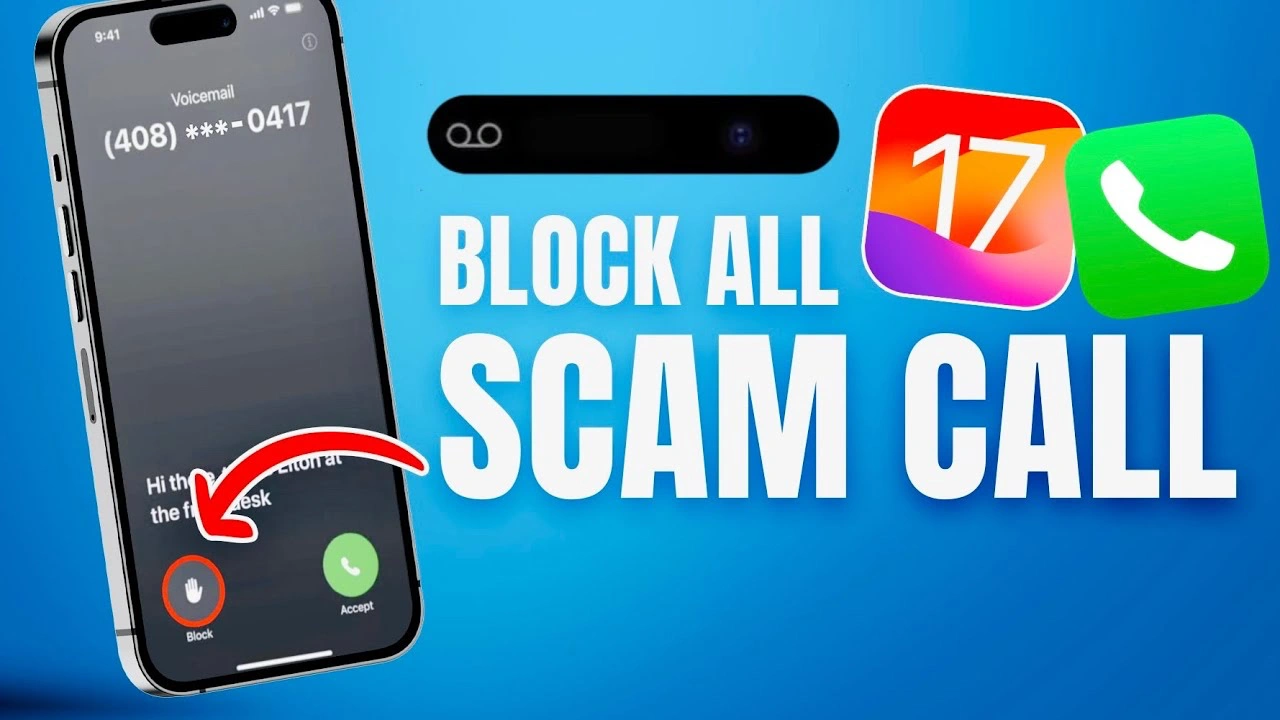
How to stop scam calls on the iPhone

Block Scam Calls iPhone

This guide is designed to show you how to stop scam calls on the iPhone. Are you tired of the incessant ringing of your iPhone, only to pick up and find another scam caller on the other end? You’re not alone. Scam calls have become a daily nuisance for many, disrupting our peace and attempting to swindle us.

If this scenario sounds all too familiar, rest assured that you are part of a vast community of individuals whose daily routines are being interrupted by these fraudulent calls. These calls are more than mere annoyances; they are intrusive attempts at deception, often designed to catch us off guard and trick us into parting with our hard-earned money or personal information.

Fortunately, for those of us relying on our iPhones to stay connected, Apple has integrated a suite of robust features designed to combat these unauthorized calls. With the advent of the iOS 17 update, these tools have become more sophisticated than ever, providing users with a formidable defense against the scourge of scam calls. In the following paragraphs, we will explore the ins and outs of these features, guiding you through the steps to leverage your iPhone’s capabilities to their fullest extent and reclaim the sense of calm that comes with a scam-free phone experience.

Navigate to Serenity: Using iPhone’s Built-in Settings to Block Scam Calls

Your iPhone is equipped with powerful tools to help you manage incoming calls. By simply diving into the settings, you can activate features that will shield you from the chaos of scam calls. This doesn’t require any additional downloads or purchases; everything you need is already at your fingertips.

Silence is Golden: The ‘Silence Unknown Callers’ Feature

One of the most effective tools at your disposal is the ‘Silence Unknown Callers’ option. When this feature is enabled, your iPhone will not ring for calls from numbers that aren’t in your contacts, recent outgoing calls, or Siri suggestions. Instead, these calls are sent directly to voicemail, and they’ll appear in your recent calls list, so you can review them at your leisure. This means that unless a caller is already known to you, your phone won’t disturb you.

The Criteria for Allowed Calls

With ‘Silence Unknown Callers’ activated, you can rest assured that only calls from familiar numbers will make your phone ring. This feature relies on your contacts and your recent call history to determine which calls are important, ensuring that you don’t miss out on the calls you actually want to receive.

Embrace the New iOS 17 Features: Live Voicemail and Instant Spam Blocking

The release of iOS 17 has introduced even more robust options for managing unwanted calls. The new ‘Live Voicemail’ feature is particularly noteworthy. It transcribes voicemails in real-time, allowing you to read the message as it’s being left. This is a game-changer for identifying scam calls without ever having to listen to the voicemail.

Moreover, if a scam call slips through and you find yourself listening to a live voicemail from a scammer, iOS 17 gives you the power to block that number instantly. No more waiting until the call is over; you can act immediately to prevent future disturbances.

Accessibility for All iPhone Users

These features are not exclusive to the latest iPhone models; they are available on any iPhone that can run iOS 17. This inclusivity ensures that a larger number of users can benefit from these protective measures.

Summary

Scam calls don’t have to be an inevitable part of your day. With your iPhone in hand, you have all the tools you need to create a barrier against these unwelcome interruptions. By leveraging the ‘Silence Unknown Callers’ feature and embracing the new iOS 17 updates, you can enjoy a more peaceful, scam-free phone experience. Remember, your iPhone is more than just a device; it’s your partner in maintaining your peace of mind in the digital age.

Source & Image Credit: iDeviceHelp

Filed Under: Apple, Apple iPhone, Guides


Latest timeswonderful Deals

Disclosure: Some of our articles include affiliate links. If you buy something through one of these links, timeswonderful may earn an affiliate commission. Learn about our Disclosure Policy.
Categories
News

How to improve iPhone battery life with iOS 17

iPhone battery life

This guide is designed to show you how to optimize iPhone battery life with iOS 17. With the advent of iOS 17, iPhone users have a plethora of new features and improvements at their fingertips. However, amidst these advancements, battery longevity remains a paramount concern for many. Fortunately, iOS 17 offers a suite of options to optimize your settings for better battery performance. In this article, we’ll explore practical tips to enhance your iPhone’s battery life, ensuring that your device keeps pace with your daily demands.

Wi-Fi Optimization:

A simple yet effective strategy is to prefer Wi-Fi over cellular data. Wi-Fi is generally more energy-efficient, particularly with a strong signal. Investing in a high-quality Wi-Fi router could contribute to better battery life. iOS 17’s intelligent Wi-Fi management also aids in reducing unnecessary battery drain when you’re within a stable Wi-Fi network.

Cellular Data Management:

For those frequently in areas with spotty 5G coverage, iOS 17 allows you to switch to LTE. This prevents your iPhone from the battery-intensive process of searching for a 5G signal, thereby conserving energy.

Audio Playback Efficiency:

iOS 17’s music and EQ settings are designed to be energy-efficient. Turning off the default EQ settings can save battery, and using headphones with their own EQ, such as the Sony XM5s, can provide high-quality audio without extra battery consumption.

Sounds and Haptic Feedback:

Customizing your sound and haptic feedback is another way to save power. iOS 17 lets you disable keyboard clicks and haptic feedback, which, while small on a per-use basis, add up to significant savings over time.

App Activity Management:

Background app refresh is a known battery drainer. iOS 17 allows you to fine-tune these settings, turning off refresh for apps that don’t require constant updates, thus saving valuable battery life.

Display and Brightness Settings:

The display is one of the most power-hungry components. iOS 17’s auto-brightness feature adjusts screen lighting based on ambient conditions, which can conserve battery. Additionally, reducing the white point and enabling dark mode can further decrease energy consumption.

App Management:

Periodically closing apps can prevent them from draining the battery, especially if they malfunction. iOS 17’s improved app management helps identify and shut down energy-hungry apps.

Notification Optimization:

Notification management in iOS 17 is smarter, with scheduled summaries reducing the frequency of screen wake-ups, thus conserving battery life.

Location Services:

Unnecessary location tracking can be a significant battery drain. iOS 17 provides enhanced control over location services, allowing you to disable them for apps where real-time tracking isn’t essential.

Email Fetch Settings:

iOS 17 gives you the option to set email accounts to fetch data at specific intervals rather than pushing data continuously, which is particularly beneficial for non-iCloud accounts.

Battery Health Monitoring:

The updated Battery Health feature in iOS 17 helps you keep an eye on your battery’s condition, and the optimized battery charging setting extends its lifespan by learning your charging habits.

Software Updates:

Regular updates are key to maintaining battery efficiency. iOS 17 ensures your iPhone is running the latest software, which often includes optimizations for better battery performance.

Temperature Management:

iOS 17 continues to emphasize the importance of keeping your iPhone out of extreme temperatures to prevent battery damage and drain.

Summary

iOS 17 brings a host of customizable settings that can significantly improve your iPhone’s battery life. By adjusting connectivity, audio, display, app activity, and power management settings, you can enjoy a longer-lasting battery experience. Embrace these tips to ensure your iPhone is as enduring as it is innovative. We hope that you find this guide on how to optimize iPhone battery life helpful, if you have any comments, questions, or suggestions, leave a comment below and let us know.

Source Payette Forward

Image Credit: Amanz

Filed Under: Apple, Apple iPhone, Guides


Latest timeswonderful Deals

Disclosure: Some of our articles include affiliate links. If you buy something through one of these links, timeswonderful may earn an affiliate commission. Learn about our Disclosure Policy.
Categories
News

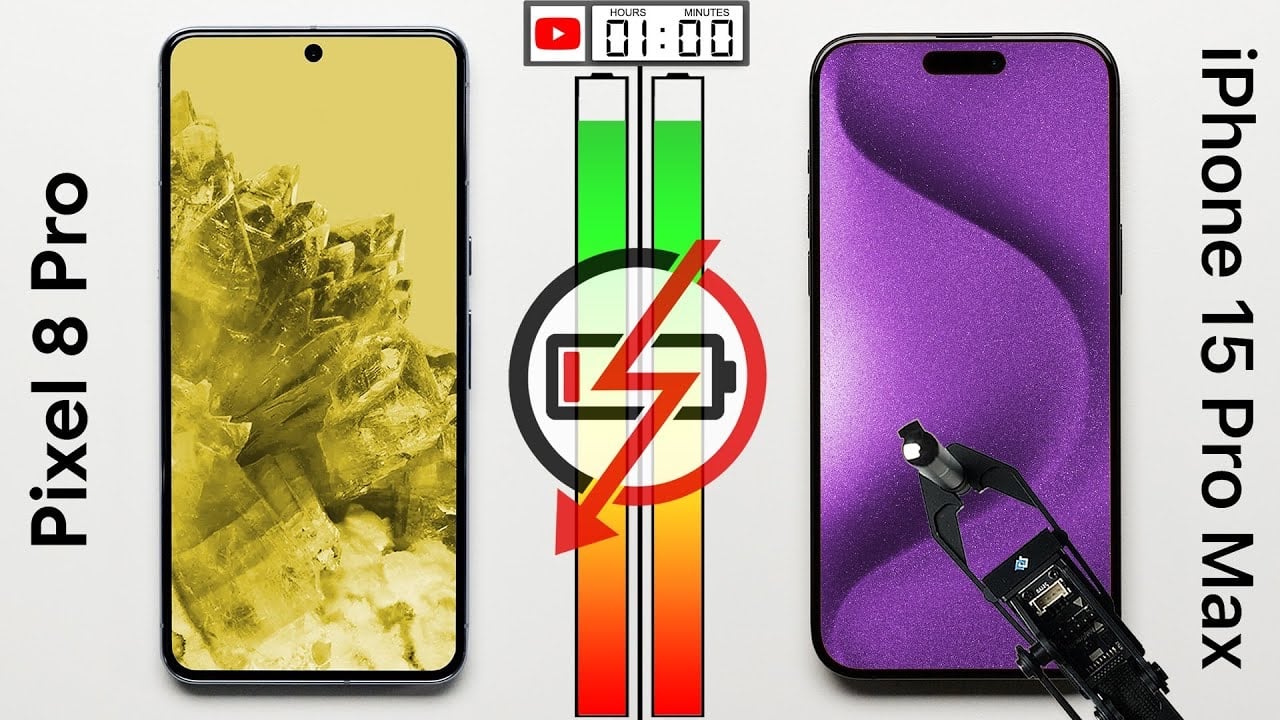
Battery Test: Google Pixel 8 Pro vs iPhone 15 Pro Max (Video)

Google Pixel 8 Pro vs iPhone 15 Pro Max

The Google Pixel 8 Pro is Google’s latest flagship Android smartphone, the handset was launched recently and now we get to find out how the device performs next to Apple’s iPhone 15 Pro Max, the battery life on the two handsets is tested in a new video.

The iPhone 15 Pro Max comes with a 4,441 mAh battery and the Google Pixel 8 Pro features a 5,500 mAh battery, the video below from Phone Buff tests the battery life on the two handsets in a range of tests. The tests are designed to simulate everyday usage of smartphones, let’s find out how they perform.

As we can see from the video the iPhone 15 Pro Max lastest the longest out of the two handsets, even though it has a smaller battery, this would suggest that the iPhone processor and software are more efficient than the Pixel 8 Pro. In the tests the iPhone lasted an additional 1 hour and 44 minutes, clocking in a total usage time of 27 hours and 44 minutes, compared to the Pixel’s 25 hours and 53 minutes.

The battery tests between the Google Pixel 8 Pro and iPhone 15 Pro Max reveal a clear pattern. While the Pixel shows commendable performance and even outshines its predecessor and the iPhone in certain aspects like browsing, the iPhone 15 Pro Max consistently demonstrates superior battery life across most tasks. For users whose primary concern is staying powered throughout the day under various usage conditions, the iPhone 15 Pro Max emerges as the winner in this battery life test.

Source & Image Credit: Phone Buff

Filed Under: Android News, Apple, Apple iPhone, Top News


Latest timeswonderful Deals

Disclosure: Some of our articles include affiliate links. If you buy something through one of these links, timeswonderful may earn an affiliate commission. Learn about our Disclosure Policy.