Categories
News

12 Handy iPhone Tips & Tricks (Video)

iPhone tips

If you’re an iPhone enthusiast, constantly on the lookout for ways to make the most out of your device, you’re in for a treat. With the latest iOS versions and iPhone models, the scope of what your phone can do is expanding remarkably. Let’s dive into 12 handy tips and tricks that will elevate your iPhone experience. The video below from Proper Honest TEch gives us a range of handy iPhone tips and tricks.

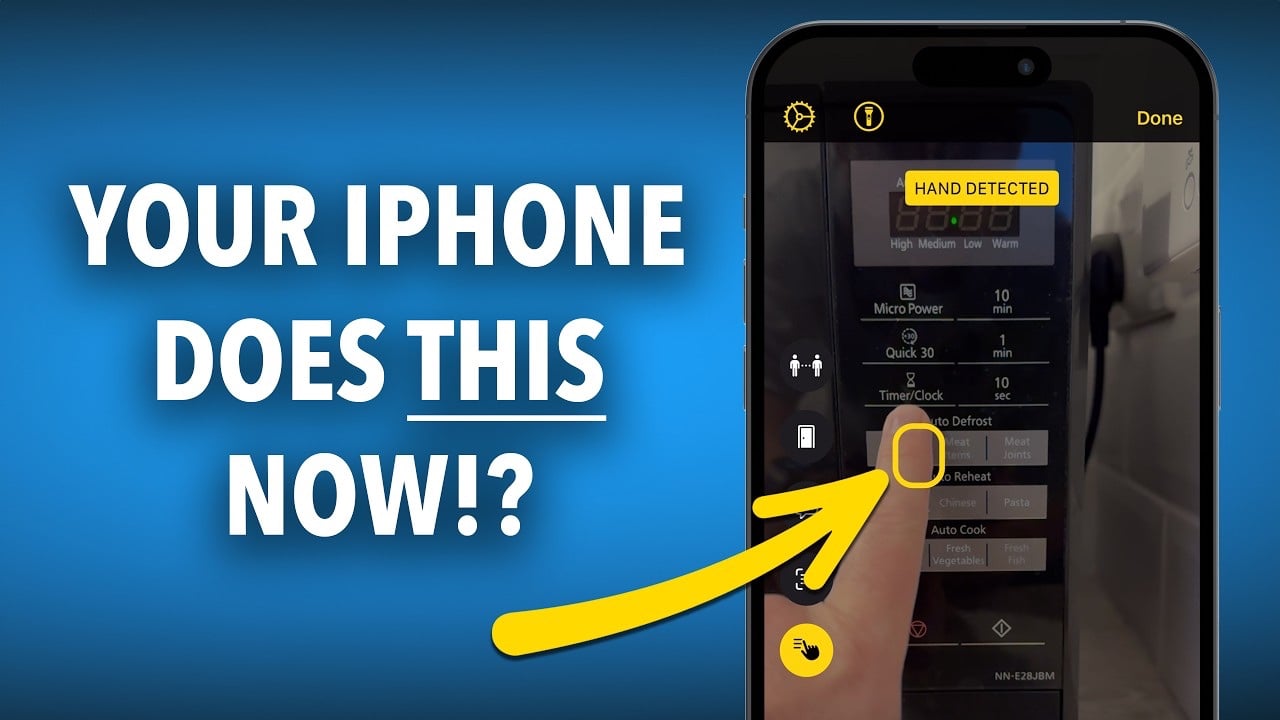
  1. Enhanced Magnifier App with Point and Speak: For users with the latest iPhone Pro models (12 and onwards) and iPad Pro 2020, the Magnifier app has received a significant upgrade. Thanks to LIDAR technology, it now reads text aloud when you point your device at an object. This feature is not just a convenience; it’s a game-changer for accessibility.
  2. Dynamic Siri Suggestions: Say goodbye to the hassle of searching for your most-used apps. Siri now intelligently suggests apps based on your usage patterns, making accessibility a breeze. This feature personalizes your experience, ensuring that your favorite apps are always at your fingertips.
  3. Voice Message Transcription in iOS 17: In the latest iOS update, received voice messages through iMessage are automatically transcribed. This means you can read your messages instead of listening to them, a handy feature for those moments when you can’t listen to audio.
  4. BetterHelp Partnership: The video also highlights a collaboration with BetterHelp, an online therapy platform. This partnership underscores the iPhone’s role in supporting mental health and well-being, a testament to its diverse capabilities.
  5. Continuity Camera with Mac: For those who use both an iPhone and a Mac, this feature is a dream come true. You can now scan documents directly into your Mac using your iPhone. This seamless integration enhances productivity and simplifies document handling.
  6. FaceTime Calls on Apple TV 4K: Imagine making FaceTime calls through your Apple TV 4K, using your iPhone as a camera. This feature transforms your TV into a large video calling screen, perfect for group calls with friends and family.
  7. Augmented Reality for Product Visualization: With LIDAR-equipped iPhones, you can now use augmented reality to visualize products like furniture in your space. This feature is particularly useful for online shopping, giving you a better sense of how products would look in your home.
  8. Measure App Precision: The Measure app on your iPhone, particularly on models with LIDAR, allows you to measure objects and spaces with remarkable accuracy. This app turns your phone into a practical tool for everyday measurements.
  9. Shortcuts and Automations: Using the Shortcuts app, your iPhone can automate various tasks, like sending messages when you leave a location. This feature simplifies your routine and automates mundane tasks, making your day more efficient.
  10. Photo Library Search with Machine Learning: You can now search for specific objects, scenes, or text within your photo library, thanks to machine learning. This advanced search capability makes managing and finding photos in your library a breeze.
  11. Live Text Feature: iPhones can recognize and interact with text in photos. This means you can perform actions like copying, translating, or looking up information directly from text in your photos, enhancing the way you interact with your images.
  12. Messages App Check-In Feature: This new feature allows you to share your location and status with trusted contacts. It’s especially useful for providing updates during a journey, adding a layer of safety and connectivity to your travels.

You will be pleased to know that these features not only demonstrate the technological advancement of the iPhone but also underscore its commitment to user convenience and accessibility. If you are wondering how to leverage these features to their fullest potential, the video concludes with an invitation to view another segment with more iPhone tips.

Source & Image Credit: Proper Honest Tech

Filed Under: Apple, Apple iPhone


Latest timeswonderful Deals

Disclosure: Some of our articles include affiliate links. If you buy something through one of these links, timeswonderful may earn an affiliate commission. Learn about our Disclosure Policy.

Categories
News

How to troubleshoot common problems with your iPhone

common problems iPhone

This guide is designed to show you how to troubleshoot a range of common problems with your iPhone. The iPhone, renowned for its robust performance and multifaceted capabilities, is not immune to the occasional hiccup or technical difficulty, a common trait among sophisticated electronic devices. Experiencing issues with your iPhone can be a source of frustration, but there’s often no need for alarm. In this comprehensive guide, we aim to demystify some of the most frequently encountered challenges associated with iPhone usage. Our step-by-step approach is designed to help you navigate through these common problems, providing practical solutions and troubleshooting tips to get your device back in optimal working condition. Whether you’re facing a minor glitch or a more complex issue, this article is here to assist you in resolving these concerns efficiently.

General Troubleshooting Tips

Before diving into specific troubleshooting steps, here are some general tips that can help resolve many common iPhone issues:

  1. Restart your iPhone: Restarting your iPhone can often clear up minor glitches and software issues. To restart your iPhone, press and hold the side button (or the top button on older models) until the power off slider appears. Drag the slider to turn off your iPhone, and then wait a few seconds before turning it back on.
  2. Update iOS: Apple regularly releases iOS updates to fix bugs and improve performance. Make sure you’re running the latest version of iOS by going to Settings > General > Software Update, the latest version of iOS at the time of writing is iOS 17.1.2.
  3. Update your apps: Outdated apps can sometimes cause problems. Check for app updates by going to the App Store and tapping on the Updates tab.
  4. Force-close an app: If an app is unresponsive or causing problems, you can force-close it by swiping up from the bottom of the screen (on iPhones with a Home button) or swiping down from the top-right corner of the screen (on iPhones with a Face ID notch).
  5. Reset your iPhone’s network settings: If you’re having problems with Wi-Fi, cellular data, or Bluetooth, try resetting your iPhone’s network settings. To do this, go to Settings > General > Reset > Reset Network Settings.

Specific Troubleshooting Tips

Here are some troubleshooting tips for specific iPhone issues:

1. Battery life issues

  • Turn off background app refresh to prevent apps from constantly updating in the background.
  • Disable location services for apps that don’t need them.
  • Reduce screen brightness.
  • Use Wi-Fi instead of cellular data when possible.
  • Consider using a battery-saving mode if available.

2. Wi-Fi issues

  • Make sure your Wi-Fi router is turned on and working properly.
  • Restart your Wi-Fi router.
  • Forget your Wi-Fi network and reconnect to it.
  • Reset your iPhone’s network settings.

3. Cellular data issues

  • Make sure you have a cellular data plan.
  • Check your cellular data signal.
  • If you’re using an eSIM, make sure it’s activated and working properly.
  • Reset your iPhone’s network settings.

4. Bluetooth issues

  • Make sure your Bluetooth is turned on.
  • Make sure the Bluetooth device you’re trying to connect to is discoverable.
  • Forget the Bluetooth device and reconnect to it.
  • Reset your iPhone’s network settings.

5. App issues

  • Force-close the app and reopen it.
  • Update the app.
  • Uninstall the app and reinstall it.
  • Contact the app developer for support.

6. Camera issues

  • Close all other apps that are using the camera.
  • Restart your iPhone.
  • Clean the camera lens with a soft, microfiber cloth.
  • Reset your iPhone’s settings.

7. Audio issues

  • Check the volume level.
  • Make sure the speaker is not blocked.
  • Clean the speaker grill with a soft, microfiber cloth.
  • Try using a different pair of headphones or earbuds.
  • Restart your iPhone.
  • Reset your iPhone’s settings.

8. Charging issues

  • Make sure you’re using a certified Lightning cable.
  • Try using a different power outlet.
  • Clean the Lightning port on your iPhone with a soft, microfiber cloth.
  • Restart your iPhone.
  • Contact Apple support if the issue persists.

Seek Professional Help

If you’ve tried all of the troubleshooting tips in this article and you’re still having problems with your iPhone, it’s best to contact Apple support or visit an Apple Store for further assistance. They will be able to diagnose the problem and provide you with the best course of action.

Summary

We hope this article has helped you troubleshoot common problems with your iPhone. Remember to always keep your iPhone up to date with the latest iOS software, and don’t be afraid to contact Apple support if you’re having trouble. If you have any questions, tips, or comments, please let us know in the comments section below.

Image Credit: Samuel Angor

Filed Under: Apple, Apple iPhone, Guides


Latest timeswonderful Deals

Disclosure: Some of our articles include affiliate links. If you buy something through one of these links, timeswonderful may earn an affiliate commission. Learn about our Disclosure Policy.

Categories
News

How to Create an Awesome iPhone Setup (Video)

ultimate iPhone setup

We previously showed you a video of the ultimate iPhone setup and now we have another video that is basically a guide on how you can create another awesome iPhone setup for your home screen with iOS 17.

In the fast-paced world of technology, your iPhone is more than just a device; it’s a crucial part of your daily life. Understanding how to maximize its utility, especially with the iPhone 15 Pro and iOS 17, can transform your user experience from ordinary to extraordinary. Let’s dive into how you can create an optimized home screen setup that not only saves time but also reduces stress and enhances your interaction with your favorite apps and tools. The video below from ThisisE is designed to show us how we can create an awesome iPhone setup with iOS 17.

A Gateway to Efficiency: The Ultimate Home Screen Setup

Imagine having all your essential tools and apps on one homepage. This is not just about decluttering your screen; it’s about enhancing functionality for both smaller and larger iPhone models. Whether you’re navigating your phone with one hand while on the move, or simply seeking faster access to your apps and notifications, this setup is your gateway to efficiency.

Tools for Transformation

At the heart of this setup are widgets and stacks of widgets. These aren’t just any widgets, but custom creations using apps like Widgetsmith and bespoke shortcuts via the Shortcuts app. The beauty of this setup? It’s compatible with most iPhones, especially those running the latest iOS 17.

1. Widget Page: Your Personal Dashboard

Your widget page is like your personal dashboard, featuring:

  • A stats stack displaying activities, battery life, and sleep data.
  • A calendar stack to keep your schedule at your fingertips.
  • Email and to-do widgets for staying on top of tasks.
  • A listening section to seamlessly switch between music and podcasts.

2. Home Page: Simplified and Streamlined

Transform your home page into a hub of productivity with:

  • A large Widgetsmith widget for quick information.
  • A handy calculator widget for those quick calculations.
  • A stack of Notion page widgets, perfect for organizing your notes and projects.
  • A folder containing your most-used apps, right where you need them.

3. Control Center: Tailored to Your Needs

Customize your control center to include:

  • Easy switching between light and dark modes.
  • Screen recording for capturing important moments.
  • Shazam for identifying music on the go.

Creating Shortcuts: A Click Away

Efficiency is key, and creating shortcuts for quick access to frequently used folders and documents is a game-changer. Integrate these shortcuts into your Widgetsmith widget for even faster access.

Customization at Its Best

Why settle for the default when you can personalize it? Customize your widgets to match your iPhone’s aesthetic, play with styles and colors, and make your screen truly yours.

Adapting to Different Models

Not all iPhones are created equal. For those without an action button, utilize the back tap feature in the accessibility settings to trigger shortcuts.

Enhance with Accessories

Briefly, it’s worth mentioning the use of NFC tags and accessories like a car charger and mount to further enhance your iPhone experience.

Guiding You Through

If you’re wondering how to put all these pieces together, don’t worry. You will be pleased to know that it’s simpler than it sounds. With a bit of customization and some tweaks to your settings, you can create an iPhone setup that works seamlessly for you.

Remember, your iPhone is a powerful tool, and with the right setup, you can unlock its full potential. So, start experimenting with these tips and tailor your iPhone to suit your lifestyle perfectly.

Source & Image Credit: ThisisE

Filed Under: Apple, Apple iPad, Guides


Latest timeswonderful Deals

Disclosure: Some of our articles include affiliate links. If you buy something through one of these links, timeswonderful may earn an affiliate commission. Learn about our Disclosure Policy.

Categories
News

Name Drop on the iPhone and iOS 17 is secure

Name Drop

There have been a number of reports over the last few days that Name Drop on the iPhone with iOS 17 is not secure, this is incorrect, Apple’s feature on its iPhone is totally secure and does not pose a security risk to you or your information.

Some police departments and news sites in the USA have spread misinformation about this feature on the iPhone and how it works, it has given the impression that contact information is shared automatically when two iPhones are near each other, this is incorrect. The video below from iDeviceHelp gives us more details on the feature and how it works.

The iPhones have to be really close to each other and then a popup will appear, asking you if you want to share your contact details via Name Drop, your contact details cannot be shared with the other person without you giving permission by clicking the prompt.

The feature is turned on by default and the news organizations and police departments who shared the details about the feature, give the impression that your details would be shared with someone else close to you without your permission, this is false and incorrect information. Some of the news reports suggested that information could be stolen from a locked phone, both devices need to be unlocked, really close together, as in almost touching and you have to click the prompt to share your details.

Source & Image Credit: iDeviceHelp

Filed Under: Apple, Apple iPhone, Top News


Latest timeswonderful Deals

Disclosure: Some of our articles include affiliate links. If you buy something through one of these links, timeswonderful may earn an affiliate commission. Learn about our Disclosure Policy.

Categories
News

How to create the ultimate iPhone setup

iPhone setup

We previously looked at how to create a minimalist iPhone setup. Are you looking to transform your iPhone into a sleek and functional masterpiece? You will be pleased to know that the latest video guide, “Create the Ultimate iPhone Setup,” offers invaluable insights into customizing your iPhone’s lock screen and home screen, blending aesthetics with practicality. The video below from ireviews shows us how to create the ultimate iPhone setup for your Home Screen and Lock Screen.

Lock Screen Customization

Firstly, let’s delve into the lock screen. The video shows two essential widgets. One displays the battery percentages for your various devices – a must-have for those juggling multiple Apple gadgets. The other widget is a hub of information, showing connectivity status, storage, RAM memory, and time. Imagine having all this vital information at a glance!

A pro tip to elevate your lock screen’s look is the smart use of colors. Match the clock and widgets color with your wallpaper for a visually pleasing effect. Achieving this is a breeze with the Color Picker tool found in the customization settings.

Home Screen Customization

Moving on to the home screen, simplicity meets functionality. A widget from ‘Widget’ encompasses everything you need: a calendar, weather forecast, step counter, links to your favorite apps, settings info, and time. With iOS 17, these widgets have become interactive, allowing you to tap them for more detailed information.

A striking feature is the widget’s transparent background, which seamlessly integrates with your chosen wallpaper. The guide provides straightforward instructions to achieve this look, utilizing a screenshot of an empty home screen page.

Additional Home Screen Features

The video doesn’t stop there. It introduces ‘Moo Widgets’, a clever app that allows you to add a hidden page of apps. This feature is not just about aesthetics; it’s about efficiency and accessibility. Swipe on the home screen, and voilà, your apps are there, out of sight but easily reachable.

In combination with ‘Moo Widgets’, ‘Blank Widgets’ plays a pivotal role. It creates a stack that conceals ‘Moo Widgets’, enabling a secret widget on your home screen. This setup maintains a clean look while ensuring your apps are just a swipe away.

Moreover, the guide suggests utilizing the left side of the home screen for practical widgets like shortcuts, a calendar, and a world clock. This is perfect for those who love having quick access to their daily essentials.

Overall Setup Aesthetic and Functionality

The overarching goal of this setup is to achieve a clean and simple look without compromising functionality. You’ll find that this custom setup is not only easy to create but also elevates your iPhone’s usability. The video concludes by reassuring viewers of the setup’s simplicity and provides all necessary links for wallpapers, widgets, and apps in the video description.

By following this information in the video, you can transform your iPhone into a more efficient, aesthetically pleasing device that caters to your personal and professional needs. So, if you are wondering how to give your iPhone a functional makeover without sacrificing style, this video is your go-to resource.

Source & Image Credit: iReviews

Filed Under: Apple, Apple iPhone, Guides


Latest timeswonderful Deals

Disclosure: Some of our articles include affiliate links. If you buy something through one of these links, timeswonderful may earn an affiliate commission. Learn about our Disclosure Policy.

Categories
News

Fake iPhone 15 Pro Max shown off on video

Fake iPhone 15 Pro Max

Every year when. Apple releases their new iPhones we also get to see various fake iPhones and now we can have a look at a new fake iPhone 15 Pro Max. The video below from Phone Repair Guru gives us a look at one of the latest fake iPhones that have been released.

This insightful comparison between the authentic and fake versions of this sought-after device reveals startling similarities and notable differences, guiding consumers in identifying potential frauds.

Firstly, let’s delve into the physical appearance and packaging of these devices. The counterfeit iPhone arrives in a box strikingly similar to the original, with subtle differences in font and print quality. However, a closer inspection under a blacklight unveils the absence of an Apple logo on the fake box, a crucial clue in discerning its authenticity. When it comes to the design, the fake iPhone astoundingly mimics the genuine one, boasting curved edges and a comparable finish. This level of detail in replication is both impressive and alarming.

Moving onto the hardware and features, the counterfeit iPhone does not shy away from ambition. It sports a USB-C port, mirroring the genuine iPhone 15 Pro Max. However, it falls short in several aspects: it lacks both wireless and MagSafe charging capabilities. The screen quality is fairly decent, yet the larger chin and subpar front camera quality are dead giveaways. Additionally, the device tries to mimic iOS 17 and even includes a functional action button, albeit with less finesse.

The performance and functionality of the fake iPhone are where the differences become more pronounced. The camera quality is notably inferior, displaying inaccurate colors and a grainy texture. The device also displays false iPhone 15 Pro Max stats and includes a non-functional warranty option. Interestingly, it features a back tap option, but it operates inefficiently.

This analysis shows that while the counterfeit iPhone 15 Pro Max mirrors the real one in several ways, critical disparities in features, functionality, and build quality are unmistakable. These insights are pivotal in raising awareness about the risks of encountering such counterfeit products. If you are wondering how to stay vigilant, remember to pay attention to subtle details in packaging, hardware features, and performance.

Source Phone Repair Guru

Filed Under: Apple, Apple iPhone


Latest timeswonderful Deals

Disclosure: Some of our articles include affiliate links. If you buy something through one of these links, timeswonderful may earn an affiliate commission. Learn about our Disclosure Policy.

Categories
News

How to Create a Minimalist iPhone Setup with iOS 17

iPhone iOS 17

Are you looking to simplify your iPhone experience with the latest iOS 17? If so, you will be pleased to know that achieving a minimalist setup that balances functionality, aesthetics, and mindfulness is now more accessible than ever. This video below from Robert Creating will walk you through transforming your iPhone into a device that not only looks great but also encourages a healthier, less addictive relationship with technology.

Step 1: Ensure Your iPhone is Updated The journey begins by updating your iPhone to the latest iOS 17. This step is crucial as it unlocks all the new settings and features you’ll need for your minimalist transformation.

Step 2: Aesthetic Customization iOS 17 offers a plethora of aesthetic customizations. A popular choice is the grayscale theme, which provides a cleaner, less distracting look. You can personalize your iPhone with black and white wallpapers that automatically switch based on different modes during the day.

Step 3: Streamlined Lock Screen Setup Your lock screen can be a window to simplicity. Set a serene black-and-white photo, perhaps of a calming landscape or an architectural marvel, along with handy widgets like headphone battery levels and fitness app summaries.

Step 4: Home Screen Customization Echo your lock screen’s photo on the home screen for a cohesive look. iOS 17 allows you to limit your home screen to a single page, showcasing only essential apps. This step significantly reduces clutter and helps maintain focus.

Step 5: Utilize Focus Modes Focus modes are a standout feature in iOS 17. Set up different modes for work, sleep, and mindfulness, each with its own app layout and notification settings.

  • Work Mode: Activate this from Monday to Friday and include apps crucial for your professional tasks.
  • Mindfulness Mode: Include apps that promote a balanced and mindful use of your phone, such as meditation or fitness tracking apps.
  • Sleep Mode: Employ a darker theme with minimal distractions, perhaps just a moon icon, signaling it’s time to put the phone down for the night.

Step 6: Dock Customization Keep your dock limited to frequently used apps like your phone, a notes app, a smart home control app, and the camera. This approach ensures that your most important tools are always just a tap away.

Step 7: Innovative App Integration iOS 17 introduces exciting integrations like an AI assistant tool powered by GPT-4, which can enhance your content creation process and overall productivity.

Step 8: Setting Up New Focus Modes Dive into the settings to fine-tune your Focus modes. You can customize which contacts can reach you, tailor your lock screen for each mode, and even schedule them to activate automatically.

Step 9: Personalizing App Icons Use resources like Pinterest to find unique app icons, and employ the Shortcuts app to apply these custom icons for a truly personalized look.

Step 10: Standby Mode When charging, your phone can display useful information like the time, calendar, or rotating photos. Customize these widgets to suit your needs and preferences.

Step 11: App Blocking for Reduced Distraction Consider using apps like Unplug to block distracting apps during work hours or nighttime, helping you stay focused and maintain a healthy digital balance.

As you embark on this journey of minimalist transformation, remember that the beauty of iOS 17 lies in its flexibility to adapt to your unique lifestyle and preferences. Experiment with different settings and layouts until you find the perfect balance that reflects your personality and enhances your daily life.

Source Robert Creating

Filed Under: Apple, Apple iPhone, Guides


Latest timeswonderful Deals

Disclosure: Some of our articles include affiliate links. If you buy something through one of these links, timeswonderful may earn an affiliate commission. Learn about our Disclosure Policy.

Categories
News

How To Use Shortcuts On The iPhone

Shortcuts iPhone

This guide is designed to show you how to use Shortcuts on the iPhone, these can be used for a wide range of different things on your iPhone> In today’s dynamic and fast-moving world, where the quest for efficiency and convenience takes center stage, the Shortcuts app on the iPhone stands out as a remarkably potent instrument. It’s designed to simplify and accelerate daily tasks, significantly boosting productivity. This app is incredibly adaptable, offering users the ability to automate those mundane, repetitive actions that consume valuable time. Moreover, it provides the facility to craft personalized commands tailored to individual needs and preferences.

What’s particularly striking about the Shortcuts app is its integration with Siri, Apple’s intelligent assistant. This feature allows for the use of intuitive voice commands, adding a layer of ease and accessibility to its functionality. It means that tasks can be performed and processes initiated without even a single tap or swipe – just by using your voice.

The Shortcuts app is not just for those steeped in technology; its real beauty lies in its accessibility. Whether you’re a tech-savvy enthusiast always on the lookout for the latest gadgetry or someone who’s just beginning to explore the possibilities of technology, the app is intuitive and user-friendly. It invites users of all skill levels to delve into its capabilities.

Diving into the intricacies of the Shortcuts app opens up a realm of possibilities. It’s like having a personal assistant at your fingertips, ready to carry out your commands and streamline your digital life. From setting up morning routines to managing emails and social media interactions, the possibilities are vast and varied. Understanding how to leverage this tool effectively can transform the way you interact with your device, making every interaction more efficient, productive, and enjoyable.

Demystifying the Shortcuts App

The Shortcuts app serves as a central hub for creating, managing, and executing shortcuts, which are essentially sequences of pre-defined instructions that perform specific tasks. These shortcuts can range from simple actions like opening a specific app or sending a text message to more complex automations that involve multiple steps and interactions with third-party apps.

Crafting Your First Shortcut: A Step-by-Step Guide

  1. Launch the Shortcuts app: Locate the Shortcuts app icon on your iPhone’s home screen or in the App Library.
  2. Explore the Gallery: Tap the “Gallery” tab to browse through a collection of pre-built shortcuts designed for various purposes.
  3. Choose a Shortcut: Select a shortcut that aligns with your desired task or automation.
  4. Customize and Activate: Once a shortcut has been selected, review and customize its actions as needed. Then, tap the “Play” button to execute the shortcut.

Delving into the World of Automation

The Shortcuts app offers a vast array of automation possibilities, allowing users to streamline their daily routines and enhance productivity. Here are some examples of how shortcuts can be utilized:

  • Streamline Routine Tasks: Create shortcuts to automate repetitive tasks like generating a daily to-do list, setting alarms, or adjusting device settings.
  • Enhance Productivity: Automate actions like sending work emails, creating meeting agendas, or generating reports, saving valuable time and effort.
  • Personalize Your Experience: Craft shortcuts to control your smart home devices, manage your music playlists, or access personalized information like weather forecasts or traffic updates.

Unlocking the Power of Siri Voice Commands

Siri, Apple’s intelligent voice assistant, can be seamlessly integrated with Shortcuts, allowing users to execute shortcuts hands-free. To activate a shortcut using Siri, simply say “Hey Siri” followed by the shortcut’s name or a custom phrase you’ve assigned.

Additional Tips and Tricks

  • Explore the Shortcuts Community: Discover a wealth of user-created shortcuts by browsing the Shortcuts app’s community section.
  • Learn from Others: Utilize online tutorials and guides to enhance your understanding of Shortcuts and discover advanced techniques.
  • Share Your Creations: Share your own shortcuts with friends and family to spread the knowledge and benefits of automation.

Summary

The Shortcuts app empowers iPhone users to take control of their devices and enhance their productivity. By mastering the art of shortcut creation and leveraging Siri voice commands, users can automate repetitive tasks, personalize their experience, and streamline their daily routines. With its vast potential and ever-growing community, the Shortcuts app continues to revolutionize the way we interact with our iPhones. You can find out more details about using Shortcuts on the iPhone over at Apple’s website.

Image Credit: Amanz

Filed Under: Guides


Latest timeswonderful Deals

Disclosure: Some of our articles include affiliate links. If you buy something through one of these links, timeswonderful may earn an affiliate commission. Learn about our Disclosure Policy.

Categories
News

How To Share Your iPhone Screen On FaceTime

share iphone screen FaceTime

This guide is designed to show you how to share your iPhone screen on FaceTime. In today’s technology-driven world, the ability to share your screen seamlessly has become increasingly important for collaboration, presentations, and even casual interactions. FaceTime, Apple’s renowned video calling service, offers a convenient feature that allows you to share your iPhone screen with others during a call. Whether you’re showcasing a new app, guiding someone through a complex process, or simply sharing a funny video, screen sharing on FaceTime makes it effortless to engage with others in a more interactive and immersive way.

Prerequisites for Screen Sharing

Before embarking on your screen-sharing journey, ensure that both your device and the recipient’s meet the necessary requirements:

  • Compatible Devices: Both devices must be an iPhone 5s or later running iOS 12 or later.
  • Network Connectivity: A stable Wi-Fi or cellular connection is crucial for smooth screen sharing.
  • FaceTime Compatibility: Ensure that the FaceTime app is installed and up-to-date on both devices.

Initiating Screen Sharing

  • Launch FaceTime: Begin by opening the FaceTime app and initiating a video call with the desired person.
  • Access Share Content: Once the call is established, locate the “Share Content” button, typically represented by a rectangle with an upward arrow.
  • Initiate Screen Sharing: Tap the “Share Content” button, followed by the “Share My Screen” option. This will commence the screen-sharing session, displaying your entire iPhone screen to the recipient.

Sharing Specific Apps

For instances where you want to share a specific app rather than your entire screen, follow these steps:

  • Select the App: Navigate to the app you wish to share and tap on it.
  • Initiate App Sharing: Once the app is selected, tap on the “Share My Screen” option. This will limit the shared content to the chosen app.

Terminating Screen Sharing

When you’re ready to conclude the screen-sharing session, simply follow these steps:

  • Access Share Content: Tap on the “Share Content” button to bring up the sharing options.
  • End Screen Sharing: Select the “Stop Sharing” option to terminate the screen-sharing session.

Joining a Screen Sharing Session

If you’re the recipient of a screen-sharing session, follow these steps to join:

  • Join Screen Sharing Prompt: Locate the “Open next to Join Screen Sharing” prompt.
  • Initiate Joining: Tap on the prompt to join the screen-sharing session and view the shared screen.
  • Enlarging and Moving the Shared Screen: To enlarge the shared screen, tap on it. To move the shared screen, tap and drag it.
  • Exiting Screen Sharing: To leave the screen-sharing session, tap on the “Share Content” button, followed by the “Leave Screen Sharing” option.

Additional Tips for Enhanced Screen Sharing

  • Optimize Network Connection: For optimal performance, prioritize a Wi-Fi connection over cellular data.
  • Control Screen Sharing via Control Center: Utilize the Control Center to pause or resume the screen-sharing session.
  • Annotate and Draw on Shared Screen: Leverage the Control Center to draw or annotate on the shared screen for enhanced communication.
  • Troubleshooting: If encountering issues, ensure both devices have the latest software updates and restart the FaceTime app.

Screen sharing on FaceTime offers a valuable tool for collaboration, presentations, and even casual interactions. By following these guidelines, you can seamlessly share your iPhone screen with others, enhancing your FaceTime experience and fostering more engaging connections. You can find iout more details about charing your screen on your iPhone in FaceTime over at Apple’s website.

Image Credit: Harry Cunningham

Filed Under: Apple, Apple iPhone, Guides


Latest timeswonderful Deals

Disclosure: Some of our articles include affiliate links. If you buy something through one of these links, timeswonderful may earn an affiliate commission. Learn about our Disclosure Policy.

Categories
News

How to Schedule a Text Message on Your iPhone

schedule text message

The default Messages application on an iPhone, as it currently stands, doesn’t provide an in-built feature that directly allows users to schedule the sending of text messages. However, this limitation isn’t an absolute barrier. Users looking to schedule texts can explore a few alternative methods that effectively enable this functionality. These workarounds, though not directly integrated into the Messages app, offer a practical solution for those needing to time their message deliveries. Such methods might involve using third-party applications designed for message scheduling or leveraging the Shortcuts app, which is a versatile tool available on iOS devices for automating a wide range of tasks, including the sending of messages at predetermined times. This approach requires a bit of setup and creativity but can effectively bridge the gap left by the absence of a native scheduling feature in the Messages app.

Method 1: Using the Shortcuts App

The Shortcuts app, pre-installed on iPhones running iOS 13 and later, allows you to create automated tasks that can be triggered by various conditions, including time of day. You can utilize this feature to schedule text messages to be sent at a specified time.

  1. Open the Shortcuts App: Locate and launch the Shortcuts app on your iPhone.
  2. Create a Personal Automation: Tap the “Automation” tab at the bottom of the screen. If you’ve never created an automation before, tap “Create Personal Automation.”
  3. Select Time of Day Trigger: Choose “Time of Day” from the list of options.
  4. Set the Schedule: Specify the time and date when you want the message to be sent. You can choose a specific time, repeat the automation daily or monthly, or select a custom schedule.
  5. Add Send Message Action: Tap “Add Action” and search for “Send Message.” Select the “Send Message” action.
  6. Choose Recipient and Message Content: Enter the recipient’s phone number or select a contact from your address book. Type the message you want to send in the “Message” field.
  7. Review and Save: Tap “Next” to review your automation. If everything is correct, tap “Done” to save the automation.

Method 2: Using Third-Party Apps

Several third-party apps offer scheduling capabilities for text messages. These apps typically provide additional features, such as recurring messages, reminders, and customization options. Some popular options include:

  • Scheduled
  • SMS Scheduler
  • SimpleText

These apps typically require you to sign up for an account and grant them access to your contacts and messaging permissions.

Limitations and Considerations

  • Delivery Reliability: Scheduled messages rely on the Shortcuts app or third-party app running in the background to trigger the automation at the specified time. If your iPhone is not connected to Wi-Fi or cellular data at the scheduled time, the message may not be sent immediately.
  • Battery Usage: Running background automations can have a slight impact on battery life. However, the impact should be minimal for occasional scheduled messages.
  • Compatibility: Third-party apps may have specific compatibility requirements with iOS versions and iPhone models.
  • Privacy Concerns: Sharing your contacts and messaging permissions with third-party apps raises privacy concerns. Review the app’s privacy policy carefully before granting access.

Summary

The ability to schedule text messages on your iPhone presents numerous benefits, such as the convenience of sending timely reminders, heartfelt greetings, or important messages at precisely chosen moments. This feature becomes particularly useful in managing communications efficiently, ensuring that you don’t forget to send a crucial message or a birthday wish. Although the native Messages app on the iPhone lacks a direct scheduling feature, this functionality is not out of reach. You have the option of utilizing the Shortcuts app, a powerful tool provided by Apple, which allows for a variety of automated actions, including the scheduling of text messages. Additionally, there is a range of third-party applications available that are specifically designed to offer this capability.

When opting for third-party apps, it’s important to be mindful of their limitations, such as potential compatibility issues with different iOS versions or constraints in scheduling flexibility. Furthermore, it’s crucial to consider the privacy implications, as these applications may require access to your contacts and message content. Always review the privacy policies and user reviews of these apps to ensure they align with your personal and data security standards. By carefully selecting the appropriate tool, you can effectively complement the functionality of the built-in Messages app, thus enhancing your overall messaging experience on the iPhone.

Image Credit: Sophia Stark

Filed Under: Apple, Apple iPhone, Guides


Latest timeswonderful Deals

Disclosure: Some of our articles include affiliate links. If you buy something through one of these links, timeswonderful may earn an affiliate commission. Learn about our Disclosure Policy.