Categories
News

How to create an AI influencer to promote your brand

How to build an AI influencer using Fooocus

If one of your new your resolutions is to build your very own AI influencer,  you will be pleased to know that it is much easier than you might think. Remember not all AI influencers need to just attract followers they can also promote your brand or products if done correctly.  Enabling you to create a portfolio of models that you can use again and again for your marketing material without the additional costs of using photographic studios, on location photography or costly models from an agency. This method also puts you in full control over the influencer allowing you to manage costs and use them in any promotion you can imagine without the need to renegotiate fees.

The key to creating and AI influencer is the ability to generate large quantities of AI images using a consistent face throughout. So the first thing you need to do is generate a portrait of the face of your new AI influencer. This first stage can be done using a variety variety of different AI image generators depending on your preference whether it be OpenAI’s DallE 3, Midjourney, Stable Diffusion or others.

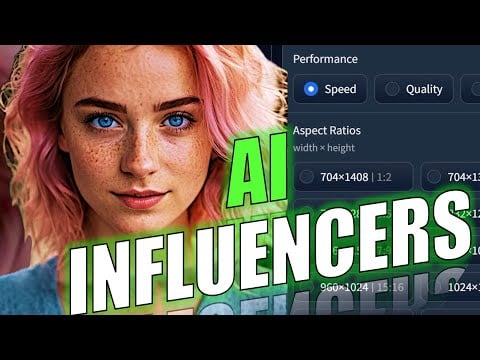
In the fast-paced world of digital marketing and online branding, creating a unique and recognizable virtual persona is a great way to promote your products, brand or simply attract followers. With the advent of artificial intelligence, the ability to craft AI influencers with consistent facial features has become a reality, and one of the tools at the forefront of this innovation is Fooocus. This software is designed to help users generate and refine virtual models that can represent brands or ideas in the digital space.

Before diving into the world of AI influencers, it’s important to ensure that your computer meets the necessary specifications to run Fooocus effectively. The software requires a system with at least 8 GB of RAM, an Nvidia graphics card with a minimum of 4 GB of video memory, 33 GB of free disk space, and the Pinocchio software installed. These prerequisites are crucial for the smooth operation of Fooocus and the creation of high-quality images.

How to make your own AI influencer

Once you’ve installed Fooocus and met the system requirements, the next step is to familiarize yourself with its user interface. The interface serves as the central point for all your creative endeavors, allowing you to select a base image that will define the consistent look of your AI influencer. This base image is vital as it ensures that your virtual model maintains the same facial features across various expressions and settings, which is key to building a strong and recognizable brand identity.

Here are some other articles you may find of interest on the subject of using Fooocus :

As you work with Fooocus, you may encounter images that don’t quite meet your standards. Fortunately, the software includes image correction tools that allow you to fine-tune your AI influencer’s appearance, ensuring a polished and professional look. These tools are intuitive and user-friendly, making it easy to achieve the desired results without extensive technical knowledge.

For those who wish to delve deeper into customization, Fooocus offers a range of advanced features. These include adjustable resolution settings, the ability to use negative prompts to avoid certain traits, and tabs dedicated to style and model adjustments. One of the standout features is the image prompt function, which lets you blend elements from different images to perfect your model’s look. This level of control allows you to create a virtual model that truly stands out and captures the essence of your brand.

Fooocus detailed adjustments

In addition to these customization options, Fooocus provides specific settings for detailed adjustments. These settings include the stop at value, weight, performance presets, style presets, guidance scale, sharpness, and aspect ratio or resolution. By tweaking these parameters, you can optimize both the performance and aesthetic appeal of your AI influencer, ensuring that the images you produce are of the highest quality.

High-resolution images are a must in today’s digital landscape, where clarity and detail can make a significant impact. Fooocus’s image upscaling feature is invaluable for those who need to enlarge their images for use across different platforms without sacrificing quality. This ensures that your AI influencer looks sharp and professional, whether on a mobile screen or a billboard.

Another advantage of using Fooocus is the ability to generate a variety of images for your virtual model. This functionality allows you to showcase your AI influencer in different contexts, such as various scenarios or clothing options. Having a diverse portfolio of images is beneficial for maintaining audience interest and adapting to different marketing campaigns or social media platforms.

Things to consider when designing an AI influencer

Designing a digital persona, especially for brand promotion or social media influence, involves several key areas. These areas encompass both technical and creative aspects, ensuring the persona is both engaging and consistent. Here’s a breakdown of the crucial elements to consider when creating your AI influencer.

  • Conceptualization and Brand Alignment:
    • Core Characteristics: Identify key traits like charisma, intellect, humor, or empathy. These should mirror the attributes your brand wishes to project.
    • Brand Message Synchronization: Ensure the persona’s characteristics and narrative align with your brand’s messaging, mission, and values.
    • Foundation for Interaction: This initial step dictates how the persona will engage with the audience, reflecting your brand’s approach to customer interaction.
  • Identity Creation:
    • Backstory Development: Craft a compelling and relatable backstory for the AI influencer, giving them depth and making them more engaging.
    • Personality Traits: Choose traits that appeal to your target audience, such as being adventurous for a travel brand or knowledgeable for a tech brand.
    • Interests and Values: Align these with those of your target demographic to foster a deeper connection.
  • Voice and Communication Style:
    • Language Style: Decide on formal, casual, or a mix of tones, depending on your audience and brand voice.
    • Consistent Tone: Maintain a consistent tone across all communications to establish a recognizable voice.
    • Content Type: Determine the mix of educational, entertaining, promotional, and interactive content.
  • Visual Design:
    • Facial Features and Expressions: Design features that are appealing and convey the AI’s personality.
    • Hairstyle and Color: Choose styles that resonate with current trends while maintaining a unique identity.
    • Fashion Style and Clothing: Reflect the latest fashion trends or brand-specific attire.
    • Makeup and Accessories: Use these elements to enhance the persona’s visual appeal and connect with trends.
  • Photographic Style and Portfolio Development:
    • Consistent Photographic Style: Establish a signature style for photos, including angles, filters, and themes.
    • Lighting and Color Schemes: Use these elements to set a mood that complements the AI’s character.
    • Diverse Portfolio: Create a range of images that showcase different aspects of the persona’s lifestyle and interests.
  • Personality and Voice Consistency:
    • Communication Style: Ensure the AI’s way of interacting remains consistent across different platforms.
    • Content Consistency: Align the content with the AI’s established personality and voice.
  • Engagement Strategy:
    • Content Planning: Develop a content calendar that includes various types of posts, from promotional to personal stories.
    • Interaction Methods: Use comments, direct messages, and other engagement tools to interact with followers.
    • Posting Frequency: Determine an optimal posting schedule to maintain presence without overwhelming followers.
  • Ethical Considerations:
    • Transparency: Clearly disclose the AI’s nature to maintain trust and authenticity.
    • Addressing Ethical Concerns: Tackle issues related to representation, authenticity, and societal impact.
  • Analytics and Adaptation:
    • Engagement Analysis: Regularly review engagement metrics to gauge the effectiveness of content and strategy.
    • Strategy Adaptation: Use insights from analytics to refine the AI influencer’s approach and content.
  • Long-Term Evolution:
    • Updating Visuals and Personality: Keep the persona fresh and relevant by evolving with trends and audience preferences.
    • Expanding to Different Markets: Consider creating multiple AI influencers, each tailored to different segments of your market, to broaden reach and appeal.

It’s important to acknowledge the contributions of the open-source AI community, whose collective efforts have provided the tools and methodologies that make software like Fooocus possible. Their dedication to advancing AI technology has paved the way for innovative tools that are reshaping the way we approach digital content creation.

Fooocus is a powerful tool for anyone interested in creating AI influencers with uniform facial features. By utilizing this software, you can master the user interface, customize settings to fit your specific needs, and produce standout images that will captivate your audience. Whether you’re involved in marketing, the arts, or simply have a passion for technology, Fooocus opens the door to new possibilities in digital expression, allowing you to bring your virtual visions to life with precision and flair.

Filed Under: Guides, Top News


Latest timeswonderful Deals

Disclosure: Some of our articles include affiliate links. If you buy something through one of these links, timeswonderful may earn an affiliate commission. Learn about our Disclosure Policy.

Categories
News

Create consistent characters for storybooks using ChatGPT DallE 3

how to use DallE 3 to create consistent characters

If you are interested in generating storybooks with images that contain consistent characters. You may be interested to know that you can easily create a custom GPT using ChatGPT and DallE 3 AI image generator to help you create storybook images that are consistent throughout. In the realm of storytelling, the characters you create are the heart and soul of your narrative. They must be vivid, memorable, and maintain a consistent presence from start to finish.

By harnessing the power of artificial intelligence (AI), storytellers now have access to powerful tools that can transform written character descriptions into striking visual representations. AI tools like ChatGPT, when used in tandem with image generators such as DALL-E, can bring your characters to life in a way that was once only possible for skilled illustrators.

To embark on this creative endeavor, you must first craft detailed character descriptions. These should not only cover the physical aspects of your characters but also delve into their personalities and backstories. The more precise and rich your descriptions are, the better the AI can visualize and create accurate depictions of your characters.

create story books with consistent characters using DallE 3

Once you have your character descriptions, the next step is to choose an art style that fits the mood and setting of your story. This could range from the dynamic strokes of a graphic novel to the gentle shades of a pastel painting. Your chosen style will guide the AI in producing images that are in harmony with the overall tone of your work.

Clear and direct communication with the AI is crucial. By providing concise and clear prompts, you reduce the risk of misinterpretation and increase the likelihood that the AI will generate images that match your vision. Think of these prompts as a map that directs the AI through the creative landscape of your story.

Using DallE 3 and ChatGPT to create consistent characters for your storybooks

Check out the amazing tutorial below to learn more about how to create consistent characters using ChatGPT and DallE 3 OpenAI’s AI image generator. Learn how to create a custom GPT to enable you to create multiple storybooks with consistent characters throughout each page and illustration.

Here are some other articles you may find of interest on the subject of consistent character creation :

To further refine the AI’s output, allowing it to access the internet for additional context and to understand programming code can be advantageous. This expanded knowledge base equips the AI with the ability to create more detailed and nuanced illustrations.

However, even with advanced AI, there will be times when the images produced don’t quite hit the mark. This is where your skills in troubleshooting and adjusting come into play. Identifying and correcting errors early on is essential to keeping your character portrayals accurate and consistent.

Sometimes, the AI-generated illustrations will need a human touch to reach perfection. Using an external editing tool can help you make those final adjustments, ensuring that the images align perfectly with your creative vision.

Setting up the AI involves a few key steps: defining character traits, selecting an art style, and providing explicit instructions. Including reference images can be incredibly helpful, as they give the AI a concrete visual standard to aim for.

As AI technology continues to advance, it’s important to regularly review and update the instructions you’ve given to align with your evolving storytelling needs.

The last stage in the process is post-generation image correction. This is your opportunity to add a personal touch to the illustrations, making sure each one is not only consistent but also captures your unique artistic essence.

By combining thorough planning, artistic selection, and technological collaboration, you can forge a partnership between ChatGPT and DALL-E that effectively brings your characters off the page and into visual form. With capabilities like online search, code interpretation, and manual editing at your disposal, you can navigate any challenges that arise, ensuring that your visual storytelling is as engaging and cohesive as the story itself.

Image Credits : Mia Meow

Filed Under: Guides, Top News


Latest timeswonderful Deals

Disclosure: Some of our articles include affiliate links. If you buy something through one of these links, timeswonderful may earn an affiliate commission. Learn about our Disclosure Policy.

Categories
News

How to Create a Christmas Contact Poster & Memoji

Christmas Contact Poster

As the holiday season draws near, it’s the perfect time to add a festive touch to your iPhone. If you’re looking to personalize your device with a Christmas theme, you’ll be pleased to know that creating a Christmas Contact Poster and Memoji is a fun and simple task. Here’s a step-by-step guide that will have your phone reflecting the holiday spirit in no time. The video below from iDeviceHelp shows us how we can create a Christmas Contact Poster and Memoji on the iPhone.

  1. Access Your Contact Card: Begin by launching the phone application on your iPhone. Navigate to your contacts, and here, you’ll find your contact card. It’s the starting point of our festive journey.
  2. Edit or Create a Contact Poster: If you already have a contact poster, feel free to edit it. Otherwise, seize this opportunity to create a new one. This poster acts as a delightful greeting every time you access your contact information.
  3. Choosing and Editing Your Memoji: The real fun begins with the Memoji option. Whether you already have a Memoji you adore or you’re starting from scratch, this step is all about personalization. Select a Memoji face and prepare to give it a holiday twist.
  4. Customizing Headwear: Now, navigate to the headwear options. Scroll down to find the quintessential Santa Claus hat. Customize it in traditional red and white to embody the Santa theme. It’s these little touches that bring your Memoji to life.
  5. Finalizing the Poster: After decking out your Memoji in festive attire, select a layout for the contact poster. Customize the font and background color to your preference. A pro tip: a black background can really make your Memoji’s colors pop.
  6. Additional Customization: Don’t stop at the headwear. Extend the holiday spirit to your Memoji’s clothing. Opt for a red outfit to match the Santa hat, creating a cohesive and festive look.
  7. Switching Back Post-Holiday: Once the holiday season winds down, you can easily revert to your previous contact poster. This flexibility allows for seasonal changes while keeping your favorite settings intact.

Remember, the goal is to have fun and inject a bit of holiday cheer into your daily device use. This tutorial is designed to be straightforward, taking just about five minutes to complete. You’ll find that customizing your iPhone in this manner not only brings a smile to your face but can also be a great conversation starter.

Throughout this process, maintain an exploratory attitude. The iPhone offers a plethora of options to personalize your Memoji and contact poster. Experiment with different combinations to find the one that best represents your holiday spirit.

The festive season is a time for joy and creativity, and what better way to express that than through your personal devices? So, dive into this delightful task and let your iPhone mirror the cheerfulness of the season.

Source & Image Credit: iDeviceHelp

Filed Under: Apple, Apple iPhone


Latest timeswonderful Deals

Disclosure: Some of our articles include affiliate links. If you buy something through one of these links, timeswonderful may earn an affiliate commission. Learn about our Disclosure Policy.

Categories
News

How to Create Engineered Checklists in ChatGPT

Engineered Checklists

This guide is designed to show you how to create engineered checklists or todo lists with ChatGPT. In the fast-paced world we live in, managing daily tasks efficiently has become more crucial than ever. Whether you’re a CEO or a retired officer, streamlining your to-do lists can significantly impact your productivity. This is where ChatGPT, an innovative AI tool, steps in to transform how we handle our checklists. In a recent video titled “Leveraging ChatGPT for Efficient Checklist Creation,” the presenter, a busy individual like many of us, unveils the secrets to crafting engineered checklists using ChatGPT. Here’s a breakdown of what you’ll learn and how it can revolutionize your daily task management.

The Art of Efficient Checklist Creation

You’ll be pleased to know that ChatGPT can be your ally in creating effective checklists. Whether it’s for organizing your research, workouts, or personal commitments, ChatGPT offers a unique approach. The AI tool intelligently analyzes your tasks and suggests an optimized structure, ensuring you get the most out of your day.

A Tool for Everyone

If you are wondering how a tech tool fits into your lifestyle, ChatGPT caters to a diverse demographic. Its utility spans across different age groups and professions, making it a universal assistant for checklist creation.

Tailoring to Your Needs with Custom Instructions

One of the highlights of ChatGPT is its ‘Custom Instructions’ feature. This allows you to input your personal routines and preferences, aiding the AI in generating more personalized and efficient schedules and checklists. This feature is particularly helpful in ensuring that your lists reflect your unique needs and lifestyle.

Practical Demonstration of Task Organization

The video showcases a practical demonstration of how to upload a to-do list to ChatGPT. The AI then suggests how to organize these tasks based on efficiency, prioritizing important activities, batching similar tasks, and even incorporating breaks to enhance productivity.

Integrating Routine Tasks and Unique Events

ChatGPT also excels in incorporating routine tasks and unique weekly events. This ensures that when the AI generates a to-do list, it takes into account all aspects of your weekly schedule, making your list comprehensive and practical.

Maximizing Efficiency and Productivity

A key aspect of ChatGPT’s functionality is its ability to maximize efficiency and productivity. It considers various factors, such as your energy levels and the time of day, to suggest the optimal order for completing tasks, helping you make the most of your time.

Interactive User Experience

Interacting with ChatGPT is a breeze. The video demonstrates how users can upload images of handwritten lists and receive task completion suggestions and research assistance. This interactive feature makes ChatGPT not just a tool but a personal productivity partner.

Customization and Ease of Use

ChatGPT shines in its ease of customization. You can tailor its responses to fit your individual needs and routines, making it a versatile tool for enhancing personal productivity.

Summary

At the core of its functionality, ChatGPT presents a groundbreaking approach to managing daily tasks. This isn’t just about ticking off items on a list; it’s about strategically engineering your day for peak efficiency and productivity. With ChatGPT, you unlock the potential to transform ordinary checklists into dynamic, personalized plans that align with your goals, energy levels, and time constraints. The AI tool’s sophisticated algorithms take into account various factors that influence your daily routine, offering tailored suggestions that optimize how and when you tackle each task.

Imagine starting your day with a clear, focused roadmap designed specifically for you, where every task is positioned at the optimal time, ensuring you’re working at your best. This kind of structured approach goes beyond mere task management; it’s about mastering your time and energy in a way that enhances your overall productivity. Whether it’s managing complex professional projects or juggling personal commitments, ChatGPT’s engineered checklists provide a level of organization and efficiency that traditional methods simply cannot match.

By incorporating ChatGPT into your daily routine, you’re not just embracing a tool; you’re adopting a new mindset towards productivity. It’s an opportunity to step into a world where your time is valued and effectively utilized, where each day is an opportunity to achieve more with less stress. The transformation in your productivity and time management that ChatGPT offers is more than just an improvement; it’s a complete redefinition of how you approach your day-to-day life.

Embrace the capabilities of ChatGPT and witness a significant transformation in the way you manage your time and tasks. This innovative AI tool is more than a convenience; it’s a game-changer in the realm of personal productivity and efficiency.

Source AI Foundations

Filed Under: Guides


Latest timeswonderful Deals

Disclosure: Some of our articles include affiliate links. If you buy something through one of these links, timeswonderful may earn an affiliate commission. Learn about our Disclosure Policy.

Categories
News

How to write songs and create music videos using AI

How to write songs and create music videos using AI

The landscape of music and video production is undergoing a significant transformation, thanks to the integration of artificial intelligence (AI). Artists and creators now have the ability to harness AI to bring their imaginative concepts to life in ways that were once thought to be impossible. This shift is opening doors to personalized and innovative content creation, making it simpler for anyone to produce music, write songs and create videos that resonate with their unique style and vision.

At the forefront of this shift is Suno, an AI-powered platform that specializes in creating music compositions and vocals that align with your personal taste. By providing Suno with details about your preferred genre and theme, the tool generates a distinctive piece of music that mirrors your creative intent. This bespoke soundtrack becomes the foundation for your project, setting the tone for the entire production.

Once the music is in place, the next step is to craft a visual narrative for your music video. This is where Playground AI comes into play. It’s a versatile tool that produces images ranging from abstract to realistic, depending on your vision. These images form the basis of your music video’s storyline, ensuring that the visuals are in harmony with the audio.

Bringing these images to life is where animation comes in, and platforms like Pika Labs, RunwayML, and Kaiber offer the tools needed to animate still pictures. These platforms are designed to be user-friendly, allowing creators to add movement and depth to their music videos without needing extensive technical knowledge.

How to write songs using AI

Here are some other articles you may find of interest on the subject of :

Editing a video to perfection is a complex task. It involves syncing lip movements with lyrics and blending animations seamlessly. This precision is crucial for creating a music video that captivates the audience and provides a seamless viewing experience.

To further improve the quality of your video, you might consider using upscaling tools. These applications can take footage of lower quality and enhance it to a crisp, high-definition standard, giving your music video a polished and professional appearance.

The album cover serves as the visual introduction to your music, and AI now enables you to design eye-catching covers without needing to be a graphic design expert. AI-generated artwork can capture the mood and style of your music, providing an attractive visual for your audience.

make music videos with AI

Another innovative tool is vocal isolation software. This technology allows you to separate vocals from the background music, enabling you to add new harmonies or layers to your songs, thus enriching the overall sound. It is a free online application that provides you with two tracks after processing a karaoke version of your song (no vocals) and acapella version (isolated vocals). Processing usually takes about 10 seconds.

Exploring the various AI tools available for music video styles and effects can lead to unique and captivating results. AI offers a wide range of creative possibilities, from vintage to modern aesthetics, allowing you to find the perfect match for your music’s tone.

The role of AI in music and video production is expanding the horizons for creative expression. From write songs using AI and generating music with Suno to animating images and refining videos, the tools discussed here offer a comprehensive approach to creating AI-generated songs and music videos. As you explore the diverse styles and effects that AI has to offer, embrace your creativity and discover the ideal combination to fulfill your artistic vision.

Filed Under: Guides, Top News


Latest timeswonderful Deals

Disclosure: Some of our articles include affiliate links. If you buy something through one of these links, timeswonderful may earn an affiliate commission. Learn about our Disclosure Policy.

Categories
News

Combine Gemini Pro AI with LangChain to create a mini RAG sys

Combine Gemini Pro AI with LangChain to create a mini RAG system

In the rapidly evolving world of language processing, the integration of advanced tools like Gemini Pro with LangChain is a significant step forward for those looking to enhance their language model capabilities. This guide is crafted for individuals with a semi-technical background who are eager to explore the synergy between these two powerful platforms. With your Google AI studio API key at hand and recently made available by Google for its new Gemini AI.  We will explore a process that will take your language models to new heights.

LangChain is a robust and versatile toolkit for building advanced applications that leverage the capabilities of language models. It focuses on enhancing context awareness and reasoning abilities, backed by a suite of libraries, templates, and tools, making it a valuable resource for a wide array of applications.

LangChain represents a sophisticated framework aimed at developing applications powered by language models, with a strong emphasis on creating systems that are both context-aware and capable of reasoning. This functionality allows these applications to connect with various sources of context, such as prompt instructions, examples, and specific content. This connection enables the language model to ground its responses in the provided context, enhancing the relevance and accuracy of its output.

The framework is underpinned by several critical components. The LangChain Libraries, available in Python and JavaScript, form the core, offering interfaces and integrations for a multitude of components. These libraries facilitate the creation of chains and agents by providing a basic runtime for combining these elements. Moreover, they include out-of-the-box implementations that are ready for use in diverse applications.

Accompanying these libraries are the LangChain Templates, which constitute a collection of reference architectures. These templates are designed for easy deployment and cater to a broad spectrum of tasks, thereby offering developers a solid starting point for their specific application needs. Another integral part of the framework is LangServe, a library that enables the deployment of LangChain chains as a REST API. This feature allows for the creation of web services that enable other applications to interact with LangChain-based systems over the internet using standard web protocols.

The framework includes LangSmith, a comprehensive developer platform. LangSmith provides an array of tools for debugging, testing, evaluating, and monitoring chains built on any language model framework. Its design ensures seamless integration with LangChain, streamlining the development process for developers.

To kick things off, you’ll need to install the LangChain Google gen AI package. This is a straightforward task: simply download the package and follow the installation instructions carefully. Once installed, it’s crucial to configure your environment to integrate the Gemini Pro language model. Proper configuration ensures that LangChain and Gemini Pro work seamlessly together, setting the stage for a successful partnership.

After setting up Gemini Pro with LangChain, you can start to build basic chains. These are sequences of language tasks that Gemini Pro will execute in order. Additionally, you’ll be introduced to creating a mini Retrieval-Augmented Generation (RAG) system. This system enhances Gemini Pro’s output by incorporating relevant information from external sources, which significantly improves the intelligence of your language model.

Combining Gemini Pro and LangChain

The guide below by Sam Witteveen takes you through the development of Program-Aided Language (PAL) chains. These chains allow for more complex interactions and tasks. With Gemini Pro, you’ll learn how to construct these advanced PAL chains, which expand the possibilities of what you can accomplish with language processing.

Here are some other articles you may find of interest on the subject of working with Google’s latest Gemini AI model :

LangChain isn’t limited to text; it can handle multimodal inputs, such as images. This part of the guide will show you how to process these different types of inputs, thus widening the functionality of your language model through Gemini Pro’s versatile nature.

A critical aspect of using Google AI studio is the management of API keys. This guide will walk you through obtaining and setting up these keys. Having the correct access is essential to take full advantage of the features that Gemini Pro and LangChain have to offer.

Finally, the guide will demonstrate the practical applications of your integrated system. Whether you’re using Gemini Pro alone or in conjunction with other models in the Gemini series, the applications are vast. Your LangChain projects, ranging from language translation to content creation, will benefit greatly from the advanced capabilities of Gemini Pro.

By following this guide and tutorial kindly created by Sam Witteveen , you will have a robust system that leverages the strengths of Gemini Pro within LangChain. You’ll be equipped to develop basic chains, mini RAG systems, PAL chains, and manage multimodal inputs. With all the necessary packages and API keys in place, you’re set to undertake sophisticated language processing projects. The details and code jump over to the official GitHub repository.

Filed Under: Guides, Top News


Latest timeswonderful Deals

Disclosure: Some of our articles include affiliate links. If you buy something through one of these links, timeswonderful may earn an affiliate commission. Learn about our Disclosure Policy.

Categories
News

How to Create Realistic Images with ChatGPT

Realistic Images with ChatGPT

Creating realistic images with ChatGPT, which is significantly augmented by its integration with the advanced DALL-E image generation AI, represents a state-of-the-art endeavor in the realm of artificial intelligence. This unique collaboration between two sophisticated AI systems allows for the seamless fusion of advanced text generation and intricate image creation capabilities. By harnessing the power of ChatGPT’s nuanced language understanding and DALL-E’s remarkable ability to convert textual descriptions into visually stunning images, users can explore a new frontier in digital creativity.

This in-depth guide aims to provide a detailed roadmap for effectively navigating this innovative process. It delves into the intricacies of both systems, offering insights and strategies to leverage their combined strengths, thereby enabling users to craft images that are not only realistic but also artistically compelling and rich in detail. Whether you’re a seasoned artist, a graphic designer, or simply someone fascinated by the potential of AI in creative endeavors, this guide is tailored to help you make the most of these groundbreaking technologies.

Understanding the Technology

ChatGPT: The Language Model

  • Role: Primarily functions as a text-based model, excelling in understanding and producing natural language.
  • Interaction: Serves as your interface for providing instructions and receiving feedback.

DALL-E: The Image Generation Model

  • Capability: An AI system by OpenAI, DALL-E can generate detailed images from text descriptions.
  • Strengths: Notable for its ability to create diverse, imaginative, and intricate visuals based on descriptive prompts.

Integration of ChatGPT and DALL-E

  • Synergy: ChatGPT uses DALL-E to transform your text prompts into vivid images.
  • Workflow: You communicate with ChatGPT, which then relays your vision to DALL-E.

Crafting Effective Prompts

Descriptive Language

  • Detail-Oriented: The richness of your description significantly influences the final image. Include details about color schemes, emotional tones, environmental settings, object specifics, and perspectives.
  • Examples: Instead of “a dog,” say “a golden retriever with a red collar sitting on a sunny beach.”

Clarity and Precision

  • Avoid Ambiguity: Clear and concise prompts yield the best results. Ambiguity can lead to unexpected interpretations.
  • Be Specific: For example, “a bustling New York street in the 1920s, with vintage cars and pedestrians in period attire” is more effective than “an old city scene.”

Stylistic Elements

  • Artistic Styles: You can describe the desired artistic style, such as impressionist, surreal, or photorealistic, keeping in mind the prohibition on referencing contemporary artists.
  • Mood and Atmosphere: Words that convey mood, like “serene,” “chaotic,” or “melancholic,” can shape the emotional tone of the image.

Utilizing the DALL-E Tool

Direct Instructions

  • Command Structure: Clearly state your request, such as “Use DALL-E to create an image of…
  • Aspect Ratio: Specify if you prefer a non-standard aspect ratio (e.g., widescreen).

Revisions and Refinement

Iterative Process

  • Feedback and Adjustments: Providing specific feedback on initial results allows for refinement. Indicate what aspects to keep and what to modify.
  • Patience is Key: Achieving the perfect image might require several iterations.

Ethical Considerations and Limitations

Content Guidelines

  • Ethical Boundaries: DALL-E is programmed to comply with ethical guidelines and avoid generating inappropriate or sensitive content.
  • Creative Responsibility: Be mindful of the ethical implications of your prompts, especially regarding sensitive themes.

Technological Limitations

  • Current Constraints: Understand that there are certain things DALL-E can’t do, like creating exact likenesses of real people or infringing on copyrights.
  • Evolving Capabilities: Stay informed about updates and improvements to the technology.

Practical Applications

Creative and Professional Use Cases

  • Creative Projects: Ideal for art creation, storyboarding, concept art, and more.
  • Educational Purposes: Enhances teaching materials, presentations, and learning experiences.
  • Professional Enhancements: Useful in marketing, graphic design, content creation, and other professional domains.

Examples and Tips

Effective Prompt Construction

  • Good Example: “Create an image of an ancient library with towering bookshelves, dimly lit by candlelight, with a large, globe in the center.”
  • Needs Improvement: “An old library.”

Final Considerations

  • Stay Informed: As AI technology progresses, the capabilities and guidelines of tools like ChatGPT and DALL-E will evolve.
  • Explore and Experiment: Don’t hesitate to experiment with different styles, themes, and descriptions to fully explore the creative potential of these tools.

Summary

By meticulously following these guidelines and embracing the creative potential of AI, you can master the art of generating realistic and compelling images using ChatGPT and DALL-E. This process is more than just a skill acquisition; it’s an exploration into the boundless realm of imagination, enabled by cutting-edge technology. As you become adept at navigating the nuances of these AI tools, you’ll find that your creative arsenal is significantly enriched, allowing for the creation of artwork that transcends traditional boundaries. Moreover, this process of learning and creation isn’t just about personal or professional growth. It also provides a fascinating preview into the evolving landscape of digital art and design, where the fusion of human creativity and artificial intelligence is beginning to redefine what’s possible. Engaging with ChatGPT and DALL-E in this way isn’t just about producing images; it’s about being at the forefront of a digital revolution, witnessing and contributing to the emergence of new forms of artistic expression that will shape the future of the creative world.

Categories
News

How to Create a New Apple ID for Your iPhone or iPad

create apple ID

Creating an Apple ID is an essential step for new users of Apple devices, including iPhones and iPads. This ID serves as a unique identifier, seamlessly linking all your Apple devices and services. It’s not just about gaining access to basic features like the App Store, iCloud, iMessage, and FaceTime; an Apple ID also unlocks a world of possibilities within the Apple ecosystem. With this ID, you can download and install apps from the App Store, expanding the functionality of your device.

Additionally, it enables you to rent movies from iTunes, offering a wide range of entertainment options at your fingertips. Importantly, an Apple ID is crucial for utilizing iCloud services, which provide secure and convenient storage for your data, photos, and backups, ensuring that your important information is accessible and protected across all your devices. Thus, setting up an Apple ID is a fundamental step in integrating into the Apple ecosystem and making the most out of your new device.

Prerequisites

Before you begin creating your Apple ID, ensure you have the following items ready:

  • An internet connection: You’ll need an internet connection to create your Apple ID and access Apple services. Make sure you’re connected to a stable Wi-Fi network or have a strong mobile data connection.
  • A valid email address: You’ll need a valid email address to create your Apple ID. Choose an email address that you’ll use regularly and can access easily.
  • A strong password: A strong password is essential for protecting your Apple ID and the data associated with it. Choose a password that is at least 8 characters long and includes a mix of uppercase and lowercase letters, numbers, and special symbols.
  • Payment information (optional): If you plan to purchase apps or content from the App Store, you’ll need to enter your payment information. This can include your credit card number, debit card number, or PayPal account information.

Creating an Apple ID Using Your iPhone or iPad

There are two primary methods to create an Apple ID using your iPhone or iPad: through the App Store or through the Settings app.

Option 1: Through the App Store

  • Launch the App Store on your iPhone or iPad.
  • Tap on your profile icon in the top right corner of the screen.
  • Scroll down and tap on the “Create New Apple ID” option.
  • Follow the on-screen instructions to enter your personal information, including your email address, password, name, and payment details (if applicable).
  • Verify your email address by clicking on the link sent to your inbox.
  • Complete the rest of the setup process, including accepting the terms and conditions.

Option 2: Through the Settings App

  • Open the Settings app on your iPhone or iPad.
  • Tap on your name or profile picture.
  • Scroll down and tap on the “iCloud” tab.
  • Tap on the “Create New Apple ID” option.
  • Follow the on-screen instructions to enter your personal information, including your email address, password, name, and payment details (if applicable).
  • Verify your email address by clicking on the link sent to your inbox.
  • Complete the rest of the setup process, including accepting the terms and conditions.

Important Considerations

When creating your Apple ID, it’s important to follow these key guidelines to ensure your account’s security and protect your personal information:

  • Choose a strong password: Avoid using easily guessable passwords or those associated with your personal information. A strong password should be at least 8 characters long and include a combination of uppercase and lowercase letters, numbers, and symbols.
  • Secure your email address: Use a secure and private email address for your Apple ID. Avoid using personal or work email addresses that may be compromised.
  • Protect your Apple ID credentials: Keep your Apple ID password confidential and don’t share it with anyone. Enable two-factor authentication to add an extra layer of security to your account.
  • Beware of scams: Be cautious of phishing emails or websites that attempt to collect your Apple ID credentials. Never provide your password or personal information to unsolicited requests.

Additional Tips

To further safeguard your Apple ID and the data associated with it, consider these additional tips:

  • Manage your Apple ID: Regularly check your Apple ID settings and ensure that payment information, security options, and family sharing settings are accurate and up-to-date.
  • Enable Find My iPhone or iPad: This feature allows you to locate and remotely erase your device if it’s lost or stolen.
  • Keep your device software up to date: Apple regularly releases software updates to address security vulnerabilities and enhance device performance.

Summary

An Apple ID serves as the gateway to a world of possibilities on your iPhone or iPad. It’s the single identifier that connects you to Apple’s vast ecosystem of services and features, allowing you to browse and download apps from the App Store, store your photos, music, and documents in iCloud, and enjoy seamless connectivity with other Apple devices.

By following the steps outlined in this guide, you can effortlessly create and manage your Apple ID, ensuring that you fully embrace the benefits of this versatile digital tool. Remember, security is paramount when it comes to your Apple ID, so always prioritize safeguarding your information to maintain the integrity of your account. You can find out more details about creating your Apple ID for a new iPhone or iPad over at Apple’s website.

Image Credit: David Švihovec

Filed Under: Apple, Apple iPad, Apple iPhone, Guides


Latest timeswonderful Deals

Disclosure: Some of our articles include affiliate links. If you buy something through one of these links, timeswonderful may earn an affiliate commission. Learn about our Disclosure Policy.

Categories
News

Create amazing “Make It More” images with DallE 3 & Midjourney

Create amazing Make It More images combing DallE 3 and Midjourney

The emergence of a new trend that’s captivating the internet known as “Make it More”. Where the boundaries of AI image generation are pushed to create visuals that are as absurd as they are entertaining. It’s a digital playground where the mundane becomes extraordinary, and the results are as unpredictable as they are delightful.

Imagine taking a simple image—a cat, for instance—and asking an AI to enhance its features. But the fun doesn’t stop there. With each subsequent request, the AI takes the cat’s cuteness to new, almost unbelievable levels. This is made possible by the AI’s advanced understanding of context, where it remembers your previous prompts and knows that you’re seeking an increasingly adorable cat. This contextual memory is the key to creating a series of images that become progressively more whimsical.

Make It More images made easy

learn how to combine the powers of both OpenAI’s DallE 3 and Midjourney AI art generator is to create some amazing Make It More images. Transforming mundane everyday images or objects into something amazing.

The excitement grows as you use more imaginative adjectives to challenge the AI. You might say, “make it the cutest cat in the cosmos,” and the AI will respond with images that are as humorous as they are imaginative, perhaps showing a cat with eyes that sparkle like stars or fur that seems to be made of clouds.

Another AI tool, MidJourney, adds a new layer to this creative process. It allows users to take the initial image and explore various outrageous possibilities. This feature encourages users to steer the AI’s output into even more creative realms, resulting in a diverse array of fantastical images.

The “Make It More” trend has found a natural home on social media, where these AI-generated images are shared and celebrated. It’s a space where users compete to showcase their creativity and humor, leveraging the AI’s capabilities to produce images that are as shareable as they are surprising. This isn’t just a display of AI’s potential; it’s a celebration of human ingenuity in coming up with the prompts that guide the AI.

At its core, the “Make It More” trend is a playful exploration of AI’s creative potential. By using comparative adjectives and understanding the AI’s grasp of conversational context, users can generate a whimsical variety of images that push the limits of the imagination. Whether you’re using ChatGPT DallE 3, MidJourney, or another AI platform, the possibilities are limited only by your own creativity. This is an invitation to share your most imaginative and outlandish AI-generated images and to discover just how far you can stretch a simple concept.

Here are some other articles you may find of interest on the subject of Midjourney styles and creating amazing artwork using DallE 3 and other AI generators

Filed Under: Guides, Top News


Latest timeswonderful Deals

Disclosure: Some of our articles include affiliate links. If you buy something through one of these links, timeswonderful may earn an affiliate commission. Learn about our Disclosure Policy.

Categories
News

How to Create an Awesome iPhone Setup (Video)

ultimate iPhone setup

We previously showed you a video of the ultimate iPhone setup and now we have another video that is basically a guide on how you can create another awesome iPhone setup for your home screen with iOS 17.

In the fast-paced world of technology, your iPhone is more than just a device; it’s a crucial part of your daily life. Understanding how to maximize its utility, especially with the iPhone 15 Pro and iOS 17, can transform your user experience from ordinary to extraordinary. Let’s dive into how you can create an optimized home screen setup that not only saves time but also reduces stress and enhances your interaction with your favorite apps and tools. The video below from ThisisE is designed to show us how we can create an awesome iPhone setup with iOS 17.

A Gateway to Efficiency: The Ultimate Home Screen Setup

Imagine having all your essential tools and apps on one homepage. This is not just about decluttering your screen; it’s about enhancing functionality for both smaller and larger iPhone models. Whether you’re navigating your phone with one hand while on the move, or simply seeking faster access to your apps and notifications, this setup is your gateway to efficiency.

Tools for Transformation

At the heart of this setup are widgets and stacks of widgets. These aren’t just any widgets, but custom creations using apps like Widgetsmith and bespoke shortcuts via the Shortcuts app. The beauty of this setup? It’s compatible with most iPhones, especially those running the latest iOS 17.

1. Widget Page: Your Personal Dashboard

Your widget page is like your personal dashboard, featuring:

  • A stats stack displaying activities, battery life, and sleep data.
  • A calendar stack to keep your schedule at your fingertips.
  • Email and to-do widgets for staying on top of tasks.
  • A listening section to seamlessly switch between music and podcasts.

2. Home Page: Simplified and Streamlined

Transform your home page into a hub of productivity with:

  • A large Widgetsmith widget for quick information.
  • A handy calculator widget for those quick calculations.
  • A stack of Notion page widgets, perfect for organizing your notes and projects.
  • A folder containing your most-used apps, right where you need them.

3. Control Center: Tailored to Your Needs

Customize your control center to include:

  • Easy switching between light and dark modes.
  • Screen recording for capturing important moments.
  • Shazam for identifying music on the go.

Creating Shortcuts: A Click Away

Efficiency is key, and creating shortcuts for quick access to frequently used folders and documents is a game-changer. Integrate these shortcuts into your Widgetsmith widget for even faster access.

Customization at Its Best

Why settle for the default when you can personalize it? Customize your widgets to match your iPhone’s aesthetic, play with styles and colors, and make your screen truly yours.

Adapting to Different Models

Not all iPhones are created equal. For those without an action button, utilize the back tap feature in the accessibility settings to trigger shortcuts.

Enhance with Accessories

Briefly, it’s worth mentioning the use of NFC tags and accessories like a car charger and mount to further enhance your iPhone experience.

Guiding You Through

If you’re wondering how to put all these pieces together, don’t worry. You will be pleased to know that it’s simpler than it sounds. With a bit of customization and some tweaks to your settings, you can create an iPhone setup that works seamlessly for you.

Remember, your iPhone is a powerful tool, and with the right setup, you can unlock its full potential. So, start experimenting with these tips and tailor your iPhone to suit your lifestyle perfectly.

Source & Image Credit: ThisisE

Filed Under: Apple, Apple iPad, Guides


Latest timeswonderful Deals

Disclosure: Some of our articles include affiliate links. If you buy something through one of these links, timeswonderful may earn an affiliate commission. Learn about our Disclosure Policy.