This Halloween, take your costume to the next level with MYEYEBB’s colored contacts. Our comprehensive guide walks you through how these transformative accessories can complete various looks—from fantastical creatures to pop culture icons. With tutorials and creative DIY ideas, we encourage you to let your imagination run wild and make this Halloween unforgettable. Get your MYEYEBB colored contacts now and truly transform!
I. Introduction
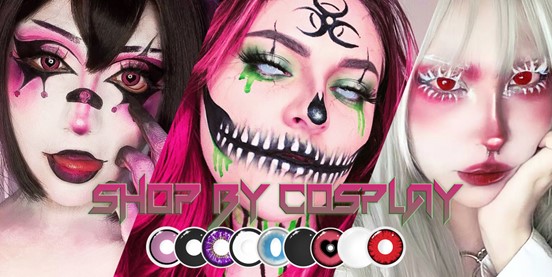
Ah, Halloween—a mystical night filled with ghouls, goblins, and glam! But wait, there’s a new player in the game that’s turning heads and capturing the Instagram limelight. That’s right; we’re talking about colored contacts for Halloween. These little gems can transform not only your vision, but your overall look as well. This blog is your one-stop guide to unlocking the immense potential of colored contacts for Halloween. From tutorials to creative ideas, MYEYEBB has got you covered.
What’s the secret sauce that can elevate your Halloween makeup from ‘meh’ to ‘mesmerizing’? Colored contacts for Halloween, without a doubt. When you slip these into your eyes, you’re not just changing your eye color; you’re stepping into a new persona. Eye color can dramatically influence how a character is perceived. From icy blues to fiery reds, the impact is undeniable. So, let’s delve into some tutorials, shall we?
III. Tutorial 1: Enchanting Fantasy Creature
Ever dreamed of being a mermaid or a fairy for Halloween? Turn that fantasy into reality with this tutorial. Start with a dewy foundation to mimic the ethereal glow of these magical beings. Choose eyeshadows that resonate with your character—think oceanic hues for mermaids and soft pastels for fairies. The game-changer? MYEYEBB’s colored contacts for Halloween. Slipping these on elevates your look from basic to breathtaking, making your eyes the show-stopping feature of your fantastical transformation.
Once your colored contacts for Halloween are in, use a combination of matte and shimmer eyeshadows to create depth. Highlight the inner corners of your eyes and the brow bone for that extra dash of magic. The contacts not only complete but also elevate your look, taking your Halloween makeup from ordinary to extraordinary.
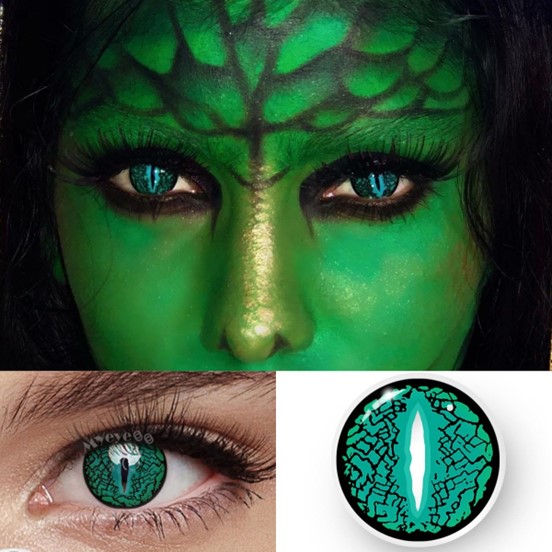
IV. Tutorial 2: Fierce Animal-Inspired Makeup
Detailed Instructions
Foundation:
Begin with a foundation that matches your skin tone to maintain the natural essence of the animal you’re emulating. This will serve as your canvas, ensuring that the rest of your makeup blends seamlessly.
Animal Stripes:
Unleash your inner beast with some bold animal stripes or spots. Use a black eyeliner pencil to sketch out the patterns on your face. Whether you’re going for tiger stripes or leopard spots, make sure they’re evenly spaced and symmetrical for the most authentic look.
Faux Fur:
Give your look some texture by applying a light layer of mascara. Focus on the eyelashes, but you can also lightly brush some on your eyebrows to mimic the texture of animal fur. This will add depth and dimension to your fierce, animal-inspired makeup.
Animal Authenticity
To truly embody your chosen creature, consider adding a pair of colored contacts for Halloween. These will mimic the animal’s eye color, taking your look from simply a costume to a living, breathing embodiment of the wild. With your striking makeup and eye-catching lenses, you’re not just a person in a costume—you’re a fierce predator or a graceful prey, ready to roam the Halloween night!
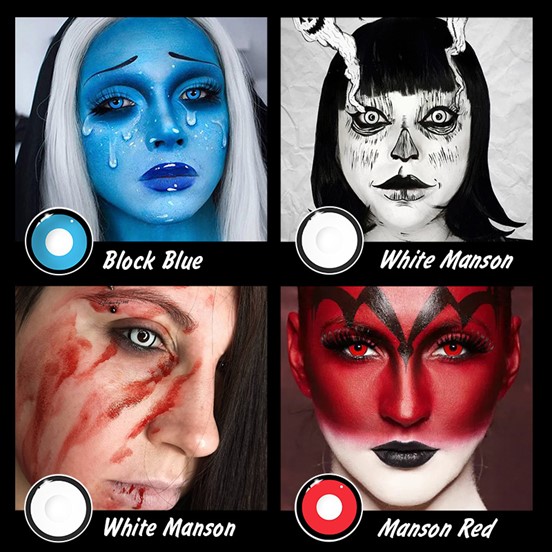
V. Tutorial 3: Terrifying Zombie or Undead Character
Step-by-step Guide
Begin your transformation into the undead by first applying a pale, almost grey, foundation to create a lifeless base. Next, use dark eyeshadows to create hollowed-out eyes and contour the face for a sunken appearance. Adding red and purple tones around the eyes and mouth will give a bruised and decayed look. The final touch to truly bring your zombie character to life (or death) is a pair of white or red colored contacts for Halloween. This will give your eyes a haunting, empty appearance that will chill anyone to the bone.
Frightening Effects
To complement your creepy contacts, use matte black eyeshadow to deepen the hollows of your eyes and cheeks. Apply a dark red or black lipstick, then smudge it slightly for a messy, just-ate-a-brain look. Finish off by adding fake blood and dark veins to your face and neck. This will create a truly terrifying effect that pairs perfectly with your haunting Halloween contacts.
VI. Tutorial 4: Mythical Being or Monster
Halloween is the perfect time to transform yourself into a mythical creature like a vampire or demon. A key element to completing your transformation is using colored contacts for Halloween. These special contacts will not only change the color of your eyes but can also give you a supernatural appearance that contributes to your character’s identity. Whether you want to have the hypnotic eyes of a vampire or the fiery gaze of a demon, colored contacts will enhance your overall look and make your Halloween costume
VII. Tutorial 5: Pop Culture Icon or Horror Movie Character
Recreating the signature look of a pop culture or horror movie character can be a fun and creative way to show your appreciation for your favorite characters. One crucial element that is often overlooked is the eye color. Accurate eye color is essential for a faithful portrayal of the character. For example, using colored contacts for Halloween can make a big difference in your costume’s authenticity. Whether you are dressing up as a famous pop icon or a terrifying horror movie character, don’t forget to pay attention to the small details like eye color to make your transformation complete.
VIII. Creative DIY Ideas: Beyond the Tutorials
Thinking outside the box this Halloween? Colored contacts aren’t just for recreating specific characters; they can be the creative spark for an entirely unique costume idea. Imagine the arresting visual of neon-green eyes paired with galaxy-inspired makeup, or deep red eyes to complement a steampunk ensemble. Colored contacts for Halloween offer endless possibilities for individual expression.
Don’t be afraid to push the boundaries and combine colored contacts with unconventional makeup styles for unique effects. Consider mixing genres; how about anime eyes with a vintage ’20s look? The sky’s the limit, and the only rule is to let your imagination run wild. Whether you’re a makeup guru or a beginner, colored contacts can elevate your Halloween game to a whole new level.
IX. Conclusion
To wrap it up, colored contacts for Halloween aren’t just accessories; they’re essential elements that breathe life into your character. So, this Halloween, don’t just dress up—transform. MYEYEBB encourages you to explore your creative boundaries and make this Halloween unforgettable.
So, what are you waiting for? Get your MYEYEBB colored contacts for Halloween and let your imagination run wild!