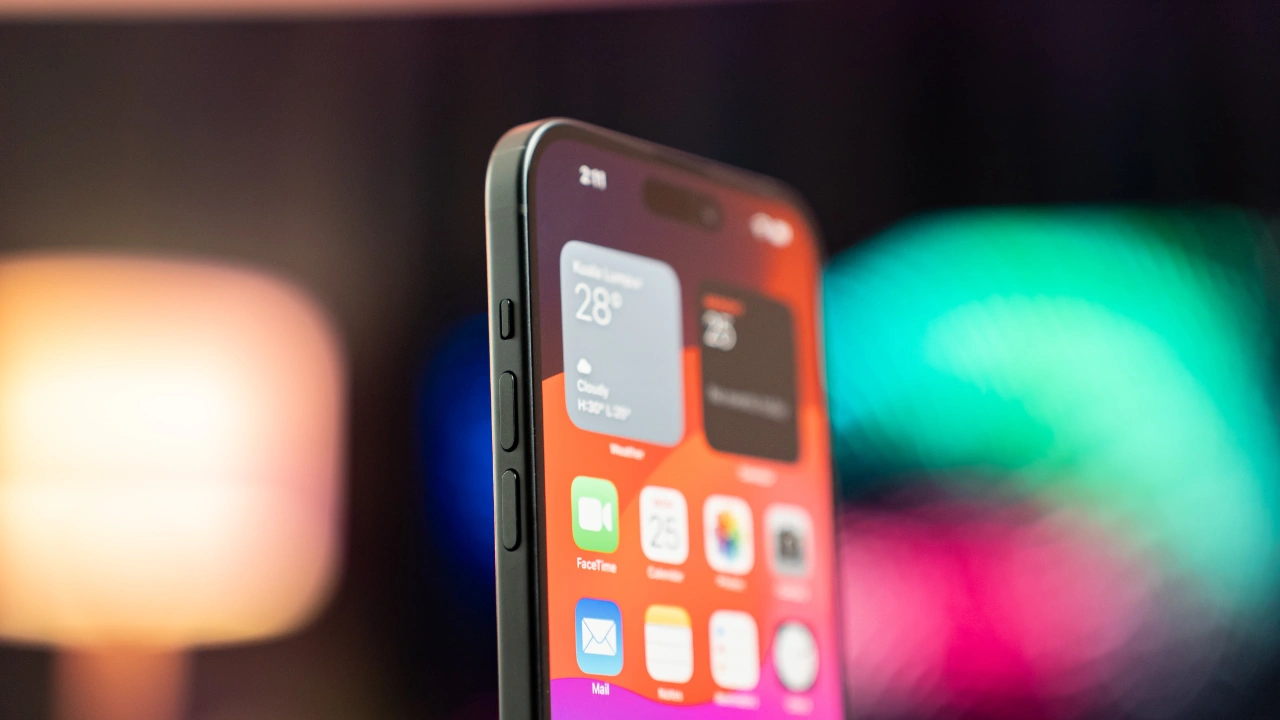
When you go to share something on your iPhone, iOS tries to be helpful by displaying a row of suggested contacts at the top of the Share menu. Keep reading to learn how to get rid of them.
Whenever you go to share something on your iPhone or iPad using the Share button, iOS brings up a Share menu – often called the Share Sheet – at the top of which is a row of suggested contacts with whom you’ve interacted recently. Swiping along this row reveals more contacts, and the icon in the corner of each profile picture indicates the app that you often use to communicate with that person.
These suggested contacts are useful if you share a lot of things with the same people, but there may be times when you’d prefer not to see specific contacts there, for example if someone is a duplicate suggestion over multiple apps, or if you don’t want to draw attention to your regular comms with a certain someone. Whatever the reason, you can actually steer these sharing suggestions to appear less often, or not at all. Here’s how.
Make Contacts Appear Less Often in the Share Menu
Tap the Share button (the box with an arrow pointing out) in any app to bring up the Share Sheet.
Long press on the suggested contact that you want to see less often in the Share menu.
Tap Suggest Less in the popover menu.
Bear in mind, doing this won’t guarantee that the contact doesn’t appear in the Share Sheet again in future, but if you keep repeating it whenever they do show up, iOS will eventually get the message.
Remove All Contacts From iPhone Share Menu
Short of deleting their contact in the Contacts app, the only way to guarantee that someone doesn’t keep turning up on your Share Sheet is to disable the contact suggestions row completely.
Open the Settings app.
Scroll down and tap Siri & Search.
Under the “Suggestions From Apple” section, toggle off the switch next to Show When Sharing.
That’s all there is to it. Now the next time you invoke the Share Sheet, you won’t see any contact profiles at the top. You can reverse the change just as easily by switching on the Show When Sharing toggle again.
Duplicate contacts can be a frustrating nuisance on your iPhone. These redundant entries not only overcrowd your address book, leading to unnecessary clutter, but they also complicate the process of locating the correct contact information when it’s most needed. Moreover, these duplicates can create additional challenges, particularly when attempting to synchronize your contact list across multiple devices, potentially leading to confusion and errors in data management. Thankfully, there are several straightforward methods available to efficiently remove these duplicate contacts from your iPhone, thereby streamlining your contact list and enhancing your overall user experience.
Identifying Duplicate Contacts
The first step to deleting duplicate contacts is to identify them. There are a few different ways to do this.
Manually: You can manually review your contacts and identify duplicates. This can be time-consuming, but it’s the most accurate way to identify duplicates.
Use the built-in duplicate detector: Your iPhone has a built-in duplicate detector that can help you identify potential duplicates. To use it, go to Settings > Contacts and tap Duplicates Found.
Use a third-party app: There are a number of third-party apps that can help you identify and delete duplicate contacts. These apps can be helpful if you have a large number of contacts.
Merging Duplicate Contacts
Once you’ve identified your duplicate contacts, you can merge them. There are a few different ways to do this as well.
Use the built-in merge feature: Your iPhone has a built-in merge feature that you can use to merge duplicate contacts. To use it, go to Contacts and select the two contacts you want to merge. Tap Edit and then tap Link Contacts.
Use a third-party app: If you’re using a third-party app to identify duplicate contacts, you may also be able to use it to merge them.
Deleting Duplicate Contacts
Once you’ve merged your duplicate contacts, you can delete the ones that are no longer needed. To do this, go to Contacts, select the contact you want to delete, and tap Delete.
Preventing Duplicate Contacts
There are a few things you can do to prevent duplicate contacts from being created in the first place.
Make sure your contacts are up-to-date: Make sure your contacts are up-to-date by regularly syncing them with your iCloud account.
Import contacts carefully: When importing contacts from another device or service, make sure you don’t import duplicates.
Use a contact management app: A contact management app can help you keep your contacts organized and prevent duplicates from being created.
Additional Tips
Here are a few additional tips for deleting duplicate contacts on your iPhone:
Back up your contacts: Before you start deleting contacts, make sure you back them up. This way, you can restore them if you accidentally delete a contact.
Be careful not to delete important contacts: When deleting duplicate contacts, be careful not to delete any important contacts.
Use a trusted third-party app: If you’re using a third-party app to identify or delete duplicate contacts, make sure it’s a trusted app from a reputable developer.
Summary
Deleting duplicate contacts on your iPhone can be a tedious task, but it’s worth it to keep your address book clean and organized. By following the tips in this article, you can easily delete duplicate contacts and make your iPhone’s address book more user-friendly.
Image Credit: Amanz
Filed Under: Apple, Apple iPhone, Guides
Latest timeswonderful Deals
Disclosure: Some of our articles include affiliate links. If you buy something through one of these links, timeswonderful may earn an affiliate commission. Learn about our Disclosure Policy.
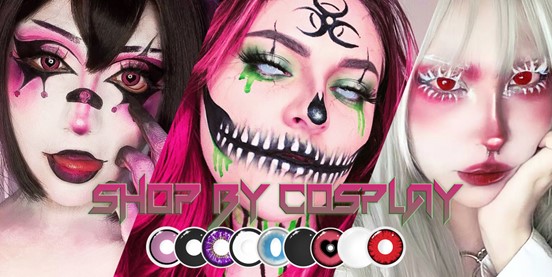
This Halloween, take your costume to the next level with MYEYEBB’s colored contacts. Our comprehensive guide walks you through how these transformative accessories can complete various looks—from fantastical creatures to pop culture icons. With tutorials and creative DIY ideas, we encourage you to let your imagination run wild and make this Halloween unforgettable. Get your MYEYEBB colored contacts now and truly transform!
I. Introduction
Ah, Halloween—a mystical night filled with ghouls, goblins, and glam! But wait, there’s a new player in the game that’s turning heads and capturing the Instagram limelight. That’s right; we’re talking about colored contacts for Halloween. These little gems can transform not only your vision, but your overall look as well. This blog is your one-stop guide to unlocking the immense potential of colored contacts for Halloween. From tutorials to creative ideas, MYEYEBB has got you covered.
What’s the secret sauce that can elevate your Halloween makeup from ‘meh’ to ‘mesmerizing’? Colored contacts for Halloween, without a doubt. When you slip these into your eyes, you’re not just changing your eye color; you’re stepping into a new persona. Eye color can dramatically influence how a character is perceived. From icy blues to fiery reds, the impact is undeniable. So, let’s delve into some tutorials, shall we?
III. Tutorial 1: Enchanting Fantasy Creature
Ever dreamed of being a mermaid or a fairy for Halloween? Turn that fantasy into reality with this tutorial. Start with a dewy foundation to mimic the ethereal glow of these magical beings. Choose eyeshadows that resonate with your character—think oceanic hues for mermaids and soft pastels for fairies. The game-changer? MYEYEBB’s colored contacts for Halloween. Slipping these on elevates your look from basic to breathtaking, making your eyes the show-stopping feature of your fantastical transformation.
Once your colored contacts for Halloween are in, use a combination of matte and shimmer eyeshadows to create depth. Highlight the inner corners of your eyes and the brow bone for that extra dash of magic. The contacts not only complete but also elevate your look, taking your Halloween makeup from ordinary to extraordinary.
IV. Tutorial 2: Fierce Animal-Inspired Makeup
Detailed Instructions
Foundation:
Begin with a foundation that matches your skin tone to maintain the natural essence of the animal you’re emulating. This will serve as your canvas, ensuring that the rest of your makeup blends seamlessly.
Animal Stripes:
Unleash your inner beast with some bold animal stripes or spots. Use a black eyeliner pencil to sketch out the patterns on your face. Whether you’re going for tiger stripes or leopard spots, make sure they’re evenly spaced and symmetrical for the most authentic look.
Faux Fur:
Give your look some texture by applying a light layer of mascara. Focus on the eyelashes, but you can also lightly brush some on your eyebrows to mimic the texture of animal fur. This will add depth and dimension to your fierce, animal-inspired makeup.
Animal Authenticity
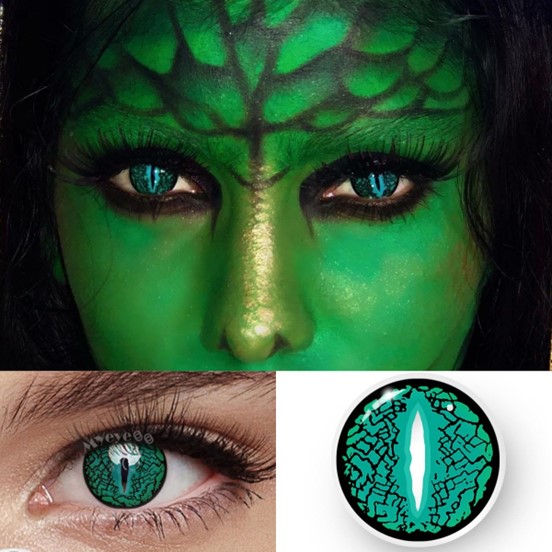
To truly embody your chosen creature, consider adding a pair of colored contacts for Halloween. These will mimic the animal’s eye color, taking your look from simply a costume to a living, breathing embodiment of the wild. With your striking makeup and eye-catching lenses, you’re not just a person in a costume—you’re a fierce predator or a graceful prey, ready to roam the Halloween night!
V. Tutorial 3: Terrifying Zombie or Undead Character
Step-by-step Guide
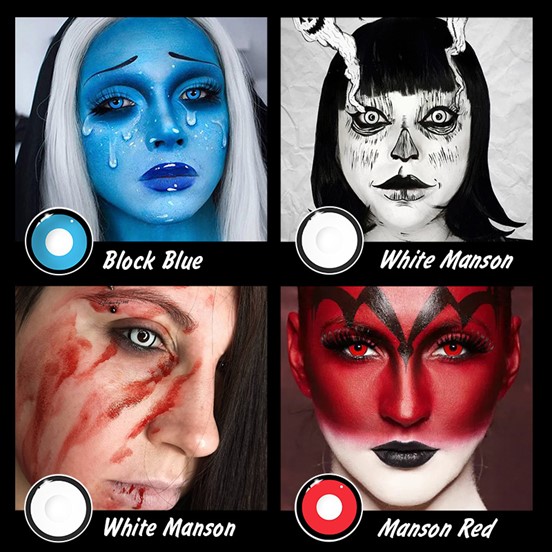
Begin your transformation into the undead by first applying a pale, almost grey, foundation to create a lifeless base. Next, use dark eyeshadows to create hollowed-out eyes and contour the face for a sunken appearance. Adding red and purple tones around the eyes and mouth will give a bruised and decayed look. The final touch to truly bring your zombie character to life (or death) is a pair of white or red colored contacts for Halloween. This will give your eyes a haunting, empty appearance that will chill anyone to the bone.
Frightening Effects
To complement your creepy contacts, use matte black eyeshadow to deepen the hollows of your eyes and cheeks. Apply a dark red or black lipstick, then smudge it slightly for a messy, just-ate-a-brain look. Finish off by adding fake blood and dark veins to your face and neck. This will create a truly terrifying effect that pairs perfectly with your haunting Halloween contacts.
VI. Tutorial 4: Mythical Being or Monster
Halloween is the perfect time to transform yourself into a mythical creature like a vampire or demon. A key element to completing your transformation is using colored contacts for Halloween. These special contacts will not only change the color of your eyes but can also give you a supernatural appearance that contributes to your character’s identity. Whether you want to have the hypnotic eyes of a vampire or the fiery gaze of a demon, colored contacts will enhance your overall look and make your Halloween costume
VII. Tutorial 5: Pop Culture Icon or Horror Movie Character
Recreating the signature look of a pop culture or horror movie character can be a fun and creative way to show your appreciation for your favorite characters. One crucial element that is often overlooked is the eye color. Accurate eye color is essential for a faithful portrayal of the character. For example, using colored contacts for Halloween can make a big difference in your costume’s authenticity. Whether you are dressing up as a famous pop icon or a terrifying horror movie character, don’t forget to pay attention to the small details like eye color to make your transformation complete.
VIII. Creative DIY Ideas: Beyond the Tutorials
Thinking outside the box this Halloween? Colored contacts aren’t just for recreating specific characters; they can be the creative spark for an entirely unique costume idea. Imagine the arresting visual of neon-green eyes paired with galaxy-inspired makeup, or deep red eyes to complement a steampunk ensemble. Colored contacts for Halloween offer endless possibilities for individual expression.
Don’t be afraid to push the boundaries and combine colored contacts with unconventional makeup styles for unique effects. Consider mixing genres; how about anime eyes with a vintage ’20s look? The sky’s the limit, and the only rule is to let your imagination run wild. Whether you’re a makeup guru or a beginner, colored contacts can elevate your Halloween game to a whole new level.
IX. Conclusion
To wrap it up, colored contacts for Halloween aren’t just accessories; they’re essential elements that breathe life into your character. So, this Halloween, don’t just dress up—transform. MYEYEBB encourages you to explore your creative boundaries and make this Halloween unforgettable.
So, what are you waiting for? Get your MYEYEBB colored contacts for Halloween and let your imagination run wild!
The number of people crossing the border slowed down this summer, but it’s back up again now. Illegal crossings of the U.S.-Mexico border are on the rise this month, and U.S. Customs and Border Protection is seeing a lot more people each day than they did in the summer.
NBC News said that CBP data showed that border agents met more than 7,500 refugees just on Sunday. Of those, 1,800 were in Rio Grande Valley, Texas; 1,600 were in Del Rio, Texas; 1,500 were in Tucson, Arizona; and more than 1,000 were in El Paso, Texas.
After a slow period over the summer, the number of people crossing the border has gone up every week since September. However, the number of people crossing is still less than the record of 10,000 per day set in May. The government of President Biden had said that the lower numbers during the summer showed that its tactics at the border were working.
Fox News got drone footage of more than 2,200 people crossing the border early Monday morning near Eagle Pass, Texas. “We stay on guard and expect changes, knowing that smugglers will keep using false information to take advantage of weak people,” CBP told the outlet. “CBP is working according to plan and as part of our standard procedures to quickly decongest the areas along the southwest border and to safely and efficiently screen and process migrants so they can be put through immigration enforcement proceedings that follow our laws.” In July, an average of 4,300 people crossed each day. On Sunday, there were 7,500.
On Monday, the CBP’s El Paso Office of Field Operations stopped handling goods at the Bridge of the Americas (BOTA) port of entry for the time being. The agency did not say when it would go back to normal operations. Instead, it said it would do so “as soon as possible.” CBP said, “The temporary suspension at BOTA will allow CBP’s Office of Field Operations officers to help the U.S. Border Patrol process noncitizens who arrived between the ports of entry, including vulnerable groups like families and children who came alone.” “CBP regularly plans for and carries out contingency measures like this one to support the agency’s overall mission and make sure that people in its care are safe and healthy.”